SpringCloud Gateway搭建Gateway 微服务应用实例
前言
本篇博文是关于SpringCloud Gateway搭建Gateway 微服务应用实例,希望你能够喜欢
个人主页:晨犀主页
个人简介:大家好,我是晨犀,希望我的文章可以帮助到大家,您的满意是我的动力
欢迎大家:这里是CSDN,我总结知识的地方,欢迎来到我的博客,感谢大家的观看
如果文章有什么需要改进的地方还请大佬不吝赐教 先在此感谢啦
文章目录
- SpringCloud Gateway
-
- 搭建Gateway 微服务
-
- 搭建Gateway-应用实例
-
- 需求分析/图解
- 解读
- 代码实现
- 测试
-
- 浏览器:(通过网关访问) http://localhost:20000/member/get/1
- Postman 测试添加(走网关)
- 注意事项和细节
- 二说Gateway 路由配置
-
- 方式1: application.yml 中配置-前面讲过
- 方式2: 编写配置类注入【了解】
- 测试
-
- 浏览器:(通过网关访问) http://localhost:20000/member/get/1
- Postman 测试添加(走网关)
- 动态路由
-
- 需求分析/图
- 代码实现
- 测试
- 总结
-
- -- 代码
SpringCloud Gateway
搭建Gateway 微服务
搭建Gateway-应用实例
需求分析/图解
– 引入Gateway 项目架构

解读
- 通过网关暴露的接口,实现调用真正的服务
- 网关本身也是一个微服务模块

代码实现
- 参考member-service-consumer-80 创建e-commerce-gateway-20000(具体步骤参考以前)
- 修改pom.xml, 部分内容可以从member-service-consumer-80 的pom.xml 拷贝
<project xmlns="http://maven.apache.org/POM/4.0.0"
         xmlns:xsi="http://www.w3.org/2001/XMLSchema-instance"
         xsi:schemaLocation="http://maven.apache.org/POM/4.0.0 http://maven.apache.org/xsd/maven-4.0.0.xsd">
    <parent>
        <artifactId>e-commerce-centerartifactId>
        <groupId>com.my.springcloudgroupId>
        <version>1.0-SNAPSHOTversion>
    parent>
    <modelVersion>4.0.0modelVersion>

    <artifactId>member-service-consumer-80artifactId>


    <dependencies>

        <dependency>
            <groupId>org.springframework.cloudgroupId>
            <artifactId>spring-cloud-starter-zipkinartifactId>
        dependency>

        <dependency>
            <groupId>org.springframework.cloudgroupId>
            <artifactId>spring-cloud-starter-netflix-eureka-clientartifactId>
        dependency>


        <dependency>
            <groupId>org.projectlombokgroupId>
            <artifactId>lombokartifactId>
        dependency>


        <dependency>
            <groupId>com.my.springcloudgroupId>
            <artifactId>e_commerce_center-common-apiartifactId>
            <version>${project.version}version>
        dependency>

    dependencies>

project>
3.创建application.yml(重点核心) 内容如下:
server:
  port: 20000

spring:
  application:
    name: e-commerce-gateway
  cloud:
    gateway:
      routes: #配置路由,可以配置多个路由 List routes
        - id: member_route01 #路由的id, 程序员自己配置,要求唯一
          #gateway 最终访问的url 是 url=uri+Path
          #匹配后提供服务的路由地址: 也可以是外网 http://www.baidu.com
          #比如: 客户端/浏览器请求 url http://localhost:20000/member/get/1
          #如果根据Path匹配成功 最终访问的url/转发url 就是 url=http://localhost:10000/member/get/1
          #如果匹配失败, 则有gateway返回404信息
          #疑问: 这里配置的 uri 是固定,在当前这种情况其实可以没有有Eureka Server,后面会使用灵活方式
          #     配置,就会使用到Eureka Server
          uri: http://localhost:10000
          predicates: #断言,可以有多种形式
            - Path=/member/get/**
        - id: member_route02 #路由的id, 程序员自己配置,要求唯一
          uri: http://localhost:10000
          predicates: #断言,可以有多种形式
            #这时如果客户端/浏览器 访问gateway 的url http://localhost:20000/member/save
            #匹配Path成功 最终访问的url 就是 http://localhost:10000/member/save
            - Path=/member/save


#配置Eureak-Client
eureka:
  instance:
    hostname: e-commerce-service #先配置着
  client:
    register-with-eureka: true #将自己注册到Eureka-Server
    fetch-registry: true
    service-url:
      #表示将自己注册到哪个eureka-server
      #这里为了方便,使用Eureka Server的单机环境测试
      defaultZone: http://eureka9001.com:9001/eureka
4.创建主启动类com/my/springcloud/GateWayApplication20000.java
@SpringBootApplication
@EnableEurekaClient
public class GateWayApplication20000 {
    public static void main(String[] args) {
    	SpringApplication.run(GateWayApplication20000.class, args);
    }
}
测试
启动e-commerce-eureka-server-9001
启动member-service-provider-10000
启动e-commerce-gateway-20000
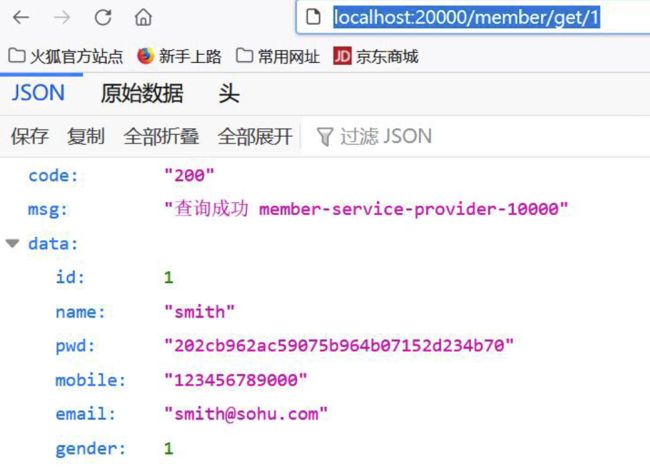
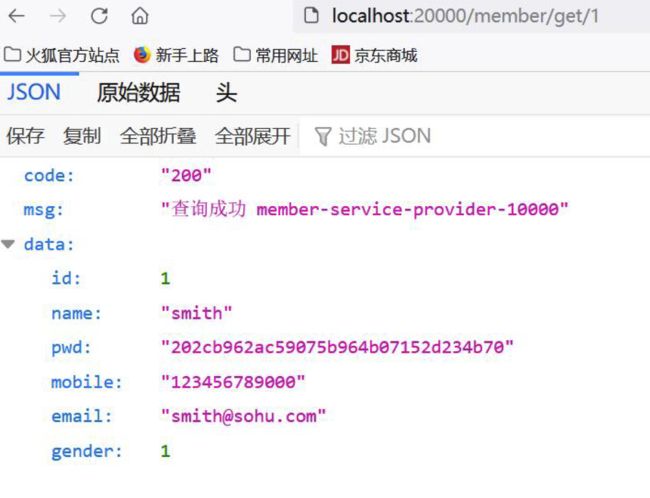
浏览器:(通过网关访问) http://localhost:20000/member/get/1
浏览器输入: http://localhost:20000/member/get/1

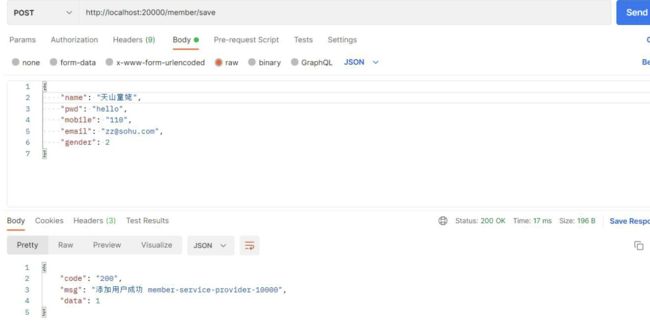
Postman 测试添加(走网关)
请求地址: http://localhost:20000/member/save
json 数据:
{
    "name": "天山童姥",
    "pwd": "hello",
    "mobile": "110",
    "email": "[email protected]",
    "gender": 2
}
注意事项和细节
- 因为我们的member 的controller 的方法参数使用了@RequestBody

- 所以,在使用postman 时,需要使用json 格式发送数据, 否则会报400 错误

- @RequestBody 的作用是: 将前端发送的json 数据封装成对象, 如果发送的不是json 数据,会报错误
二说Gateway 路由配置
方式1: application.yml 中配置-前面讲过
方式2: 编写配置类注入【了解】
- 先注销application.yml 对网关路由部分注销
server:
  port: 20000

#spring:
#  application:
#    name: e-commerce-gateway
#  cloud:
#    gateway:
#      routes: #配置路由,可以配置多个路由 List routes
#        - id: member_route01 #路由的id, 程序员自己配置,要求唯一
#          #gateway 最终访问的url 是 url=uri+Path
#          #匹配后提供服务的路由地址: 也可以是外网 http://www.baidu.com
#          #比如: 客户端/浏览器请求 url http://localhost:20000/member/get/1
#          #如果根据Path匹配成功 最终访问的url/转发url 就是 url=http://localhost:10000/member/get/1
#          #如果匹配失败, 则有gateway返回404信息
#          #疑问: 这里配置的 uri 是固定,在当前这种情况其实可以没有有Eureka Server,后面会使用灵活方式
#          #     配置,就会使用到Eureka Server
#          uri: http://localhost:10000
#          predicates: #断言,可以有多种形式
#            - Path=/member/get/**
#        - id: member_route02 #路由的id, 程序员自己配置,要求唯一
#          uri: http://localhost:10000
#          predicates: #断言,可以有多种形式
#            #这时如果客户端/浏览器 访问gateway 的url http://localhost:20000/member/save
#            #匹配Path成功 最终访问的url 就是 http://localhost:10000/member/save
#            - Path=/member/save
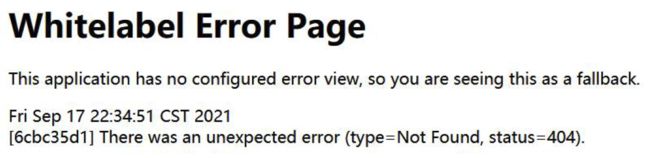
- 重启e-commerce-gateway-20000, 再次测试,网关路由失效
- 参考官方文档https://cloud.spring.io/spring-cloud-static/spring-cloud-gateway/2.2.1.RELEASE/reference/html/#spring-cloud-circuitbreaker-filter-factory ,
创建com/my/springcloud/config/GateWayRoutesConfig.java

@Configuration
public class GateWayRoutesConfig {

    //配置注入路由

    /**
     * 在理解通过配置类注入/配置 路由,可以对照前面的application.yml来对比理解
     * cloud:
     *     gateway:
     *       routes: #配置路由,可以配置多个路由 List routes
     *         - id: member_route01 #路由的id, 程序员自己配置,要求唯一
     *           #gateway 最终访问的url 是 url=uri+Path
     *           #匹配后提供服务的路由地址: 也可以是外网 http://www.baidu.com
     *           #比如: 客户端/浏览器请求 url http://localhost:20000/member/get/1
     *           #如果根据Path匹配成功 最终访问的url/转发url 就是 url=http://localhost:10000/member/get/1
     *           #如果匹配失败, 则有gateway返回404信息
     *           #疑问: 这里配置的 uri 是固定,在当前这种情况其实可以没有有Eureka Server,后面会使用灵活方式
     *           #     配置,就会使用到Eureka Server
     *           uri: http://localhost:10000
     *           predicates: #断言,可以有多种形式
     *             - Path=/member/get/**
     */
    @Bean
    public RouteLocator myRouteLocator04(RouteLocatorBuilder routeLocatorBuilder) {

        RouteLocatorBuilder.Builder routes = routeLocatorBuilder.routes();

        //方法写完
        //梳理
        //1. 下面的方法我们分别指定了id , uri 和path
        //2. Function fn
        //(1) 是一个函数式接口
        //(2) 接收的类型是 PredicateSpec ,返回的类型是 Route.AsyncBuilder
        //(3) r -> r.path("/member/get/**")
        //                .uri("http://localhost:10000") 就是lambda表达式
        //(4) 一会还要用代码进行说明-先使用-再理解
        //3. 小伙伴们可以理解这是一个规定写法

        return routes.route("member_route04", r -> r.path("/member/get/**")
                .uri("http://localhost:10000"))
                .build();


    }

    @Bean
    public RouteLocator myRouteLocator05(RouteLocatorBuilder routeLocatorBuilder) {

        RouteLocatorBuilder.Builder routes = routeLocatorBuilder.routes();

        return routes.route("member_route05", r -> r.path("/member/save")
                .uri("http://localhost:10000"))
                .build();

    }
}
测试
启动e-commerce-eureka-server-9001
启动member-service-provider-10000
启动e-commerce-gateway-20000
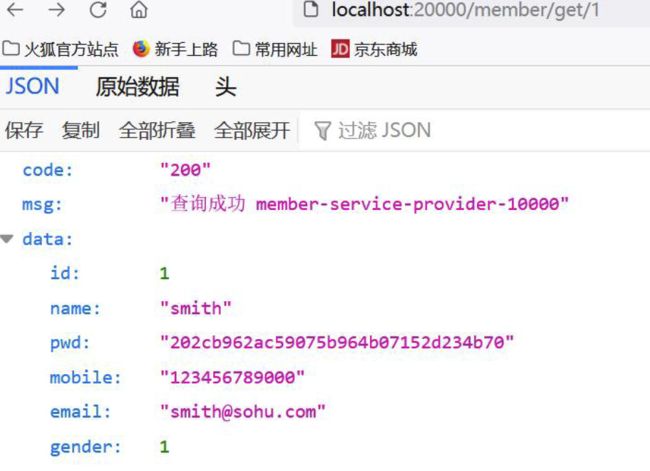
浏览器:(通过网关访问) http://localhost:20000/member/get/1
浏览器输入: http://localhost:20000/member/get/1
Postman 测试添加(走网关)
请求地址: http://localhost:20000/member/save
json 数据:
{
    "name": "天山童姥",
    "pwd": "hello",
    "mobile": "110",
    "email": "[email protected]",
    "gender": 2
}

别忘了,将代码恢复成yml 配置
动态路由
需求分析/图
代码实现
- 修改e-commerce-gateway-20000 的application.yml
server:
  port: 20000

spring:
  application:
    name: e-commerce-gateway
  cloud:
    gateway:
      discovery:
        locator:
          #Flag that enables DiscoveryClient gateway integration
          #启用了 DiscoveryClient 服务发现
          enabled: true
      routes: #配置路由,可以配置多个路由 List routes
        - id: member_route01 #路由的id, 程序员自己配置,要求唯一
          #gateway 最终访问的url 是 url=uri+Path
          #匹配后提供服务的路由地址: 也可以是外网 http://www.baidu.com
          #比如: 客户端/浏览器请求 url http://localhost:20000/member/get/1
          #如果根据Path匹配成功 最终访问的url/转发url 就是 url=http://localhost:10000/member/get/1
          #如果匹配失败, 则有gateway返回404信息
          #疑问: 这里配置的 uri 是固定,在当前这种情况其实可以没有有Eureka Server,后面会使用灵活方式
          #     配置,就会使用到Eureka Server
          #uri: http://localhost:10000
          #解读
          #1. lb: 协议名 , member-service-provider 注册到eureka server 服务名(小写)
          #2. 默认情况下,负载均衡算法是轮询
          uri: lb://member-service-provider
          predicates: #断言,可以有多种形式
            - Path=/member/get/**
        - id: member_route02 #路由的id, 程序员自己配置,要求唯一
          #uri: http://localhost:10000
          uri: lb://member-service-provider
          predicates: #断言,可以有多种形式
            #这时如果客户端/浏览器 访问gateway 的url http://localhost:20000/member/save
            #匹配Path成功 最终访问的url 就是 http://localhost:10000/member/save
            - Path=/member/save
测试
启动e-commerce-eureka-server-9001
启动member-service-provider-10000
启动member-service-provider-10002
启动e-commerce-gateway-20000
浏览器:(通过网关访问) http://localhost:20000/member/get/1

总结
-
配置好动态路由后Gateway 会根据注册中心上微服务名,为请求创建动态路由,实现动态路由功能。
-
使用的lb 协议支持负载均衡-轮询算法。
-
配置自己的负载均衡算法, 测试完毕恢复成原来的轮询算法。
– 代码
@Configuration
public class RibbonRule {
    //配置注入自己的负载均衡算法
    @Bean
    public IRule myRibbonRule() {
        //这里返回的是RandomRule,当然小伙伴也可以自己指定
        return new RandomRule();
    }
}
文章到这里就结束了,如果有什么疑问的地方请指出,诸大佬们一起来评论区一起讨论
希望能和诸大佬们一起努力,今后我们一起观看感谢您的阅读
如果帮助到您不妨3连支持一下,创造不易您们的支持是我的动力