Spring_boot模块配置
1.spring-boot-starter-parent
spring父节点依赖,引入这个之后就不需要再添加version设置,springboot会自动选择最合适的版本进行添加.
父节点依赖管理
//pom.xml文件
<parent>
    <groupId>org.springframework.boot</groupId>
    <artifactId>spring-boot-starter-parent</artifactId>
    <version>2.0.5.RELEASE</version>
</parent>

//父节点依赖管理
<dependencyManagement>
    <dependencies>
      <!--springboot版本管理-->
      <dependency>
        <groupId>org.springframework.boot</groupId>
        <artifactId>spring-boot-dependencies</artifactId>
        <version>2.0.5.RELEASE</version>
        <type>pom</type>
        <scope>import</scope>
      </dependency>
    </dependencies>
  </dependencyManagement>
2.新建子节点springboot_springmvc
	//start-web,子模块之springmvc模块
    <dependencies>
        <dependency>
            <groupId>org.springframework.boot</groupId>
            <artifactId>spring-boot-starter-web</artifactId>
        </dependency>
    </dependencies>
导入的包的模块
Maven: ch.qos.logback:logback-classic:1.2.3
Maven: ch.qos.logback:logback-core:1.2.3
Maven: com.fasterxml.jackson.core:jackson-annotations:2.9.0
Maven: com.fasterxml.jackson.core:jackson-core:2.9.6
Maven: com.fasterxml.jackson.core:jackson-databind:2.9.6
Maven: com.fasterxml.jackson.datatype:jackson-datatype-jdk8:2.9.6
Maven: com.fasterxml.jackson.datatype:jackson-datatype-jsr310:2.9.6
Maven: com.fasterxml.jackson.module:jackson-module-parameter-names:2.9.6
Maven: com.fasterxml:classmate:1.3.4
Maven: javax.annotation:javax.annotation-api:1.3.2
Maven: javax.validation:validation-api:2.0.1.Final
Maven: org.apache.logging.log4j:log4j-api:2.10.0
Maven: org.apache.logging.log4j:log4j-to-slf4j:2.10.0
Maven: org.apache.tomcat.embed:tomcat-embed-core:8.5.34
Maven: org.apache.tomcat.embed:tomcat-embed-el:8.5.34
Maven: org.apache.tomcat.embed:tomcat-embed-websocket:8.5.34
Maven: org.hibernate.validator:hibernate-validator:6.0.12.Final
Maven: org.jboss.logging:jboss-logging:3.3.2.Final
Maven: org.slf4j:jul-to-slf4j:1.7.25
Maven: org.slf4j:slf4j-api:1.7.25
Maven: org.springframework.boot:spring-boot:2.0.5.RELEASE
Maven: org.springframework.boot:spring-boot-autoconfigure:2.0.5.RELEASE
Maven: org.springframework.boot:spring-boot-starter:2.0.5.RELEASE
Maven: org.springframework.boot:spring-boot-starter-json:2.0.5.RELEASE
Maven: org.springframework.boot:spring-boot-starter-logging:2.0.5.RELEASE
Maven: org.springframework.boot:spring-boot-starter-tomcat:2.0.5.RELEASE
Maven: org.springframework.boot:spring-boot-starter-web:2.0.5.RELEASE
Maven: org.springframework:spring-aop:5.0.9.RELEASE
Maven: org.springframework:spring-beans:5.0.9.RELEASE
Maven: org.springframework:spring-context:5.0.9.RELEASE
Maven: org.springframework:spring-core:5.0.9.RELEASE
Maven: org.springframework:spring-expression:5.0.9.RELEASE
Maven: org.springframework:spring-jcl:5.0.9.RELEASE
Maven: org.springframework:spring-web:5.0.9.RELEASE
Maven: org.springframework:spring-webmvc:5.0.9.RELEASE
Maven: org.yaml:snakeyaml:1.19
这里需要配置两个文件
一个是@SpringBootApplication,称之为启动项
以下是代码:
//启动项
@SpringBootApplication
public class HelloApp {
    public static void main(String[] args) {
        SpringApplication.run(HelloApp.class);
    }
}
//一个简单的controller
@Controller
public class HelloController {

    @RequestMapping("/index")
    @ResponseBody
    public String index(){
        return "index";
    }
}
3.热部署spring-boot-devtools
在springmvc的pom.xml中配置
	<!--start-web-->
    <dependencies>
        <dependency>
            <groupId>org.springframework.boot</groupId>
            <artifactId>spring-boot-starter-web</artifactId>
        </dependency>

        <!--快速热启动-->
        <dependency>
            <groupId>org.springframework.boot</groupId>
            <artifactId>spring-boot-devtools</artifactId>
            <optional>true</optional>
            <scope>true</scope>
        </dependency>
    </dependencies>

<build>
        <plugins>
            <plugin>
                <groupId>org.springframework.boot</groupId>
                <artifactId>spring-boot-maven-plugin</artifactId>
                <configuration>
                    <!--fork :  如果没有该项配置,可能devtools不会起作用,即应用不会restart -->
                    <fork>true</fork>
                </configuration>
            </plugin>
        </plugins>
    </build>
说的是配置了之后就能够热部署了,但实际效果欠佳
4.spring_boot_jsp
依赖jar包
	<dependencies>
        <dependency>
            <groupId>junit</groupId>
            <artifactId>junit</artifactId>
            <version>4.12</version>
        </dependency>
        <!-- 依赖配置-->
        <!-- web支持: 1、web mvc; 2、restful; 3、jackjson支持; 4、aop ........ -->
        <dependency>
            <groupId>org.springframework.boot</groupId>
            <artifactId>spring-boot-starter-web</artifactId>
        </dependency>

        <!-- servlet 依赖. -->
        <dependency>
            <groupId>javax.servlet</groupId>
            <artifactId>javax.servlet-api</artifactId>
        </dependency>

        <dependency>
            <groupId>javax.servlet</groupId>
            <artifactId>jstl</artifactId>
        </dependency>

        <!-- tomcat 的支持. -->
        <dependency>
            <groupId>org.springframework.boot</groupId>
            <artifactId>spring-boot-starter-tomcat</artifactId>
        </dependency>
        <dependency>
            <groupId>org.apache.tomcat.embed</groupId>
            <artifactId>tomcat-embed-jasper</artifactId>
        </dependency>
    </dependencies>

	<build>
        <finalName>springboot_jsp</finalName>
        <pluginManagement><!-- lock down plugins versions to avoid using Maven defaults (may be moved to parent pom) -->
            <plugins>
                <plugin>
                    <artifactId>maven-clean-plugin</artifactId>
                    <version>3.1.0</version>
                </plugin>
                <!-- see http://maven.apache.org/ref/current/maven-core/default-bindings.html#Plugin_bindings_for_war_packaging -->
                <plugin>
                    <artifactId>maven-resources-plugin</artifactId>
                    <version>3.0.2</version>
                </plugin>
                <plugin>
                    <artifactId>maven-compiler-plugin</artifactId>
                    <version>3.8.0</version>
                </plugin>
                <plugin>
                    <artifactId>maven-surefire-plugin</artifactId>
                    <version>2.22.1</version>
                </plugin>
                <plugin>
                    <artifactId>maven-war-plugin</artifactId>
                    <version>3.2.2</version>
                </plugin>
                <plugin>
                    <artifactId>maven-install-plugin</artifactId>
                    <version>2.5.2</version>
                </plugin>
                <plugin>
                    <artifactId>maven-deploy-plugin</artifactId>
                    <version>2.8.2</version>
                </plugin>
            </plugins>
        </pluginManagement>
    </build>
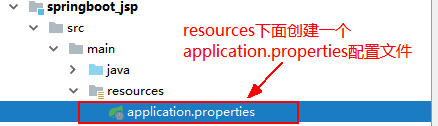
配置文件内容
# 页面默认前缀目录
spring.mvc.view.prefix=/WEB-INF/jsp/
# 响应页面默认后缀
spring.mvc.view.suffix=.jsp
准备两个类
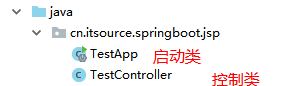
TestApp
//设置启动项
@SpringBootApplication
public class TestApp {
    public static void main(String[] args) {
        SpringApplication.run(TestApp.class);
    }
}
TestController
@Controller
public class TestController {
    @RequestMapping("/index")
    public String index(){
        return "index";
    }
}
webapp路径下创建index.jsp页面WEB-INF/jsp/index.jsp

**在使用模块开发的时候,启动tomcat 访问jsp 需要配置

index.jsp页面
<%@ page contentType="text/html;charset=UTF-8" language="java" %>
<html>
<head>
    <title>Title</title>
</head>
<body>

    <h1>success!!!</h1>
</body>
</html>
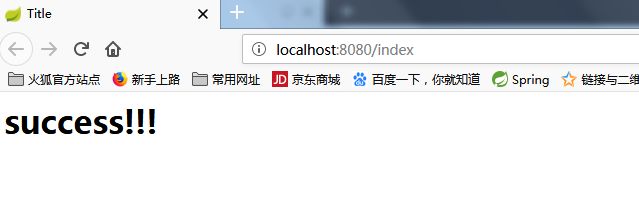
设置好了,重启服务,得到如下结果
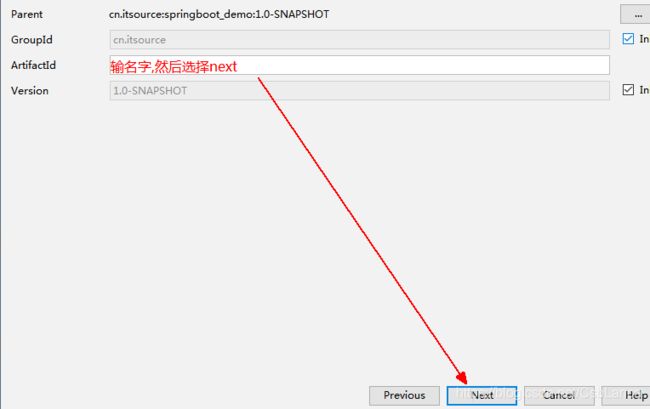
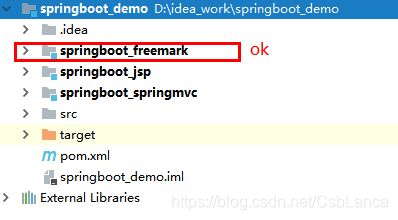
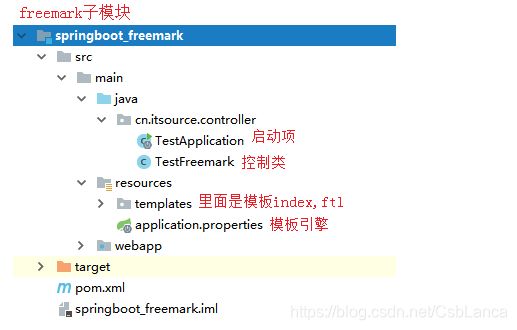
5.spring_boot_freemark配置
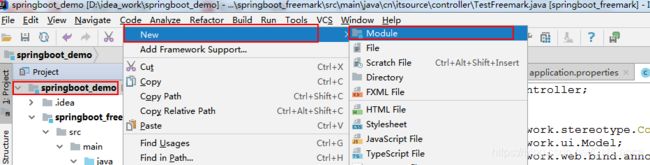
创建一个子模块
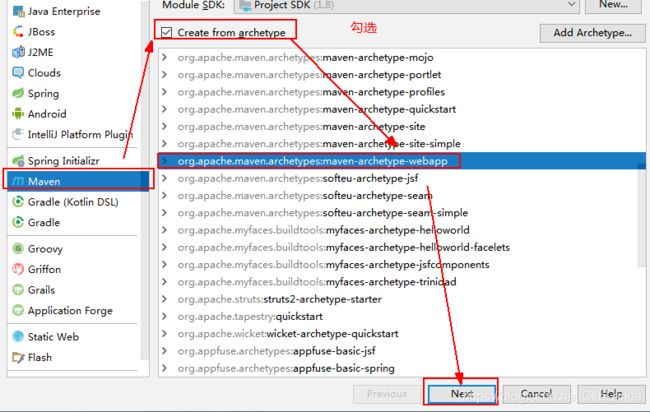
修改jdk1.8,加入freemark的依赖jar包
	//pom.xml中的部分内容,不是全部
	<properties>
        <project.build.sourceEncoding>UTF-8</project.build.sourceEncoding>
        <maven.compiler.source>1.8</maven.compiler.source>
        <maven.compiler.target>1.8</maven.compiler.target>
    </properties>

    <dependencies>
        <dependency>
            <groupId>junit</groupId>
            <artifactId>junit</artifactId>
            <version>4.12</version>
            <scope>test</scope>
        </dependency>

        <!--freemark模板技术依赖jar包,对freemark的支持-->
        <dependency>
            <groupId>org.springframework.boot</groupId>
            <artifactId>spring-boot-starter-web</artifactId>
        </dependency>
        <dependency>
            <groupId>org.springframework.boot</groupId>
            <artifactId>spring-boot-starter-freemarker</artifactId>
        </dependency>
    </dependencies>
# FreeeMarker 模板引擎配置
#       设定ftl文件路径
spring.freemarker.tempalte-loader-path=classpath:/templates
#        关闭缓存,及时刷新,上线生产环境需要修改为true
spring.freemarker.cache=false
spring.freemarker.charset=UTF-8
spring.freemarker.check-template-location=true
spring.freemarker.content-type=text/html
spring.freemarker.expose-request-attributes=true
spring.freemarker.expose-session-attributes=true
spring.freemarker.request-context-attribute=request
spring.freemarker.suffix=.ftl
//页面
<!DOCTYPE html>
<html xmlns="http://www.w3.org/1999/xhtml"xmlns:th="http://www.thymeleaf.org"
      xmlns:sec="http://www.thymeleaf.org/thymeleaf-extras-springsecurity3">
<head>
    <title>Hello World!</title>
</head>
<body>
<h1>Hello , ${message}</h1>
</body>
</html>
//启动项
@SpringBootApplication
public class TestApplication {
    public static void main(String[] args) {
        SpringApplication.run(TestApplication.class);
    }
}
//控制类
@Controller
public class TestFreemark {
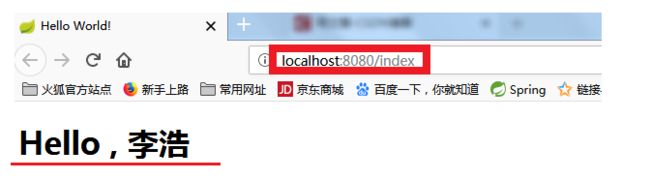
@RequestMapping("/index")
public String index(Model model){
model.addAttribute("message","李浩" );
return "index";
}
}
成功界面:
6.对Json格式的支持
@Controller
public class JsonCtroller {
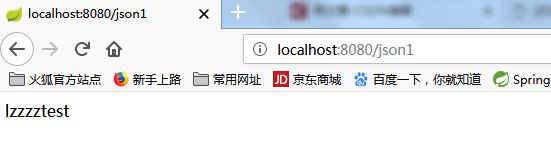
@RequestMapping("/json1")
@ResponseBody
public String json(){
return "lzzzztest";
}
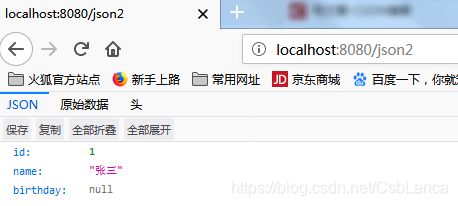
@RequestMapping("/json2")
@ResponseBody
public User json2(){
return new User(1L,"张三");
}
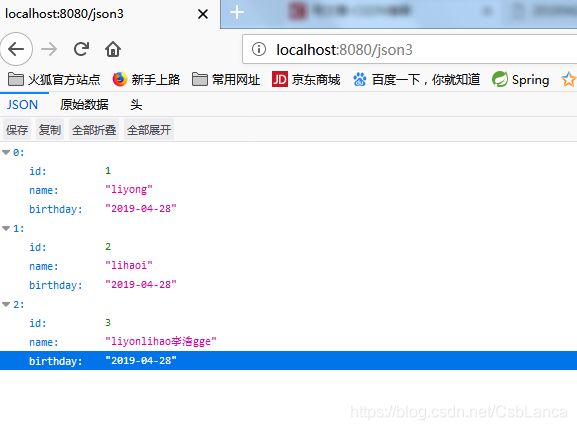
@RequestMapping("/json3")
@ResponseBody //json返回方式
public List<User> json3(){
return Arrays.asList(new User(1L,"liyong",new Date()),
new User(2L,"lihaoi",new Date()),
new User(3L,"liyonlihao李浩gge",new Date()))
;
}
}
public class User {
    private Long id;
    private String name;
    private Date birthday;
    @JsonFormat(pattern = "yyyy-MM-dd",timezone = "GMT+8")
    public Date getBirthday() {
        return birthday;
    }
}
拿到结果值
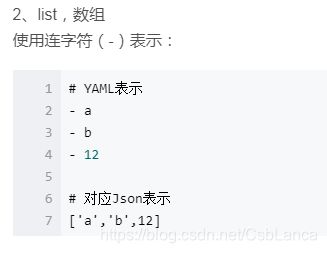
7.yml的使用
Springboot除了支持properties的配置,还支持yaml,而且企业中也是用的最多的。
YAML是YAML Ain’t Markup Language递归缩写,是YAML不是标记语言的意思,读音“yamel”(或者“雅梅尔”)。YAML是便于人阅读基于unicode编码的各种语言的序列号标准。它的用途广泛,用于配置文件,日志文件,跨语言数据共享,对象持久化,复杂的数据结构。
原则:
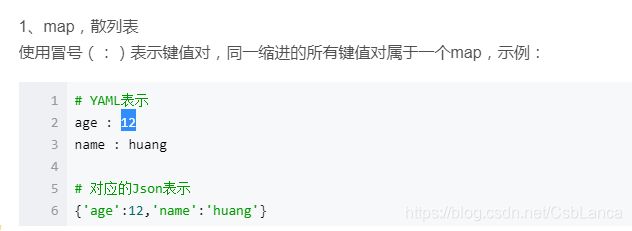
1、大小写敏感
2、使用缩进表示层级关系
4、缩进长度没有限制,只要元素对齐就表示这些元素属于一个层级。
5、使用#表示注释
6、字符串可以不用引号标注
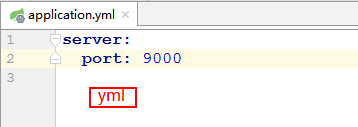
yml配置格式
8.springboot打包运行项目
==>方式1:在idea中通过main函数运行
==>配置一个maven插件
 <build>
        <plugins>
            <plugin>
                <groupId>org.apache.maven.plugins</groupId>
                <artifactId>maven-compiler-plugin</artifactId>
                <configuration>
                    <source>1.8</source>
                    <target>1.8</target>
                    <encoding>utf-8</encoding>
                </configuration>
            </plugin>
            <plugin>
                <groupId>org.springframework.boot</groupId>
                <artifactId>spring-boot-maven-plugin</artifactId>
                <configuration>
                	//填写你启动项的类全限定名
                    <mainClass>cn.itsource.controller.TestApplication</mainClass> <!--主类 包含main-->
                    <layout>JAR</layout>
                </configuration>
            </plugin>
        </plugins>
    </build>
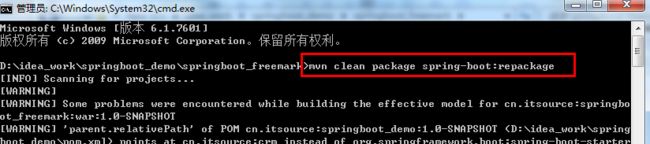
—>show in explorer在弹出的目录下键入以下maven命令

mvn clean package spring-boot:repackage
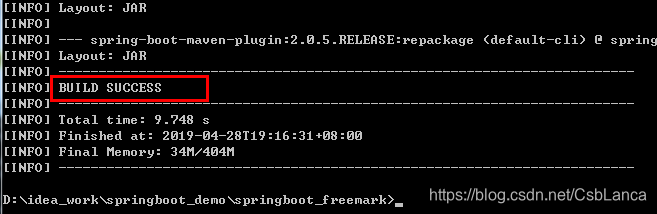
执行命令之后
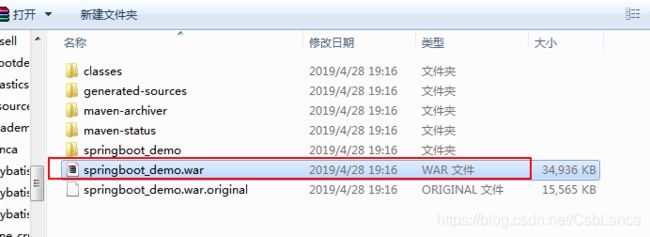
将war修改成jar

然后将原来的target删掉,重新在该目录下打开cmd命令窗口
键入mvn clean package spring-boot:repackage,重新编译
得到如下的编译文件 xxx.jar
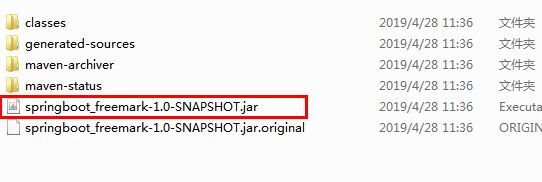
在此目录下,再次重新打开cmd命令框,键入
java -jar xxx.jar
得到如下结果
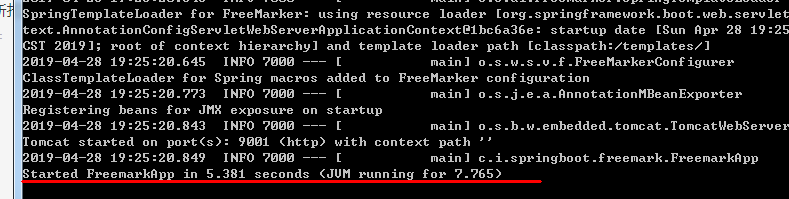
**于是我们就成功通过java -jar xxx.jar命令成功启动一个项目
9.Spring Profiles多环境支持
主要分:测试,开发,产品
1)多环境
我们在主配置文件编写的时候,文件名可以是 application-{profile}.properties/yml
默认使用application.properties/yml的配置
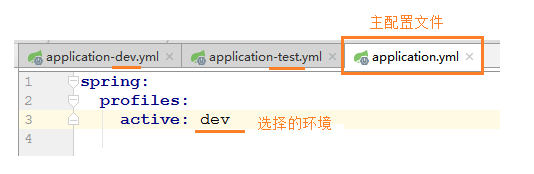
通过主文件application.yml中的active:dev/或者test来选择运行环境
测试,开发,产品
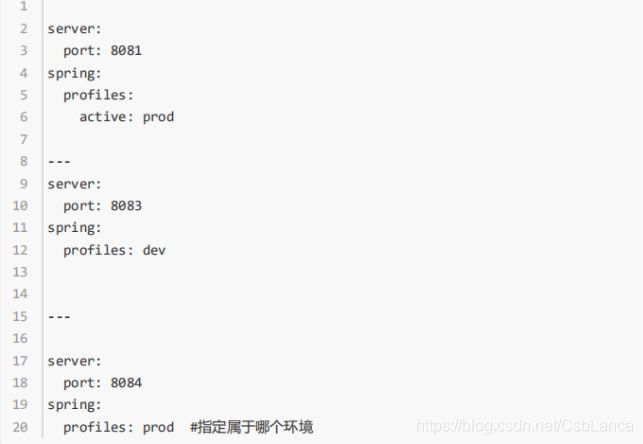
测试没有效果 最后一个端口启动有效果 会覆盖前面的
2)激活指定profile
1、在配置文件中指定 spring.profiles.active=dev
2、命令行:java -jar -Dspring.profiles.active=dev
spring-boot-02-config-0.0.1-SNAPSHOT.jar
10.springboot_starter_test
11springboot_springjdbc
导包-web,test,springjdbc,mysql
	//导包
	<!--web,test,springjdbc,mysql-->
        <dependency>
            <groupId>org.springframework.boot</groupId>
            <artifactId>spring-boot-starter-web</artifactId>
        </dependency>
        <dependency>
            <groupId>org.springframework.boot</groupId>
            <artifactId>spring-boot-starter-test</artifactId>
        </dependency>

        <dependency>
            <groupId>mysql</groupId>
            <artifactId>mysql-connector-java</artifactId>
        </dependency>
        <dependency>
            <groupId>org.springframework.boot</groupId>
            <artifactId>spring-boot-starter-jdbc</artifactId>
        </dependency>
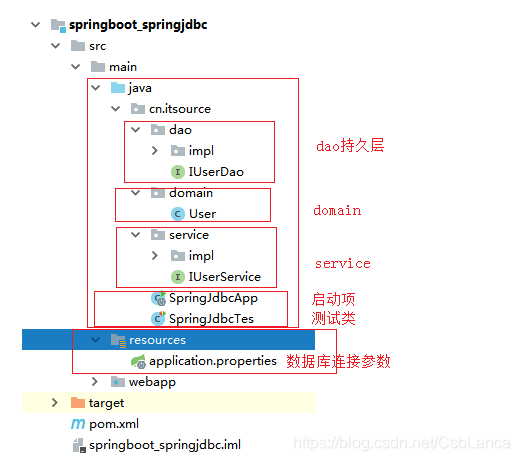
数据库连接参数
spring.datasource.url = jdbc:mysql://localhost:3306/shop
spring.datasource.username = root
spring.datasource.password = 123456
spring.datasource.driverClassName = com.mysql.jdbc.Driver
spring.datasource.max-active=20
spring.datasource.max-idle=8
spring.datasource.min-idle=8
spring.datasource.initial-size=10
测试类
@RunWith(SpringRunner.class)
@SpringBootTest(classes = SpringJdbcApp.class)
public class SpringJdbcTes {
    @Autowired
    private IUserService userService;

    @Test
    public void test() throws Exception{
        User user=new User();
        user.setName("xxxxyyyy");
        userService.save(user);
    }
}
12springboot_MyBatis
导入依赖jar包
 <dependency>
            <groupId>org.springframework.boot</groupId>
            <artifactId>spring-boot-starter-web</artifactId>
        </dependency>
        <dependency>
            <groupId>org.springframework.boot</groupId>
            <artifactId>spring-boot-starter-test</artifactId>
        </dependency>

        <!-- mysql 数据库驱动. -->
        <dependency>
            <groupId>mysql</groupId>
            <artifactId>mysql-connector-java</artifactId>
        </dependency>

        <!-- spring-boot mybatis依赖: -->
        <dependency>
            <groupId>org.mybatis.spring.boot</groupId>
            <artifactId>mybatis-spring-boot-starter</artifactId>
            <version>1.1.1</version>
        </dependency>
        <!--
            MyBatis提供了拦截器接口,我们可以实现自己的拦截器,
            将其作为一个plugin装入到SqlSessionFactory中。
                Github上有位开发者写了一个分页插件,我觉得使用起来还可以,挺方便的。
                Github项目地址: https://github.com/pagehelper/Mybatis-PageHelper
             -->
        <dependency>
            <groupId>com.github.pagehelper</groupId>
            <artifactId>pagehelper</artifactId>
            <version>4.1.0</version>
        </dependency>
        <dependency>
            <groupId>junit</groupId>
            <artifactId>junit</artifactId>
        </dependency>
老规矩三层架构写好
方式一:普通方式
执行测试

@RunWith(SpringRunner.class)
@SpringBootTest(classes = SpringMybatisApp.class)
public class SpringMybatisTes {
@Autowired
private IUserService userService;
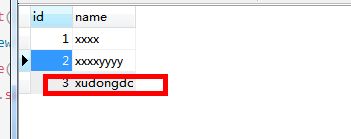
@Test
public void test() throws Exception{
User user=new User();
user.setName("xudongdong");
userService.save(user);
}
}
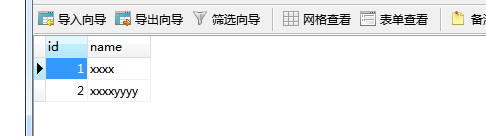
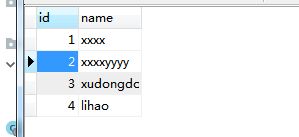
测试结果
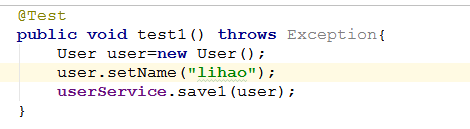
方式二,配置xml的方式UserMapper.xml
<?xml version="1.0" encoding="UTF-8" ?>
        <!DOCTYPE mapper PUBLIC "-//mybatis.org//DTD Mapper 3.0//EN"
                "http://mybatis.org/dtd/mybatis-3-mapper.dtd">
<mapper namespace="cn.itsource.mapper.UserMapper">

    <!--void save(User user);-->
    <insert id="save1" parameterType="User" useGeneratedKeys="true" keyProperty="id" keyColumn="id">
        insert into t_user(name) values(#{name})
    </insert>
</mapper>

13springboot_pageHelp
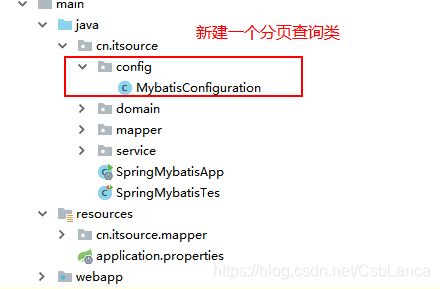
//MybatisConfiguration分页配置类
@Configuration  //相当于application-xxx.xml
public class MybatisConfiguration {
    @Bean //相当于以前在配置文件里面配置bean的效果
    public PageHelper pageHelper(){
        //新建一个分页对象
        PageHelper pageHelper = new PageHelper();
        //新建一个属性对象
        Properties p = new Properties();
        //pageNum
        p.setProperty("offsetAsPageNum", "true");
        //设置为true时,使用RowBounds分页会进行count查询
        p.setProperty("rowBoundsWithCount", "true");
        //启用合理化时,如果pageNum<1会查询第一页,如果pageNum>pages会查询最后一页
        p.setProperty("reasonable", "true");
        //将属性p设置到分页对象里面去
        pageHelper.setProperties(p);
        //返回分页对象,里面带有查询的属性或者说条件
        return pageHelper;
    }
}
mapper
IUserService
UserServiceImpl
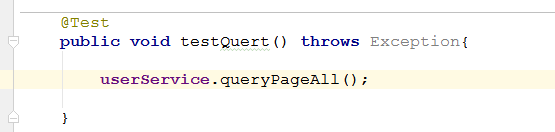
Test
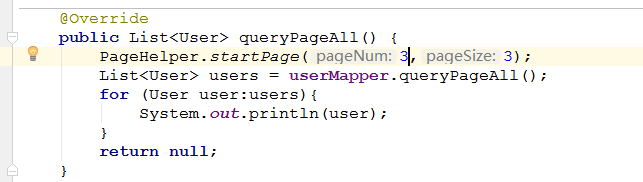
分页结果

内容有点多,慢慢来