vue自定义插件 封装一个类似 element 中 message 消息提示框的插件
vue自定义插件 封装一个类似 element 中 message 消息提示框的插件
- 一、资源文档
-
- 1.vue内置组件 transition
- 2.Vue.use()
- 3.Vue.extend()
- 4.Vue.render()
- 5.vm.$mount
- 6.vm.$destroy
- 二、实现源码
-
- 1.目录结构
- 2.插件模板
- 3.插件执行逻辑
- 4.插件安装
- 5.插件使用
- 6.插件效果
本文是在钻研与学习该篇文章后(原文地址),整理下来的知识点与简化后的内容。
一、资源文档
1.vue内置组件 transition
- 官网: https://v2.cn.vuejs.org/v2/api/#transition
- blog: https://blog.csdn.net/weixin_46995731/article/details/108991062
2.Vue.use()
- 官网: https://v2.cn.vuejs.org/v2/api/#Vue-use
3.Vue.extend()
- 官网: https://v2.cn.vuejs.org/v2/api/#Vue-extend
- blog: https://www.cnblogs.com/hentai-miao/p/10271652.html
4.Vue.render()
- 官网: https://v2.cn.vuejs.org/v2/api/#render
- CSDN(偏应用): https://blog.csdn.net/xiaoxiaoluckylucky/article/details/100603594
- 掘金(偏原理): https://juejin.cn/post/6844903973502058504
5.vm.$mount
- 官网: https://v2.cn.vuejs.org/v2/api/#vm-mount
6.vm.$destroy
- 官网: https://v2.cn.vuejs.org/v2/api/#vm-destroy
二、实现源码
1.目录结构
vue项目文件结构缩减版,仅为了展示文件存放位置
components
-- Message
   -- Message.vue
   -- index.js
-- HelloWorld.vue
router
store
App.vue
main.js
2.插件模板
Message.vue
<template>
  <transition>
    <div v-show="show" :class="`message-container message-container-${type}`">
      <div>{{ msg }}div>
    div>
  transition>
template>

<script>
export default {
  name: 'Message',
  props: {
    type: {
      type: String,
      default: 'success'
    },
    msg: {
      type: String
    },
    show: {
      type: Boolean
    }
  }
}
script>

<style scoped>
.v-enter-active,
.v-leave-active {
  transition: all 1s;
}

.v-enter,
.v-leave-to {
  opacity: 0;
}

.message-container {
  position: fixed;
  top: 20px;
  left: 50%;
  transform: translateX(-50%);
  min-width: 400px;
  padding: 5px 20px;
  border-radius: 4px;
  z-index: 9999;
  color: #ffffff;
  background-color: #fff;
  box-shadow: 0 0 10px rgba(0, 0, 0, 0.3);
}

.message-container-success {
  background-color: blue;
}

.message-container-error {
  background-color: red;
}
style>
3.插件执行逻辑
index.js
import Message from './Message.vue'

/**
 * des: 封装一个可以直接类似 this.$msg.success() 调用的全局弹框插件
 * @param duration {Number} 弹框显示时间
 * @param msg {String} 弹框内容
 * @param callBack {Function} 回调函数
 */
export default function install (Vue) {
  //   注册组件
  Vue.component('message', Message)

  function createMessage (options) {
    // 为了简便,这里我们不再对有关参数进行校验
    const { type, msg, duration, callBack } = options
    // 弹框构造器
    let MsgProfile
    // 弹框实例
    let msgInstance

    function _createMsg () {
      // 创建弹框构造器
      MsgProfile = Vue.extend({
        render (h) {
          const props = {
            show: this.show,
            type,
            msg
          }
          // 使用 render 函数,渲染 message 组件,并将 props 传入
          return h('message', { props })
        },
        data () {
          return {
            show: false
          }
        }
      })
    }

    function _mountMsg () {
      // 创建弹框实例
      msgInstance = new MsgProfile().$mount()
      // 将弹框挂载到body
      document.body.appendChild(msgInstance.$el)
      // 显示弹框
      msgInstance.show = true
    }

    function _destroyMsg () {
      // 用于销毁弹框的定时器
      let t1 = setTimeout(function () {
        clearTimeout(t1)

		// 隐藏弹框
        msgInstance.show = false
        // 用于显示淡入效果的定时器
        let t2 = setTimeout(function () {
          clearTimeout(t2)
          // 移除节点
          document.body.removeChild(msgInstance.$el)
          // 销毁示例
          msgInstance.$destroy()
          msgInstance = null
          // 触发回调
          callBack && typeof callBack === 'function' && callBack()
        }, 1000)
      }, duration)
    }

    _createMsg()
    _mountMsg()
    _destroyMsg()
  }

  Vue.prototype.$msg = {
    success (duration, msg, callBack) {
      createMessage({
        type: 'success',
        duration,
        msg,
        callBack
      })
    },
    error (duration, msg, callBack) {
      createMessage({
        type: 'error',
        duration,
        msg,
        callBack
      })
    }
  }
}
4.插件安装
main.js
import Message from './components/Message/index'
Vue.use(Message )
5.插件使用
helloWorld.vue
<template>
<div class="hello">
<button @click="clickSuccess">成功button>
<button @click="clickError">错误button>
div>
template>
<script>
export default {
name: 'HelloWorld',
methods: {
clickSuccess () {
this.$msg.success(3000, '你是成功者')
},
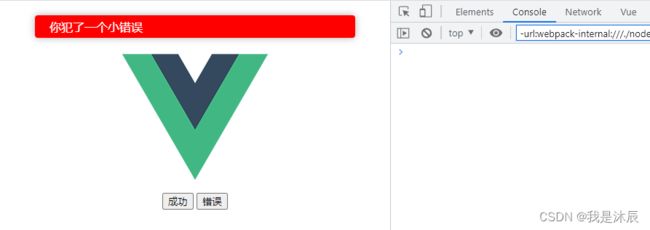
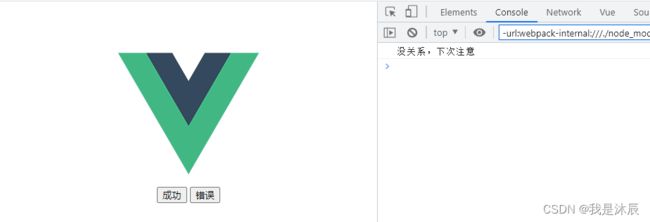
clickError () {
this.$msg.error(3000, '你犯了一个小错误', function () {
console.log('没关系,下次注意')
})
}
}
}
script>
6.插件效果
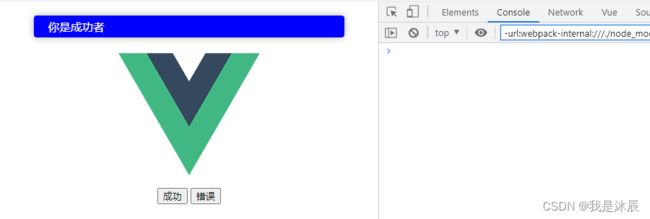
简单的 message 插件就封装好了,在实际开发中,可能这类需求较少,大家学习之后可以自行优化、拓展。
文章中没有过多的言语,核心的逻辑是 Message 文件夹下的 index.js 文件,相关注释写的比较清楚了,如果仍存在不懂的地方,可以结合着提供的资料来看,或在评论区留言探讨。
水平有限,文章中仍有诸多疏漏错误,望拨冗斧正!