8种React组件间通信方式(类组件+函数组件)
前言
大家好~,笔者是一名正在学习前端的大学生,本文是笔者主要参考文章10种React组件之间通信的方法的学习笔记,如有错误还望指出❀
1.父组件=>子组件
1.1 Props
子组件是类组件,新建文件ChildByProps1.js,代码如下:
import React,{Component} from "react";
export default class ChildByProps1 extends  Component {
    constructor(props){
        super(props);
    }
    render(){
        return (
            <span>子组件1:{this.props.txt}</span>
        )
    }
}
子组件是函数组件,新建文件ChildByProps2.js,代码如下:
export default function ChildByProps2(props){
    const {txt} = props;
    return <span>子组件2:{txt}</span>
}
父组件引入子组件,通过props传递数据给子组件,为了美观些,笔者调用了antd组件库(具体安装引用可自行百度,也可以使用原生组件),在App.js文件中添加代码如下:
import React from 'react';
import './App.css';
import ChildByProps1 from './Component/ClassComponent/Parent2ChildByProps';
import ChildByProps2 from './Component/FunctionComponent/Parent2ChildByProps';
import { Divider,Button, message, Tooltip } from 'antd';
function App() {
	return (
		<div className='container'>
	      <Divider>父传子Props</Divider>
	        <ChildByProps1 txt={"俺是类组件"}></ChildByProps1>
	        <ChildByProps2 txt="俺是函数组件"></ChildByProps2>
	     </div>
	)
}
export default App;
Props进阶,children属性,表示该组件的子节点,只要组件有子节点,props就有该属性。children属性与普通的props一样,值可以是任意值(文本、react元素、组件,甚至是函数)。
在刚才的代码上作修改看看效果吧~
APP.js文件:
        <ChildByProps2 txt="俺是函数组件">
          <button>俺是一个按钮</button>
        </ChildByProps2>
子组件:
export default function ChildByProps2(props){
    const {txt} = props;
    return (
        <div>
            <span>子组件2:{txt}</span>
            ;子节点:{props.children}
        </div>
    )
}
最后运行一下,效果如下(样式css的于此就不放代码啦,问题不大的~):

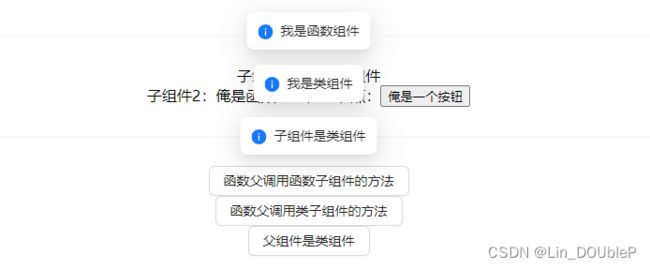
1.2 ref实例方法
父组件可以通过使用refs来直接调用子组件实例的方法:
useImperativeHandle可以让你在使用ref时自定义暴露给父组件的实例值。在大多数情况下,应当避免使用ref这样的命令式代码。useImperativeHandle应当与forwardRef一起使用。
- useImperativeHandle使用简单总结:
- 作用: 减少暴露给父组件获取的DOM元素属性, 只暴露给父组件需要用到的DOM方法
- 参数1: 父组件传递的ref属性
- 参数2: 返回一个对象, 以供给父组件中通过ref.current调用该对象中的方法
函数组件(useRef):
useImperativeHandle、forwardRef、useRef()
函数子组件,新建ChildByRef2.js文件,代码如下:
import React, { useState,useImperativeHandle, forwardRef } from "react";
import {message } from "antd";


function ChildByRef2({},ref){
    const showMsg = (msg)=>{
        message.info(msg);
    }
    //将方法暴露给父组件使用
    //@param: ref:父组件传递的ref属性,参数2返回一个对象,以供父组件通过ref.current调用对象中的方法
    useImperativeHandle(ref,()=>({
         show: showMsg
    }));
    return (
        <></>
    )
}
export default forwardRef(ChildByRef2);
类组件(createRef):
React.createRef()、useImperativeHandle、forwardRef
类子组件,新建ChildByRef1.js文件,代码如下:
import { message } from "antd";
import React from "react";

export default class ChildByRef1 extends React.Component{
    constructor(props){
        super(props)
    }
    show = (msg)=>{
        message.info(msg)
    }
    render() {
        return (
            <></>
        )
    }
}
由于App组件是函数组件,再构建一个父组件是类组件的例子来调用一下,新建Parent1.js文件,代码如下:
import { Button } from "antd";
import React,{ Component, createRef } from "react";
import ChildByRef1 from "../Parent2ChildByRef";

export default class Parent1 extends Component{
    constructor(props) {
        super(props)
        this.report = React.createRef();
        this.state={}
    }

    render(){
        return(
            <div>
                <Button onClick={()=>{this.report.current.show("子组件是类组件")}}>父组件是类组件</Button>
                <ChildByRef1 ref={this.report}></ChildByRef1>
            </div>
        )
    }
}
父组件App.js :
import ChildByRef2 from './Component/FunctionComponent/Parent2ChildByRef';
import ChildByRef1 from './Component/ClassComponent/Parent2ChildByRef';
import Parent1 from './Component/ClassComponent/Parent';
function App() {
  const myRef1 = useRef();
  const myRef2 = useRef();
    //使用子组件暴露的方法
  const myclick2 = ()=>{
     myRef2.current.show("我是函数组件");
  }
  return(
  	<div className='container'>
  	  <Divider>父传子Ref</Divider>
        <ChildByRef2 ref={myRef2}></ChildByRef2>
        <Button onClick={myclick2}>函数父调用函数子组件的方法</Button>
        <ChildByRef1 ref={myRef1}></ChildByRef1>
        <Button onClick={()=>{myRef1.current.show("我是类组件")}}>函数父调用类子组件的方法</Button>
        <Parent1></Parent1>
    </div>
  )
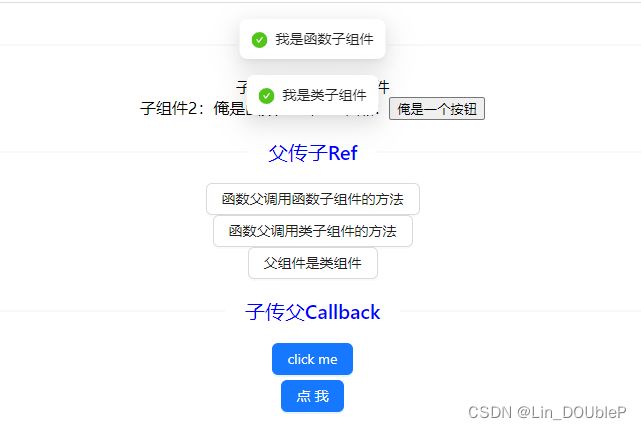
}
2.子组件=>父组件
2.1 Callback回调函数
函数子组件
import React from "react";
import { Button } from "antd";

export default function ChildByCallback2({myClick}){
    const handleClick = ()=>{
        myClick("我是函数子组件")
    }
    return (
        <Button type="primary" onClick={handleClick}>click me</Button>
    )
}
类子组件
import { Button } from "antd";
import React from "react";

export default class ChildByCallback1 extends React.Component{
    constructor(props){
        super(props);
    }
    handleClick = ()=>{
        this.props.myClick("我是类子组件")
    }
    render(){
        return (
            <Button type="primary" style={{marginTop:"5px"}} onClick={this.handleClick}>点我</Button>
        )
    }
}
App.js
import ChildByCallback2 from './Component/FunctionComponent/Child2ParentByCallBack';
import ChildByCallback1 from './Component/ClassComponent/Child2ParentByCallBack';
function App() {
	const handleClick = (data)=>{
    	message.success(data)
    }
  	return (
		<div>
			<Divider>子传父Callback</Divider>
        	<ChildByCallback2 myClick={handleClick}></ChildByCallback2>
        	<ChildByCallback1 myClick={handleClick}></ChildByCallback1>
		</div>
	)
}
3.兄弟组件通信
利用共同父组件(状态提升:将共享状态提升到最近的公共父组件中,由公共父组件管理这个状态)。为了方便,这里使用了钩子函数useState。
兄弟组件A,代码如下:
import React from "react";
export default function SiblingA({count}){
    return (
        <span>A的count值{count}</span>
    )
}
兄弟组件B,代码如下:
import React from "react";
import { Button } from "antd";

export default function SiblingB({updateFunc}){
    const clickFunc = ()=>{
        updateFunc(value=>{
            return value+1
        })
    }
    return (
        <Button onClick={clickFunc}>B修改A的值</Button>
    )
}
App.js
import SiblingA from './Component/FunctionComponent/SiBlingA';
import SiblingB from './Component/FunctionComponent/SiblingB';

function App(){
    const [count,countUpdate] = useState(0)
	return (
		<div>
		    <Divider>兄弟组件利用共同父组件(状态提升)</Divider>
	        <SiblingA count={count}></SiblingA>
	        <SiblingB updateFunc={countUpdate}></SiblingB>
		</div>
	)
}
4.跨级组件通信
4.1 Context
- 调用 React. createContext() 创建 Provider(提供数据) 和 Consumer(消费数据) 两个组件。
- 使用 Provider 组件作为父节点。
- 设置 value 属性,表示要传递的数据。
- 调用 Consumer 组件接收数据。
为了方便,先新建一个文件构建Context对象
import React from "react";

const MyContext = React.createContext();
export default MyContext;
然后分别构建父组件、子组件、孙组件:
import React from "react";
import Son from "../Son";
export default function Father(){
    return (
        <div>
            父组件
            <Son></Son>
        </div>
    )
}
import React from "react";
import Sun from "../Sun";

export default function Son(){
    return (
        <div>
            子组件
            <Sun></Sun>
        </div>
    )
}
import React from "react";
import MyContext from "../../../utils/MyContext";

export default function Sun(){

    return (
        <MyContext.Consumer>
            {
                ({color,changeColor})=>
                   <div style={{color:color}}>
                    子孙组件
                    <button onClick={changeColor}>换颜色</button>
                    </div>
            }

        </MyContext.Consumer>
    )
}
最后在App.js中引入:
import Father from './Component/FunctionComponent/Father';
import MyContext from './utils/MyContext';

function App() {
  const [color,colorUpdate] = useState("green");
	return(
		<div>
      		<Divider>跨级组件Context</Divider>
        	<MyContext.Provider value={{color,
        	changeColor:()=>{if(color!=="blue"){colorUpdate("blue")}else{colorUpdate("green")}}}}>
            	APP组件
            	<Father></Father>
        	</MyContext.Provider>
		</div>
	)
}
4.2 Protal(传送门)
Portals的主要应用场景是:当两个组件在react项目中是父子组件的关系,但在HTML DOM里并不想是父子元素的关系。
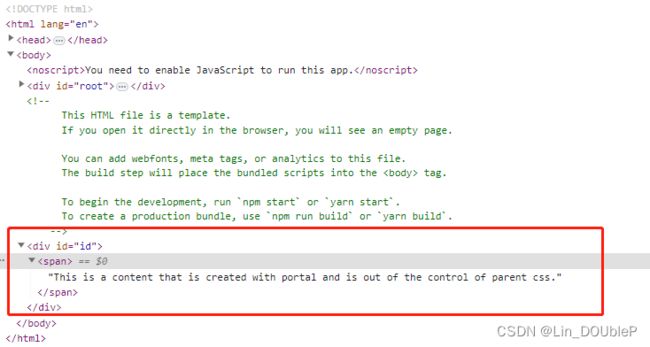
可以使用 ReactDOM.createPortal(child,container) 创建一个 Portal。这里的 child 是一个 React 元素,fragment 片段或者是一个字符串,container 是 Portal 要插入的 DOM 节点的位置。
使用 React Portal 时,应该注意几个方面。
- 事件冒泡会正常工作 —— 通过将事件传播到 React 树的祖先,事件冒泡将按预期工作,而与 DOM 中的 Portal 节点位置无关。
- React 可以控制 Portal 节点及其生命周期 — 当通过 Portal 渲染子元素时,React 仍然可以控制它们的生命周期。
- React Portal 只影响 DOM 结构 —— Portal 只会影响 HTML DOM 结构,而不会影响 React 组件树。
- 预定义的 HTML 挂载点 —— 使用 React Portal 时,你需要提前定义一个 HTML DOM 元素作为 Portal 组件的挂载。
利用Protal搭建子组件:
import React, { useEffect } from "react";
import { createPortal } from "react-dom";

export default function Portal({children,isOpen}){
    const mount = document.body

    useEffect(()=>{
        if(mount){
            const el = document.createElement("div");
            el.setAttribute("id",'id');
            mount.appendChild(el);
        }
        //清除副作用
        return ()=>{
            mount.removeChild(document.getElementById('id'));
        }
    },[]);

    if(isOpen){
        const el = document.getElementById('id');
        return createPortal(children,el);
    }else return null
}
App.js
import Portal from './Component/FunctionComponent/Portal';
function App() {
  const [open,openUpdate] = useState(false)
  return (
	 <Divider>跨级组件Portal</Divider>
     <div className='component'>
        <button onClick={()=>{
          openUpdate(!open);
        }}
          >Open Modal</button>
        <Portal isOpen={open}>
          <Tooltip>
            This is a content that is created with portal and is out of the control of parent css.
          </Tooltip>
        </Portal>
      </div>
    )
}
5.全局变量
子组件:
import React from "react";
export default class ComponentByGlobal extends React.Component {
    state = {
        value:window.a
    }
    constructor(props){
        super(props)
    }
    componentDidUpdate(prevState){
        if(prevState.value!==this.state.value){
            console.log("window.a is changed to " + this.state.value);
        }
    }

    render(){
        return (
        <div>
            window.a的值为{this.state.value}
            <button onClick={()=>{this.setState({value:window.a})}}>点击更新</button>
        </div>
        )
    }
}
App.js
import ComponentByGlobal from './Component/ClassComponent/GlobalVariable';
function App(){
  window.a=1
  return (
	<div>
      <Divider>全局变量Global Variables</Divider>
        <button onClick={()=>{window.a+=10; console.log(window.a)}}>更改全局变量window.a</button>
        <ComponentByGlobal></ComponentByGlobal>
	</div>
  )
}
6.通过Observer Pattern来通信
利用观察者模式Observer Pattern,一个组件负责订阅某个消息,另一个组件负责发送这个消息。设置一个独立的小模块EventBus来专门管理这些自定义事件。
class EventBus {
    constructor() {
        this.bus = document.createElement("fakeelement");
    }

    addEventListener(event,callback) {
        this.bus.addEventListener(event,callback)
    }

    removeEventListener(event,callback) {
        this.bus.removeEventListener(event,callback)
    }

    //触发执行
    dispatchEvent(event,detail={}){
        this.bus.dispatchEvent(new CustomEvent(event,{detail}));
    }
}

export default new EventBus();
类子组件A和类子组件B通信:
//接受自定义事件

import { message } from "antd";
import React from "react";
export default class ComponentA extends React.Component {

    componentDidMount() {
        document.addEventListener('myEvent',this.handleEvent)
    }

    componentWillUnmount() {
        document.removeEventListener('myEvent',this.handleEvent)
    }

    handleEvent = e=>{
        message.info(e.detail.log)
    }

    render() {
        return <></>
    }
}
//发送自定义事件

import React from "react";

export default class ComponentB extends React.Component {

    sendEvent = ()=>{
        document.dispatchEvent(new CustomEvent('myEvent',{
            detail:{
                log:"hello world!!!"
            }
        }))
    }

    render() {
        return <button onClick={this.sendEvent}>Send</button>
    }
}
函数子组件A和函数子组件B通信:
import { useEffect } from "react";
import EventBus from "../../../utils/EventBus";
import { message } from "antd";


export default function BusComponentA(){

    const handleEvent = e=>{
        message.info(e.detail.info)
    }

    useEffect(()=>{
        //挂载
        EventBus.addEventListener('otherEvent',handleEvent)
        return (()=>{
            //卸载
            EventBus.removeEventListener('otherEvent',handleEvent)
        })
    },[])

    return (<></>)
import EventBus from "../../../utils/EventBus"

export default function BusComponentB(){
    const sendEvent = ()=>{
        EventBus.dispatchEvent('otherEvent',
                {info:'嘻嘻哈哈的'}
        )
    }
    return <button onClick={sendEvent}>Send</button>
}
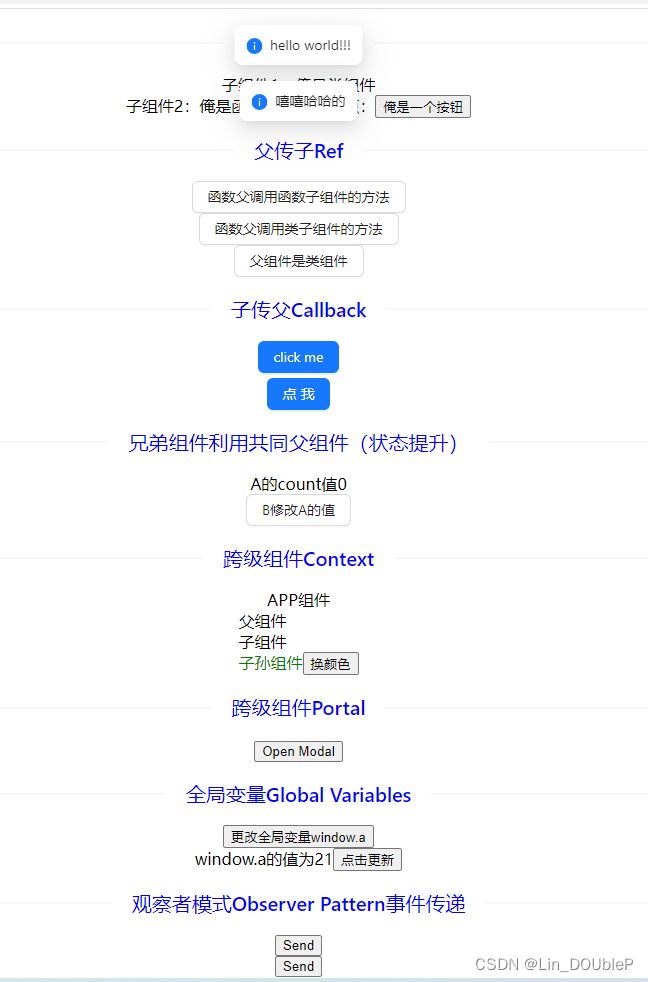
最后在App.js中引入:
      <Divider>观察者模式Observer Pattern事件传递</Divider>
        <ComponentA></ComponentA>
        <ComponentB></ComponentB>
        <BusComponentA></BusComponentA>
        <BusComponentB></BusComponentB>
结语:
本次分享就到这了~笔者为初学者,欢迎各位评论区交流。


