第一次OpenCV小作业-使用鼠标左键画圆画矩形
2020年9月28日 OpenCV中GUI的特性作业:
在白色(255, 255, 255)的背景中,利用滑动条选择颜色(RGB!),用鼠标左键画圆,右键画矩形。
分析:
要在白色背景中,利用滑动条选择颜色(RGB),用鼠标左键画圆,右键画矩形
4个条件
我们一一来实现:
1.白色背景实现
首先创建一个窗口,窗口名字为ljy
window_name = 'ljy'                # set a window name with 'ljy'
cv2.namedWindow(window_name)       # create window first
img = np.zeros((512, 512, 3), np.uint8)   # set a parameter en_create a window
再将背景图涂成白色
img.fill(255) # fill for white background (255,255,255)
效果图如下:
2. 滑动条选择颜色(RGB)
使用cv2.createTrackbar()方法来创建滑动条。
代码如下:
创建一个函数来获取RGB值并且返回,返回顺序为B, G, R;为了显示在某一个窗口内,请求传入一个参数(windowName)
关键代码get_color(windowName)自定义函数:
# define a function to put a color palette and return a colo with sequence b, g, r
def get_color(windowName):
    cv2.createTrackbar('R', windowName, 0, 255, nothing)        # set Trackbar with name 'R' in window name 'windowName'
    cv2.createTrackbar('G', windowName, 0, 255, nothing)        # set Trackbar with name 'G' in window name 'windowName'
    cv2.createTrackbar('B', windowName, 0, 255, nothing)        # set Trackbar with name 'B' in window name 'windowName'
    r = cv2.getTrackbarPos('R', windowName)                     # put it on
    g = cv2.getTrackbarPos('G', windowName)                     # put it on
    b = cv2.getTrackbarPos('B', windowName)                     # put it on
    return b, g, r                                              # return 3 value with sequence b, g, r
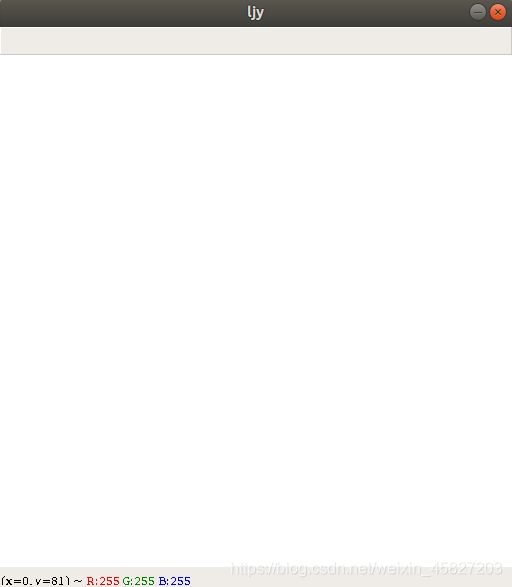
效果图如下:

3.用鼠标左键画圆,右键画矩形
鼠标点击事件代码可以通过以下代码来查看有哪些鼠标点击事件。
import cv2

events = [i for i in dir(cv2) if 'EVENT' in i]
print(events)

- 我们要使用到的鼠标左键按下事件和右键按下事件分别为
EVENT_LBUTTONDOWN左键按下EVENT_RBUTTONDOWN右键按下
OpenCV 库内就有一个现成的方法circle(img, center, radius, color, thickness=None, lineType=None, shift=None)调用即可。
但是这样画圆的话只能写死圆的半径和大小;不够灵活,希望做成画图工具那样,使用鼠标拖动来画圆。
- 使用鼠标拖动来画图就还需要需要两个鼠标点击事件
EVENT_MOUSEMOVE鼠标移动EVENT_FLAG_LBUTTON鼠标左键是否按下
发现在ubuntu 18.04中,右键会有一个菜单出现,改成使用滑轨选择使用什么图形绘图。
添加一条滑轨,和之前差不多就不赘述了。
关键代码:
# define a function to put a slide bar to switch mode which is draw a rectangle or a circle
def set_a_switch(switch_name, windowName):
    cv2.createTrackbar(switch_name, windowName, 0, 1, nothing)  # create a TrackBar with 2 mode which window name
    #                                                             is called with 'window_name'
    s = cv2.getTrackbarPos(switch_name, windowName)             # put it on
    return s                                                    # return TrackBar value
这个函数返回一个值表示现在绘制什么图形,请求两个参数,第一个是这个滑轨的名字,另一个是要生成在哪个窗口的名字。
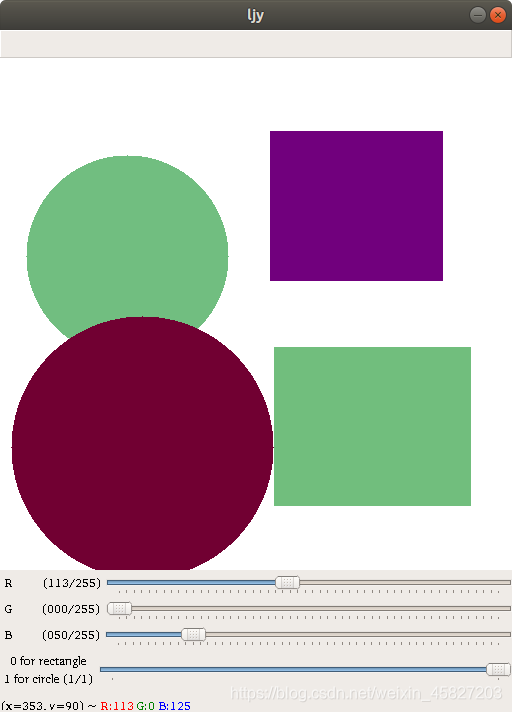
效果图如下:
![]()
- 是时候开始画图了
分3点
- 鼠标左键按下才开始画图,没有按下不画,松开停止画图。
- 获取鼠标左键初次按下的坐标并记录下来作为矩形的一个角或是圆的圆心。
关键代码:
drawing = False                    # set a flag to judge DRAWING or NOT

mode = True                        # judge drawing a rectangle or a circle
ix, iy = -1, -1                    # Define two variables to record the coordinates of the first left mouse button press


# this function for draw a picture
def draw_picture(event, x, y, flags, param):
    global ix, iy, drawing, mode

    # Create a color palette
    switch_name = '0 for rectangle\n1 for circle'      # set switch name
    color = (get_color(window_name))                   # Gets the color selected by the user
    if set_a_switch(switch_name, window_name) == 0:    # use function set_a_switch judge which picture should be drawing
        mode = True     # draw rectangle
    else:
        mode = False    # draw circle

    if event == cv2.EVENT_LBUTTONDOWN:      # if just left button down
        drawing = True                      # meaning drawing
        ix, iy = x, y                       # record the initial coordinate
    elif event == cv2.EVENT_MOUSEMOVE and flags == cv2.EVENT_FLAG_LBUTTON:      # event to judge IsMouseMove?
        #                                                                         flags to judge ButtonDown?

        if drawing == True:                                                             # Drawing
            if mode == True:                                                            # Draw rectangle
                cv2.rectangle(img, (ix, iy), (x, y), color, -1)                         # from coordinate (ix, iy) to (x, y) and the radius is -1( solid )
            else:                                                                       # Draw circle
                cv2.circle(img, (ix, iy), abs(ix - x) + abs(iy - y), color, -1)         # from center(ix, iy) to border(x, y)
                # cv2.circle(img, (x, y), abs(ix - x) + abs(iy - y), color, -1)         # from border(ix, iy) to center(x, y)
    elif event == cv2.EVENT_LBUTTONUP:                                                  # left button up means the draw is end.
        drawing = False                                                                 # set drawing false


cv2.setMouseCallback(window_name, draw_picture)         # Mouse Call Back Event
#                                                       winName is window name;
#                                                       onMouse is specifies the function pointer to be called
#                                                       each time the mouse time occurs in the window.
最后,按下ESC键退出并释放资源
关键代码:
while 1:
    cv2.imshow(window_name, img)                        # show window
    k = cv2.waitKey(1) & 0xFF                           # read the key which pressed
    # if k == ord('m'):
    #     mode = not mode
    if k == 27:                                         # if the 'ESC' key is pressed
        break                                           # Ending

cv2.destroyAllWindows()                                 # release window resources
效果图如下: