VS2019封装C++类为动态链接库DLL
一、创建DLL
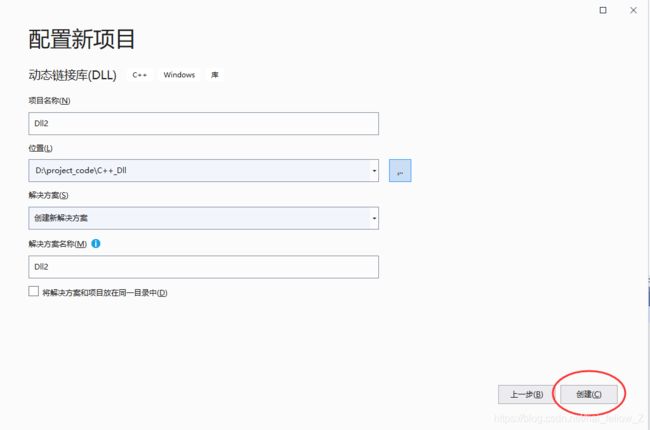
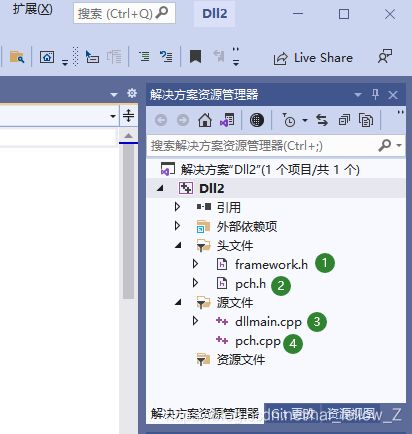
1、新建DLL项目
2、给工程添加类
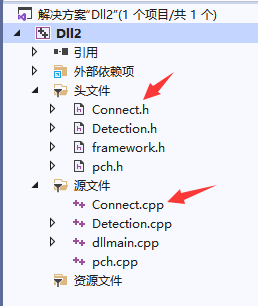
在上一步的基础上,右键Dll2->添加类,命名为要封装的类名,此处为Detection类。
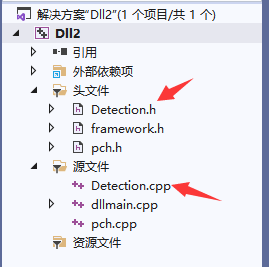
分别对应将类的.h和.cpp代码行复制到添加的类中;
# Detection.h
class Detection
{
public:
	Detection();
	~Detection();
	...
	void Initialize(int width, int height);
	vector<Box_Coordinate> Detecting(cv::Mat frame);
	//获取Mat对象
	Mat GetFrame();

private:
	...
	vector<Box_Coordinate> box_coordinate;
};
3、建立虚基类
由于需要根据基类中的函数提供类的接口,此处将基类写在pch.h文件中(只写函数的声明,不用写函数的定义实现)。
注意:保证基类中的函数与Detection类中的函数参数、返回值等保持一致,否则会出现“C2259 “Detection”: 无法实例化抽象类”的问题。
// pch.h: 这是预编译标头文件。
// 下方列出的文件仅编译一次,提高了将来生成的生成性能。
// 这还将影响 IntelliSense 性能,包括代码完成和许多代码浏览功能。
// 但是,如果此处列出的文件中的任何一个在生成之间有更新,它们全部都将被重新编译。
// 请勿在此处添加要频繁更新的文件,这将使得性能优势无效。
#ifndef PCH_H
#define PCH_H
// 添加要在此处预编译的标头
#include "framework.h"
#include 注意以上,在基类所在头文件中加上#define CLASS_DECLSPEC __declspec(dllexport),表示这里要把类导出。同时修改基类声明,加上CLASS_DECLSPEC即为class CLASS_DECLSPEC Base。
另外,需要修改Detection类继承于基类,见下方对应修改。
class Detection :public Base
4、连接基类与子类
#connect.h
#pragma once
#include"pch.h"
class CLASS_DECLSPEC Connect
{
public:
	Connect();
	~Connect();
public:
	Base* CreateObject();
	void DeleteObject(Base* _bp);
};
#Connect.cpp
#include "pch.h"
#include "Connect.h"
#include "Detection.h"

Connect::Connect()
{}
Connect::~Connect()
{}

Base* Connect::CreateObject()
{
	return new Detection;		//注意此处
}
void Connect::DeleteObject(Base* _bp)
{
	if (_bp)
		delete _bp;
}
完成以上之后,点击执行,会出现以下弹出框。这是因为DLL不是可执行文件.exe,所以无法被启动,点击‘确定’,DLL的创建完成!

可以看到,在文件夹中生成了以下文件。
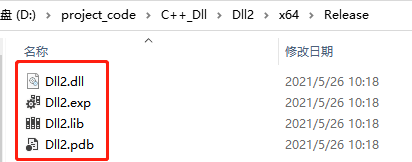
另外注意:不要出现头文件闭环引用,否则会有“C2504 未定义基类”的错误。
![]()
二、测试
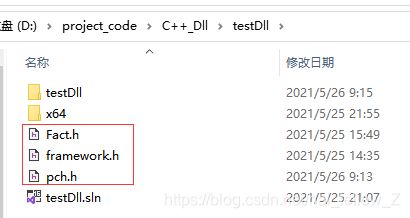
创建一个新的工程,用来测试dll,此处新建了testDll工程,然后将以下三个文件对应拷贝过来。
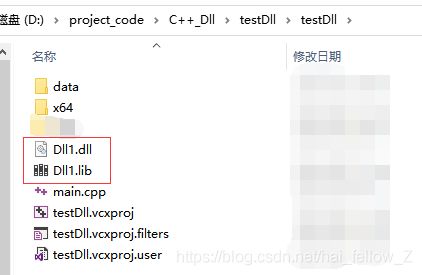
将DLL的两个文件拷贝到下面文件夹中。
测试代码
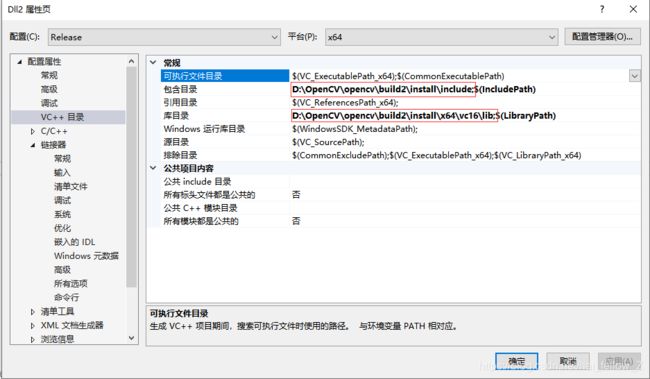
#include 再一次添加opencv依赖项。

此处一定要记得添加lib文件!!!

测试成功。
参考https://blog.csdn.net/weixin_38994901/article/details/106625837
错误:_open’: This function or variable may be unsafe. Consider using _sopen_s instead.
解决:C/C++预处理器,添加:_CRT_SECURE_NO_WARNINGS
错误:在vs2019上编译错误:Error C2116 ‘GetProcessTimes’: function parameter lists do not match between declarations win32_api.
解决:使用/permissive命令关闭一致性,C/C++属性-》命令行-》/permissive

