SpringCloud 的微服务调用
此次博客将简单描述如何在使用SpringCloud框架创建的微服务项目中进行微服务的互相调用。
一、Eureka的认识
Eureka和dubbo框架中经常使用的Zookeeper类似,都是一个用于服务注册和发现的组件。当你创建的微服务需要被其它服务调用时,就需要先在EurekaServer中注册这个服务,方便服务消费者从Eureka查询服务提供者的地址,并通过该地址调⽤服务提供者的接⼝。具体的EurekaServer的架构图如图所示:
二、EurekaServer的创建
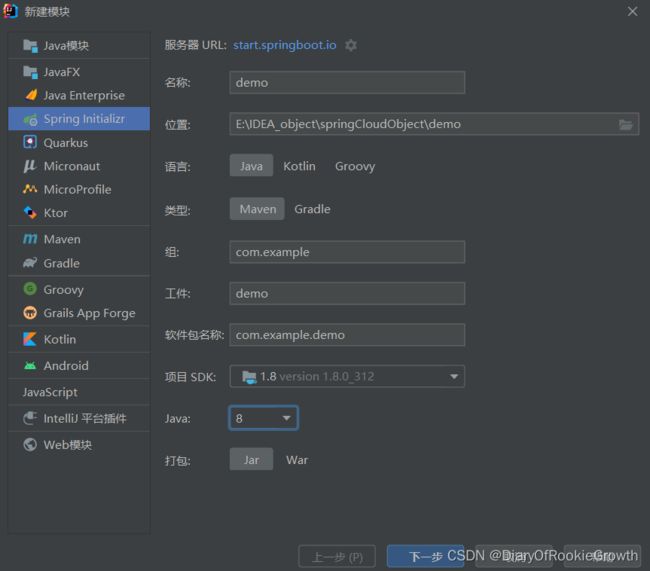
1、利用IDEA提供模板,并在其中选择好相应的依赖。
具体配置文件内容如下:
    4.0.0

        org.springframework.boot
        spring-boot-starter-parent
        2.4.9


    com.example
    eurekaServer
    0.0.1-SNAPSHOT
    eurekaServer
    Demo project for Spring Boot

        1.8
        2020.0.3


            org.springframework.cloud
            spring-cloud-starter-netflix-eureka-server


            org.springframework.boot
            spring-boot-devtools
            runtime
            true


            org.projectlombok
            lombok
            true


            org.springframework.boot
            spring-boot-starter-test
            test


                org.springframework.cloud
                spring-cloud-dependencies
                ${spring-cloud.version}
                pom
                import


                org.springframework.boot
                spring-boot-maven-plugin


                            org.projectlombok
                            lombok
注意:在选择依赖版本时,应注意SpringCloud和SpringBoot的版本要相对应。
2、在自动生成的启动器上,加上注解@EnableEurekaServer来启动EurekaServer。
@SpringBootApplication
@EnableEurekaServer
public class EurekaServerApplication {

    public static void main(String[] args) {
        SpringApplication.run(EurekaServerApplication.class, args);
    }

}
3、设置配置文件,配置相应的端口和信息。
server:
    port: 9004
spring:
    application:
        name: eureka-server
eureka:
    client:
        service-url:
            # eureka 服务地址,如果是集群的话;需要指定其它集群eureka地址
            defaultZone: http://127.0.0.1:9004/eureka
        # 不注册⾃⼰
        register-with-eureka: false
        # 不拉取服务
        fetch-registry: false
4、如果要测试是否创建成功,可以在服务器启动之后访问相应的端口和地址就能看见控制页面。
三、服务提供者的创建
1、在利用模板创建服务提供者的方式和上一步大致相同,就是需要选择的依赖部分不一样。
    4.0.0

        org.springframework.boot
        spring-boot-starter-parent
        2.4.9


    com.kkb
    billServer
    0.0.1-SNAPSHOT
    billServer
    Demo project for Spring Boot

        1.8
        2020.0.3


            org.springframework.cloud
            spring-cloud-starter-netflix-eureka-client
            3.0.3


            org.springframework.boot
            spring-boot-starter-web


            org.springframework.cloud
            spring-cloud-starter-config


            org.springframework.boot
            spring-boot-devtools
            runtime
            true


            org.projectlombok
            lombok
            true


            org.springframework.boot
            spring-boot-starter-test
            test


                org.springframework.cloud
                spring-cloud-dependencies
                ${spring-cloud.version}
                pom
                import


                org.springframework.boot
                spring-boot-maven-plugin


                            org.projectlombok
                            lombok
2、在启动器类上添加注解@EnableDiscoveryClient。
@SpringBootApplication
@EnableDiscoveryClient
public class BillServerApplication {

    public static void main(String[] args) {
        SpringApplication.run(BillServerApplication.class, args);
    }

}
3、在配置文件中设置相应的参数。
server:
  port: ${port:9001}
spring:
  application:
    name: billServer
eureka:
  client:
    service-url:
      defaultZone: http://127.0.0.1:9004/eureka
    fetch-registry: true
    register-with-eureka: true
4、这时先启动Eureka,再启动服务提供者,访问Eureka的控制页面就可以看见注册的服务列表了。
四、创建服务消费者
1、在模板中选择相应的依赖。具体依赖如下:
    4.0.0

        org.springframework.boot
        spring-boot-starter-parent
        2.4.9


    com.example
    makeBill
    0.0.1-SNAPSHOT
    makeBill
    Demo project for Spring Boot

        1.8
        2020.0.3


            org.springframework.cloud
            spring-cloud-starter-netflix-eureka-client


            org.springframework.boot
            spring-boot-starter-web


            org.springframework.boot
            spring-boot-devtools
            runtime
            true


            org.projectlombok
            lombok
            true


            org.springframework.boot
            spring-boot-starter-test
            test


                org.springframework.cloud
                spring-cloud-dependencies
                ${spring-cloud.version}
                pom
                import


                org.springframework.boot
                spring-boot-maven-plugin


                            org.projectlombok
                            lombok
2、在配置文件中配置相应的参数:
server:
  port: 9002
spring:
  application:
    name: makeServer
eureka:
  client:
    service-url:
      defaultZone: http://127.0.0.1:9004/eureka
3、改造启动类,在类名上加上注解@EnableDiscoveryClient,并在类中加上一个返RestTemplate的单例方法。为了在调用服务时实现负载均衡,在该方法上加上注解@LoadBalnced,具体代码如下:
@SpringBootApplication
@EnableDiscoveryClient
public class MakeBillApplication {

    public static void main(String[] args) {
        SpringApplication.run(MakeBillApplication.class, args);
    }

    @Bean
    @LoadBalanced//实现负载均衡
    public RestTemplate restTemplate(){
        return new RestTemplate();
    }

}
4、在controller层代码中,需要调用服务时,可以使用RestTemplate来调用服务。如果有调用的服务有多个端口可以实现负载均衡时,在编写url地址就不要指定具体的地址和端口,换成服务名就行。
    @Resource
    private RestTemplate restTemplate;

    @GetMapping("/text/{id}")
    public ResponseEntity getResultById(@PathVariable("id") Integer id){


        String url = "http://billServer/bill/test/list/"+id;
        LastResult payment = restTemplate.getForObject(url, LastResult.class);
        return ResponseEntity.ok(payment);
} 
