Air780E小程序远程开关-LuatOS版本
目前,Air780E的CSDK已经开源了,LuatOS也作为其中的一个部分开源了出来,今天学习一下如何通过小程序远程控制开发板上灯的开关,学会以后可以制作远程开关控制各种设备。
本教程无需拥有服务器和小程序开发经验,会点鼠标会复制粘贴就能做
先来效果演示
一、腾讯云准备
1、新建项目
我们用到的是腾讯云的物联网开发平台https://console.cloud.tencent.com/iotexplorer
没账号的自己注册,每个账号都有免费额度,足够我们自己玩玩了。点进公共实例。
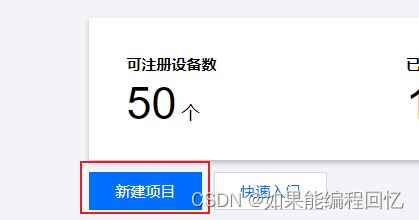
新建项目
项目名称自己起一个,描述写不写都行,填完保存
2、新建产品
然后在页面上就能看到我们新建的项目了,点击项目名称,进去新建产品,名称我这里叫远程开关,可以随便写。然后品类选标准品类,点进去搜索开关,勾选一路开关,如下图。通信方式选2G/3G/4G,其他默认。点击确定。
3、添加设备
点进我们刚新建的产品,点4设备调试页面,点击新建设备。
填写设备名称,建议用设备imei等唯一标识,我这里演示方便就写了air780e 
点击我们刚新建的设备,记录以下几个参数,一会要用。
二、设备端开发
可以自行编译CSDK里的luatos项目,也可以用我这里编译好的LuatOS-SoC_V1001_EC618.soc
具体怎么编译以后再写教程
1、计算连接参数
腾讯云是需要鉴权才允许设备连接,因此,我们要首先计算连接参数,这里使用iotauth库可以方便的计算阿里云,腾讯云,百度云,涂鸦云,阿里云,华为云的连接参数。
根据api的说明,结合前面我们在腾讯云注册的设备,代码就很简单了
2、连接服务器
获取参数以后,根据返回值就可以得到连接mqtt服务器的信息,根据mqtt库的说明,代码如下
mqttc = mqtt.create(nil, product_key .. ".iotcloud.tencentdevices.com", 1883)
        mqttc:auth(client_id, user_name, password)
        mqttc:keepalive(240) -- 默认值240s
        mqttc:autoreconn(true, 3000) -- 自动重连机制
        mqttc:on(
            function(mqtt_client, event, data, payload)
                if event == "conack" then
                    sys.publish("mqtt_conack")
                    log.info("mqtt", "mqtt已连接")
                    mqtt_client:subscribe("$thing/down/property/" .. product_key .. "/".. device_id)
                elseif event == "recv" then
                    log.info("mqtt", "收到消息", data, payload)
                    local json = json.decode(payload)
                    if json.method == "control" then
                        if json.params.power_switch == 1 then
                            LED(1)
                        elseif json.params.power_switch == 0 then
                            LED(0)
                        end
                    end
                elseif event == "sent" then
                    log.info("mqtt", "sent", "pkgid", data)
                end
            end
        )
        mqttc:connect()
        sys.wait(10000)
        mqttc:subscribe("$thing/down/property/" .. product_key .. "/" .. device_id)
        sys.waitUntil("mqtt_conack")
        while true do
            local ret, topic, data, qos = sys.waitUntil("mqtt_pub", 30000)
            if ret then
                if topic == "close" then
                    break
                end
                mqttc:publish(topic, data, qos)
            end
        end
        mqttc:close()
        mqttc = nil
3、处理数据
根据腾讯云的文档,我们使用的物模型中power_switch是我们需要的开关参数。我们只需要根据文档对收到的数据解析即可,具体代码看前文代码
三、测试
把完整代码烧录进设备,不会烧录的可以看 AIR780E二次开发点灯(LuatOS)
代码兼容Air780E,ESP32C3和Air105+W5500,注意修改相应参数为自己的。
PROJECT = "gpiodemo"
VERSION = "1.0.0"
local sys = require "sys"
require("sysplus")
local wifi_ssid = ""
local wifi_password = ""--如果是wifi设备,这里改成你的wifi账号和密码
local product_key = ""
local device_id = "" --改为你自己的设备id
local device_secret = "" --改为你自己的设备密钥
local mqttc = nil
sys.taskInit(
    function()
        log.info("BSP", rtos.bsp())
        if rtos.bsp() == "ESP32C3" then
            LED = gpio.setup(12, 0, gpio.PULLUP)
            wlan.init()
            wlan.setMode(wlan.STATION)
            wlan.connect(ssid, password, 1)
            local result, data = sys.waitUntil("IP_READY")
            log.info("wlan", "IP_READY", result, data)
        elseif rtos.bsp() == "AIR105" then
            w5500.init(spi.HSPI_0, 24000000, pin.PC14, pin.PC01, pin.PC00)
            w5500.config() --默认是DHCP模式
            w5500.bind(socket.ETH0)
            LED = gpio.setup(62, 0, gpio.PULLUP)
        elseif rtos.bsp() == "EC618" then
            LED = gpio.setup(27, 0, gpio.PULLUP)
        end
        local client_id, user_name, password = iotauth.qcloud(product_key, device_id, device_secret, "sha1", 1700561166)
        log.info("参数", client_id, user_name, password)
        mqttc = mqtt.create(nil, product_key .. ".iotcloud.tencentdevices.com", 1883)
        mqttc:auth(client_id, user_name, password)
        mqttc:keepalive(240) -- 默认值240s
        mqttc:autoreconn(true, 3000) -- 自动重连机制
        mqttc:on(
            function(mqtt_client, event, data, payload)
                if event == "conack" then
                    sys.publish("mqtt_conack")
                    log.info("mqtt", "mqtt已连接")
                    mqtt_client:subscribe("$thing/down/property/" .. product_key .. "/".. device_id)
                elseif event == "recv" then
                    log.info("mqtt", "收到消息", data, payload)
                    local json = json.decode(payload)
                    if json.method == "control" then
                        if json.params.power_switch == 1 then
                            LED(1)
                        elseif json.params.power_switch == 0 then
                            LED(0)
                        end
                    end
                elseif event == "sent" then
                    log.info("mqtt", "sent", "pkgid", data)
                end
            end
        )
        mqttc:connect()
        sys.wait(10000)
        mqttc:subscribe("$thing/down/property/" .. product_key .. "/" .. device_id)
        sys.waitUntil("mqtt_conack")
        while true do
            local ret, topic, data, qos = sys.waitUntil("mqtt_pub", 30000)
            if ret then
                if topic == "close" then
                    break
                end
                mqttc:publish(topic, data, qos)
            end
        end
        mqttc:close()
        mqttc = nil
    end
)
-- 用户代码已结束---------------------------------------------
-- 结尾总是这一句
sys.run()
-- sys.run()之后后面不要加任何语句!!!!!
点击腾讯云设备的二维码
使用腾讯连连小程序扫码添加设备,添加完就能看到我们设备在线了
点击总开关,改变开关状态,就能看到,设备上的灯跟着改变状态了
日志也可以看到收到的消息,可用根据消息调试其他功能,比如倒计时开启


