OTRS 工单系统部署
目录
-
- 前言
- 一、规划
-
- 1.1 服务器规划
- 1.2 服务版本
- 二、部署
-
- 2.1 安装必要小工具
- 2.2 安装 Apache
- 2.3 安装 MySQL
- 2.4 安装 OTRS
-
- 2.4.1 安装
- 2.4.2 配置 MySQL
- 2.4.3 配置 Apache
- 三、验证
-
- 3.1 访问(已提前建库建表)
- 3.2 安装(未提前建库建表)
- 3.3 OTRS 配置守护进程
- 四、FAQ
-
- 4.1 Perl 模块安装问题
- 4.2 OS 防火墙问题
- 总结
前言
OTRS(Open-source Ticket Request System),也称为开源工单请求系统,是一个免费、开源的基于网络的工单系统。开源项目于 2001 年在德国创立,已被全球超过16万用户使用,支持38种语言。是以全球业界公认的 IT 服务管理标准 ITIL V3 为基础,开发的一整套 IT 服务管理解决方案。
一、规划
1.1 服务器规划
| OS | 用途 |
|---|---|
| CentOS7(10.20.10.68) | OTRS web展示端(Apache 2.4) |
| CentOS7(10.20.10.65) | OTRS 数据存储端(MySQL 5.7) |
1.2 服务版本
-
MySQL
Server version:5.7 -
OTRS
Server version: 6.0 -
Apache
Server version:Apache/2.4.6 (CentOS)
二、部署
2.1 安装必要小工具
yum install -y epel* wget unzip
2.2 安装 Apache
# 安装
yum install -y httpd && systemctl start httpd && systemctl enable httpd

# 查看安装版本
httpd -v
Server version: Apache/2.4.6 (CentOS)
Server built:   Nov 16 2020 16:18:20
2.3 安装 MySQL
1、安装
# 清除残余MySQL,保证一个干净的环境
yum erase mariadb mariadb-server mariadb-libs mariadb-devel -y
userdel -r mysql
rm -rf /etc/my*
rm -rf /var/lib/mysql
# 下载 mysql yum 源
wget -i -c http://dev.mysql.com/get/mysql57-community-release-el7-10.noarch.rpm
yum -y install mysql57-community-release-el7-10.noarch.rpm
# 安装MySQL服务
yum -y install mysql-community-server

# 启动MySQL
systemctl start mysqld.service
systemctl enable mysqld.service
2、配置
-
为 OTRS 创建一个数据库,作为数据存储
create database otrs_db default charset utf8 collate utf8_general_ci; -
为 OTRS 创建一个用户并使用以下命令授予 otrs_db 数据库的读写权限
CREATE USER 'otrs'@'10.20.10.%' IDENTIFIED BY 'OTRS@admin'; GRANT INSERT,DELETE,UPDATE,SELECT ON otrs_db.* TO 'otrs'@'10.20.10.%'; FLUSH PRIVILEGES; -
修改 my.cnf 配置文件
vim /etc/my.cnf max_allowed_packet=64M query_cache_size=16M innodb_log_file_size=256M innodb_file_per_table=1 character-set-server=utf8 -
重启 MySQL
systemctl restart mysqld.service
2.4 安装 OTRS
2.4.1 安装
1、安装必要 Perl 模块
OTRS 是用 Perl 编写的,并使用了许多 Perl 模块。因此,需要安装必需的 Perl 模块。
yum install bash-completion "perl(Archive::Zip)" "perl(Crypt::SSLeay)" "perl(IO::Socket::SSL)" "perl(LWP::UserAgent)" "perl(Net::DNS)" "perl(Net::LDAP)" "perl(Template)" "perl(XML::LibXML)" "perl(XML::LibXSLT)" "perl(XML::Parser)" "perl(YAML::XS)" "perl(YAML::XS)" "perl(Authen::NTLM)" "perl(Mail::IMAPClient)" "perl(JSON::XS)" "perl(Encode::HanExtra)" "perl(DBD::Pg)" "perl(Crypt::Eksblowfish::Bcrypt)" "perl(DateTime)" "perl(DBD::mysql)" perl-core procmail -y
2、下载 OTRS RPM 包
下载地址:https://ftp.otrs.org.cn/releases/
选择适用于 CentOS 的 RPM 包或源码包。
wget https://ftp.otrs.org.cn/releases/RPMS/rhel/7/otrs-6.0.30-02.noarch.rpm
3、安装
rpm -ivh otrs-6.0.30-02.noarch.rpm
4、检查缺少的模块
注:如果yum无法安装模块,可看第四节(FAQ)
-
检查1
# 通过 .pl 脚本来检查缺少的模块
perl /opt/otrs/bin/otrs.CheckModules.pl
yum -y install "perl(YAML::XS)" # 其他数据库,如oracle,MySQL驱动模块我已经安装了 # yum -y install "perl(DBD::oracle)" -
检查2
perl -cw /opt/otrs/bin/cgi-bin/index.plyum -y install perl-namespace-clean # 或 perl -MCPAN -e shell install namespace/clean.pm # 两种方法,选其一即可 -
检查3
[root@centos7-2 ~]# perl -cw /opt/otrs/bin/cgi-bin/customer.pl /opt/otrs/bin/cgi-bin/customer.pl syntax OK -
检查4
[root@centos7-2 ~]# perl -cw /opt/otrs/bin/otrs.Console.pl
/opt/otrs/bin/otrs.Console.pl syntax OK
注:如果选择在线安装的,到此步骤就结束了,重启一下 Apache 即可开始在线安装:http://10.20.10.68/otrs/installer.pl,可直接跳到3.2小节查看安装步骤。
如果手动导入数据(sql)的话,继续执行下面的步骤。
2.4.2 配置 MySQL
1、修改 OTRS 配置文件
vim /opt/otrs/Kernel/Config.pm
依次修改以下四个部分。
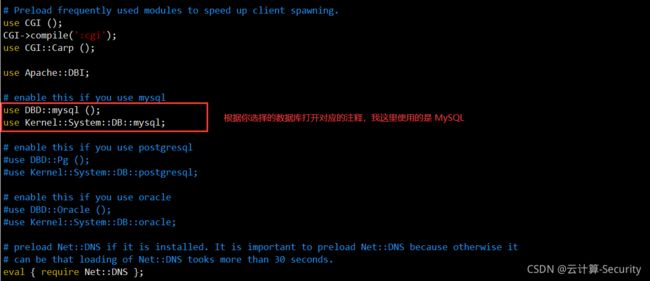
2、编辑apache2-perl-startup.pl文件启用 MySQL 支持
根据个人的实际情况来打开对应的注释符。
vim /opt/otrs/scripts/apache2-perl-startup.pl
3、导入数据
登录 MySQL 并执行 sql 脚本
source /opt/otrs/scripts/database/otrs-schema.mysql.sql
source /opt/otrs/scripts/database/otrs-initial_insert.mysql.sql
source /opt/otrs/scripts/database/otrs-schema-post.mysql.sql
2.4.3 配置 Apache
1、配置
vim /etc/httpd/conf/httpd.conf
Include /opt/otrs/scripts/apache2-httpd.include.conf    # 添加conf配置文件 或 ln -s /opt/otrs/scripts/apache2-httpd.include.conf /etc/httpd/conf.d/otrs.conf
User otrs     # otrs用户
2、重启 Apache 服务
systemctl restart httpd
三、验证
3.1 访问(已提前建库建表)
这种方式为已建库建表的情况下执行,调过来安装步骤(3.2小节)。访问安装URL:http://10.20.10.68/otrs/index.pl
默认登录用户:root@localhost
默认登录密码:root
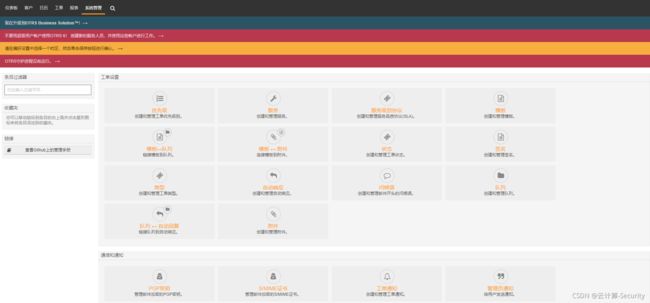
登录成功后,会看到如下展示界面。
3.2 安装(未提前建库建表)
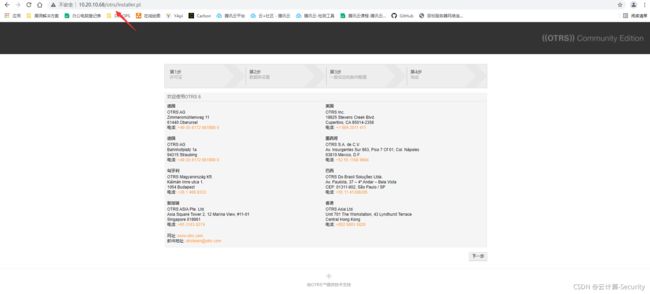
这种方式在没建库建表的情况下执行。访问安装URL:http://10.20.10.68/otrs/installer.pl
使用这种方法就不需要建库建表,在 OTRS web 配置就行。
也不需OTRS配置连接数据的信息(如2.2.4小节),但需要启用 MySQL 支持(在2.2.4小节)
1、访问 OTRS web 界面
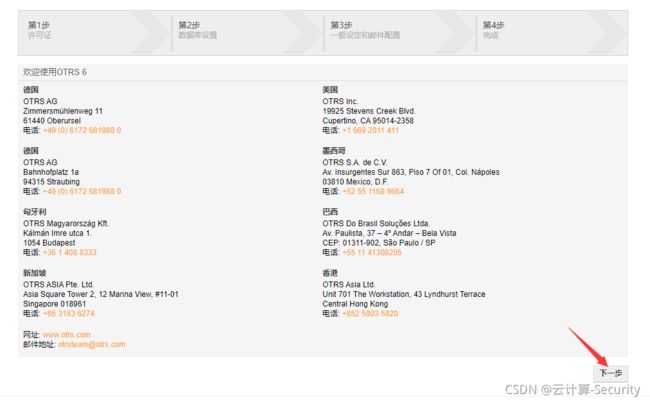
2、开始安装
-
点击【下一步】
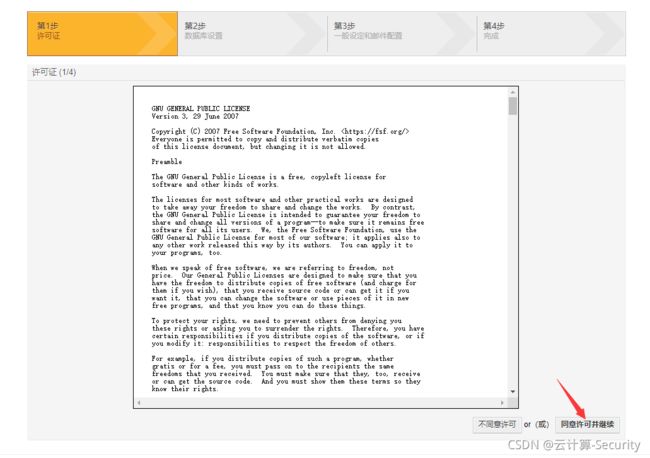
-
点击【同意许可并继续】
-
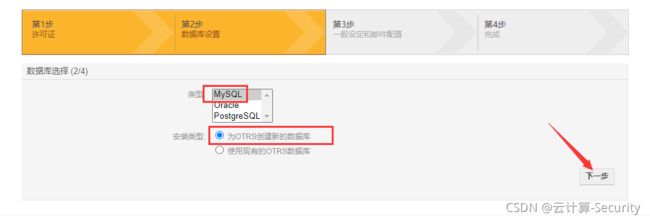
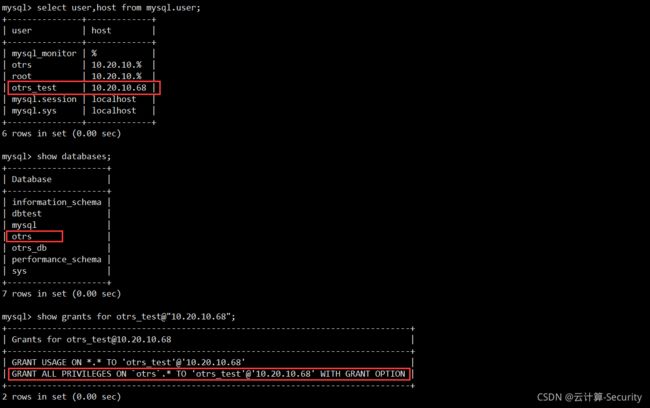
选择数据库
类型:MySQL
安装类型:为OTRS创建新的数据库
安装类型也可选择使用现有的 OTRS 数据库(前提是你已经在MySQL上创建好数据库及user了),操作类似
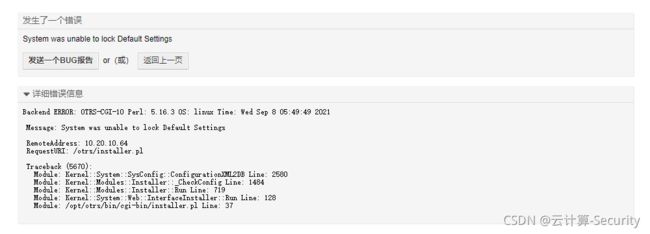
不过我选择使用现有的OTRS数据库的时候报错了:
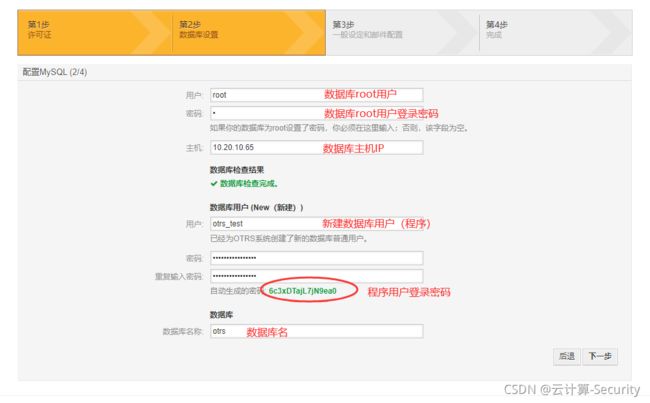
去MySQL查看一下,看是否已经创建。
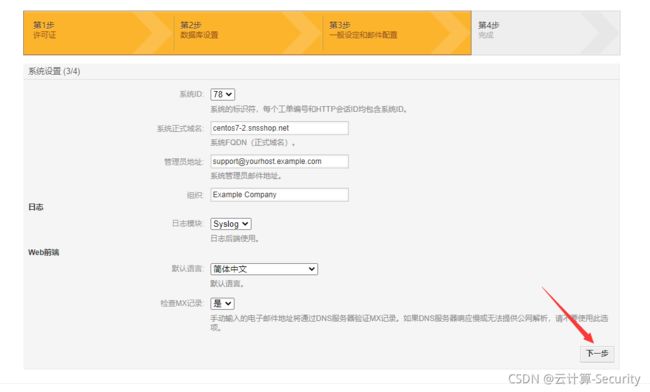
-
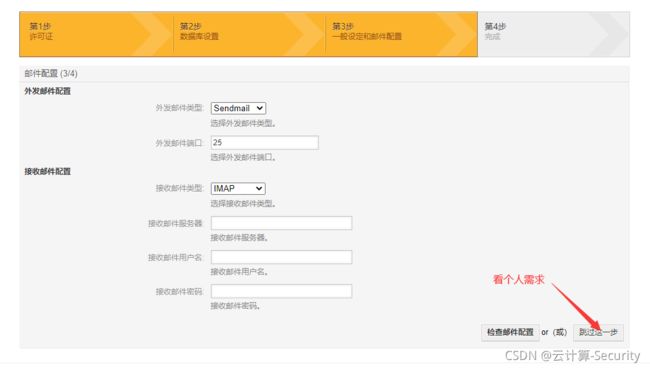
一般设置和邮件配置
-
配置完成
-
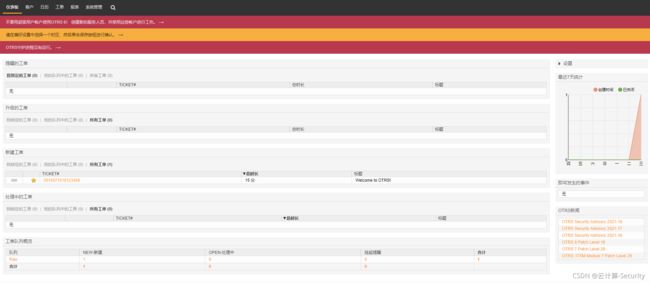
访问:http://10.20.10.68/otrs/index.pl
登录成功后可看到如下界面。
3.3 OTRS 配置守护进程
vim /etc/systemd/system/otrs.service

[Unit]
Description=OTRS service
After=syslog.target network.target httpd.service

[Service]
Type=forking
ExecStart=/sbin/runuser -l otrs -c '/opt/otrs/bin/otrs.Daemon.pl start; /opt/otrs/bin/Cron.sh start'
PIDFile=/opt/otrs/var/run/Daemon-NodeID-1.pid
ExecStop=/sbin/runuser -l otrs -c '/opt/otrs/bin/otrs.Daemon.pl stop; /opt/otrs/bin/Cron.sh stop'

[Install]
WantedBy=multi-user.target
管理 OTRS
systemctl daemon-reload           # 重载守护进程

systemctl enable otrs.service     # 开机启动
systemctl start otrs.service      # 启动
systemctl status otrs.service     # 状态
systemctl stop otrs.service       # 停止
四、FAQ
4.1 Perl 模块安装问题
1、访问 http://10.20.10.68/otrs/installer.pl 时报错
2、查看 Apache 服务错误日志
错误提示:找不到 Moo.pm 文件
3、解决方案
perl -MCPAN -e shell         # CPAN 在线安装,一路回车即可

# 如想修改镜像源,可执行下面操作(阿里/163都行)
vim /root/.cpan/CPAN/MyConfig.pm
'urllist' => [q[http://www.cpan.org/]] 修改为:'urllist' => [q[http://mirrors.aliyuncs.com/]]
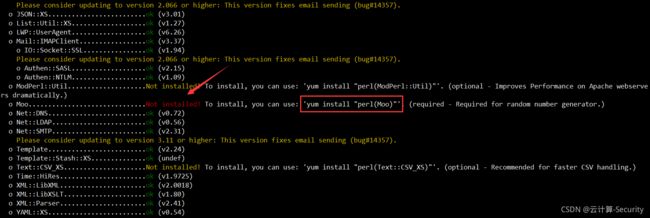
如下图:缺少 Moo 模块
[root@centos7-2 ~]# yum install "perl(Moo)"           # 通过直接yum方式可能有些模块无法下载
Loaded plugins: fastestmirror
Loading mirror speeds from cached hostfile
 * base: mirrors.163.com
 * epel: hkg.mirror.rackspace.com
 * extras: mirrors.163.com
 * updates: mirrors.aliyun.com
No package perl(Moo) available.
Error: Nothing to do
因此,可通过 CPAN 在线安装
[root@centos7-2 ~]# perl -MCPAN -e shell         # 运行CPAN
Terminal does not support AddHistory.

cpan shell -- CPAN exploration and modules installation (v1.9800)
Enter 'h' for help.

cpan[1]> install Moo                # 安装对应的模块
...
...
Installing /usr/local/share/perl5/Method/Generate/BuildAll.pm
Installing /usr/local/share/man/man3/oo.3pm
Installing /usr/local/share/man/man3/Moo::Role.3pm
Installing /usr/local/share/man/man3/Moo.3pm
Appending installation info to /usr/lib64/perl5/perllocal.pod
  HAARG/Moo-2.005004.tar.gz
  /usr/bin/make install  -- OK     # 安装成功
4、MySQL 数据库模块
对于使用 MySQL 作为数据存储的,都要安装 MySQL 对呀的模块,否则访问报错,看一下 Apache 报错日志。
# 提示缺少数据库(MySQL)驱动模块,安装对应模块即可

yum -y install "perl(DBD::mysql)"
4.2 OS 防火墙问题
# 关闭防火墙/SELINUX
systemctl stop firewalld      # 临时关闭
systemctl disable firewalld   # 永久关闭
setenforce 0                  # 临时关闭
vim /etc/sysconfig/selinux    # 永久关闭:将SELINUX=enforcing 替换为SELINUX=disabled

# 若要打开防火墙,则需添加规则
firewall-cmd --permanent --zone=public --add-port=80/tcp
firewall-cmd --reload
总结
部署其实都很简单,最重要的是如何解决部署过程中出现的问题,比如网络、防火墙、端口等是否正常,再就是要学会看日志,根据错误日志解决对应的问题,在 FAQ 中日志的提示就很明显,很快就能定位出问题的所在。以上就是关于 OTRS 开源工单系统的部署,若你在以上部署过程中遇到了问题可私信我,我们一起来解决。
<点击跳转至开头>


