Zookeeper源码构建+ 选举leader源码剖析
1、启动或leader宕机选举流程
2、客户端与服务端交互流程(NIO或Netty)
3、写入数据的ZAB一致性协议(如何保证消息的顺序性)
4、Watch监听触发机制
一、从源码启动zookeeper
1、启动单机zookeeper
zookeeper源码下载地址,选择分支3.5.8:
https://github.com/apache/zookeeper.git
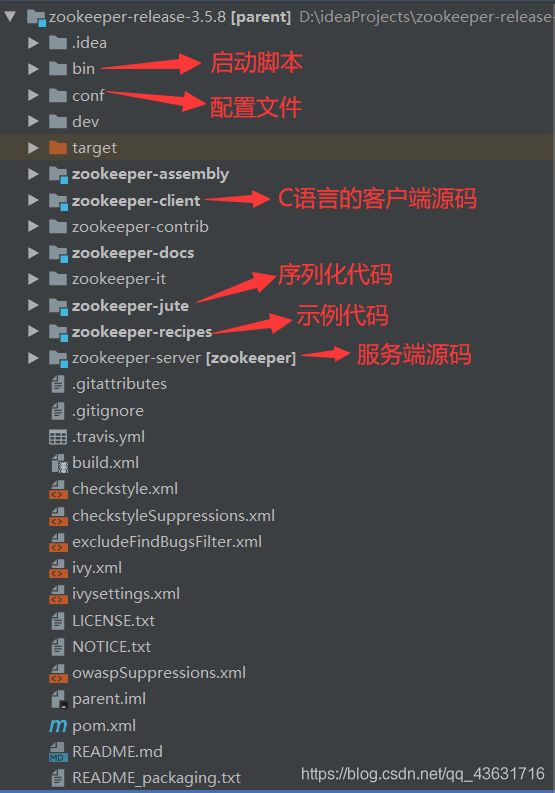
源码导入idea后,如果org.apache.zookeeper.Version类会报错,需要建一个辅助类:
package org.apache.zookeeper.version;

public interface Info {
    int MAJOR = 1;
    int MINOR = 0;
    int MICRO = 0;
    String QUALIFIER = null;
    int REVISION = -1;
    String REVISION_HASH = "1";
    String BUILD_DATE = "2020-10-15";
}
我本地的并没有报错,所以我并没有添加这个类!!!
然后在根目录编译执行:
mvn clean install -DskipTests
开源项目找入口类一般都是从启动脚本去找,可以从bin目录下的zkServer.sh或zkServer.cmd里找到启动主类运行即可:

org.apache.zookeeper.server.quorum.QuorumPeerMain
注意:
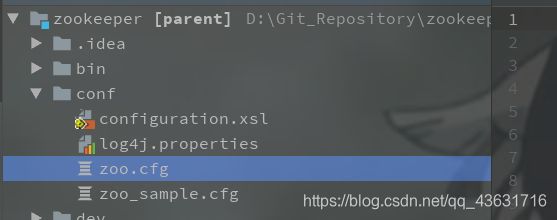
1、将conf文件夹里的zoo_sample.cfg文件复制一份改名为zoo.cfg,将zoo.cfg文件位置配置到启动参数里
“-Dzookeeper.serverCnxnFactory=org.apache.zookeeper.server.NettyServerCnxFactory”
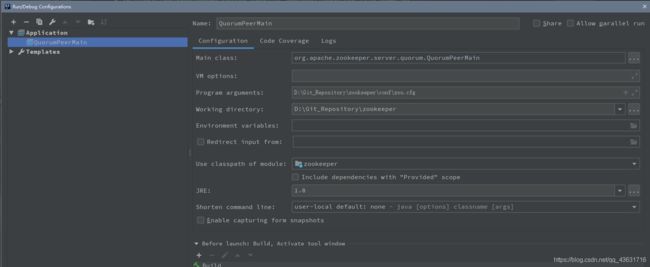
2、启动之前需要先将zookeeper-server项目里pom.xml文件里依赖的包(除了jline)的scope为provided这一行全部注释掉
3、将conf文件夹里的log4j.properties文件复制一份到zookeeper-server项目的 \target\classes 目录下,这样项目启动时才会打印日志
设置完成后我们启动类QuorumPeerMain:
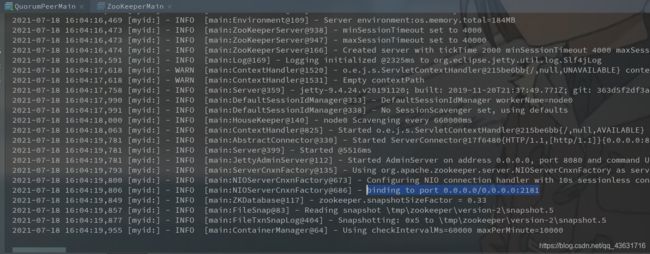
可以看到ZK已经启动成功了。
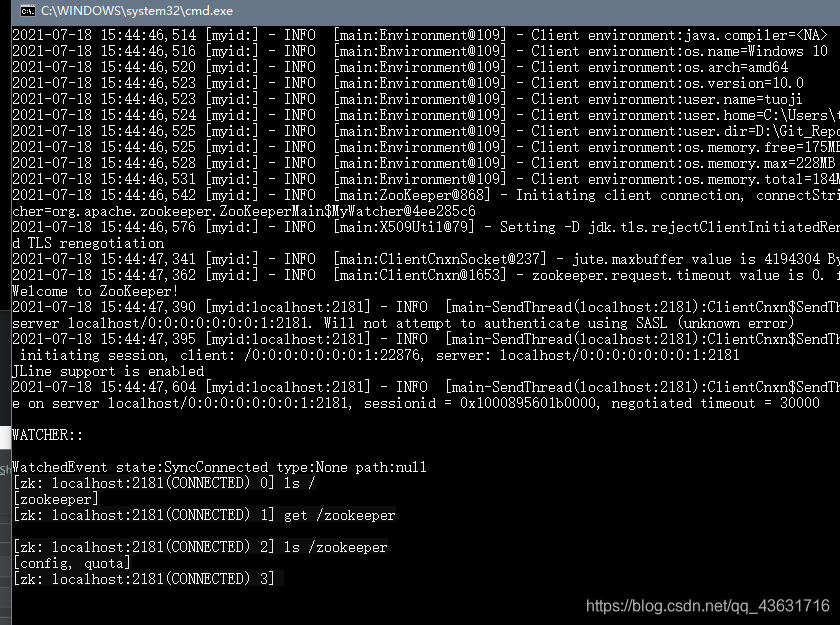
用客户端命令连接源码启动的server:
// 默认连接到本机2181端口
bin/zkCli.sh

// 或者
bin/zkCli.sh -server localhost:2181

// 或者使用具体的IP端口
bin/zkCli.sh -server 192.168.50.190:2181
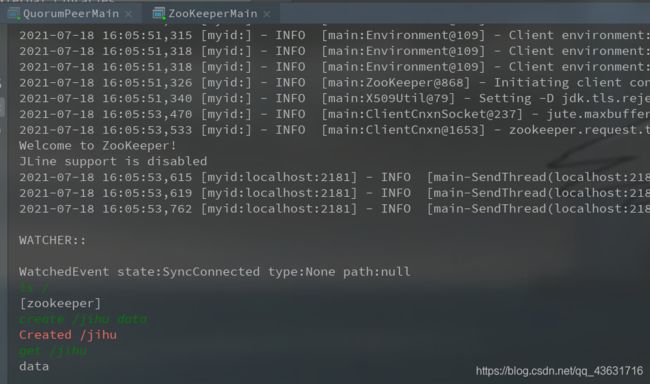
也可以从源码里运行客户端(org.apache.zookeeper.ZooKeeperMain),注意需要加入启动参数,见下图:
-server localhost:2181
2、从源码启动zookeeper集群
复制3个zoo.cfg文件,修改对应集群配置.,并创建data/data\zookeeper1、data\zookeeper2、data\zookeeper3三个文件夹来保存数据。
下面是zoo1.cfg的实例配置:
# The number of milliseconds of each tick
tickTime=2000
# The number of ticks that the initial
# synchronization phase can take
initLimit=10
# The number of ticks that can pass between
# sending a request and getting an acknowledgement
syncLimit=5
# the directory where the snapshot is stored.
# do not use /tmp for storage, /tmp here is just
# example sakes.
dataDir=D:/Git_Repository/zookeeper/data/zookeeper1
# the port at which the clients will connect
clientPort=2181
# the maximum number of client connections.
# increase this if you need to handle more clients
#maxClientCnxns=60
#
# Be sure to read the maintenance section of the
# administrator guide before turning on autopurge.
#
# http://zookeeper.apache.org/doc/current/zookeeperAdmin.html#sc_maintenance
#
# The number of snapshots to retain in dataDir
#autopurge.snapRetainCount=3
# Purge task interval in hours
# Set to "0" to disable auto purge feature
#autopurge.purgeInterval=1
server.1=127.0.0.1:2001:3001
server.2=127.0.0.1:2002:3002
server.3=127.0.0.1:2003:3003
注意这个dataDir的路径中的’/’,不是’’,否则可能回报错: myid is missing。
然后需要在zookeeper1、zookeeper2、zookeeper3下分别创建一个名称为myid的文件并填入机器id,内容分别为1,2, 3。
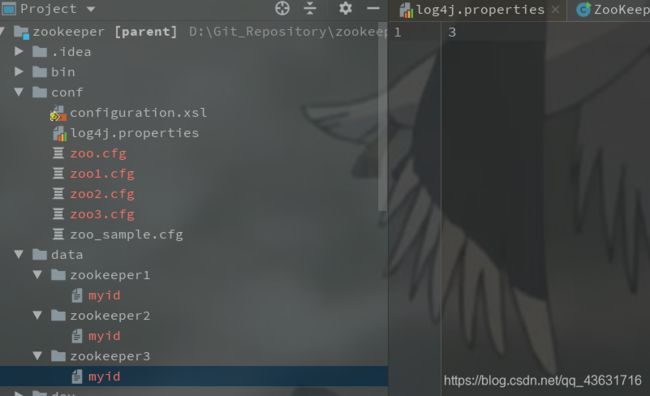
并创建三个不同配置的启动节点,见下图:

分别运行每个节点,集群启动完毕!2181是leader, 2182和2183是follower节点。

二、启动或leader宕机选举leader流程
1、流程梳理
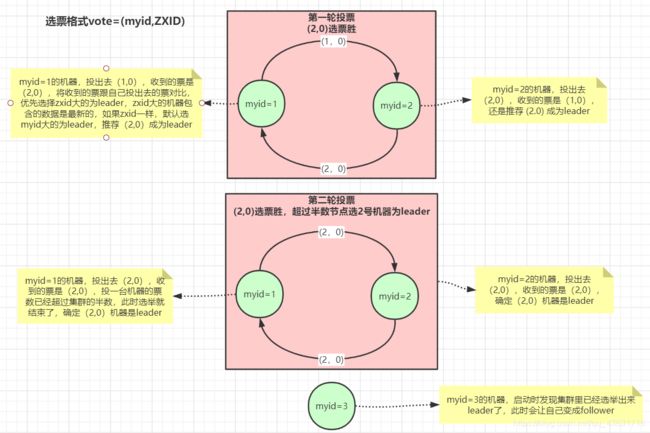
第一轮投票
每台机器第一次投票都是投给自己。
优先选择ZXID大的为leader,因为ZXID大的机器包含的数据是最新的。
如果AXID一样大,默认选myid大的为leader。
注意,集群机器的数量是按照配置文件中配置的个数决定的,并不是服务启动的个数!
第二轮投票
第二次选举的时候,每一个机器都会将自己上一轮中认为是leader的票继续投出去。
myid为1的机器投出去是(2,0,收到也是(2,0);myid为2的发出去(2,0),收到也是(2,0), 此时(2, 0)得票数为2,超过半数,则myid为2的机器成为leader。
myid为3的机器加入进来,发现已经存在leader了,自己就设置为follower节点。
2、源码分析
我们首先来从启动类QuorumPeerMain来看:
  public static void main(String[] args) {
        QuorumPeerMain main = new QuorumPeerMain();
        try {
            main.initializeAndRun(args);
        } catch (IllegalArgumentException e) {
        .........
我们重点关注initializeAndRun这方法即可:
在这里插入代码片
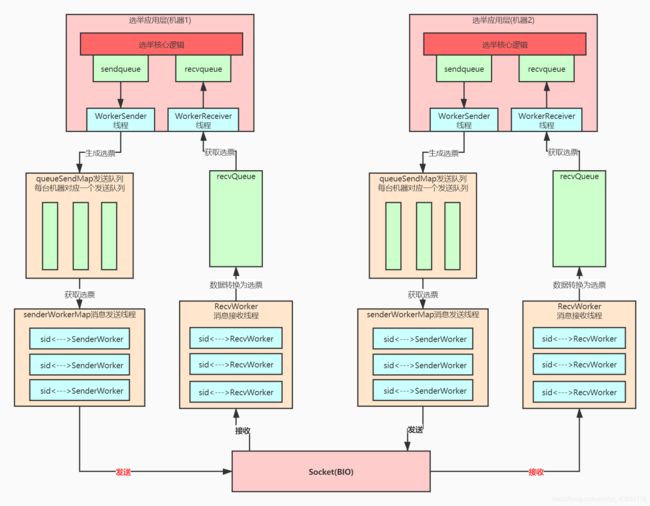
三、leader选举多层队列架构
整个zookeeper选举底层可以分为选举应用层和消息传输层,应用层有自己的队列统一接收和发送选票,传输层也设计了自己的队列,但是按发送的机器分了队列,避免给每台机器发送消息时相互影响,比如某台机器如果出问题发送不成功则不会影响对正常机器的消息发送。
