React高阶组件
文章目录
- 1. 介绍
- 2. 高阶组件的定义和使用
- 3. 装饰器
-
- 3.1 装饰器调用高阶函数
- 3.2 装饰器装饰类
- 3.3 装饰器装饰成员属性
- 3.4 装饰器装饰成员方法
- 4. 高阶组件反向继承
- 5. memoization(计算属性/记忆组件)
- 6. Portals
1. 介绍
高阶组件 (Higher-Order Components) 就是一个函数,传给它一个组件,它返回一个新的组件。
高阶组件:就相当于手机壳,通过包装组件,增强组件功能。
实现步骤:
- 创建一个函数
- 指定函数参数,参数应该以大写字母开头
- 在此函数内部创建一个类组件或函数组件
高阶组件常见作用:
- 进行权限控制
- 路由限制
- 访问统计
- 统一布局
缺点:增加了组件层级,影响性能
2. 高阶组件的定义和使用
定义高阶组件:
// 定义高阶组件,用来进行全局布局
import React from 'react'
import _ from 'lodash'
// 1.它就是一个函数
// 2.参数首字母大写,因为你传入的是一个组件,在react中组件的调用必须首字母大写
// 3.返回一个组件
// 写法1
const withLayout = Cmp => {
class Layout extends React.Component {
render() {
// 方案1
// let phone = this.props.phone
// phone = 'xxxxx'
// 方案2:深复制
let props = _.cloneDeep(this.props)
props.phone = 'aaaaaa'
// console.log(this.props);
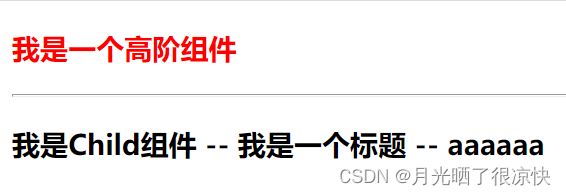
return <div>
<h3 style={{ color: 'red' }}>我是一个高阶组件</h3>
<hr />
{/* 我是一个高阶组件
//
// 我是一个高阶组件
//
// 我是一个高阶组件
//
// 我是一个高阶组件
//
// 父组件:
import React, { Component } from 'react'
import Child from './pages/Child'

class App extends Component {
  render() {
    return (
      <div>
        <Child title="我是一个标题" phone="13523253252" />
      </div>
    )
  }
}

export default App
子组件:
import React, { Component } from 'react'

import withLayout from '../../hoc/withLayout'

class Child extends Component {
  render() {
    return (
      <div>
        <h3>
          我是Child组件 -- {this.props.title} -- {this.props.phone}
        </h3>
      </div>
    )
  }
}

export default withLayout(Child)
3. 装饰器
概述:
装饰器是用来装饰类的,可以增强类,在不修改类的内部的源码的同时,增强它的能力(即装饰器会增加类的属性和方法)。
装饰器使用@函数名写法,对类进行装饰,目前在js中还是提案,使用需要配置相关兼容代码库。react脚手架创建的项目默认是不支持装饰器,需要手动安装相关模块和添加配置文件。
使用前准备:
-
安装解析装饰器语法的模块
yarn add -D @babel/plugin-proposal-decorators -
安装配置相关兼容代码的模块
yarn add -D customize-cra react-app-rewired -
修改package.json文件中scripts命令
"scripts": { "start": "react-app-rewired start", "build": "react-app-rewired build", "test": "react-scripts test", "eject": "react-scripts eject" } -
在项目根目录中添加config-overrides.js配置文件
此文件可以理解为就是webpack.config.js的扩展文件
// 增量配置当前项目中的webpack配置,建议在react18中不要用 // 建议在react18中也不要用装饰器 // override 方法,如果webpack中有此配置则,覆盖,如果没有则添加 const { addDecoratorsLegacy, override } = require('customize-cra') // 追加上一个装饰器 module.exports = override(addDecoratorsLegacy()) -
修改配置文件后,需要重启服务
3.1 装饰器调用高阶函数
对上文中书写的子组件(高阶函数的部分)进行修改:
import React, { Component } from 'react'

import withLayout from '../../hoc/withLayout'

// @装饰器 对这个类进行修改   装饰器只能装饰类
// 装饰器特性它还没有正式的在js规范中,所以需要来添加js解析器来解析这样的语法
// yarn eject 弹开webpack配置,添加 babel的plugins配置
// 增量配置  @craco/craco进行增量配置=>配置webpack   或  customize-cra react-app-rewired


@withLayout
class Child extends Component {
  render() {
    return (
      <div>
        <h3>
          我是Child组件 -- {this.props.title} -- {this.props.phone}
        </h3>
      </div>
    )
  }
}

// export default withLayout(Child)
export default Child
高阶函数的执行顺序:
App.jsx:
import React, { Component } from 'react'
import Child from './components/Child-02-装饰器调用高阶组件'

class App extends Component {
  render() {
    return (
      <div>
        <Child />
      </div>
    )
  }
}

export default App
Child.jsx:
import React, { Component } from 'react'
import withLayout from '../hoc/withLayout'

const fn1 = target => {
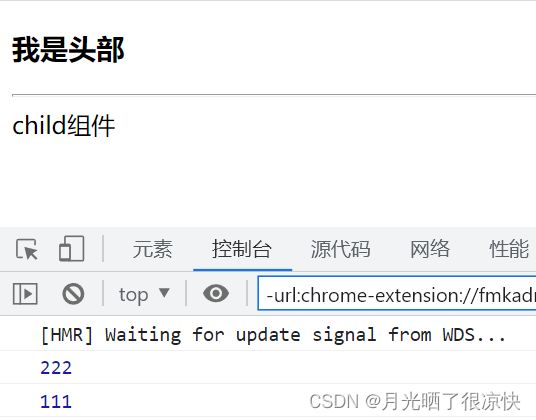
  console.log(111)
}
const fn2 = target => {
  console.log(222)
}

// 装饰器,装饰一个类,可以写N多个,执行的顺序为 从下向上,从右向左
@fn1 @fn2 @withLayout
class Child extends Component {
  render() {
    return (
      <div>
        <div>child组件</div>
      </div>
    )
  }
}

// export default fn1(fn2(withLayout(Child)))
export default Child
3.2 装饰器装饰类
有两种写法。
写法1(装饰器装饰类的函数,不使用小括号):
import React, { Component } from 'react'

// 装饰器 用来装饰类的,可以增强类,在不修改类的内部的源码的同时,增强它的能力(属性或方法)

// 函数
// 装饰器写法,和vue中的 use 插件是很一样
// 装饰函数,在装饰时它没有写小括号
// target它就是当前你装饰的类(demo)
const handle = target => {
  // console.log(target)

  // 定义一个静态方法,不是成员方法,无法通过实例来调用
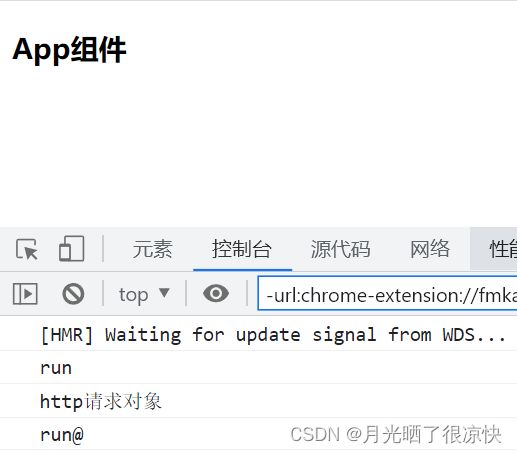
  target.run = () => console.log('run')// Demo.run()

  // 成员属性
  target.prototype.$http = 'http请求对象'

  // 成员方法
  target.prototype.run = function () {
    console.log('run@')
  }
}
@handle
class Demo { }
Demo.run()
const d = new Demo()
console.log(d.$http);
d.run()

class App extends Component {
  render() {
    return (
      <div>
        <h3>App组件</h3>
      </div>
    )
  }
}

export default App
写法2(装饰器装饰类的函数,使用小括号):
import React, { Component } from 'react'
// 装饰器装饰的类的函数使用了小括号,则定义函数时一定要返回一个新函数
// target它就是当前你装饰的类(demo)
const handle = msg => target => {
  // 成员方法
  target.prototype.run = function () {
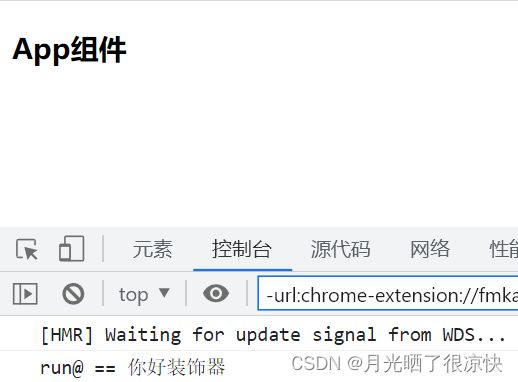
    console.log('run@ ==', msg)
  }
}

@handle('你好装饰器')
class Demo {}
const d = new Demo()
d.run()

class App extends Component {
  render() {
    return (
      <div>
        <h3>App组件</h3>
      </div>
    )
  }
}

export default App
3.3 装饰器装饰成员属性
装饰器可以修改成员属性的描述:
// 装饰器装饰成员属性,装饰时没有写小括号
// target 装饰的类的实例 new Demo  this
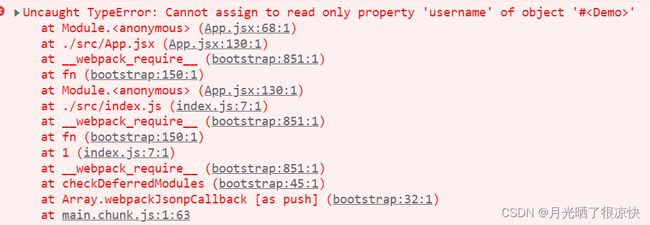
// key 当前的成员属性名称  username
// description 就是当前属性在对象中它的描述 Object.defineProperty
const handle = (target, key, description) => {
  // 装饰器可以修改描述
  return {
    ...description,
    // 设置当前属性为只读属性
    writable: false
  }
  // target[key] = 'vvv'
}
class Demo {
  @handle
  username = 'abc'
}
const d = new Demo()
d.username='vvv'
console.log(d.username)
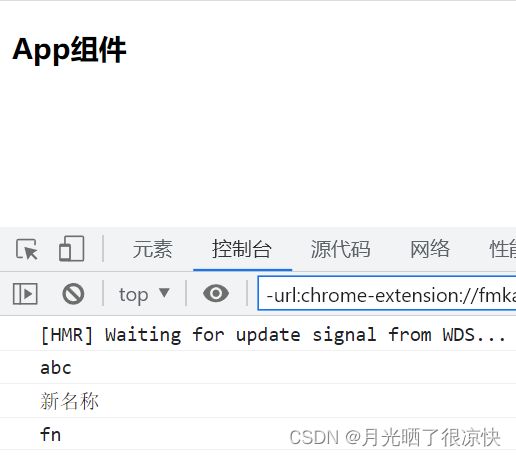
装饰器可以添加新的成员属性:
import React, { Component } from 'react'
// 成员属性不能重置值,但可以修改属性描述
// 在给成员属性添加装饰时,可以动态的来添加别的成员属性或方法
const handle = name => (target, key, description) => {
  // console.log(target, key, description)
  // 添加新的属性值
  target.name = name

  target.fn = function () {
    console.log('fn')
  }
}

class Demo {
// 可以装饰属性,可读可写设置(readonly),可被迭代(in),可被删除(delete)
  @handle('新名称')
  username = 'abc'
}

const d = new Demo()
console.log(d.username)
console.log(d.name)
d.fn()

class App extends Component {
  render() {
    return (
      <div>
        <h3>App组件</h3>
      </div>
    )
  }
}

export default App
3.4 装饰器装饰成员方法
import React, { Component } from 'react'

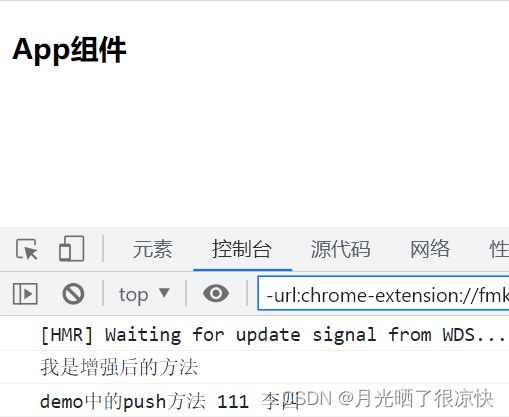
const handle = name => (target, key, description) => {
  // 原对象中的方法
  let oldFn = description.value

  description.value = function (...arg) {
    console.log('我是增强后的方法')
    // 解决了this指向,会了两种在调用时解决this指向问题的方案
    // oldFn.call(this, ...arg)
    // this 指向调用函数的对象
    oldFn.apply(this, arg)
  }
}

class Demo {
  username = '李四'

  @handle('张三')
  push(arg) {
    console.log('demo中的push方法', arg, this.username)
  }
}
const d = new Demo()
d.push('111')

class App extends Component {
  render() {
    return (
      <div>
        <h3>App组件</h3>
      </div>
    )
  }
}

export default App
4. 高阶组件反向继承
描述:
通过创建新组件继承自原始组件, 把原始组件作为父组件。
作用:可以渲染劫持或是操作 state 数据。
使用:
App.jsx:
import React, { Component } from 'react'
import Child from './components/Child-03-反向继承'

// Child组件,可以理解为是第3方组件,但是这个组件它功能可能不全,需要增强

class App extends Component {
  render() {
    return (
      <div>
        <Child>你好世界</Child>
      </div>
    )
  }
}

export default App
Child.jsx:
import React, { Component } from 'react'
import withCmp from '../hoc/withCmp'

@withCmp
class Child extends Component {
  state = {
    id: 1
  }
  render() {
    return (
      <div>
        <button></button>
      </div>
    )
  }
}

export default Child
定义高阶组件(withCmp.js):
import React, { Component } from 'react';

// 高阶组件的反向继承,来扩展原组件中的页面结构或方法
export default Cmp => {
  return class extends Cmp {
    render() {
      // let ele = React.cloneElement(super.render().props.children, {}, '值')
      let ele = React.cloneElement(super.render().props.children, {}, this.props.children)
      return (
        <div>
          <h3>{this.state.id}</h3>
          {ele}
        </div>
      );
    }
  }
}
5. memoization(计算属性/记忆组件)
描述:
连续两次相同传参,第二次会直接返回上次的结果,每次传参不一样,就直接调用函数返回新的结果,会丢失之前的记录,并不是完全记忆,可以在它的参数中传入 state 数据从而实现了类似 Vue 中的计算属性功能。
语法:
# 安装
npm i -S memoize-one

# 引入
import memoizeOne from 'memoize-one'

# 使用
getValue = memoizeOne((x,y) => x+y)

# 调用
render(){
let total = this.getValue(this.state.x, this.state.y)
return <div>{total}</div>
}
使用:
import React, { Component } from 'react'
// 用于计算所用,在类组件中,需要安装,在函数组件中它内置
// 此方法是一个性能优化的方案,可以不用,但是如果有计算且多次调用,则建议使用
import memizeOne from 'memoize-one'

class App extends Component {
  state = {
    n1: 1,
    n2: 2
  }

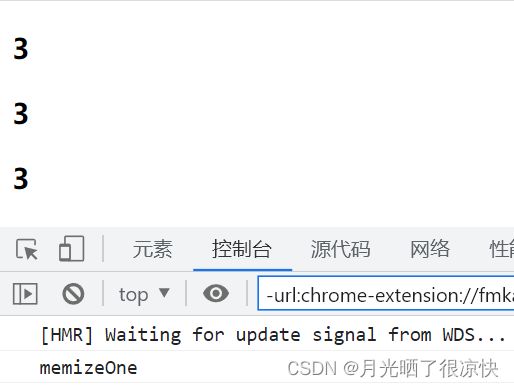
  // n1和n2参数就是它的依赖项,只要它的依赖项没有变化,则第2次后调用都为缓存中读取
  sum = memizeOne((n1, n2) => {
    console.log('memizeOne')
    return n1 + n2
  })

  render() {
    let { n1, n2 } = this.state
    return (
      <div>
        <h3>{this.sum(n1, n2)}</h3>
        <h3>{this.sum(n1, n2)}</h3>
        <h3>{this.sum(n1, n2)}</h3>
      </div>
    )
  }
}

export default App
6. Portals
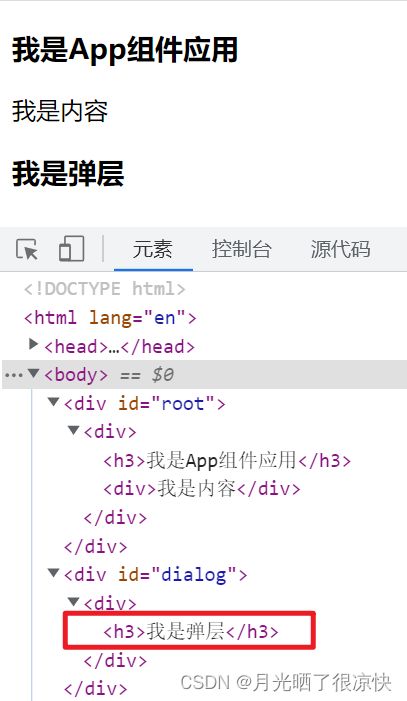
描述:
Portal 提供了一种将子节点渲染到存在于父组件以外的 DOM 节点的优秀的方案。
使用:
App.jsx:
import React, { Component } from 'react'
import Child from './components/Child-05-portal指定html挂载点显示'

class App extends Component {
  render() {
    return (
      <div>
        <h3>我是App组件应用</h3>
        <Child />
        <div>我是内容</div>
      </div>
    )
  }
}

export default App
child.jsx:
import React, { Component } from 'react'
// 引入相关库
import { createPortal } from 'react-dom'

class Child extends Component {
  render() {
    return createPortal(
      <div>
        <h3>我是弹层</h3>
      </div>,
      document.getElementById('dialog')
    )
  }
}

export default Child
public/index.html:
DOCTYPE html>
<html lang="en">

<head>
  <meta charset="utf-8" />
  <meta name="viewport" content="width=device-width, initial-scale=1" />
  <title>React学习title>
head>

<body>
  <div id="root">div>
  <div id="dialog">div>
body>

html>
案例——弹出层的实现:
App.jsx:
import React, { Component } from 'react'
import Child from './components/Child-06-portals实现弹出层'

class App extends Component {
  state = {
    isshow: true
  }
  render() {
    return (
      <div>
        <h3>我是App组件应用</h3>
        {this.state.isshow ? <Child /> : null}
        <div>我是内容</div>
        <hr />
        <button
          onClick={() => {
            this.setState(state => ({ isshow: !state.isshow }))
          }}
        >
          ++++
        </button>
      </div>
    )
  }
}

export default App
Child.jsx:
import React, { Component } from 'react'
import { createPortal } from 'react-dom'

const createDialog = () => {
  const el = document.createElement('div')
  el.id = 'dialog'
  el.style.cssText = `
  position: absolute;
  top: 0;
  width: 100%;
  min-height: 100vh;
  background: rgba(0, 0, 0, 0.6);
  color: #fff;
  font-size: 30px;
  display: flex;
  justify-content: center;
  align-items: center;`
  document.body.appendChild(el)
  // 要把对象和销毁方法返回出去,这样别人才能使用
  return [el, () => el.remove()]
}

class Child extends Component {

  // 方案1
  // el = document.createElement('div')
  // componentDidMount() {
  //   document.body.appendChild(this.el)
  // }
  // componentWillUnmount() {
  //   this.el.remove()
  // }

  // 方案2
  el = createDialog()
  componentDidMount() {
    this.timer = setTimeout(this.el[1], 3000)
  }

  componentWillUnmount() {
    this.el[1]()
    this.timer && clearTimeout(this.timer)
  }

  render() {
    return createPortal(
      <div>
        <h3>我是弹层@</h3>
      </div>,
      this.el[0]
    )
  }
}

export default Child
