Springboot使用jar包文件上传回显和部署云端
文章目录
-
- 一、springboot项目部署云端Linux
-
- 1、打包
- 2、上传云服务器
- 3、部署jar包相关linux命令
- 二、jar包方式文件上传的路径问题
-
-
- 1、问题引入
- 2、问题解决:
-
这几天尝试使用springboot的jar包方式部署云端,总结一下经验和遇到的问题
一、springboot项目部署云端Linux
1、打包
1、设置一个云端未使用的端口,springboot以jar包形式运行会占用这个端口
2、pom.xml打包方式改为jar
3、使用maven工具打包,先clean一下再使用package打包成jar包
打包完成生成一个.jar文件
2、上传云服务器
3、部署jar包相关linux命令
启动:
#运行jar包(关闭终端后就终止)
java -jar xxx.jar
#以nohup模式运行,关闭终端后仍在后台运行,jar包运行日志输出在webLog.txt中
nohup java -jar xxx.jar > webLog.txt &
如何关闭nohup java呢?
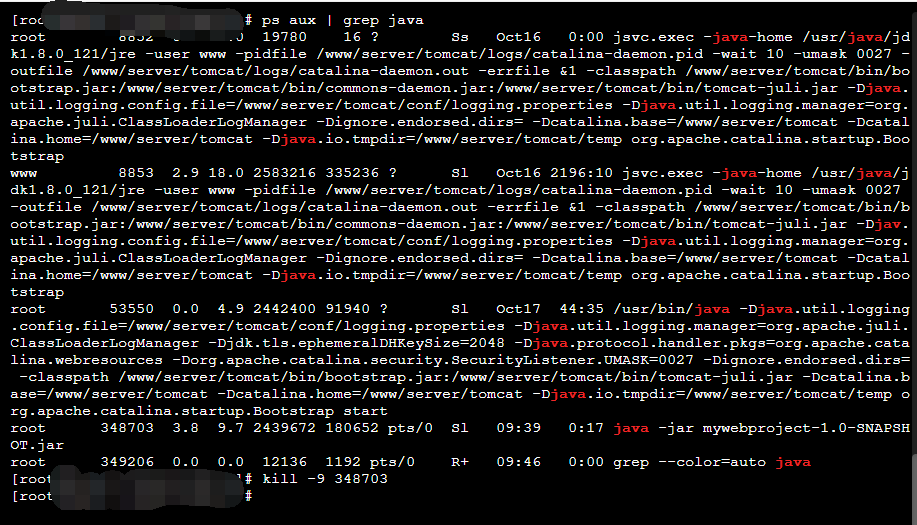
#找到所有java进程,看看我们的项目是那个进程
ps aux | grep java
#找到项目的pid,用kill关闭
kill -9  pid
二、jar包方式文件上传的路径问题
1、问题引入
在idea开发工具中,我们不是用jar包方式运行,在文件上传时常常选择上传到target/classes/static下的一个目录
**举例:**拿我这个图片上传函数来说,我的想法是将上传的图片传到static目录下,因为springboot自动配置了static目录下能直接用/upload/xxx.jpg读取到图片资源,在函数末尾,我直接将访问路径/upload/filName返回给了前端,idea中是能读取到图片的。
@RequestMapping("/uploadImage")
    @ResponseBody
    public JSONObject uploadImg (MultipartFile file) throws Exception{

        //文件后缀
        String trueFileName = file.getOriginalFilename();
        String suffix = trueFileName.substring(trueFileName.lastIndexOf("."));

        //文件名随机+后缀
        String fileName = "teachers-"+ UUID.randomUUID().toString().replaceAll("-", "") +suffix;

        File projectPath = new File(ResourceUtils.getURL("classpath:").getPath());
        //项目路径绝对mywebproject\target\classes
        String absolutePath = projectPath.getAbsolutePath();
        //放入/static/upload/目录下
        String path = absolutePath+"/static/upload/";
        System.out.println(path);

        //没有就创建文件夹
        File targetFile = new File(path, fileName);
        if(!targetFile.exists()){
            targetFile.mkdirs();
        }

        //保存
        try {
            file.transferTo(targetFile);
        } catch (Exception e) {
            e.printStackTrace();
        }
        //返回给前端文件位置
        JSONObject res = new JSONObject();
        res.put("url", "/upload/"+fileName);
        res.put("success", 1);
        res.put("message", "upload success!");

        return res;

    }
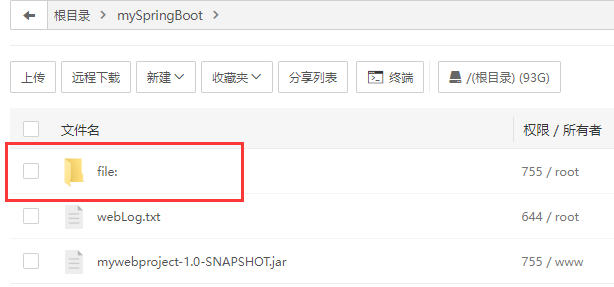
但是当我上传到云端后,以jar包方式运行,我上传的图片就不能上传到指定位置了,而是在jar包同级生成了/mySpringBoot/file:/mySpringBoot/mywebproject-1.0-SNAPSHOT.jar!/BOOT-INF/classes!/static/upload这样一个目录
原因:我们解压jar包后发现,static目录在jar包内,但是操作系统不让我们修改jar包的内容。这就导致操作系统生成了一个新的目录来存放我们上传的文件
2、问题解决:
既然他不在项目路径内生成,那我们可以用①文件流读取或者②配置虚拟静态资源映射
此处我只展示方法二:②配置虚拟静态资源映射
由以上生成的目录我们可以得知:在我的云服务器上,图片上传的绝对路径为/mySpringBoot/file:/mySpringBoot/mywebproject-1.0-SNAPSHOT.jar!/BOOT-INF/classes!/static/upload
在springboot中我们可以实现WebMvcConfigurer来添加静态资源处理映射
@Configuration
public class MvcConfig implements WebMvcConfigurer {
  	@Override
    public void addResourceHandlers(ResourceHandlerRegistry registry) {
    //addResourceLocations是我们的文件上传绝对路径,注意要加file:
    //addResourceHandler是我们的映射地址,即上传到ResourceLocations的图片能用/upload/xxx.jpg取到
	registry.addResourceHandler("/upload/**").addResourceLocations("file:/mySpringBoot/file:/mySpringBoot/mywebproject-1.0-SNAPSHOT.jar!/BOOT-INF/classes!/static/upload/");
    }
}
**注意:**addResourceLocations()里面路径注意要加file:
此时,再运行项目的时候,就能通过云服务器主机地址:端口号/upload/xxx.jpg取到,问题解决
为了日后修改方便,我们将该路径写在yaml配置文件中
#linux上传文件地址
bandit:
  upload: file:/mySpringBoot/file:/mySpringBoot/mywebproject-1.0-SNAPSHOT.jar!/BOOT-INF/classes!/static/upload/
然后在配置类中@Value拿到这个值,如下配置
@Configuration
public class MvcConfig implements WebMvcConfigurer {

    @Value("${bandit.upload}")
    private String uploadPath;

  	@Override
    public void addResourceHandlers(ResourceHandlerRegistry registry) {
    	registry.addResourceHandler("/upload/**").addResourceLocations(uploadPath);
    }
}


