Three.js入门②
最近学习Three.js,此贴供学习记录之用。
学习视频:Three.js教程。讲解很详细,也有配套的笔记,但不包含前端基础知识的讲解,如果是纯小白的朋友,可以找这位up之前的教程学习一下。
文章目录
- 一、光源对物体表面的影响
-
- 物体材质
- 光源种类
-
- 1、点光源
-
- 点光源辅助观察控件PointLightHelper
- 2、自然光源
- 3、平行光源
-
- 平行光辅助观察控件DirectionalLight
- 二、相机控件OrbitControls
-
- 控件引入
- OrbitControls使用
- 三、动画渲染循环
- 完整.js文件
- 先写一个简单的html文件
<!DOCTYPE html>
<html lang="en">
    <head>
        <meta charset="UTF-8">
        <title>Three.js入门②</title>
    </head>

    <body>
    	<!-- type="importmap"功能:.html文件中也能和nodejs开发环境中一样方式,引入npm安装的js库 -->
        <script type="importmap">
            {
                "imports": {
                    "three": "./three.js/build/three.module.js",
                }
            }
        </script>

        <!-- 引入.js文件 -->
        <script src="./0508_1.js" type="module"></script>
    </body>
</html>
- 再写根据入门①一个.js文件,然后就让我们开始
// 引入
import * as THREE from 'three';

// scene
const scene = new THREE.Scene();

// axes
const axesHelper = new THREE.AxesHelper(100);
scene.add(axesHelper);

// mesh
const geometry = new THREE.BoxGeometry(50, 50, 50);
// 这次要换用另一材质的mesh所以后面先不写

const width = 800;
const height = 500;
// camera
const camera = new THREE.PrespectiveCamera(30, width/height, 0.1, 3000);
camera.position.set(200, 200, 200);
camera.lookAt(0);

//renderer
const renderer = new THREE.WebGLRenderer();
renderer.setSize(width, height);
renderer.render(scene, camera);

document.body.appendChild(renderer.domElement);
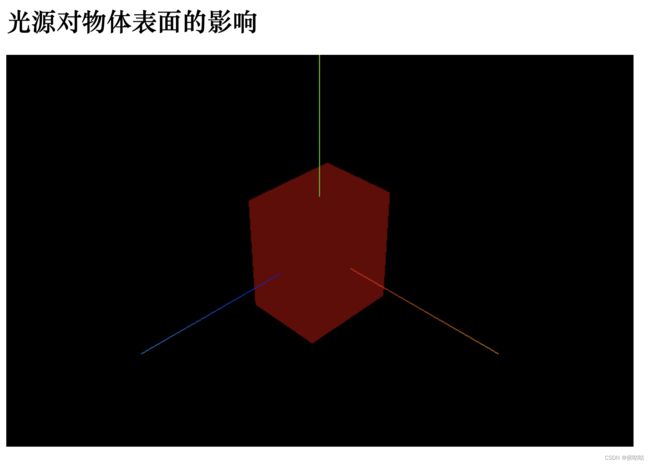
一、光源对物体表面的影响
物体材质
物体材质分为受光照影响材质和不受光照影响材质两种,其中不受光照影响的就是在上一篇笔记中用到过的基础网格材质MeshBasicMaterial,其余材质均受光照影响。

- 创建材质对象,这里使用漫反射材质做例子
// 设置受光照影响材质
const material = new THREE.MeshLambertMeterial({	// 漫反射材质
	color: 0x00ffff;
)};
- 创建网格模型
const mesh = new THREE.Mesh(geometry, material);
- ⚠️这里不需要设置物体位置,默认在原点处
我不明白为什么,设置了之后物体会显示不出来
// mesh.position.set(0, 0, 0);
- 添加物体到场景中
scene.add(mesh);
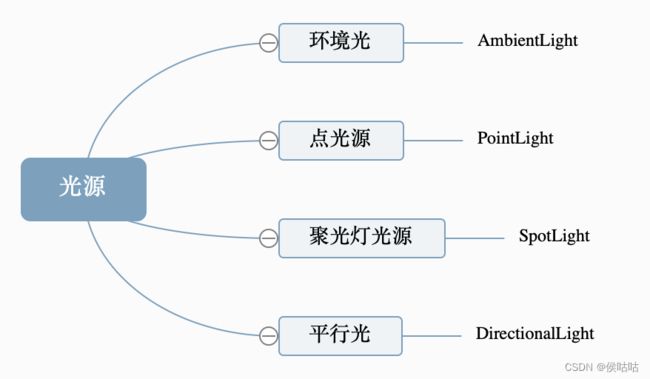
光源种类
1、点光源
- 创建点光源对象
点光源参数:
- color: 光源颜色,缺省值白色
intensity: 光照强度,缺省值1
distance: 光照远度,表示从光源到光照强度为0的位置,缺省值0,表示光永远不会消失(距离无穷大)
decay: 沿着光照距离的衰退量,缺省值 2。
// 创建点光源
const pointLight = new THREE.PointLight(0xffffff, 1.0);
- 设置点光源位置
// 点光源位置
pointLight.position.set(400, 400, 400);
- 将点光源加入场景
// 将点光源加入场景
scene.add(pointLight);
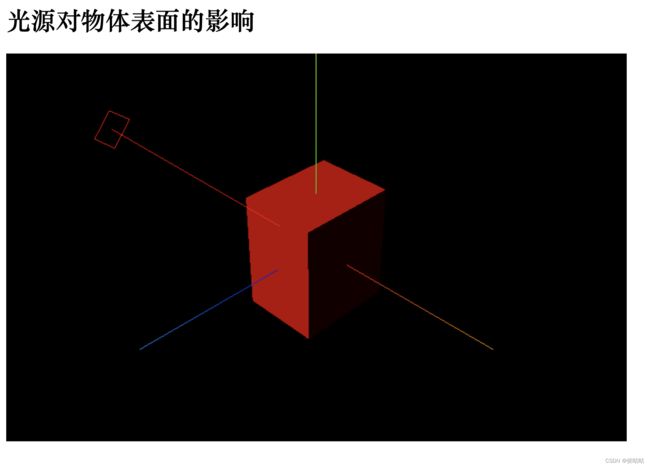
点光源辅助观察控件PointLightHelper
通过PointLightHelper控件可视化点光源。
参数:
- pointLight: 光源对象
phereSize: 球形辅助对象尺寸 缺省值为1
color: 颜色 缺省值为光源颜色
// 点光源辅助观察
const pointLightHelper = new THREE.PointLightHelper(pointLight, 10);
scene.add(pointLightHelper);
2、自然光源
没有特定方向,整体改变光线明暗
参数:
- color: 光源颜色 缺省值白色
intensity: 光照强度 缺省值1
const ambientLight = new THREE.AmbientLight(0xffffff, 0.4);
scene.add(ambientLight);
3、平行光源
沿特定方向发射
参数:
- color: 光源颜色 缺省值白色
intensity: 光照强度 缺省值1
const directionalLight = new THREE.DirectionalLight(0xffffff, 1);
directionalLight.position.set(10, 100, 100);
// 平行光指向网格对象mesh,若不设置则默认指向原点
directionalLight.target = mesh;
scene.add(directionalLight);
平行光辅助观察控件DirectionalLight
可视化平行光
参数
- light: 被模拟光源
size: 平面尺寸 缺省为1
color: 颜色 缺省为光源颜色
const dirLightHelper = new THREE.DirectionalLightHelper(directionalLight, 5, 0xff0000);
scene.add(dirLightHelper);
二、相机控件OrbitControls
OrbitControls本质上就是改变相机的参数,比如相机的位置属性和透视投影相机距离模型的距离,可实现旋转缩放的预览效果。
控件引入
- .html文件中importmaps部分添加
"three/addons/": "./three.js/examples/jsm/"
- .js文件部分添加
// 引入扩展库OrbitControls.js
import { OrbitControls } from 'three/addons/controls/OrbitControls.js';
OrbitControls使用
// 创建相机控件轨道控制器对象
const controls = new OrbitControls(camera, renderer.domElement);
// 设置事件
controls.addEventListener('change', function(){	// 监听鼠标键盘事件
	// 渲染
	renderer.render(scene, camera);
	// 在控制台查看相机位置变化
	console.log('camera.position', camera.position);
});
三、动画渲染循环
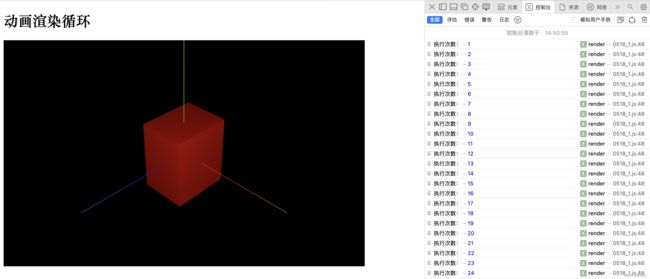
- 请求动画帧window.requestAnimationFrame实现动画渲染
requestAnimationFrame实现周期性循环执行 默认每秒钟执行60次,但不一定能做到,要看代码的性能
let i = 0;
function render() {
    i += 1;
    console.log('执行次数:', i);
    requestAnimationFrame(render);  // 请求再次执行函数render()
}
render();
function render() {
    // 执行渲染
    renderer.render(scene, camera);
    // 每次绕Z轴旋转0.01弧度
    mesh.rotateZ(0.01);
    // 请求再次执行渲染函数render,渲染下一帧
    requestAnimationFrame(render);
}
render();
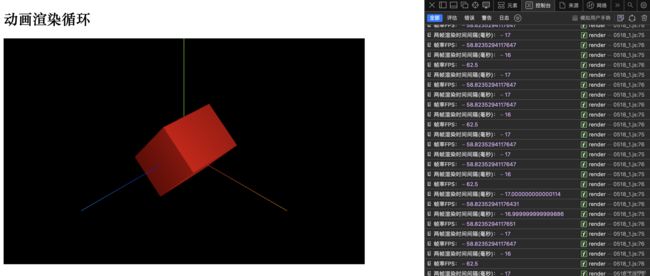
- 效果
- 计算渲染两帧的时间间隔和帧率
// Clock()用于跟踪时间
/*
    参数:
        autoStart: 是否要在第一次调用 .getDelta() 时自动开启时钟 缺省为true
 */
const clock = new THREE.Clock();
function render() {
    /* getDelta()获取自 .oldTime 设置后到当前的秒数。 同时将 .oldTime 设置为当前时间。
       如果 .autoStart 设置为 true 且时钟并未运行,则该方法同时启动时钟。 */
    const spt = clock.getDelta() * 1000;    // 计算结果为毫秒
    console.log('两帧渲染时间间隔(毫秒):', spt);
    console.log('帧率FPS:', 1000 / spt);
    renderer.render(scene, camera);
    mesh.rotateZ(0.01);
    requestAnimationFrame(render);
}
render();
- 效果
完整.js文件
// 引入three.js
import * as THREE from 'three';

// 引入扩展库OrbitControls.js
import { OrbitControls } from 'three/addons/controls/OrbitControls.js';

const scene = new THREE.Scene();

const axesHelper = new THREE.AxesHelper(100);
scene.add(axesHelper);

const geometry = new THREE.BoxGeometry(50, 50, 50);
// 设置受光照影响材质
const material = new THREE.MeshLambertMaterial({   // 漫反射材质
    color: 0x00ffff,
});
const mesh = new THREE.Mesh(geometry, material);
// mesh.position.set(0, 0, 0);
scene.add(mesh);

// 设置光源
const pointLight = new THREE.PointLight(0xffffff, 1.0);
// 光源位置
pointLight.position.set(400, 400, 400);
// 加入场景
scene.add(pointLight);

// 点光源辅助观察
/*
    参数:
        pointLight: 光源对象
        phereSize: 球形辅助对象尺寸 缺省值为1
        color: 颜色 缺省值为光源颜色
 */
const pointLightHelper = new THREE.PointLightHelper(pointLight, 10);
scene.add(pointLightHelper);

// 环境光 没有特定方向,整体改变光线明暗
/*
    参数:
        color: 光源颜色 缺省值白色
        intensity: 光照强度 缺省值1
 */
const ambientLight = new THREE.AmbientLight(0xffffff, 0.4);
scene.add(ambientLight);

// 平行光 沿特定方向发射
/*
    参数:
        color: 光源颜色 缺省值白色
        intensity: 光照强度 缺省值1
 */
const directionalLight = new THREE.DirectionalLight(0xffffff, 1);
directionalLight.position.set(10, 100, 100);
// 平行光指向网格对象mesh,若不设置则默认指向原点
directionalLight.target = mesh;
scene.add(directionalLight);
// 平行光辅助观察DirectionalLight 可视化平行光
/*
    参数:
        light: 被模拟光源
        size: 平面尺寸 缺省为1
        color: 颜色 缺省为光源颜色
 */
const dirLightHelper = new THREE.DirectionalLightHelper(directionalLight, 5, 0xff0000);
scene.add(dirLightHelper);

const width = 800;
const height = 500;
const camera = new THREE.PerspectiveCamera(30, width/height, 0.1, 3000);
camera.position.set(200, 200, 200);
camera.lookAt(0, 0, 0);

const renderer = new THREE.WebGLRenderer();
renderer.setSize(width, height);
renderer.render(scene, camera);

document.body.appendChild(renderer.domElement);

/*
    OrbitsControls本质上是改变相机的参数
 */
// 相机控件轨道控制器
const controls = new OrbitControls(camera, renderer.domElement);
// 如果OrbitControls改变了相机参数,重新调用渲染器渲染三维场景
controls.addEventListener('change', function(){ // 监听鼠标、键盘事件
    // 通过控制台查看相机位置变化
    console.log('camera.position: ', camera.position);
    renderer.render(scene, camera); // 渲染
})

// 动画渲染循环
// 请求动画帧window.requestAnimationFrame实现动画渲染
/*
    requestAnimationFrame实现周期性循环执行 默认每秒钟执行60次,但不一定能做到,要看代码的性能
 */
let i = 0;
function render() {
    i += 1;
    console.log('执行次数:', i);
    requestAnimationFrame(render);  // 请求再次执行函数render()
}
// render();

// 旋转动画 利用连续渲染实现
function render() {
    // 执行渲染
    renderer.render(scene, camera);
    // 每次绕Z轴旋转0.01弧度
    mesh.rotateZ(0.01);
    // 请求再次执行渲染函数render,渲染下一帧
    requestAnimationFrame(render);
}
// render();

// 计算渲染两帧的时间间隔和帧率
// Clock()用于跟踪时间
/*
    参数:
        autoStart: 是否要在第一次调用 .getDelta() 时自动开启时钟 缺省为true
 */
const clock = new THREE.Clock();
function render() {
    /* getDelta()获取自 .oldTime 设置后到当前的秒数。 同时将 .oldTime 设置为当前时间。
       如果 .autoStart 设置为 true 且时钟并未运行,则该方法同时启动时钟。 */
    const spt = clock.getDelta() * 1000;    // 计算结果为毫秒
    console.log('两帧渲染时间间隔(毫秒):', spt);
    console.log('帧率FPS:', 1000 / spt);
    renderer.render(scene, camera);
    mesh.rotateZ(0.01);
    requestAnimationFrame(render);
}
render();
