Spring注解开发——声明式事务源码分析
我们直接进入这个注解@EnableTransactionManagement
@Target({ElementType.TYPE})
@Retention(RetentionPolicy.RUNTIME)
@Documented
@Import({TransactionManagementConfigurationSelector.class})
public @interface EnableTransactionManagement {
    boolean proxyTargetClass() default false;

    AdviceMode mode() default AdviceMode.PROXY;

    int order() default 2147483647;
}
发现这个也是跟Aop原理一样,通过Import 加载TransactionManagementConfigurationSelector类
在进入到TransactionManagementConfigurationSelector类中
public class TransactionManagementConfigurationSelector extends AdviceModeImportSelector{ public TransactionManagementConfigurationSelector() { } protected String[] selectImports(AdviceMode adviceMode) { switch(adviceMode) { case PROXY: return new String[]{AutoProxyRegistrar.class.getName(), ProxyTransactionManagementConfiguration.class.getName()}; case ASPECTJ: return new String[]{"org.springframework.transaction.aspectj.AspectJTransactionManagementConfiguration"}; default: return null; } } }
进入Switch判断,发现我们在上面已经定义了 AdviceMode mode() default AdviceMode.PROXY
所以会创建二个对象
一个是AutoProxyRegistrar
另一个是ProxyTransactionManagementConfiguration
让我们接下来一个一个看,先看看 AutoProxyRegistrar主要功能吧
public class AutoProxyRegistrar implements ImportBeanDefinitionRegistrar {
    private final Log logger = LogFactory.getLog(this.getClass());

    public AutoProxyRegistrar() {
    }

    public void registerBeanDefinitions(AnnotationMetadata importingClassMetadata, BeanDefinitionRegistry registry) {
        boolean candidateFound = false;
        Set annoTypes = importingClassMetadata.getAnnotationTypes();
        Iterator var5 = annoTypes.iterator();

        while(var5.hasNext()) {
            String annoType = (String)var5.next();
            AnnotationAttributes candidate = AnnotationConfigUtils.attributesFor(importingClassMetadata, annoType);
            if (candidate != null) {
                Object mode = candidate.get("mode");
                Object proxyTargetClass = candidate.get("proxyTargetClass");
                if (mode != null && proxyTargetClass != null && AdviceMode.class == mode.getClass() && Boolean.class == proxyTargetClass.getClass()) {
                    candidateFound = true;
                    if (mode == AdviceMode.PROXY) {
                        AopConfigUtils.registerAutoProxyCreatorIfNecessary(registry);
                        if ((Boolean)proxyTargetClass) {
                            AopConfigUtils.forceAutoProxyCreatorToUseClassProxying(registry);
                            return;
                        }
                    }
                }
            }
        }

        if (!candidateFound) {
            String name = this.getClass().getSimpleName();
            this.logger.warn(String.format("%s was imported but no annotations were found having both 'mode' and 'proxyTargetClass' attributes of type AdviceMode and boolean respectively. This means that auto proxy creator registration and configuration may not have occurred as intended, and components may not be proxied as expected. Check to ensure that %s has been @Import'ed on the same class where these annotations are declared; otherwise remove the import of %s altogether.", name, name, name));
        }

    }
}
在这里我们又看到了熟悉的判断,这又跟我们上面判断的一样
下面有一个判断 if ((Boolean)proxyTargetClass) ,但我们上面默认 boolean proxyTargetClass() default false,所以不会进入该方法
还是进的是上面的AopConfigUtils.registerAutoProxyCreatorIfNecessary(registry);
然后我们继续进入这个方法registerAutoProxyCreatorIfNecessary
public static BeanDefinition registerAutoProxyCreatorIfNecessary(BeanDefinitionRegistry registry) {
   return registerAutoProxyCreatorIfNecessary(registry, null);
}
又是注册一个自动代理对象,然后又会调用下面的方法
public static BeanDefinition registerAutoProxyCreatorIfNecessary(BeanDefinitionRegistry registry, Object source) {
   return registerOrEscalateApcAsRequired(InfrastructureAdvisorAutoProxyCreator.class, registry, source);
}
让我们在点进去看看这个类做了什么
public class InfrastructureAdvisorAutoProxyCreator extends AbstractAdvisorAutoProxyCreator {

   private ConfigurableListableBeanFactory beanFactory;


   @Override
   protected void initBeanFactory(ConfigurableListableBeanFactory beanFactory) {
      super.initBeanFactory(beanFactory);
      this.beanFactory = beanFactory;
   }

   @Override
   protected boolean isEligibleAdvisorBean(String beanName) {
      return (this.beanFactory.containsBeanDefinition(beanName) &&
            this.beanFactory.getBeanDefinition(beanName).getRole() == BeanDefinition.ROLE_INFRASTRUCTURE);
   }

}
我们发现跟Aop又是很像的,先初始化BeanFactory
继承了AbstractAdvisorAutoProxyCreator
先会找到各种增强器
protected ListfindEligibleAdvisors(Class beanClass, String beanName) { List candidateAdvisors = findCandidateAdvisors(); List eligibleAdvisors = findAdvisorsThatCanApply(candidateAdvisors, beanClass, beanName); extendAdvisors(eligibleAdvisors); if (!eligibleAdvisors.isEmpty()) { eligibleAdvisors = sortAdvisors(eligibleAdvisors); } return eligibleAdvisors; }
public Object postProcessAfterInitialization(Object bean, String beanName) throws BeansException {
   if (bean != null) {
      Object cacheKey = getCacheKey(bean.getClass(), beanName);
      if (!this.earlyProxyReferences.contains(cacheKey)) {
         return wrapIfNecessary(bean, beanName, cacheKey);
      }
   }
   return bean;
}
总的来说还是跟Aop一样,利用后置处理器机制在对象创建以后,包装对象,返回一个代理对象(增强器),代理对象执行方法利用拦截器链进行调用
接下来我们看我们创建的另一个对象,ProxyTransactionManagementConfiguration
看看他做了什么
public class ProxyTransactionManagementConfiguration extends AbstractTransactionManagementConfiguration {
    public ProxyTransactionManagementConfiguration() {
    }

    @Bean(
        name = {"org.springframework.transaction.config.internalTransactionAdvisor"}
    )
    @Role(2)
    public BeanFactoryTransactionAttributeSourceAdvisor transactionAdvisor() {
        BeanFactoryTransactionAttributeSourceAdvisor advisor = new BeanFactoryTransactionAttributeSourceAdvisor();
        advisor.setTransactionAttributeSource(this.transactionAttributeSource());
        advisor.setAdvice(this.transactionInterceptor());
        advisor.setOrder((Integer)this.enableTx.getNumber("order"));
        return advisor;
    }
1)给容器中添加事务增强器
@Bean
@Role(2)
public TransactionAttributeSource transactionAttributeSource() {
    return new AnnotationTransactionAttributeSource();
}
public AnnotationTransactionAttributeSource() {
    this(true);
}

public AnnotationTransactionAttributeSource(boolean publicMethodsOnly) {
    this.publicMethodsOnly = publicMethodsOnly;
    this.annotationParsers = new LinkedHashSet(2);
    this.annotationParsers.add(new SpringTransactionAnnotationParser());
    if (jta12Present) {
        this.annotationParsers.add(new JtaTransactionAnnotationParser());
    }

    if (ejb3Present) {
        this.annotationParsers.add(new Ejb3TransactionAnnotationParser());
    }

}
2)事务增强器要用事务注解的信息:AnnotationTransactionAttributeSource
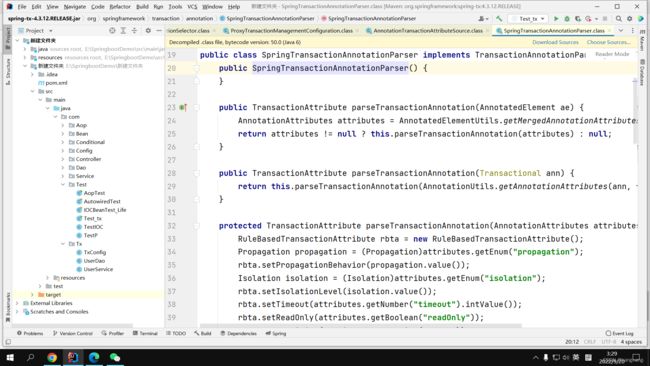
SpringTransactionAnnotationParser(用来解析事务注解)
 像这些都是存在于@Transactional注解里的方法
3)继续往下看,不仅要添加事务增强器,除了要事务注解信息
advisor.setAdvice(this.transactionInterceptor())
事务拦截器
public TransactionInterceptor transactionInterceptor() {
    TransactionInterceptor interceptor = new TransactionInterceptor();
    interceptor.setTransactionAttributeSource(this.transactionAttributeSource());
    if (this.txManager != null) {
        interceptor.setTransactionManager(this.txManager);
    }

    return interceptor;
transactionAttributeSource先把这个事务属性保存起来
又把txManager事务管理器保存起来
我们在点到TransactionInterceptor这个保存我们属性,看看他想要干嘛
public class TransactionInterceptor extends TransactionAspectSupport implements MethodInterceptor, Serializable
一进来就发现了这个“熟人”,当时我们在AOP中,四个通知方法,被先包装成增强器,最后也是变成了MethodInterceptor(方法拦截器)
这里肯定很多小伙伴会疑问,什么叫方法拦截器呢
简单来说就是我们会给容器中放个代理对象,代理对象要执行目标方法,方法拦截器就会开始工作拦截了
我们来看看他怎么工作的
protected Object invokeWithinTransaction(Method method, Class targetClass, final TransactionAspectSupport.InvocationCallback invocation) throws Throwable {
    final TransactionAttribute txAttr = this.getTransactionAttributeSource().getTransactionAttribute(method, targetClass);
    final PlatformTransactionManager tm = this.determineTransactionManager(txAttr);
这个跟我们的Aop可以说一模一样,因为是代理对象在执行目标方法时,代理对象会执行拦截器链而我们的拦截器链只有一个,就是我们上面提到的TransactionInterceptor(事务拦截器)
1)先获取事务相关的属性
2)再获取PlatformTransactionManager ,但一般我们都不会给添加指定TransactionManager,最终会从容器中按照类型获取一个TransactionManager
try {
    Object var3 = invocation.proceedWithInvocation();
    return var3;
} catch (Throwable var8) {
    if (txAttr.rollbackOn(var8)) {
        if (var8 instanceof RuntimeException) {
            throw (RuntimeException)var8;
        }

        throw new TransactionAspectSupport.ThrowableHolderException(var8);
    }

    var4 = new TransactionAspectSupport.ThrowableHolder(var8);
3)执行事务方法
4)注意这里最重要的回滚,如果异常的话,就利用事务管理器的回滚这次操作
protected void commitTransactionAfterReturning(TransactionAspectSupport.TransactionInfo txInfo) {
    if (txInfo != null && txInfo.hasTransaction()) {
        if (this.logger.isTraceEnabled()) {
            this.logger.trace("Completing transaction for [" + txInfo.getJoinpointIdentification() + "]");
        }

        txInfo.getTransactionManager().commit(txInfo.getTransactionStatus());
    }

}
5)如果正常的话,我们就会拿到事务管理器,然后提交事务
这就是我们整个事务的过程,整个流程跟我们的Aop非常相似
希望这些能帮助到各位