分布式微服务 SpringCloud Alibaba 中 Seata 分布式事务 组件搭建
文章目录
- Seata 三大角色
-
- TC:事务协调者
- TM:事务管理器
- RM:资源管理器
- 搭建TC:Seata-Server
-
- 1.下载[seata-server](https://github.com/seata/seata/releases)
- 2.Mysql创建数据库seata,执行以下脚本
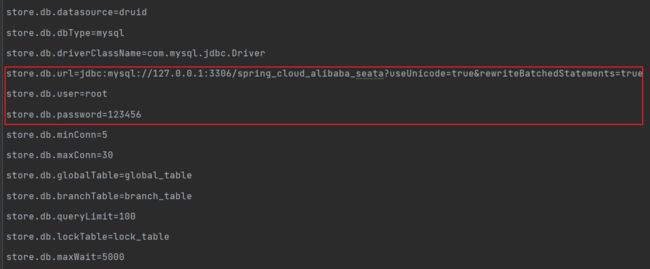
- 2.打开\seata-server-1.4.2\conf\file.conf文件修改成以下
- 3.打开\seata-server-1.4.2\conf\registry.conf文件修改成以下
- 4.启动nacos
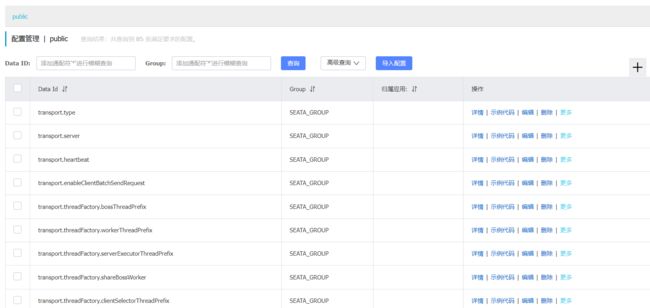
- 5.初始化配置中心设置
-
- 下载seata源码
- 进入script/config-center/config.txt修改成以下
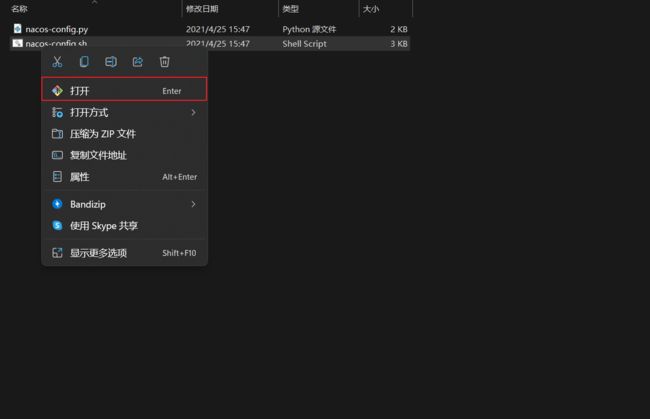
- 进入seata-1.4.2\seata-1.4.2\script\config-center\nacos
- 6.启动seata-server
- 搭建RM:(分支事务)
-
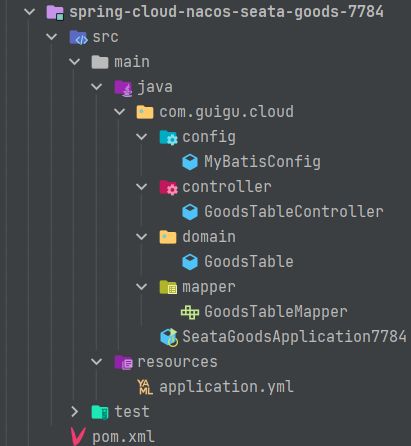
- 1.分别导入jar包
- 2.拷贝seata-server的confregistry.conf文件
- 3.编写application.yml配置文件
-
- 打开seata-1.4.2\seata-1.4.2\script\config-center\config.txt查看事务组
- 4.编写配置类
- 5.编写实体类
- 6.编写Controller层
- 7.编写启动类
- 搭建TM:(全局事务发起者)
-
- 1.导入jar包
- 2.拷贝seata-server的confregistry.conf文件
- 3.编写application.yml配置文件
- 4.编写配置类
- 5.编写实体类
- 6.编写service的业务实现类
- 7.编写Controller层
- 8.编写启动类
- 运行测试
Seata 三大角色
-
TC:事务协调者
-
TM:事务管理器
-
RM:资源管理器
搭建TC:Seata-Server
1.下载seata-server
2.Mysql创建数据库seata,执行以下脚本
-- -------------------------------- The script used when storeMode is 'db' --------------------------------
-- the table to store GlobalSession data
CREATE TABLE IF NOT EXISTS `global_table`
(
    `xid`                       VARCHAR(128) NOT NULL,
    `transaction_id`            BIGINT,
    `status`                    TINYINT      NOT NULL,
    `application_id`            VARCHAR(32),
    `transaction_service_group` VARCHAR(32),
    `transaction_name`          VARCHAR(128),
    `timeout`                   INT,
    `begin_time`                BIGINT,
    `application_data`          VARCHAR(2000),
    `gmt_create`                DATETIME,
    `gmt_modified`              DATETIME,
    PRIMARY KEY (`xid`),
    KEY `idx_gmt_modified_status` (`gmt_modified`, `status`),
    KEY `idx_transaction_id` (`transaction_id`)
) ENGINE = InnoDB
  DEFAULT CHARSET = utf8;

-- the table to store BranchSession data
CREATE TABLE IF NOT EXISTS `branch_table`
(
    `branch_id`         BIGINT       NOT NULL,
    `xid`               VARCHAR(128) NOT NULL,
    `transaction_id`    BIGINT,
    `resource_group_id` VARCHAR(32),
    `resource_id`       VARCHAR(256),
    `branch_type`       VARCHAR(8),
    `status`            TINYINT,
    `client_id`         VARCHAR(64),
    `application_data`  VARCHAR(2000),
    `gmt_create`        DATETIME(6),
    `gmt_modified`      DATETIME(6),
    PRIMARY KEY (`branch_id`),
    KEY `idx_xid` (`xid`)
) ENGINE = InnoDB
  DEFAULT CHARSET = utf8;

-- the table to store lock data
CREATE TABLE IF NOT EXISTS `lock_table`
(
    `row_key`        VARCHAR(128) NOT NULL,
    `xid`            VARCHAR(128),
    `transaction_id` BIGINT,
    `branch_id`      BIGINT       NOT NULL,
    `resource_id`    VARCHAR(256),
    `table_name`     VARCHAR(32),
    `pk`             VARCHAR(36),
    `gmt_create`     DATETIME,
    `gmt_modified`   DATETIME,
    PRIMARY KEY (`row_key`),
    KEY `idx_branch_id` (`branch_id`)
) ENGINE = InnoDB
  DEFAULT CHARSET = utf8;
2.打开\seata-server-1.4.2\conf\file.conf文件修改成以下
3.打开\seata-server-1.4.2\conf\registry.conf文件修改成以下
4.启动nacos
5.初始化配置中心设置
下载seata源码
进入script/config-center/config.txt修改成以下
进入seata-1.4.2\seata-1.4.2\script\config-center\nacos
6.启动seata-server
双击steata\seata-server-1.4.2\bin\seata-server.bat文件
启动成功后查看nacos可视化界面有没有seata服务

搭建RM:(分支事务)
1.分别导入jar包
        <dependency>
            <groupId>com.alibaba.cloudgroupId>
            <artifactId>spring-cloud-starter-alibaba-seataartifactId>
        dependency>
2.拷贝seata-server的confregistry.conf文件
seata版本低的需要拷贝这个文件到resources目录下(我是2.2.6就没拷贝了)

3.编写application.yml配置文件
server:
  port: 7784

spring:
  application:
    name: seata-goods-server
  datasource:
    driver-class-name: com.mysql.cj.jdbc.Driver
    username: root
    password: 123456
    url: jdbc:mysql://127.0.0.1:3306/springcloud?useUnicode=true&characterEncoding=UTF-8&serverTimezone=UTC
  cloud:
    nacos:
      discovery:
        server-addr: 192.168.116.1:8848
    alibaba:
      seata:
        tx-service-group: my_test_tx_group
#        日志打印
mybatis-plus:
  configuration:
    log-impl: org.apache.ibatis.logging.slf4j.Slf4jImpl
logging:
  level:
    com.baomidou.mybatisplus: DEBUG
    com.guigu.cloud.mapper: DEBUG
  file:
    #    日志生成路径
    name: D:\\log\\goodsLog.log
打开seata-1.4.2\seata-1.4.2\script\config-center\config.txt查看事务组
tx-service-group: my_test_tx_group
4.编写配置类
package com.guigu.cloud.config;

import com.alibaba.druid.pool.DruidDataSource;
import io.seata.rm.datasource.DataSourceProxy;
import org.mybatis.spring.annotation.MapperScan;
import org.springframework.boot.context.properties.ConfigurationProperties;
import org.springframework.context.annotation.Bean;
import org.springframework.context.annotation.Configuration;
import org.springframework.context.annotation.Primary;

import javax.sql.DataSource;

@Configuration
@MapperScan(basePackages = "com.guigu.cloud.mapper")
public class MyBatisConfig {

   /**
    * 从配置文件获取属性构造datasource,注意前缀,这里用的是druid,根据自己情况配置,
    * 原生datasource前缀取"spring.datasource
    *
    * @return
    */
   @Bean
   @ConfigurationProperties(prefix = "spring.datasource")
   public DataSource dataSource() {
       return new DruidDataSource();
   }

   /**
    * 构造datasource代理对象,替换原来的datasource
    *
    * @param hikariDataSource
    * @return
    */
   @Primary
   @Bean("dataSource")
   public DataSourceProxy dataSourceProxy(DataSource hikariDataSource) {
       return new DataSourceProxy(hikariDataSource);
   }
}
5.编写实体类
package com.guigu.cloud.domain;

import com.baomidou.mybatisplus.annotation.IdType;
import com.baomidou.mybatisplus.annotation.TableId;
import com.baomidou.mybatisplus.annotation.TableName;
import lombok.AllArgsConstructor;
import lombok.Builder;
import lombok.Data;
import lombok.NoArgsConstructor;

@Data
@AllArgsConstructor
@NoArgsConstructor
@TableName("goods_table")
@Builder
public class GoodsTable {
    @TableId(type = IdType.AUTO)
    private Integer gId;
    private String gName;
    private Integer quantity;
}
6.编写Controller层
@RestController
@RequestMapping("Goods")
@Slf4j
public class GoodsTableController {
    @Resource
    GoodsTableMapper goodsTableMapper;

    @PutMapping("deductGoods/{id}/{num}")
    public String findGoods(@PathVariable("id") Integer id,
                            @PathVariable("num") Integer num) {
        //查询原来的库存
        Optional<GoodsTable> goodsTable = Optional.ofNullable(goodsTableMapper.selectById(id));
        log.info("id:"+String.valueOf(id)+",num:"+String.valueOf(num));
        log.info("原来库存:"+String.valueOf(goodsTable.get().getQuantity()));
        //调用扣除库存
        int state = goodsTableMapper.updateById(GoodsTable.builder().gId(id).quantity(goodsTable.get().getQuantity() - num).build());
        return state > 0 ? "success" : "error";
    }
}
7.编写启动类
//由于循环依赖,所以排除Database自动配置
@SpringBootApplication(exclude = DataSourceAutoConfiguration.class)
public class SeataGoodsApplication7784 {
    public static void main(String[] args) {
        SpringApplication.run(SeataGoodsApplication7784.class,args);
    }
}
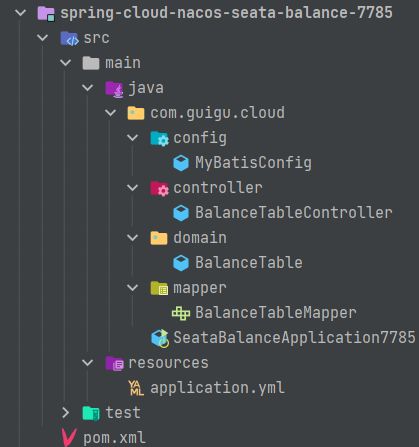
余额微服务则重复RM搭建步骤
搭建TM:(全局事务发起者)
1.导入jar包
        <dependency>
            <groupId>com.alibaba.cloudgroupId>
            <artifactId>spring-cloud-starter-alibaba-seataartifactId>
        dependency>
2.拷贝seata-server的confregistry.conf文件
seata版本低的需要拷贝这个文件到resources目录下

3.编写application.yml配置文件
server:
  port: 7783

spring:
  application:
    name: seata-order-server
  datasource:
    driver-class-name: com.mysql.cj.jdbc.Driver
    username: root
    password: 123456
    url: jdbc:mysql://127.0.0.1:3306/springcloud?useUnicode=true&characterEncoding=UTF-8&serverTimezone=UTC
  cloud:
    nacos:
      discovery:
        server-addr: 192.168.116.1:8848
    alibaba:
      seata:
        tx-service-group: my_test_tx_group
#        日志打印
mybatis-plus:
  configuration:
    log-impl: org.apache.ibatis.logging.slf4j.Slf4jImpl
logging:
  level:
    com.baomidou.mybatisplus: DEBUG
    com.guigu.cloud.mapper: DEBUG
  file:
#    日志生成路径
    name: D:\\log\\orderLog.log
4.编写配置类
package com.guigu.cloud.config;

import com.alibaba.druid.pool.DruidDataSource;
import io.seata.rm.datasource.DataSourceProxy;
import org.mybatis.spring.annotation.MapperScan;
import org.springframework.boot.context.properties.ConfigurationProperties;
import org.springframework.context.annotation.Bean;
import org.springframework.context.annotation.Configuration;
import org.springframework.context.annotation.Primary;

import javax.sql.DataSource;

@Configuration
@MapperScan(basePackages = "com.guigu.cloud.mapper")
public class MyBatisConfig {

    /**
     * 从配置文件获取属性构造datasource,注意前缀,这里用的是druid,根据自己情况配置,
     * 原生datasource前缀取"spring.datasource
     *
     * @return
     */
    @Bean
    @ConfigurationProperties(prefix = "spring.datasource")
    public DataSource dataSource() {
        return new DruidDataSource();
    }

    /**
     * 构造datasource代理对象,替换原来的datasource
     *
     * @param hikariDataSource
     * @return
     */
    @Primary
    @Bean("dataSource")
    public DataSourceProxy dataSourceProxy(DataSource hikariDataSource) {
        return new DataSourceProxy(hikariDataSource);
    }
}
5.编写实体类
package com.guigu.cloud.domain;

import com.baomidou.mybatisplus.annotation.IdType;
import com.baomidou.mybatisplus.annotation.TableId;
import com.baomidou.mybatisplus.annotation.TableName;
import com.fasterxml.jackson.annotation.JsonProperty;
import lombok.AllArgsConstructor;
import lombok.Builder;
import lombok.Data;
import lombok.NoArgsConstructor;

import java.util.Date;

@Data
@AllArgsConstructor
@NoArgsConstructor
@Builder
@TableName("order_table")
public class OrderTable {
    /**
     * 由于驼峰命名,@Requestbody映射不了值
     * 解决1:加JsonProperty注解指定key,
     * 解决2:字段过短,例如:orderId即可
     * 解决3:全部小写
     */
    @TableId(type = IdType.AUTO)
    @JsonProperty(value = "oId")
    private Integer oId;

    @JsonProperty(value = "gId")
    private Integer gId;

    @JsonProperty(value = "bId")
    private Integer bId;

    @JsonProperty(value = "oSerial")
    private String oSerial;

    @JsonProperty(value = "createDate")
    private Date createDate;
}
6.编写service的业务实现类
@Slf4j
@Service
public class OrderTableServiceImpl implements OrderTableService {

    /**
     * 注入订单mapper层
     */
    @Resource
    OrderTableMapper orderTableMapper;

    /**
     * 注入调用商品微服务的feign
     */
    @Resource
    GoodsFeign goodsFeign;

    /**
     * 注入调用余额微服务的feign
     */
    @Resource
    BalanceFeign balanceFeign;

    @Override
    @GlobalTransactional
    public void saveOrder(OrderTable orderTable) {

        log.info("开始创建订单");
        int insert = orderTableMapper.insert(orderTable);
        String orderMassage = insert > 0 ? "success" : "error";
        log.info("创建订单" + orderMassage);

        log.info("开始扣除库存");
        //从订单获取商品id
        String goodsMessage = goodsFeign.findGoods(orderTable.getGId(), 1);
        log.info("扣除库存" + goodsMessage);

        log.info("开始扣除余额");
        //从订单获取余额id
        String BalanceMassage = balanceFeign.findGoods(orderTable.getBId(), 1);
        log.info("扣除余额" + BalanceMassage);
    }
}
7.编写Controller层
@RestController
@RequestMapping("Order")
@Slf4j
public class OrderTableController {

    @Resource
    OrderTableService orderTableService;

    @PostMapping("saveOrder")
    public String saveOrder(@RequestBody OrderTable orderTable) {
        log.info(String.valueOf(orderTable));
        try {
            //调用添加订单
            orderTableService.saveOrder(orderTable);
            return "success";
        } catch (Exception e) {
            return "error:" + e.getMessage();
        }
    }
}
8.编写启动类
@SpringBootApplication(exclude = DataSourceAutoConfiguration.class)
@EnableFeignClients
public class SeataOrderApplication7783 {
    public static void main(String[] args) {
        SpringApplication.run(SeataOrderApplication7783.class, args);
    }
}
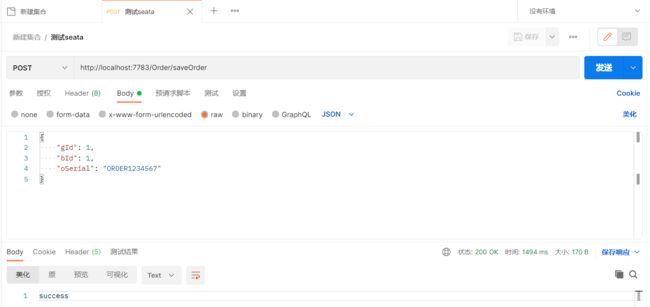
运行测试


