基于CentOS8部署的LNMP平台安装zabbix-4.4.8
大家好,我是SuieKa,本博文讲解zabbix在cnetos8的安装。
前言
zabbix是一个基于WEB界面的提供分布式系统监视以及网络监视功能的企业级的开源解决方案。
zabbix能监视各种网络参数,保证服务器系统的安全运营;并提供灵活的通知机制以让系统管理员快速定位/解决存在的各种问题。
zabbix由2部分构成,zabbix server与可选组件zabbix agent。 zabbix server可以通过SNMP,zabbix agent,ping,端口监视等方法提供对远程服务器/网络状态的监视,数据收集等功能,它可以运行在Linux,Solaris,HP-UX,AIX,Free BSD,Open BSD,OS X等平台上。
要想搭建一个Zabbix的工作环境,需要从服务器入手。与服务器通信,管理员需要使用一个Zabbix前端界面,与Zabbix服务器和数据库进行通信。三个关键(界面、服务器和数据库)可以安装在同一台服务器上,但是如果你拥有一个更大更复杂的环境,将它们安装在不同的主机上也是一个选项。Zabbix服务器能够直接监控到同一网络中的设备,如果其他网络的设备也需要被监控,那还需要一台Zabbix代理服务器。
zabbix的主要特点:
- 安装与配置简单,学习成本低
- 支持多语言(包括中文)
- 免费开源
- 自动发现服务器与网络设备
- 分布式监视以及WEB集中管理功能
- 可以无agent监视
- 用户安全认证和柔软的授权方式
- 通过WEB界面设置或查看监视结果
- email等通知功能 等等
Zabbix主要功能:
监控CPU负载、内存使用、磁盘使用、网络状态、端口监视、日志监视、插件开发自定义、服务(ftp、mysql、esxi、OpenStack…)
zabbix官方网站:http://www.zabbix.com/
监控效果图:

是不是看起来很华丽的样子,话不多说,CentOS8开始上手
注意:
安装zabbix前,centos8是需要构建LNMP环境,因为 Zabbix 是通过 PHP 页面展示的若,需要安装LNMP,可以浏览以下博文CentOS8部署LNMP详细过程。
CentOS8安装lnmp:https://blog.csdn.net/weixin_44847002/article/details/105470778
目录
- 一、安装zabbix-4.4.8
-
- 二、配置 zabbix Server
-
- 三、网页安装 zabbix web
一、安装zabbix-4.4.8
安装之前请确保关闭防火墙
[16:33:04 root@wangzhike ~]#systemctl disable firewalld
[16:33:22 root@wangzhike ~]#cat /etc/selinux/config
# This file controls the state of SELinux on the system.
# SELINUX= can take one of these three values:
#     enforcing - SELinux security policy is enforced.
#     permissive - SELinux prints warnings instead of enforcing.
#     disabled - No SELinux policy is loaded.
#SELINUX=enforcing
SELINUX=disabled
# SELINUXTYPE= can take one of these three values:
#     targeted - Targeted processes are protected,
#     minimum - Modification of targeted policy. Only selected processes are protected.
#     mls - Multi Level Security protection.
SELINUXTYPE=targeted
1、上传zabbix源码包
我采用源码编译安装,zabbix官网有源码包,也有rpm下载方法。
[16:24:41 root@wangzhike software]#ls
zabbix-4.4.8.tar.gz

或者使用以下下载到目录里
rpm -Uvh https://repo.zabbix.com/zabbix/4.4/rhel/8/x86_64/zabbix-release-4.4-1.el8.noarch.rpm
dnf clean all
2、使用mysql创建 Zabbix 使用数据库
zabbix 需要数据库的支持,而zabbix 已经自带了数据库结构,images 数据库和表数据等相关内容。
[16:24:42 root@wangzhike software]#mysql		//登录mysql数据库
mysql: [Warning] Using a password on the command line interface can be insecure.
Welcome to the MySQL monitor.  Commands end with ; or \g.
Your MySQL connection id is 14
Server version: 8.0.19 Source distribution

Copyright (c) 2000, 2020, Oracle and/or its affiliates. All rights reserved.

Oracle is a registered trademark of Oracle Corporation and/or its
affiliates. Other names may be trademarks of their respective
owners.

Type 'help;' or '\h' for help. Type '\c' to clear the current input statement.

mysql>  create database zabbix character set UTF8 collate utf8_bin;		//创建zabbix用户并设置为utf8的字符编码格式
Query OK, 1 row affected (0.03 sec)

mysql> show databases;		//查看数据库
+--------------------+
| Database           |
+--------------------+
| information_schema |
| mysql              |
| performance_schema |
| sys                |
| zabbix             |
+--------------------+
5 rows in set (0.02 sec)
##########已创建好zabbix
mysql> create user 'zabbix'@'localhost' identified by 'Wangzhike123@';	//授权zabbix用户对zabbix数据库拥有所有权限,并设置密码
##########若报ERROR 1819 (HY000):错误,请执行flush privileges;并重新执行上一步且密码稍微整复杂点
Query OK, 0 rows affected (0.00 sec)
mysql> flush privileges;
Query OK, 0 rows affected (0.00 sec)

mysql> exit
Bye
重启数据库生效
[17:30:56 root@wangzhike ~]#/etc/init.d/mysqld restart
Shutting down MySQL.. SUCCESS!
Starting MySQL.... SUCCESS!
保证能使用创建的zabbix和自己设置的密码Wangzhike123@登录数据库
[17:31:41 root@wangzhike ~]#mysql -uzabbix -pWangzhike123@
mysql: [Warning] Using a password on the command line interface can be insecure.
Welcome to the MySQL monitor.  Commands end with ; or \g.
Your MySQL connection id is 7
Server version: 8.0.19 Source distribution

Copyright (c) 2000, 2020, Oracle and/or its affiliates. All rights reserved.

Oracle is a registered trademark of Oracle Corporation and/or its
affiliates. Other names may be trademarks of their respective
owners.

Type 'help;' or '\h' for help. Type '\c' to clear the current input statement.

mysql>
3、解压缩包zabbix-4.4.8到安装目录进行编译安装
[17:34:08 root@wangzhike software]#tar xf zabbix-4.4.8.tar.gz -C /usr/local/src/
[17:36:01 root@wangzhike software]#cd /usr/local/src/zabbix-4.4.8
导入数据库
注意:在当前的安装目录下导入数据库,注意顺序,否则会报错
依次输入密码:
[18:07:12 root@wangzhike zabbix-4.4.8]#mysql -uzabbix -p zabbix < database/mysql/schema.sql
Enter password:
[18:07:45 root@wangzhike zabbix-4.4.8]#mysql -uzabbix -p zabbix < database/mysql/images.sql
Enter password:
[18:09:33 root@wangzhike zabbix-4.4.8]#mysql -uzabbix -p zabbix < database/mysql/data.sql
Enter password:
4、编译安装 Zabbix-4.4.8
创建用户和组zabbix,并将用户zabbix加入到zabbix组里
[18:09:59 root@wangzhike zabbix-4.4.8]#groupadd zabbix
[18:11:13 root@wangzhike zabbix-4.4.8]#useradd -s /sbin/nologin -g zabbix zabbix
解决依赖问题
[18:13:38 root@wangzhike ~]#yum -y install net-snmp-devel libevent-devel
***************************************
Installed:
  libevent-devel-2.1.8-5.el8.x86_64
  net-snmp-devel-1:5.8-12.el8_1.1.x86_64
  perl-CPAN-Meta-2.150010-396.el8.noarch
  perl-Encode-Locale-1.05-9.el8.noarch
  perl-Time-HiRes-1.9758-1.el8.x86_64
  mariadb-connector-c-3.0.7-1.el8.x86_64
  mariadb-connector-c-config-3.0.7-1.el8.noarch
  net-snmp-agent-libs-1:5.8-12.el8_1.1.x86_64
  perl-CPAN-Meta-Requirements-2.140-396.el8.noarch
  perl-CPAN-Meta-YAML-0.018-397.el8.noarch
  perl-ExtUtils-Command-1:7.34-1.el8.noarch
  perl-ExtUtils-Install-2.14-4.el8.noarch
  perl-ExtUtils-MakeMaker-1:7.34-1.el8.noarch
  perl-ExtUtils-Manifest-1.70-395.el8.noarch
  perl-ExtUtils-ParseXS-1:3.35-2.el8.noarch
  perl-JSON-PP-1:2.97.001-3.el8.noarch
  perl-Test-Harness-1:3.42-1.el8.noarch
  perl-devel-4:5.26.3-416.el8.x86_64
  perl-version-6:0.99.24-1.el8.x86_64
  systemtap-sdt-devel-4.1-6.el8.x86_64
  elfutils-devel-0.176-5.el8.x86_64
  elfutils-libelf-devel-0.176-5.el8.x86_64
  lm_sensors-devel-3.4.0-20.20180522git70f7e08.el8.x86_64
  lm_sensors-libs-3.4.0-20.20180522git70f7e08.el8.x86_64
  net-snmp-libs-1:5.8-12.el8_1.1.x86_64
  perl-Math-BigInt-1:1.9998.11-7.el8.noarch
  perl-Math-Complex-1.59-416.el8.noarch
  popt-devel-1.16-14.el8.x86_64
  python3-pyparsing-2.1.10-7.el8.noarch
  rpm-devel-4.14.2-26.el8_1.x86_64

Complete!
开始编译安装
[18:20:35 root@wangzhike zabbix-4.4.8]# ./configure \
--prefix=/usr/local/zabbix \
--enable-server \
--enable-agent \
--with-mysql=/usr/local/mysql/bin/mysql_config \
--with-net-snmp \
--with-libcurl
报错:configure: error: Unable to use libpcre (libpcre check failed)
解决:yum -y install pcre*
看到以下界面就没有什么问题
  Enable proxy:          no

  Enable agent:          yes
  Agent details:
    TLS:                   no
    Linker flags:                -rdynamic
    Libraries:              -lz -lpthread    -lcurl -lm -ldl  -lresolv -lpcre
    Configuration file:    /usr/local/Zabbix/etc/zabbix_agentd.conf
    Modules:               /usr/local/Zabbix/lib/modules

  Enable agent 2:        no

  Enable Java gateway:   no

  LDAP support:          no
  IPv6 support:          no

***********************************************************
*            Now run 'make install'                       *
*                                                         *
*            Thank you for using Zabbix!                  *
*              <http://www.zabbix.com>                    *
***********************************************************
####没有 make 步骤,直接 make install
[18:33:23 root@wangzhike zabbix-4.4.8]#make install
编译成功
[18:36:31 root@wangzhike ~]#ls /usr/local/zabbix/
bin  etc  lib  sbin  share
二、配置 zabbix Server
1、修改配置文件
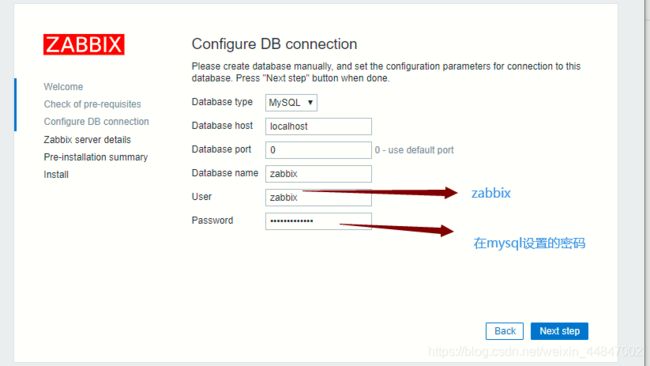
[18:36:37 root@wangzhike ~]#vi /usr/local/zabbix/etc/zabbix_server.conf
DBHost=localhost	 			####默认注释掉了,直接取消注释即可
DBName=zabbix	 				####数据库用户,我们授权的用户也是zabbix
DBUser=zabbix	 				####默认是 root,我们授权的用户是 zabbix
DBPassword=Wangzhike123@		####密码我们授权的是Wangzhike123@
2、监控 Zabbix Server 本身
监控本身,意思是本身作为服务器之外,自己也做自己的客户端,也要使用agentd这个代理者配置文件中,有 agentd 和 agent 两个配置文件,前者是守护进程,后者依赖 xinetd
[20:00:35 root@wangzhike ~]#vi /usr/local/zabbix/etc/zabbix_agentd.conf
Server=127.0.0.1
ServerActive=127.0.0.1
Hostname=Zabbix server		####默认监控服务器自己,以上三行不用改
UnsafeUserParameters=1		####允许所有的字符是在用户定义的参数,参数传递,也就是支持自定义脚本
其中 Server 和 ServerActive 都指定 zabbixserver 的 IP 地址,不同的是,前者是被动后者是主动。也就是说前者允许 127.0.0.1 这个 ip 来我这取数据。而 serverActive 的 127.0.0.1 的意思是,客户端主动提交数据。
3、通过启动脚本启动 zabbix
[20:10:55 root@wangzhike ~]#cd /usr/local/src/zabbix-4.4.8/misc/init.d/
[20:13:04 root@wangzhike init.d]#cp fedora/core/* /etc/rc.d/init.d/
[20:13:24 root@wangzhike init.d]#vi /etc/init.d/zabbix_server
BASEDIR=/usr/local/zabbix  				####找到此行,并修改
[20:14:25 root@wangzhike init.d]#vi /etc/init.d/zabbix_agentd
BASEDIR=/usr/local/zabbix  				####找到此行,并修改
启动zabbix
[20:14:52 root@wangzhike init.d]#/etc/init.d/zabbix_agentd start
Reloading systemd:                                         [  OK  ]
Starting zabbix_agentd (via systemctl):                    [  OK  ]
[20:20:22 root@wangzhike init.d]#chkconfig zabbix_server on
[20:20:25 root@wangzhike init.d]#chkconfig zabbix_agentd on
[20:20:34 root@wangzhike init.d]#netstat -nltup | grep zabbix
tcp        0      0 0.0.0.0:10050           0.0.0.0:*               LISTEN      115162/zabbix_agent
4、编辑 php 页面控制文件
默认配置文件没有写入到我们的 Nginx 的配置文件中,也就是不能加载到我们的 zabbix 页面目录
[20:20:36 root@wangzhike init.d]#cp -r /usr/local/src/zabbix-4.4.8/frontends/php/* /usr/local/nginx/html/
[20:23:23 root@wangzhike init.d]#vi /usr/local/nginx/conf/nginx.conf
location / {
root	html;
index	index.php index.html index.htm;			####找到此行内容,添加index.php
}
重启nginx服务和php-fpm服务
[20:24:00 root@wangzhike ~]#/usr/local/nginx/sbin/nginx -s reload
[20:24:48 root@wangzhike ~]#/etc/init.d/zabbix_server restart
Restarting zabbix_server (via systemctl):                  [  OK  ]
[20:25:06 root@wangzhike ~]#/etc/init.d/php-fpm restart
Gracefully shutting down php-fpm . done
Starting php-fpm  done
浏览器访问http://IP地址/

三、网页安装 zabbix web
1、进行网页安装zabbix
点击下一步即可
发现有很多环境条件不适,所以我们需要修改php.ini文件(注意:php.ini文件是修改下图的文件)


2、修改php.ini文件
[16:59:27 root@wang-tuxing init.d]#vi /usr/local/php/etc/php.ini
post_max_size = 16M	 				#修改
max_execution_time = 300			#修改
max_input_time = 300				#修改
date.timezone = Asia/Shanghai		#此行有注释,去注释并修改
保存退出
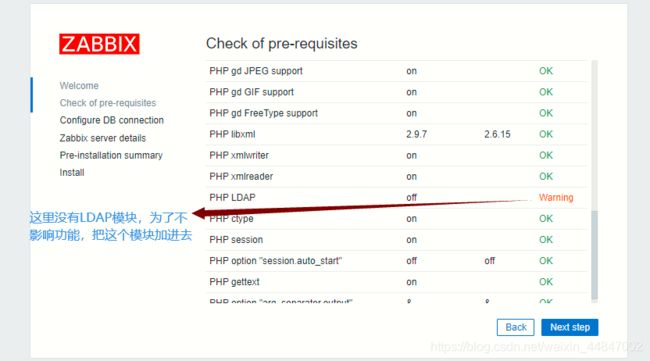
3、添加PHP LDAP模块
进入PHP安装目录(大部分为PHP添加扩展库是这种形式)
[17:02:32 root@wang-tuxing init.d]#cd /usr/local/src/php-7.4.4/ext/ldap/
[17:06:32 root@wang-tuxing ldap]#/usr/local/php/bin/phpize
Configuring for:
PHP Api Version:         20190902
Zend Module Api No:      20190902
Zend Extension Api No:   320190902
[17:06:42 root@wang-tuxing ldap]#./configure \
--with-php-config=/usr/local/php/bin/php-config \
--with-ldap


注意若报错为:
configure: error: Cannot find ldap.h
configure: error: Cannot find ldap libraries in /usr/lib.

解决:
yum install openldap-devel openldap -y
rsync -avz /usr/lib64/libldap* /usr/lib/
#######################################rsync -avz :同步工具

再次./configure步骤,即可通过预编译
下一步
[17:07:13 root@wang-tuxing ldap]#make && make install
/bin/sh /usr/local/src/php-7.4.4/ext/ldap/libtool --mode=install cp ./ldap.la /usr/local/src/php-7.4.4/ext/ldap/modules
cp ./.libs/ldap.so /usr/local/src/php-7.4.4/ext/ldap/modules/ldap.so
cp ./.libs/ldap.lai /usr/local/src/php-7.4.4/ext/ldap/modules/ldap.la
cp ./.libs/ldap.a /usr/local/src/php-7.4.4/ext/ldap/modules/ldap.a
chmod 644 /usr/local/src/php-7.4.4/ext/ldap/modules/ldap.a
ranlib /usr/local/src/php-7.4.4/ext/ldap/modules/ldap.a
libtool: install: warning: remember to run `libtool --finish /usr/local/src/php-7.4.4/modules'

Build complete.
Don't forget to run 'make test'.

Installing shared extensions:     /usr/local/php/lib/php/extensions/no-debug-zts-20190902/
修改php.ini
[17:07:40 root@wang-tuxing ldap]#vi /usr/local/php/etc/php.ini
;extension=exif      ; Must be after mbstring as it depends on it
;extension=mysqli
;extension=oci8_12c  ; Use with Oracle Database 12c Instant Client
;extension=odbc
;extension=openssl
;extension=pdo_firebird
;extension=pdo_mysql
;extension=pdo_oci
;extension=pdo_odbc
;extension=pdo_pgsql
;extension=pdo_sqlite
;extension=pgsql
;extension=shmop
extension=ldap.so			#########添加这一行
重启php.ini文件即可通过LDAP模块:/etc/init.d/php-fpm restart
注意:若出现没有gd扩展库的,我在此步骤百度悠久才找到最有效解决方法

若和我相遇同等问题的同胞们,给人一种有苦说不出的感觉,解决方法请浏览博文(最直接的方法)
https://blog.csdn.net/weixin_44847002/article/details/106025168
一直点击下一步
出现以下则需要做另一步操作

下载好的文件直接上传到指定的目录中即可
[17:30:06 root@wang-tuxing ~]#cd /usr/local/nginx/html/conf/
[17:30:13 root@wang-tuxing conf]#ls
maintenance.inc.php  zabbix.conf.php.example			####上传 zabbix.conf.php文件
[17:30:14 root@wang-tuxing conf]#ls
maintenance.inc.php  zabbix.conf.php  zabbix.conf.php.example
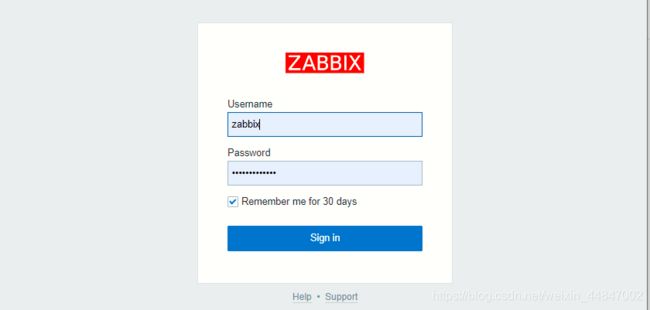
刷新页面即可