Spring Cloud Alibaba 实战
点击上方蓝色“程序猿Damon”,选择“设为星标”
回复“yeah”获取整理的学习资料
2018年11月左右,Springcloud 联合创始人Spencer Gibb在Spring官网的博客页面宣布:阿里巴巴开源 Spring Cloud Alibaba,并发布了首个预览版本。随后,Spring Cloud 官方Twitter也发布了此消息。
目前版本如下:
| Spring Cloud | Spring Cloud Alibaba | Spring Boot |
|---|---|---|
| Spring Cloud Hoxton |
2.2.0.RELEASE |
2.2.X.RELEASE |
| Spring Cloud Greenwich |
2.1.1.RELEASE |
2.1.X.RELEASE |
| Spring Cloud Finchley |
2.0.1.RELEASE |
2.0.X.RELEASE |
| Spring Cloud Edgware |
1.5.1.RELEASE |
1.5.X.RELEASE |
Spring Cloud Hoxton SR3 前不久发布,基于 Spring Boot 2.2.5 构建。也就是说最新的版本是 Hoxton 版本。但怕最新版有沙坑,我们本次用的是Greenwich 版本。而且,阿里巴巴的官方版本有的对于一些依赖有问题,我们用的是孵化器版本,其依赖关系:
| Spring Cloud | Spring Cloud Alibaba | Spring Boot |
|---|---|---|
| Spring Cloud Greenwich |
0.9.0.RELEASE |
2.1.X.RELEASE |
| Spring Cloud Finchley |
0.2.X.RELEASE |
2.0.X.RELEASE |
| Spring Cloud Edgware |
0.1.X.RELEASE |
1.5.X.RELEASE |
一、环境准备
-
Spring Boot: 2.1.8
-
Spring Cloud: Greenwich.SR3
-
Spring Cloud Alibaba: 0.9.0.RELEASE
-
Maven: 3.5.4
-
Java 1.8 +
-
Oauth2 (Spring Security 5.1.6 +)
二、实战
项目模块
主要分为:鉴权中心、服务提供者、服务消费者、网关
实战代码
鉴权中心,依赖pom.xml:
  4.0.0


  com.damon
  oauth-cas
  0.0.1-SNAPSHOT
  jar


  oauth-cas
  http://maven.apache.org


        org.springframework.boot
        spring-boot-starter-parent
        2.1.8.RELEASE


    UTF-8
    UTF-8
    1.8
    2.6.1
    1.4.7
    4.1.6
    1.2.51

    Greenwich.SR3
    1.1.1.RELEASE
    5.1.46

    2.1.1.RELEASE
    0.9.0.RELEASE


        org.springframework.cloud
        spring-cloud-alibaba-dependencies
        ${springcloud.alibaba.version}
        pom
        import


        org.springframework.cloud
        spring-cloud-dependencies
        ${springcloud.version}
        pom
        import


      org.springframework.boot
      spring-boot-starter-web


          org.springframework.boot
          spring-boot-starter-tomcat


      org.springframework.boot
      spring-boot-starter-undertow


            org.springframework.cloud
            spring-cloud-starter-oauth2


          org.springframework.cloud
          spring-cloud-starter-alibaba-nacos-discovery


          org.springframework.cloud
          spring-cloud-starter-alibaba-nacos-config


            org.springframework.boot
            spring-boot-starter-test
            test


            io.jsonwebtoken
            jjwt
            0.9.0


            cn.hutool
            hutool-all
            4.6.3


            com.google.guava
            guava
            19.0


        org.apache.commons
        commons-lang3


        commons-collections
        commons-collections
        3.2.2


      io.springfox
      springfox-swagger2
      ${swagger.version}


      io.springfox
      springfox-swagger-ui
      ${swagger.version}


        com.github.pagehelper
        pagehelper
        ${pageHelper.version}


            org.mybatis.spring.boot
            mybatis-spring-boot-starter
            1.1.1


      mysql
      mysql-connector-java
      ${mysql.version}


            com.alibaba
            druid
            1.1.3


      org.springframework.boot
      spring-boot-starter-data-redis


      com.alibaba
      fastjson
      ${fastjson.version}


      org.jsoup
      jsoup
      1.11.3


    ${project.artifactId}


        org.springframework.boot
        spring-boot-maven-plugin

          -Dfile.encoding=UTF-8
          true


        org.jacoco
        jacoco-maven-plugin
        0.7.8


              prepare-agent
              report
本例中,用到了 Nacos 作为注册中心、配置中心,估需要引入其依赖:
          org.springframework.cloud
          spring-cloud-starter-alibaba-nacos-discovery


          org.springframework.cloud
          spring-cloud-starter-alibaba-nacos-config
Oauth2 的依赖:
            org.springframework.cloud
            spring-cloud-starter-oauth2
同时利用 redis 来处理鉴权的信息存储:
      org.springframework.boot
      spring-boot-starter-data-redis
接下来需要准备配置文件 yaml:
management:
  endpoint:
    restart:
      enabled: true
    health:
      enabled: true
    info:
      enabled: true


spring:
  application:
    name: oauth-cas
  cloud:
    nacos:
      discovery:
        server-addr: 127.0.0.1:8848
      config:
        server-addr: 127.0.0.1:8848
        refreshable-dataids: actuator.properties,log.properties

  redis: #redis相关配置
    database: 8
    host: 127.0.0.1
    port: 6379
    password: qwqwsq
    jedis:
      pool:
        max-active: 8
        max-idle: 8
        min-idle: 0
    timeout: 10000ms

  http:
    encoding:
      charset: UTF-8
      enabled: true
      force: true
  mvc:
    throw-exception-if-no-handler-found: true
  main:
    allow-bean-definition-overriding: true # 当遇到同样名称时,是否允许覆盖注册

logging:
  path: /data/${spring.application.name}/logs
注意,这个配置文件需要是 bootstrap,否则可能失败,至于为什么,大家可以自己试试。
接下来就是 application:
server:
  port: 2000
  undertow:
    accesslog:
      enabled: false
      pattern: combined
  servlet:
    session:
      timeout: PT120M


client:
  http:
    request:
      connectTimeout: 8000
      readTimeout: 30000

mybatis:
  mapperLocations: classpath:mapper/*.xml
  typeAliasesPackage: com.damon.*.model
配置完成后,完成 main:
package com.damon;


import org.springframework.boot.SpringApplication;
import org.springframework.boot.autoconfigure.EnableAutoConfiguration;
import org.springframework.cloud.client.discovery.EnableDiscoveryClient;
import org.springframework.context.annotation.ComponentScan;
import org.springframework.context.annotation.Configuration;


/**
 *
 * 配置最多的就是认证服务端,验证账号、密码,存储 token,检查 token ,刷新 token 等都是认证服务端的工作
 * @author Damon
 * @date 2020年1月13日 下午2:29:42
 *
 */
@Configuration
@EnableAutoConfiguration
@ComponentScan(basePackages = {"com.damon"})
@EnableDiscoveryClient
public class CasApp {
  public static void main(String[] args) {
    SpringApplication.run(CasApp.class, args);
  }
}
接下来就是配置几个 Oauth2 服务端的几个配置类:AuthorizationServerConfig、ResourceServerConfig、SecurityConfig、RedisTokenStoreConfig、MyRedisTokenStore、UserOAuth2WebResponseExceptionTranslator、AuthenticationEntryPointHandle 等。在 Springcloud Oauth2 进阶篇、Springcloud Oauth2 HA篇 等几篇中已经讲过了。对于相关代码可以关注我的公众号和我互动。
其中最重要的就是登录时的函数:
package com.damon.login.service.impl;


import java.util.List;


import javax.servlet.http.HttpServletRequest;
import javax.servlet.http.HttpServletResponse;


import org.apache.commons.lang3.StringUtils;
import org.slf4j.Logger;
import org.slf4j.LoggerFactory;
import org.springframework.beans.factory.annotation.Autowired;
import org.springframework.security.core.authority.SimpleGrantedAuthority;
import org.springframework.security.core.userdetails.User;
import org.springframework.security.core.userdetails.UserDetails;
import org.springframework.security.core.userdetails.UsernameNotFoundException;
import org.springframework.security.crypto.password.PasswordEncoder;
import org.springframework.security.oauth2.common.OAuth2AccessToken;
import org.springframework.security.oauth2.provider.token.ConsumerTokenServices;
import org.springframework.stereotype.Service;


import com.damon.commons.Response;
import com.damon.constant.Constant;
import com.damon.constant.LoginEnum;
import com.damon.exception.InnerErrorException;
import com.damon.login.dao.UserMapper;
import com.damon.login.model.SysUser;
import com.damon.login.service.LoginService;
import com.damon.utils.IpUtil;
import com.google.common.collect.Lists;


/**
 * @author wangshoufa
 * @date 2018年11月15日 下午12:01:53
 *
 */
@Service
public class LoginServiceImpl implements LoginService {


  Logger logger = LoggerFactory.getLogger(LoginServiceImpl.class);


  //private List userList;

  @Autowired
    private PasswordEncoder passwordEncoder;

    @Autowired
  private UserMapper userMapper;

    @Autowired
    private HttpServletRequest req;

    /**
     * Auth
     * 登录认证
     * 实际中从数据库获取信息
     * 这里为了做演示,把用户名、密码和所属角色都写在代码里了,正式环境中,这里应该是从数据库或者其他地方根据用户名将加密后的密码及所属角色查出来的。账号 damon ,
     * 密码123456,稍后在换取 token 的时候会用到。并且给这个用户设置 "ROLE_ADMIN" 角色。
     *
     */
    @Override
  public UserDetails loadUserByUsername(String username) throws UsernameNotFoundException {
      logger.info("clientIp is: {} ,username: {}", IpUtil.getClientIp(req), username);
    logger.info("serverIp is: {}", IpUtil.getCurrentIp());
    // 查询数据库操作
    try {
      SysUser user = userMapper.getUserByUsername(username);
      if (user == null) {
        logger.error("user not exist");
        throw new UsernameNotFoundException("username is not exist");
        //throw new UsernameNotFoundException("the user is not found");
      }
      else {
        // 用户角色也应在数据库中获取,这里简化
        String role = "";
        if(user.getIsAdmin() == 1) {
          role = "admin";
        }
        List authorities = Lists.newArrayList();
        authorities.add(new SimpleGrantedAuthority(role));
        //String password = passwordEncoder.encode("123456");// 123456是密码
        //return new User(username, password, authorities);
        // 线上环境应该通过用户名查询数据库获取加密后的密码
        return new User(username, user.getPassword(), authorities);
      }
    } catch (Exception e) {
      logger.error("database collect failed");
      logger.error(e.getMessage(), e);
      throw new UsernameNotFoundException(e.getMessage());
    }
  }
}
函数 loadUserByUsername 需要验证数据库的密码,并且给用户授权角色。
到此,鉴权中心服务端完成。上面说的利用了 Nacos 来作为注册中心被客户端服务发现,并提供配置管理。
下载 Nacos 地址:https://github.com/alibaba/nacos/releases
版本:v1.2.1
执行:
-
Linux/Unix/Mac:
sh startup.sh -m standalone -
Windows:cmd startup.cmd -m standalone
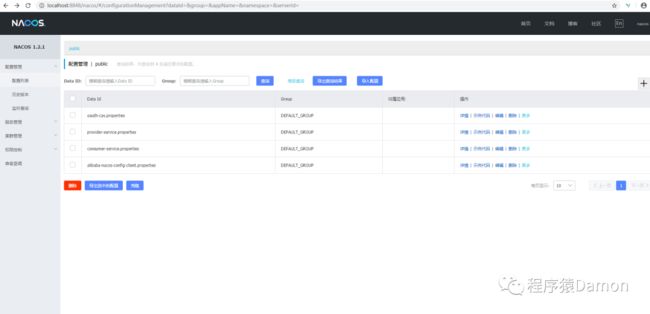
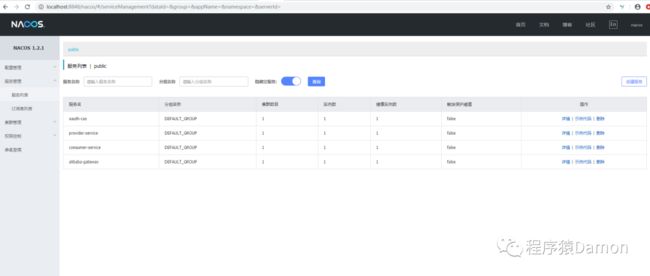
启动完成之后,访问:http://127.0.0.1:8848/nacos/,可以进入Nacos的服务管理页面,具体如下:
默认用户名与密码都是nacos。
登陆后打开服务管理,可以看到注册到 Nacos 的服务列表:
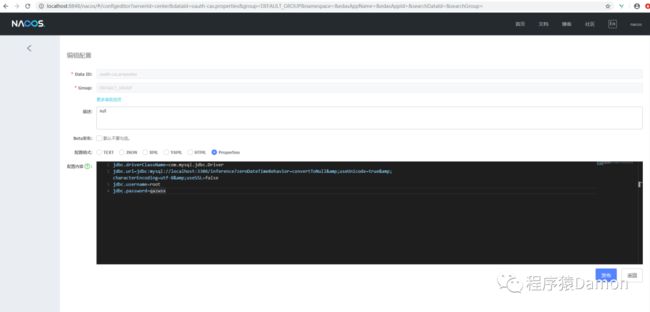
可以点击配置管理,查看配置:
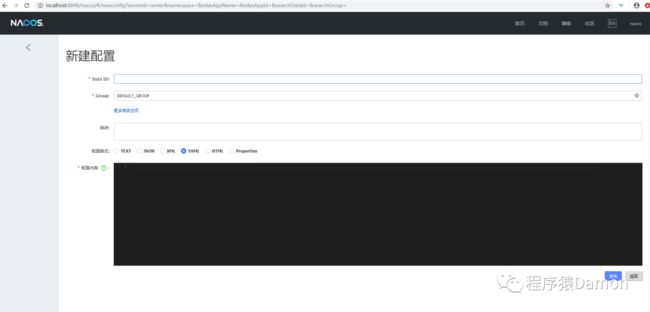
如果没有配置任何服务的配置,可以新建:
上面讲述了Nacos 如何作为注册中心与配置中心的,很简单吧。
接下来我们讲解服务提供者代码:
  4.0.0


  com.damon
  provider-service
  0.0.1-SNAPSHOT
  jar


  provider-service
  http://maven.apache.org


        org.springframework.boot
        spring-boot-starter-parent
        2.1.8.RELEASE


    UTF-8
    UTF-8
    1.8
    2.6.1
    1.4.7
    4.1.6
    1.2.51

    Greenwich.SR3
    1.1.1.RELEASE
    5.1.46

    2.1.1.RELEASE
    0.9.0.RELEASE


        org.springframework.cloud
        spring-cloud-alibaba-dependencies
        ${springcloud.alibaba.version}
        pom
        import


        org.springframework.cloud
        spring-cloud-dependencies
        ${springcloud.version}
        pom
        import


      org.springframework.boot
      spring-boot-starter-web


          org.springframework.boot
          spring-boot-starter-tomcat


      org.springframework.boot
      spring-boot-starter-undertow


            org.springframework.cloud
            spring-cloud-starter-oauth2


          org.springframework.cloud
          spring-cloud-starter-alibaba-nacos-discovery


          org.springframework.cloud
          spring-cloud-starter-alibaba-nacos-config


            org.springframework.cloud
            spring-cloud-starter-netflix-ribbon


            org.springframework.cloud
            spring-cloud-starter-netflix-hystrix


            org.springframework.boot
            spring-boot-starter-test
            test


      com.alibaba
      fastjson
      ${fastjson.version}


      io.springfox
      springfox-swagger2
      ${swagger.version}


      io.springfox
      springfox-swagger-ui
      ${swagger.version}


        org.apache.commons
        commons-lang3


        commons-collections
        commons-collections
        3.2.2


        com.github.pagehelper
        pagehelper
        ${pageHelper.version}


            org.mybatis.spring.boot
            mybatis-spring-boot-starter
            1.1.1


      mysql
      mysql-connector-java
      ${mysql.version}


            com.alibaba
            druid
            1.1.3


      org.springframework.boot
      spring-boot-starter-data-redis


            com.google.guava
            guava
            19.0


      io.jsonwebtoken
      jjwt
      0.9.0


    ${project.artifactId}


        org.springframework.boot
        spring-boot-maven-plugin

          -Dfile.encoding=UTF-8
          true


        org.jacoco
        jacoco-maven-plugin
        0.7.8


              prepare-agent
              report
一如既往的引入依赖。
配置 bootstrap 文件;
management:
  endpoint:
    restart:
      enabled: true
    health:
      enabled: true
    info:
      enabled: true

spring:
  application:
    name: provider-service

  cloud:
    nacos:
      discovery:
        server-addr: 127.0.0.1:8848
      config:
        server-addr: 127.0.0.1:8848
        refreshable-dataids: actuator.properties,log.properties

  http:
    encoding:
      charset: UTF-8
      enabled: true
      force: true
  mvc:
    throw-exception-if-no-handler-found: true
  main:
    allow-bean-definition-overriding: true #当遇到同样名称时,是否允许覆盖注册


logging:
  path: /data/${spring.application.name}/logs


cas-server-url: http://oauth-cas #http://localhost:2000#设置可以访问的地址


security:
  oauth2: #与cas对应的配置
    client:
      client-id: provider-service
      client-secret: provider-service-123
      user-authorization-uri: ${cas-server-url}/oauth/authorize #是授权码认证方式需要的
      access-token-uri: ${cas-server-url}/oauth/token #是密码模式需要用到的获取 token 的接口
    resource:
      loadBalanced: true
      #jwt: #jwt存储token时开启
        #key-uri: ${cas-server-url}/oauth/token_key
        #key-value: test_jwt_sign_key
      id: provider-service
      #指定用户信息地址
      user-info-uri: ${cas-server-url}/api/user #指定user info的URI,原生地址后缀为/auth/user
      prefer-token-info: false
      #token-info-uri:
    authorization:
      check-token-access: ${cas-server-url}/oauth/check_token #当此web服务端接收到来自UI客户端的请求后,需要拿着请求中的 token 到认证服务端做 token 验证,就是请求的这个接口
application 文件;
server:
  port: 2001
  undertow:
    accesslog:
      enabled: false
      pattern: combined
  servlet:
    session:
      timeout: PT120M
      cookie:
        name: PROVIDER-SERVICE-SESSIONID #防止Cookie冲突,冲突会导致登录验证不通过


client:
  http:
    request:
      connectTimeout: 8000
      readTimeout: 30000

mybatis:
  mapperLocations: classpath:mapper/*.xml
  typeAliasesPackage: com.damon.*.model


backend:
  ribbon:
    client:
      enabled: true
    ServerListRefreshInterval: 5000


ribbon:
  ConnectTimeout: 3000
  # 设置全局默认的ribbon的读超时
  ReadTimeout: 1000
  eager-load:
    enabled: true
    clients: oauth-cas,consumer-service
  MaxAutoRetries: 1 #对第一次请求的服务的重试次数
  MaxAutoRetriesNextServer: 1 #要重试的下一个服务的最大数量(不包括第一个服务)
  #listOfServers: localhost:5556,localhost:5557
  #ServerListRefreshInterval: 2000
  OkToRetryOnAllOperations: true
  NFLoadBalancerRuleClassName: com.netflix.loadbalancer.RoundRobinRule


hystrix.command.BackendCall.execution.isolation.thread.timeoutInMilliseconds: 5000
hystrix.threadpool.BackendCallThread.coreSize: 5
接下来启动类:
package com.damon;


import org.springframework.boot.SpringApplication;
import org.springframework.boot.autoconfigure.EnableAutoConfiguration;
import org.springframework.boot.autoconfigure.security.oauth2.client.EnableOAuth2Sso;
import org.springframework.cloud.client.discovery.EnableDiscoveryClient;
import org.springframework.context.annotation.ComponentScan;
import org.springframework.context.annotation.Configuration;


/**
 * @author Damon
 * @date 2020年1月13日 下午3:23:06
 *
 */


@Configuration
@EnableAutoConfiguration
@ComponentScan(basePackages = {"com.damon"})
@EnableDiscoveryClient
@EnableOAuth2Sso
public class ProviderApp {


    public static void main(String[] args) {
        SpringApplication.run(ProviderApp.class, args);
    }


}
注意:注解 @EnableDiscoveryClient、@EnableOAuth2Sso 都需要。
这时,同样需要配置 ResourceServerConfig、SecurityConfig。
如果需要数据库,可以加上:
package com.damon.config;


import java.util.Properties;


import javax.sql.DataSource;


import org.apache.ibatis.plugin.Interceptor;
import org.apache.ibatis.session.SqlSessionFactory;
import org.mybatis.spring.SqlSessionFactoryBean;
import org.mybatis.spring.SqlSessionTemplate;
import org.mybatis.spring.annotation.MapperScan;
import org.springframework.beans.factory.annotation.Autowired;
import org.springframework.beans.factory.annotation.Qualifier;
import org.springframework.context.annotation.Bean;
import org.springframework.context.annotation.Configuration;
import org.springframework.core.env.Environment;
import org.springframework.core.io.support.PathMatchingResourcePatternResolver;
import org.springframework.jdbc.datasource.DataSourceTransactionManager;
import org.springframework.stereotype.Component;
import org.springframework.transaction.annotation.EnableTransactionManagement;


import com.alibaba.druid.pool.DruidDataSourceFactory;
import com.github.pagehelper.PageHelper;


/**
*
*
* created by wangshoufa
* 2018年5月23日 下午7:39:37
*
*/
@Component
@Configuration
@EnableTransactionManagement
@MapperScan("com.damon.*.dao")
public class MybaitsConfig {


    @Autowired
    private EnvConfig envConfig;

    @Autowired
  private Environment env;


    @Bean(name = "dataSource")
    public DataSource getDataSource() throws Exception {
        Properties props = new Properties();
        props.put("driverClassName", envConfig.getJdbc_driverClassName());
        props.put("url", envConfig.getJdbc_url());
        props.put("username", envConfig.getJdbc_username());
        props.put("password", envConfig.getJdbc_password());
        return DruidDataSourceFactory.createDataSource(props);
    }


    @Bean
  public SqlSessionFactory sqlSessionFactory(@Qualifier("dataSource") DataSource dataSource) throws Exception {


    SqlSessionFactoryBean fb = new SqlSessionFactoryBean();
    // 指定数据源(这个必须有,否则报错)
    fb.setDataSource(dataSource);
    // 下边两句仅仅用于*.xml文件,如果整个持久层操作不需要使用到xml文件的话(只用注解就可以搞定),则不加
    fb.setTypeAliasesPackage(env.getProperty("mybatis.typeAliasesPackage"));// 指定基包
    fb.setMapperLocations(new PathMatchingResourcePatternResolver().getResources(env.getProperty("mybatis.mapperLocations")));// 指定xml文件位置


    // 分页插件
    PageHelper pageHelper = new PageHelper();
    Properties props = new Properties();
    // 启用合理化时,如果pageNum<1会查询第一页,如果pageNum>pages会查询最后一页
        //禁用合理化时,如果pageNum<1或pageNum>pages会返回空数据
    props.setProperty("reasonable", "true");
    //指定数据库
    props.setProperty("dialect", "mysql");
    //支持通过Mapper接口参数来传递分页参数
    props.setProperty("supportMethodsArguments", "true");
    //总是返回PageInfo类型,check检查返回类型是否为PageInfo,none返回Page
    props.setProperty("returnPageInfo", "check");
    props.setProperty("params", "count=countSql");
    pageHelper.setProperties(props);
    // 添加插件
    fb.setPlugins(new Interceptor[] { pageHelper });


    try {
      return fb.getObject();
    } catch (Exception e) {
            throw e;
    }
  }


    /**
     * 配置事务管理器
     * @param dataSource
     * @return
     * @throws Exception
     */
    @Bean
    public DataSourceTransactionManager transactionManager(DataSource dataSource) throws Exception {
        return new DataSourceTransactionManager(dataSource);
    }

    @Bean
    public SqlSessionTemplate sqlSessionTemplate(SqlSessionFactory sqlSessionFactory) {
        return new SqlSessionTemplate(sqlSessionFactory);
    }


}
接下来新写一个 controller 类:
package com.damon.user.controller;
import org.slf4j.Logger;
import org.slf4j.LoggerFactory;
import org.springframework.beans.factory.annotation.Autowired;
import org.springframework.security.access.prepost.PreAuthorize;
import org.springframework.security.core.Authentication;
import org.springframework.security.oauth2.provider.authentication.OAuth2AuthenticationDetails;
import org.springframework.web.bind.annotation.GetMapping;
import org.springframework.web.bind.annotation.RequestMapping;
import org.springframework.web.bind.annotation.RestController;
import com.damon.commons.Response;
import com.damon.user.service.UserService;
/**
*
*
* @author Damon
* @date 2020年1月13日 下午3:31:07
*
*/
@RestController
@RequestMapping("/api/user")
public class UserController {
private static final Logger logger = LoggerFactory.getLogger(UserController.class);
@Autowired
private UserService userService;
@GetMapping("/getCurrentUser")
@PreAuthorize("hasAuthority('admin')")
public Object getCurrentUser(Authentication authentication) {
logger.info("test password mode");
return authentication;
}
@PreAuthorize("hasAuthority('admin')")
@GetMapping("/auth/admin")
public Object adminAuth() {
logger.info("test password mode");
return "Has admin auth!";
}
@GetMapping(value = "/get")
@PreAuthorize("hasAuthority('admin')")
//@PreAuthorize("hasRole('admin')")//无效
public Object get(Authentication authentication){
//Authentication authentication = SecurityContextHolder.getContext().getAuthentication();
authentication.getCredentials();
OAuth2AuthenticationDetails details = (OAuth2AuthenticationDetails)authentication.getDetails();
String token = details.getTokenValue();
return token;
}
@GetMapping("/getUserInfo")
@PreAuthorize("hasAuthority('admin')")
public Response基本上一个代码就完成了。接下来测试一下:
认证:
curl -i -X POST -d "username=admin&password=123456&grant_type=password&client_id=provider-service&client_secret=provider-service-123" http://localhost:5555/oauth-cas/oauth/token


拿到token后:
curl -i -H "Accept: application/json" -H "Authorization:bearer f4a42baa-a24a-4342-a00b-32cb135afce9" -X GET http://localhost:5555/provider-service/api/user/getCurrentUser
这里用到了 5555 端口,这是一个网关服务,好吧,既然提到这个,我们接下来看网关吧,引入依赖:
  4.0.0


  com.damon
  alibaba-gateway
  0.0.1-SNAPSHOT
  jar


  alibaba-gateway
  http://maven.apache.org


        org.springframework.boot
        spring-boot-starter-parent
        2.1.8.RELEASE


    UTF-8
    UTF-8
    1.8
    2.6.1
    1.4.7
    4.1.6
    1.2.51

    Greenwich.SR3
    1.1.1.RELEASE
    5.1.46

    2.1.1.RELEASE
    0.9.0.RELEASE


        org.springframework.cloud
        spring-cloud-alibaba-dependencies
        ${springcloud.alibaba.version}
        pom
        import


        org.springframework.cloud
        spring-cloud-dependencies
        ${springcloud.version}
        pom
        import


            org.springframework.cloud
            spring-cloud-starter-gateway


            org.springframework.cloud
            spring-cloud-commons


            org.springframework.boot
            spring-boot-starter


          org.springframework.cloud
          spring-cloud-starter-alibaba-nacos-discovery


            org.springframework.cloud
            spring-cloud-starter-netflix-ribbon


            org.springframework.cloud
            spring-cloud-starter-netflix-hystrix


            org.springframework.boot
            spring-boot-starter-test
            test


      com.alibaba
      fastjson
      ${fastjson.version}


            com.google.guava
            guava
            19.0


    ${project.artifactId}


        org.springframework.boot
        spring-boot-maven-plugin

          -Dfile.encoding=UTF-8
          true


        org.jacoco
        jacoco-maven-plugin
        0.7.8


              prepare-agent
              report
同样利用 Nacos 来发现服务。
相关配置在 Spring Cloud Kubernetes之实战三网关Gateway 一文中有讲过,这里的注册配置改为:
spring:
  cloud:
    gateway:
      discovery:
        locator:
          enabled: true #并且我们并没有给每一个服务单独配置路由 而是使用了服务发现自动注册路由的方式
          lowerCaseServiceId: true

    nacos:
      discovery:
        server-addr: 127.0.0.1:8848
      config:
        server-addr: 127.0.0.1:8848
        refreshable-dataids: actuator.properties,log.properties
前面用的是 kubernetes。
好了,网关配置好后,启动在 Nacos dashboard可以看到该服务,表示注册服务成功。接下来就可以利用其来调用其他服务了。具体 curl 命令:
curl -i -H "Accept: application/json" -H "Authorization:bearer f4a42baa-a24a-4342-a00b-32cb135afce9" -X GET http://localhost:5555/consumer-service/api/order/getUserInfo
Ok,到此鉴权中心、服务提供者、服务消费者、服务的注册与发现、配置中心等功能已完成。如果需要完整源码,可以关注公众号,联系我,谢谢。
个人网站:技术分享博客
热文推荐
微服务自动化部署CI/CD
浅谈开发与研发之差异
面试被问 Spring cloud 上下文,可以这样回答
基于 Sentinel 作熔断 | 文末赠资料
基础设施服务k8s快速部署之HA篇
今天被问微服务,这几点,让面试官刮目相看
Spring cloud 之多种方式限流(实战)
Spring cloud 之熔断机制(实战)
面试被问finally 和 return,到底谁先执行?
Springcloud Oauth2 HA篇
Spring Cloud Kubernetes之实战一配置管理
Spring Cloud Kubernetes之实战二服务注册与发现
Spring Cloud Kubernetes之实战三网关Gateway
求关注
![]()
![]()
关注公众号,回复入群,获取更多惊喜!公众号(程序猿Damon)里回复 ES、Flink、Java、Kafka、MQ、ML、监控、大数据、k8s 等关键字可以查看更多关键字对应的文章。
如有收获,点个在看,谢谢![]()


