Install Kubernetes 1.26 on Centos 7.9(Contianerd as CRI )
目录
Node & Software & Docker Images Lists
Architecture Diagram
Install Diagram
System Configuration
Explain configs
Deploy Local Repository(OPTIONAL)& Download Yum RPM Packages
Install Container Runtime:Containerd(CIR)
Pull image in advance
Use Kubeadm Deploy Kubernetes
Deploy Calico As Pod Network Composed(Use Helm)
Add Worker Nodes to the Kubernetes Cluster
Steps for online:
Steps for offline:
Install Dashboard
Thinking
Reference link
There are many guides out there describing how to install Kubernetes on CentOS 7.9. Nevertheless, some steps might be unnecessary and some might be missing. This guide is based on offline installation method.Strictly follow the steps below, you can quickly deploy a Kubernetes 1.26 cluster environment.Besides that, I have a lot of notes to help you understand quickly.We use contianerd as container runtime into each node in the cluster.
Node & Software & Docker Images Lists
| HOSTNAME |
IP | NODE TYPE | CONFIG |
| master1 | 192.168.1.100 | master/yum repository | 2vCPU4G |
| node1 | 192.168.1.110 | worker | 2vCPu2G |
| node2 | 192.168.1.120 | worker | 2vCPu2G |
| Software Name | Version |
| kubeadm | v1.26.0 |
| kubectl | v1.26.0 |
| kubelet | v1.26.0 |
| containerd | v1.6.14 |
| ipvsadm | v1.27 |
| Image Type | Version |
| k8s | registry.aliyuncs.com/google_containers/coredns:v1.9.3 registry.aliyuncs.com/google_containers/etcd:3.5.6-0 registry.aliyuncs.com/google_containers/kube-apiserver:v1.26.0 registry.aliyuncs.com/google_containers/kube-controller-manager:v1.26.0 registry.aliyuncs.com/google_containers/kube-proxy:v1.26.0 registry.aliyuncs.com/google_containers/kube-scheduler:v1.26.0 registry.aliyuncs.com/google_containers/pause:3.9 |
| calico | docker.io/calico/apiserver:v3.24.5 docker.io/calico/cni:v3.24.5 docker.io/calico/kube-controllers:v3.24.5 docker.io/calico/node:v3.24.5 docker.io/calico/pod2daemon-flexvol:v3.24.5 docker.io/calico/typha:v3.24.5 quay.io/tigera/operator:v1.28.5 |
| dashboard | docker.io/kubernetesui/dashboard:v2.7.1 |
| System | Version |
kernel |
3.10.0-1160.el7.x86_64 |
| centos | CentOS Linux release 7.9.2009 (Core) |
Architecture Diagram
Install Diagram

K8s Components Diagram
The Control Plane is deployed on the Master Node, and the Worker Node Components are deployed on the Worker Node. We usually separate the Control Plane and Worker Nodes in the online environment for better management. But in small k8s cluster you can deploy both on one real server.

System Configuration
All Configuraion are here,excuting the following shells on each server.
cat >> /etc/hosts < /etc/selinux/config < /etc/modules-load.d/containerd.conf < /etc/sysctl.d/99-kubernetes-cri.conf
net.bridge.bridge-nf-call-ip6tables = 1
net.bridge.bridge-nf-call-iptables = 1
net.ipv4.ip_forward = 1
vm.swappiness = 0
EOF

sysctl -p /etc/sysctl.d/99-kubernetes-cri.conf

cat > /etc/sysconfig/modules/ipvs.modules <
Explain configs
- /etc/hosts :dns resolution,check you hostname correspond with /etc/hosts
- setenforce 0:The security mechanism of selinux is more complicated and may conflict with the traffic mechanism of k8s itself. It's official request
- swapoff -a:The reason for this, as I understand it, is that the kubelet isn’t designed to handle swap situations and the Kubernetes team aren’t planning to implement this as the goal is that pods should fit within the memory of the host.
- Open overlay & br_netfilter :K8s network architecture base on overlay.If the br_netfilter module is not loaded, it will not affect the communication between pods on different nodes, but it will affect the communication between pods in the same node through service
- net.ipv4.ip_forward = 1:The three-layer flat network in k8s involves the transfer of traffic between different network devices. For example, in the implementation of flannel, traffic will be transferred between the cni bridge, flannel.1 device, and local network card device. If closed, traffic cannot pass between multiple physical network devices
- net.bridge.bridge-nf-call-iptables = 1:If the sysctl
net.ipv4.ip_forwardis set to 0 (disabled) on a Linux host, then IPv4 packet forwarding is disabled.
As a result, on a Kubernetes nodes this will prevent Pod networking from functioning. - Open ipvs modules:Finally, for Kubernetes v1.10, feature gate
SupportIPVSProxyModeis set totrueby default. For Kubernetes v1.11, the feature gate is entirely removed.
Deploy Local Repository(OPTIONAL)& Download Yum RPM Packages
The reason we deploy local repository is Worker Node can't and shouldn't access extranet.Only the Master Node could do.(For personally is that buy a Elastic IP Address is expensive on HUAWEI Cloud,so i just buy one and give to the master)
If yours all node could access extranet,you can pass it.
#Confirm the version of kubeadm,we need to install v1.26.0
yum --showduplicates list kubeadm

cat > /etc/yum.repos.d/kubernetes.repo << EOF
[kubernetes]
name=Kubernetes
baseurl=https://mirrors.aliyun.com/kubernetes/yum/repos/kubernetes-el7-x86_64
enabled=1
gpgcheck=0
repo_gpgcheck=0
gpgkey=https://mirrors.aliyun.com/kubernetes/yum/doc/yum-key.gpg https://mirrors.aliyun.com/kubernetes/yum/doc/rpm-package-key.gpg
EOF

#Use -downloadonly download to /opt/repo
yum install --downloadonly --downloaddir=/opt/repo  kubelet-1.26.0 kubeadm-1.26.0  kubectl-1.26.0 ipset ipvsadm podman

#Deploy yum local repository(On Master Server)
yum -y install createrepo httpd
systemctl start httpd && systemctl enable httpd
createrepo --update /opt/repo
ln -s /opt/repo /var/www/html/

#check out
curl http://localhost/repo/

#Do these on Node Server and don't do on Master server
mkdir /etc/yum.repos.d/bak
mv /etc/yum.repos.d/*.repo /etc/yum.repos.d/bak
yum clean all
yum makecache
yum repolist

cat > /etc/yum.repos.d/local.repo << EOF
[local]
name=local
baseurl=http://192.168.1.100/repo/
enabled=1
gpgcheck=0
EOF
Do yum install to install all rpms,do on all nodes(master1、node1、node2)
yum -y install kubelet-1.26.0 kubeadm-1.26.0 kubectl-1.26.0 ipset ipvsadmYum rpm required
- kubelet-1.26.0 kubeadm-1.26.0 kubectl-1.26.0
- ipset ipvsadm
Install Container Runtime:Containerd(CIR)
wget https://github.com/containerd/containerd/releases/download/v1.6.14/cri-containerd-cni-1.6.14-linux-amd64.tar.gz
wget https://github.com/opencontainers/runc/releases/download/v1.1.7/runc.amd64
tar -zxvf cri-containerd-cni-1.6.14-linux-amd64.tar.gz -C /
chmod +x runc.amd64
rm -f /usr/local/sbin/runc
cp runc.amd64 /usr/local/sbin/runc

mkdir -p /etc/containerd
containerd config default > /etc/containerd/config.toml
sed -i "s/SystemdCgroup = false/SystemdCgroup = true/g" /etc/containerd/config.toml
sed -i "s/registry.k8s.io\/pause:3.6/registry.aliyuncs.com\/google_containers\/pause:3.9/g" /etc/containerd/config.toml

systemctl enable containerd --now
systemctl restart containerd

#Make sure that version information can be printed and no error messages are output:
[root@node1 ~]# crictl version
Version:  0.1.0
RuntimeName:  containerd
RuntimeVersion:  v1.6.14
RuntimeApiVersion:  v1
Pull image in advance
You could pull image in advance,use `ctr image pull` .And you can export from images to .tar files,then transfer to Worker Server.
#!/bin/bash
images=(
docker.io/calico/apiserver:v3.24.5
docker.io/calico/cni:v3.24.5
docker.io/calico/kube-controllers:v3.24.5
docker.io/calico/node:v3.24.5
docker.io/calico/pod2daemon-flexvol:v3.24.5
docker.io/calico/typha:v3.24.5
quay.io/tigera/operator:v1.28.5
registry.aliyuncs.com/google_containers/coredns:v1.9.3
registry.aliyuncs.com/google_containers/etcd:3.5.6-0
registry.aliyuncs.com/google_containers/kube-apiserver:v1.26.0
registry.aliyuncs.com/google_containers/kube-controller-manager:v1.26.0
registry.aliyuncs.com/google_containers/kube-proxy:v1.26.0
registry.aliyuncs.com/google_containers/kube-scheduler:v1.26.0
registry.aliyuncs.com/google_containers/pause:3.9
)

for imageName in ${images[@]}; do
ctr -n k8s.io image pull $imageName
done

for imageName in ${images[@]} ; do
key=`echo $imageName | awk -F '\\\/' '{print $3}' | awk -F ':' '{print $1}'`
ctr -n k8s.io image export $key.tar $imageName
done
Use Kubeadm Deploy Kubernetes
To use Kubeadm you should check the api version,kubeadm supports the following configuration types:
apiVersion: kubeadm.k8s.io/v1beta3
kind: InitConfiguration

apiVersion: kubeadm.k8s.io/v1beta3
kind: ClusterConfiguration

apiVersion: kubelet.config.k8s.io/v1beta1
kind: KubeletConfiguration

apiVersion: kubeproxy.config.k8s.io/v1alpha1
kind: KubeProxyConfiguration

apiVersion: kubeadm.k8s.io/v1beta3
kind: JoinConfiguration
This is a standard kubeadm.yaml. You should change these keys of advertiseAddress and imageRepository before using
And,you can excute `kubeadm config print init-defaults --component-configs KubeletConfiguration` to check default cluster info of kubeadm.
apiVersion: kubeadm.k8s.io/v1beta3
kind: InitConfiguration
localAPIEndpoint:
  advertiseAddress: 192.168.1.100
  bindPort: 6443
nodeRegistration:
  criSocket: unix:///run/containerd/containerd.sock
  taints:
  - effect: PreferNoSchedule
    key: node-role.kubernetes.io/master
---
apiVersion: kubeadm.k8s.io/v1beta3
kind: ClusterConfiguration
kubernetesVersion: 1.26.0
imageRepository: registry.aliyuncs.com/google_containers
networking:
  podSubnet: 10.244.0.0/16
---
apiVersion: kubelet.config.k8s.io/v1beta1
kind: KubeletConfiguration
cgroupDriver: systemd
failSwapOn: false
---
apiVersion: kubeproxy.config.k8s.io/v1alpha1
kind: KubeProxyConfiguration
mode: ipvs
If you want to speed up your deployment,you can pull image before kubeadm init.Do 'kubeadm config images pull --config kubeadm.yaml'
systemctl enable kubelet.service
kubeadm config images pull --config kubeadm.yaml
kubeadm config images list
kubeadm init --config kubeadm.yaml
The output of successful execution is as follows:
W0104 16:55:08.531622   29428 common.go:84] your configuration file uses a deprecated API spec: "kubeadm.k8s.io/v1beta2". Please use 'kubeadm config migrate --old-config old.yaml --new-config new.yaml', which will write the new, similar spec using a newer API version.
[init] Using Kubernetes version: v1.26.0
[preflight] Running pre-flight checks
[preflight] Pulling images required for setting up a Kubernetes cluster
[preflight] This might take a minute or two, depending on the speed of your internet connection
[preflight] You can also perform this action in beforehand using 'kubeadm config images pull'
[certs] Using certificateDir folder "/etc/kubernetes/pki"
[certs] Using existing ca certificate authority
[certs] Using existing apiserver certificate and key on disk
[certs] Using existing apiserver-kubelet-client certificate and key on disk
[certs] Using existing front-proxy-ca certificate authority
[certs] Using existing front-proxy-client certificate and key on disk
[certs] Using existing etcd/ca certificate authority
[certs] Using existing etcd/server certificate and key on disk
[certs] Using existing etcd/peer certificate and key on disk
[certs] Using existing etcd/healthcheck-client certificate and key on disk
[certs] Using existing apiserver-etcd-client certificate and key on disk
[certs] Using the existing "sa" key
[kubeconfig] Using kubeconfig folder "/etc/kubernetes"
[kubeconfig] Using existing kubeconfig file: "/etc/kubernetes/admin.conf"
[kubeconfig] Using existing kubeconfig file: "/etc/kubernetes/kubelet.conf"
[kubeconfig] Using existing kubeconfig file: "/etc/kubernetes/controller-manager.conf"
[kubeconfig] Using existing kubeconfig file: "/etc/kubernetes/scheduler.conf"
[kubelet-start] Writing kubelet environment file with flags to file "/var/lib/kubelet/kubeadm-flags.env"
[kubelet-start] Writing kubelet configuration to file "/var/lib/kubelet/config.yaml"
[kubelet-start] Starting the kubelet
[control-plane] Using manifest folder "/etc/kubernetes/manifests"
[control-plane] Creating static Pod manifest for "kube-apiserver"
[control-plane] Creating static Pod manifest for "kube-controller-manager"
[control-plane] Creating static Pod manifest for "kube-scheduler"
[etcd] Creating static Pod manifest for local etcd in "/etc/kubernetes/manifests"
[wait-control-plane] Waiting for the kubelet to boot up the control plane as static Pods from directory "/etc/kubernetes/manifests". This can take up to 4m0s
[apiclient] All control plane components are healthy after 9.503362 seconds
[upload-config] Storing the configuration used in ConfigMap "kubeadm-config" in the "kube-system" Namespace
[kubelet] Creating a ConfigMap "kubelet-config" in namespace kube-system with the configuration for the kubelets in the cluster
[upload-certs] Skipping phase. Please see --upload-certs
[mark-control-plane] Marking the node node1 as control-plane by adding the labels: [node-role.kubernetes.io/control-plane node.kubernetes.io/exclude-from-external-load-balancers]
[mark-control-plane] Marking the node node1 as control-plane by adding the taints [node-role.kubernetes.io/master:PreferNoSchedule]
[bootstrap-token] Using token: o4pn35.3zjs1udp6uw1eg8w
[bootstrap-token] Configuring bootstrap tokens, cluster-info ConfigMap, RBAC Roles
[bootstrap-token] Configured RBAC rules to allow Node Bootstrap tokens to get nodes
[bootstrap-token] Configured RBAC rules to allow Node Bootstrap tokens to post CSRs in order for nodes to get long term certificate credentials
[bootstrap-token] Configured RBAC rules to allow the csrapprover controller automatically approve CSRs from a Node Bootstrap Token
[bootstrap-token] Configured RBAC rules to allow certificate rotation for all node client certificates in the cluster
[bootstrap-token] Creating the "cluster-info" ConfigMap in the "kube-public" namespace
[kubelet-finalize] Updating "/etc/kubernetes/kubelet.conf" to point to a rotatable kubelet client certificate and key
[addons] Applied essential addon: CoreDNS
[addons] Applied essential addon: kube-proxy

Your Kubernetes control-plane has initialized successfully!

To start using your cluster, you need to run the following as a regular user:

  mkdir -p $HOME/.kube
  sudo cp -i /etc/kubernetes/admin.conf $HOME/.kube/config
  sudo chown $(id -u):$(id -g) $HOME/.kube/config

Alternatively, if you are the root user, you can run:

  export KUBECONFIG=/etc/kubernetes/admin.conf

You should now deploy a pod network to the cluster.
Run "kubectl apply -f [podnetwork].yaml" with one of the options listed at:
  https://kubernetes.io/docs/concepts/cluster-administration/addons/

Then you can join any number of worker nodes by running the following on each as root:

kubeadm join 192.168.1.100:6443 --token c2by9w.njbdb1zld9n0px9q --discovery-token-ca-cert-hash sha256:22d1f57a830da37fe1da95e1ccb3037f8e575be249b907d81013dfd4925934cc
Or you run below command if you'd forgotten token and run `kubeadm reset` on Worker Node before join.
kubeadm join 192.168.1.100:6443 --token 3yzfvq.vlk4wo2ixkf1jl5j --discovery-token-ca-cert-hash sha256:22d1f57a830da37fe1da95e1ccb3037f8e575be249b907d81013dfd4925934cc

export KUBECONFIG=/etc/kubernetes/kubelet.conf
Check cluster info
[root@master1 ~]# kubectl get cs
Warning: v1 ComponentStatus is deprecated in v1.19+
NAME                 STATUS    MESSAGE                         ERROR
controller-manager   Healthy   ok
scheduler            Healthy   ok
etcd-0               Healthy   {"health":"true","reason":""}

[root@master1 ~]# kubectl get pod -A
kube-system        coredns-5bbd96d687-zmstw                   1/1     Running   1 (37m ago)   12h
kube-system        coredns-5bbd96d687-zrxhv                   1/1     Running   1 (37m ago)   12h
kube-system        etcd-master1                               1/1     Running   1 (37m ago)   12h
kube-system        kube-apiserver-master1                     1/1     Running   1 (37m ago)   12h
kube-system        kube-controller-manager-master1            1/1     Running   1 (37m ago)   12h
kube-system        kube-proxy-vmp45                           1/1     Running   1 (37m ago)   12h
kube-system        kube-scheduler-master1                     1/1     Running   1 (37m ago)   12h
Then you need to execute the following(The following command configures how regular users use kubectl to access the cluster)
mkdir -p $HOME/.kube
sudo cp -i /etc/kubernetes/admin.conf $HOME/.kube/config
sudo chown $(id -u):$(id -g) $HOME/.kube/config
export KUBECONFIG=/etc/kubernetes/admin.conf
If kubeadm init failure,rm all configs and excute 'kubeadm reset' ,then use 'journalctl -xeu kubelet' for debug
kubeadm reset
rm -fr /etc/cni/net.d/*
ipvsadm --clear
rm -fr ~/.kube
journalctl -xeu kubelet
Deploy Calico As Pod Network Composed(Use Helm)
Before starting, you should know about Helm and tigera-operator.
Helm is the package manager of Kubernetes, we use Helm to install common components of Kubernetes,such as Calico.
Tigera-operator is goal to make installation, upgrades, and ongoing lifecycle management of Calico and Calico Enterprise as simple and reliable as possible.
So the steps of installation is: Helm -> tigera-operator -> calico components
wget https://get.helm.sh/helm-v3.10.3-linux-amd64.tar.gz
wget https://github.com/projectcalico/calico/releases/download/v3.24.5/tigera-operator-v3.24.5.tgz
tar -zxvf helm-v3.10.3-linux-amd64.tar.gz
chmod +x linux-amd64/helm
mv linux-amd64/helm  /usr/local/bin/
helm install calico tigera-operator-v3.24.5.tgz -n kube-system  --create-namespace

NAME: calico
LAST DEPLOYED: Wed May 17 17:19:02 2023
NAMESPACE: kube-system
STATUS: deployed
REVISION: 1
TEST SUITE: None
Then you can check it,waiting and confirm that all pods are in the Running state:
kubectl get pod -n kube-system | grep tigera-operator
tigera-operator-5fb55776df-wxbph   1/1     Running   0             5m10s

kubectl get pods -n calico-system
NAME                                       READY   STATUS    RESTARTS   AGE
calico-kube-controllers-68884f975d-5d7p9   1/1     Running   0          5m24s
calico-node-twbdh                          1/1     Running   0          5m24s
calico-typha-7b4bdd99c5-ssdn2              1/1     Running   0          5m24s

kubectl api-resources | grep calico
bgpconfigurations                              crd.projectcalico.org/v1               false        BGPConfiguration
bgppeers                                       crd.projectcalico.org/v1               false        BGPPeer
blockaffinities                                crd.projectcalico.org/v1               false        BlockAffinity
caliconodestatuses                             crd.projectcalico.org/v1               false        CalicoNodeStatus
clusterinformations                            crd.projectcalico.org/v1               false        ClusterInformation
felixconfigurations                            crd.projectcalico.org/v1               false        FelixConfiguration
globalnetworkpolicies                          crd.projectcalico.org/v1               false        GlobalNetworkPolicy
globalnetworksets                              crd.projectcalico.org/v1               false        GlobalNetworkSet
hostendpoints                                  crd.projectcalico.org/v1               false        HostEndpoint
ipamblocks                                     crd.projectcalico.org/v1               false        IPAMBlock
ipamconfigs                                    crd.projectcalico.org/v1               false        IPAMConfig
ipamhandles                                    crd.projectcalico.org/v1               false        IPAMHandle
ippools                                        crd.projectcalico.org/v1               false        IPPool
ipreservations                                 crd.projectcalico.org/v1               false        IPReservation
kubecontrollersconfigurations                  crd.projectcalico.org/v1               false        KubeControllersConfiguration
networkpolicies                                crd.projectcalico.org/v1               true         NetworkPolicy
networksets                                    crd.projectcalico.org/v1               true         NetworkSet
These api resources belong to calico, so it is not recommended to use kubectl to manage them. It is recommended to manage these api resources according to calicoctl. Install calicoctl as a plugin for kubectl:
curl -o kubectl-calico -O -L  "https://github.com/projectcalico/calicoctl/releases/download/v3.21.5/calicoctl-linux-amd64"
tar -zxvf helm-v3.10.3-linux-amd64.tar.gz
chmod +x linux-amd64/helm
mv linux-amd64/helm  /usr/local/bin/
mv calicoctl-linux-amd64 calicoctl
chmod +x calicoctl
mv calicoctl /usr/local/sbin/
Add Worker Nodes to the Kubernetes Cluster
Steps for online:
- Yum install kubectl、kubeadm、kubelet and other rpms
- Set System Configuration
- Install Containerd
- Kubeadm join
Steps for offline:
- Link to local rpm repository
- Yum install kubectl、kubeadm、kubelet and other rpms
- Set System Configuration
- Copy necessary files(Containerd 、calico、images)
- Install Containerd & Import Images
- Kubeadm join
In this guide,we try to steps for offline.
Link to local rpm repository & Yum Install rpms
Make sure to set your local rpm repository to the master server address
mkdir /etc/yum.repos.d/bak
mv /etc/yum.repos.d/*.repo /etc/yum.repos.d/bak
yum clean all
yum makecache
yum repolist

cat > /etc/yum.repos.d/local.repo << EOF
[local]
name=local
baseurl=http://192.168.1.100/repo/
enabled=1
gpgcheck=0
EOF
yum -y install kubelet-1.26.0 kubeadm-1.26.0  kubectl-1.26.0 ipset ipvsadm
Set System Configuration
Same system configuration guide as above
Copy necessary files
Here is everything you need:cri-containerd、runc、images.Run `scp -r * root@node1:/root` send to Worker Node.
[root@node1 ~]# ls
cri-containerd-cni-1.6.14-linux-amd64.tar.gz  images  runc.amd64
[root@node1 ~]# cd images/
[root@node1 images]# ls
apiserver.tar  coredns.tar  kube-apiserver.tar           kube-controllers.tar  kube-scheduler.tar  operator.tar  pod2daemon-flexvol.tar  typha.tar
cni.tar        etcd.tar     kube-controller-manager.tar  kube-proxy.tar        node.tar            pause.tar     save_images.sh
Then we talk about how containerd export images:
You can excute `ctl images list` or `crictl images list` to show images.
[root@master1 ~]# ctr images list
REF                                                                     TYPE                                                      DIGEST                                                                  SIZE      PLATFORMS                                          LABELS
docker.io/calico/cni:v3.24.5                                            application/vnd.docker.distribution.manifest.list.v2+json sha256:e282ea2914c806b5de2976330a17cfb5e6dcef47147bceb1432ca5c75fd46f50 83.4 MiB  linux/amd64,linux/arm/v7,linux/arm64,linux/ppc64le -
docker.io/calico/kube-controllers:v3.24.5                               application/vnd.docker.distribution.manifest.list.v2+json sha256:2b6acd7f677f76ffe12ecf3ea7df92eb9b1bdb07336d1ac2a54c7631fb753f7e 29.7 MiB  linux/amd64,linux/arm/v7,linux/arm64,linux/ppc64le -
docker.io/calico/node:v3.24.5                                           application/vnd.docker.distribution.manifest.list.v2+json sha256:5972ad2bcbdc668564d3e26960c9c513b2d7b05581c704747cf7c62ef3a405a6 77.8 MiB  linux/amd64,linux/arm/v7,linux/arm64,linux/ppc64le -
docker.io/calico/pod2daemon-flexvol:v3.24.5                             application/vnd.docker.distribution.manifest.list.v2+json sha256:392e392d0e11388bf55571155f915b1e8d080cb6824a7a09381537ad2f9b3c83 6.7 MiB   linux/amd64,linux/arm/v7,linux/arm64,linux/ppc64le -
docker.io/calico/typha:v3.24.5                                          application/vnd.docker.distribution.manifest.list.v2+json sha256:78780437eefce76d541b46d174373fd2160b84fb2f56d421df5a2e49f5207c80 27.1 MiB  linux/amd64,linux/arm64,linux/ppc64le              -
quay.io/tigera/operator:v1.28.5                                         application/vnd.docker.distribution.manifest.list.v2+json sha256:c01fc12b477e96facf29b770722fa37d292b9daec23ce14817fe77f7fc542307 20.1 MiB  linux/amd64,linux/arm64,linux/ppc64le              -
registry.aliyuncs.com/google_containers/coredns:v1.9.3                  application/vnd.docker.distribution.manifest.v2+json      sha256:df9ab8f5cf54a9ec2ad6c14dadb4bd6c37e4bc80d54f0110534c4237607d2ea2 46.7 MiB  linux/amd64                                        -
registry.aliyuncs.com/google_containers/etcd:3.5.6-0                    application/vnd.docker.distribution.manifest.v2+json      sha256:00e797072c1d464279130edbd58cbe862ff94972b82aeac5c0786b6278e21455 286.9 MiB linux/amd64                                        -
registry.aliyuncs.com/google_containers/kube-apiserver:v1.26.0          application/vnd.docker.distribution.manifest.v2+json      sha256:02610b70a7258f575f6ce0c48aca67dc723878f5956936b4d43ddc7a70203ed2 128.9 MiB linux/amd64                                        -
registry.aliyuncs.com/google_containers/kube-controller-manager:v1.26.0 application/vnd.docker.distribution.manifest.v2+json      sha256:8d7f2b0c25f2f1ea956455ee86ff49f213d8c4adebc5b8d85816147dce1f3e79 119.2 MiB linux/amd64                                        -
registry.aliyuncs.com/google_containers/kube-proxy:v1.26.0              application/vnd.docker.distribution.manifest.v2+json      sha256:548c5fa0b925b6c96eb67f51321956c0a1b924cde47e4733837b0c0072c4894a 64.1 MiB  linux/amd64                                        -
registry.aliyuncs.com/google_containers/kube-scheduler:v1.26.0          application/vnd.docker.distribution.manifest.v2+json      sha256:2b6c03ce8078e35779e7901530c88689ec11765deb76f4605e5947a14c9be10b 55.0 MiB  linux/amd64                                        -
registry.aliyuncs.com/google_containers/pause:3.9                       application/vnd.docker.distribution.manifest.v2+json      sha256:c22930374586e8889f175371d1057a5e7b9a28c3876b1226aa8cdf9ef715633b 729.9 KiB linux/amd64                                        -                 -

[root@master1 ~]# crictl image list
IMAGE                                                             TAG                 IMAGE ID            SIZE
docker.io/calico/apiserver                                        v3.24.5             3f47b57b4ce82       35.5MB
docker.io/calico/cni                                              v3.24.5             628dd70880410       87.5MB
docker.io/calico/kube-controllers                                 v3.24.5             38b76de417d5d       31.1MB
docker.io/calico/node                                             v3.24.5             54637cb36d4a1       81.6MB
docker.io/calico/pod2daemon-flexvol                               v3.24.5             2f8f95ac9ac40       7.07MB
docker.io/calico/typha                                            v3.24.5             b73c50bdf165f       28.4MB
quay.io/tigera/operator                                           v1.28.5             a179f8b7aa4db       21.1MB
registry.aliyuncs.com/google_containers/coredns                   v1.9.3              5185b96f0becf       14.8MB
registry.aliyuncs.com/google_containers/etcd                      3.5.6-0             fce326961ae2d       103MB
registry.aliyuncs.com/google_containers/kube-apiserver            v1.26.0             a31e1d84401e6       35.3MB
registry.aliyuncs.com/google_containers/kube-controller-manager   v1.26.0             5d7c5dfd3ba18       32.2MB
registry.aliyuncs.com/google_containers/kube-proxy                v1.26.0             556768f31eb1d       21.5MB
registry.aliyuncs.com/google_containers/kube-scheduler            v1.26.0             dafd8ad70b156       17.5MB
registry.aliyuncs.com/google_containers/pause                     3.9                 e6f1816883972       322kB
Then you can create a shell file `export.sh` like these:
#!/bin/bash
images=(
docker.io/calico/apiserver:v3.24.5
docker.io/calico/cni:v3.24.5
docker.io/calico/kube-controllers:v3.24.5
docker.io/calico/node:v3.24.5
docker.io/calico/pod2daemon-flexvol:v3.24.5
docker.io/calico/typha:v3.24.5
quay.io/tigera/operator:v1.28.5
registry.aliyuncs.com/google_containers/coredns:v1.9.3
registry.aliyuncs.com/google_containers/etcd:3.5.6-0
registry.aliyuncs.com/google_containers/kube-apiserver:v1.26.0
registry.aliyuncs.com/google_containers/kube-controller-manager:v1.26.0
registry.aliyuncs.com/google_containers/kube-proxy:v1.26.0
registry.aliyuncs.com/google_containers/kube-scheduler:v1.26.0
registry.aliyuncs.com/google_containers/pause:3.9
)

for imageName in ${images[@]} ; do
key=`echo $imageName | awk -F '\\\/' '{print $3}' | awk -F ':' '{print $1}'`
ctr -n k8s.io image export $key.tar $imageName
done
Next you should create a shell file `import.sh` like these:
Don't excute it now!We have to install containerd frist.
#!/bin/bash
images=(
docker.io/calico/apiserver:v3.24.5
docker.io/calico/cni:v3.24.5
docker.io/calico/kube-controllers:v3.24.5
docker.io/calico/node:v3.24.5
docker.io/calico/pod2daemon-flexvol:v3.24.5
docker.io/calico/typha:v3.24.5
quay.io/tigera/operator:v1.28.5
registry.aliyuncs.com/google_containers/coredns:v1.9.3
registry.aliyuncs.com/google_containers/etcd:3.5.6-0
registry.aliyuncs.com/google_containers/kube-apiserver:v1.26.0
registry.aliyuncs.com/google_containers/kube-controller-manager:v1.26.0
registry.aliyuncs.com/google_containers/kube-proxy:v1.26.0
registry.aliyuncs.com/google_containers/kube-scheduler:v1.26.0
registry.aliyuncs.com/google_containers/pause:3.9
)

for imageName in ${images[@]} ; do
key=`echo $imageName | awk -F '\\\/' '{print $3}' | awk -F ':' '{print $1}'`
ctr -n k8s.io image import $key.tar $imageName
done
Install Containerd & Import Images
To Install Containerd you could refer to the section of the article `Install container runtime Containerd(CIR)`
And now you can excute `import.sh`.
Excute `ctr -n k8s.io images list` to check it
Kubeadm join
If you can't find the log information saved during kubeadm init,you can run `kubeadm token create --print-join-command` on Master Server
[root@node1 images]# kubeadm join 192.168.1.100:6443 --token cif8yj.gl339hb5b401afsk --discovery-token-ca-cert-hash sha256:22d1f57a830da37fe1da95e1ccb3037f8e575be249b907d81013dfd4925934cc
[preflight] Running pre-flight checks
	[WARNING Service-Kubelet]: kubelet service is not enabled, please run 'systemctl enable kubelet.service'
[preflight] Reading configuration from the cluster...
[preflight] FYI: You can look at this config file with 'kubectl -n kube-system get cm kubeadm-config -o yaml'
[kubelet-start] Writing kubelet configuration to file "/var/lib/kubelet/config.yaml"
[kubelet-start] Writing kubelet environment file with flags to file "/var/lib/kubelet/kubeadm-flags.env"
[kubelet-start] Starting the kubelet
[kubelet-start] Waiting for the kubelet to perform the TLS Bootstrap...

This node has joined the cluster:
* Certificate signing request was sent to apiserver and a response was received.
* The Kubelet was informed of the new secure connection details.

Run 'kubectl get nodes' on the control-plane to see this node join the cluster.

[root@master1 ~]# kubectl get node
NAME      STATUS   ROLES           AGE   VERSION
master1   Ready    control-plane   12h   v1.26.0
node1     Ready              44s   v1.26.0
node2     Ready              57s   v1.26.0
Make user you can use `kubectl`,run following command
export KUBECONFIG=/etc/kubernetes/kubelet.confInstall Dashboard
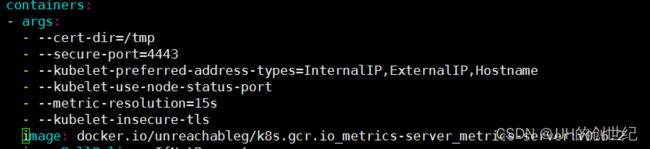
First, you can install metrics-server to display node or pod metrics information.Before apply componens.yaml,you need change the image url:docker.io/unreachableg/k8s.gcr.io_metrics-server_metrics-server:v0.6.2
And add a parameter under the configuration of the container-args:`--kubelet-insecure-tls`(In this introductory tutorial, we don't want to do complex operations)
wget https://github.com/kubernetes-sigs/metrics-server/releases/download/metrics-server-helm-chart-3.8.3/components.yaml
kubectl apply -f components.yaml

[root@master1 ~]# kubectl top node
NAME      CPU(cores)   CPU%   MEMORY(bytes)   MEMORY%
master1   206m         10%    2104Mi          57%
[root@master1 ~]# kubectl top pod -A
NAMESPACE              NAME                                        CPU(cores)   MEMORY(bytes)
calico-apiserver       calico-apiserver-ddb477bf8-dl9tc            4m           47Mi
calico-apiserver       calico-apiserver-ddb477bf8-wmjwh            3m           40Mi
calico-system          calico-kube-controllers-67df98bdc8-b9np6    2m           32Mi
calico-system          calico-node-72s7h                           21m          140Mi
calico-system          calico-typha-5cc5f699f9-zf9s9               2m           32Mi
ingress-nginx          ingress-nginx-controller-7c96f857f-d5gjl    1m           72Mi
kube-system            coredns-5bbd96d687-kzgh6                    2m           19Mi
kube-system            coredns-5bbd96d687-pc6vp                    1m           32Mi
kube-system            etcd-master1                                27m          75Mi
kube-system            kube-apiserver-master1                      54m          424Mi
kube-system            kube-controller-manager-master1             19m          77Mi
kube-system            kube-proxy-rrgk7                            8m           31Mi
kube-system            kube-scheduler-master1                      3m           32Mi
kube-system            metrics-server-5d466b9d66-6kzh8             4m           19Mi
kube-system            tigera-operator-7795f5d79b-vtfrv            2m           39Mi
kubernetes-dashboard   dashboard-metrics-scraper-7bc864c59-xkg4m   1m           8Mi
kubernetes-dashboard   kubernetes-dashboard-6c7ccbcf87-w6sr2       1m           11Mi
Then we download dashboard Yml file and change the type to NodePort and expose Port 30001.Updating file like below:
kind: Service
apiVersion: v1
metadata:
  labels:
    k8s-app: kubernetes-dashboard
  name: kubernetes-dashboard
  namespace: kubernetes-dashboard
spec:
  type: NodePort
  ports:
    - port: 443
      targetPort: 8443
      nodePort: 30001
  selector:
    k8s-app: kubernetes-dashboard
---
wget https://raw.githubusercontent.com/kubernetes/dashboard/v2.7.0/aio/deploy/recommended.yaml
kubectl apply -f recommended.yaml
kubectl get pod -n kubernetes-dashboard
NAME                                        READY   STATUS    RESTARTS   AGE
dashboard-metrics-scraper-7bc864c59-xkg4m   1/1     Running   0          53m
kubernetes-dashboard-6c7ccbcf87-w6sr2       1/1     Running   0          53m
Next, you should create a login user like `dashboard-admin` and bind this role to the clusterrole. You can do this by running `kubelet create` or kubectl apply`. And of course you need create token for this role.
kubectl create serviceaccount dashboard-admin -n kubernetes-dashboard
kubectl create clusterrolebinding dashboard-admin --clusterrole=cluster-admin --serviceaccount=kubernetes-dashboard:dashboard-admin
Or run `kubectl apply -f dashboard-admin.yaml`
apiVersion: v1
kind: ServiceAccount
metadata:
  labels:
    k8s-app: kubernetes-dashboard
  name: dashboard-admin
  namespace: kubernetes-dashboard
---
apiVersion: rbac.authorization.k8s.io/v1
kind: ClusterRoleBinding
metadata:
  name: dashboard-admin-cluster-role
roleRef:
  apiGroup: rbac.authorization.k8s.io
  kind: ClusterRole
  name: cluster-admin
subjects:
  - kind: ServiceAccount
    name: dashboard-admin
    namespace: kubernetes-dashboard
Then create a token for dashboard-admin .This method of logging in to the Dashboard is only temporary, and you need to recreate it when you shut down the k8s cluster or restart your real machine. Another way to log into Dashboard permanently is to create kubeconfig, you can try but without this guide we don't do it.
kubectl -n kubernetes-dashboard create token dashboard-admin --duration=87600h
eyJhbGciOiJSUzI1NiIsImtpZCI6Ill1OVVhMzJmaHQ5RGtwTmJvVFNUN0Vua0J3QTJtVElVRFBGbWhDWFQybmsifQ.eyJhdWQiOlsiaHR0cHM6Ly9rdWJlcm5ldGVzLmRlZmF1bHQuc3ZjLmNsdXN0ZXIubG9jYWwiXSwiZXhwIjoxNjg0NTE2OTA0LCJpYXQiOjE2ODQ1MTMzMDQsImlzcyI6Imh0dHBzOi8va3ViZXJuZXRlcy5kZWZhdWx0LnN2Yy5jbHVzdGVyLmxvY2FsIiwia3ViZXJuZXRlcy5pbyI6eyJuYW1lc3BhY2UiOiJrdWJlcm5ldGVzLWRhc2hib2FyZCIsInNlcnZpY2VhY2NvdW50Ijp7Im5hbWUiOiJkYXNoYm9hcmQtYWRtaW4iLCJ1aWQiOiIzZDlkYmViMi0wODg0LTRhMzItYjcyNC1lZjgxZDgxYzlhM2IifX0sIm5iZiI6MTY4NDUxMzMwNCwic3ViIjoic3lzdGVtOnNlcnZpY2VhY2NvdW50Omt1YmVybmV0ZXMtZGFzaGJvYXJkOmRhc2hib2FyZC1hZG1pbiJ9.Fzb9ACUYwN9QetZkl4nvGqqO5LhQxShY7QYFXamKUHSb80PFlVxf1_XmKikjOCxUkzIXSTVFbb-EDcYwV696YawSiE3MaFvtzpLfSqXc_3urqxCNZMkS0shpM3zJJ04t0xXkVxXyN9l32YFvo2Shy6y6NgG8Qs2mGXA4FO6VmFjwiztJ5Yb9npcfDefkGCWRgj1WQlZr_dbBQ_uff8dd0B5iFl9k6n2zwYksHw36OU1CPEeal7Fs7IINTUIIkJdhaFJswN9od3Yc4ltn8jte1pv9pdZ8fNTgUA4JIzooDQnmk8M8f3PwcxsL1jsYCkN_JpFaN8jImvAKjTKrl0xcCw
Open a browser and enter https://192.168.1.100:30100 . We haven't deployed TLS yet, so you should ignore the risk notice.Copy the token we had created and try login.
Congratulations, we made it, and in the dashboard you can get information about workloads, services, configurations, clusters, etc.

Thinking
- In this guide, we use `ctr export`, `ctr import`, `scr` and other commands to implement Worker Node to get images. A better way to do this is to use Harbor.
- We did not do TLS configuration,so there are some security risks in the k8s cluster
Reference link
Kubernetes Architecture Explained [Comprehensive Guide]
k8s的pod网络为什么要基于overlay网络?_k8s overlay_大叶子不小的博客-CSDN博客
【K8S】详解容器网络中的overlay、underlay_overlay和underlay_带你去吃小豆花的博客-CSDN博客
【博客514】k8s中net.ipv4.ip_forward=1的意义_lulu的云原生笔记的博客-CSDN博客
K8s为啥要启用bridge-nf-call-iptables内核参数?用案例给你讲明白_k8s bridge_终码一生的博客-CSDN博客 K8S集群常用内核参数调优参考 —— 筑梦之路_linux k8s 内核_筑梦之路的博客-CSDN博客
Pod network connectivity non-functional as a result of sysctl net.ipv4.ip_forward=0 | Support | SUSE
IPVS-Based In-Cluster Load Balancing Deep Dive | Kubernetes
Containerd-1.6.5 镜像命令空间和容器操作使用
calicoctl命令简介_styshoo的博客-CSDN博客
ctr和crictl对比和联系_crictl ctr_倾心之奇迹的博客-CSDN博客
kubeadm Configuration (v1beta3) | Kubernetes
GitHub - tigera/operator: Kubernetes operator for installing Calico and Calico Enterprise
Helm | Calico Documentation
containerd/hosts.md at release/1.6 · containerd/containerd · GitHub
Deploy and Access the Kubernetes Dashboard | Kubernetes