UnityShader_泳池实现
实现思路:
1、实现水面抖动:
①利用顶点偏移实现水面的上下波动;
②对Unity自带的CustomRenderTextureUpdateZone生成波纹贴图,并采样实现水纹
2、水面的实现:
①水面是由反射+折射产生的,这其中又涉及到涅斐尔效应,距离越远反射的比例越高,折射比例越低
②为让水面看起来更有层次感,我们让一定角度范围内的光线产生的水面颜色淡一些
③先在水下墙壁产生水纹的光线,然后折射回水面,因此从水面上也能看见水底
3、水底的波纹的实现(实现和水面波纹一样)
①对Unity自带的CustomRenderTextureUpdateZone生成波纹贴图,并采样实现水纹
场景拆分
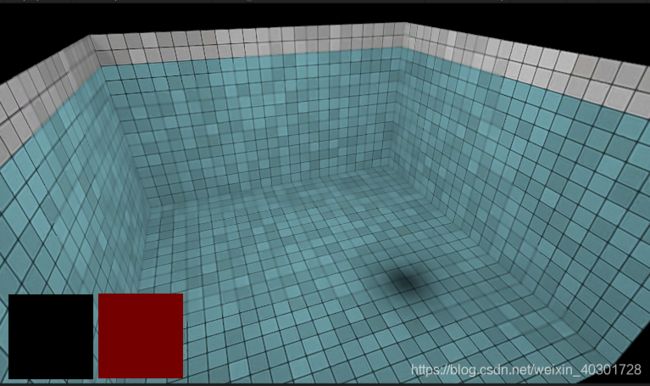
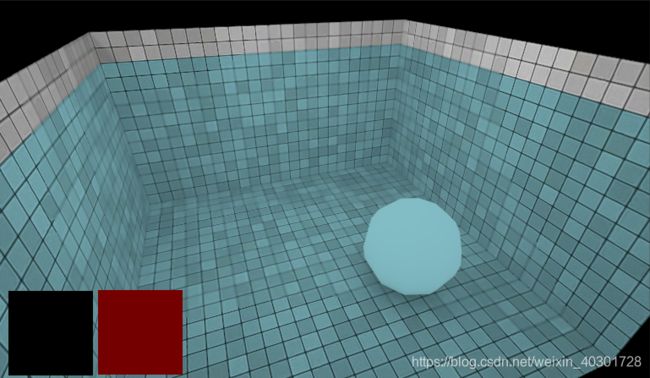
从另一个角度看实现,由四个物件组成,分别是水池、球体、水底的光(包括水底的光波纹)、水面
1、什么物件都没有
2、只拥有水池
3、拥有水池、球体
4、拥有水池、球体、水底光
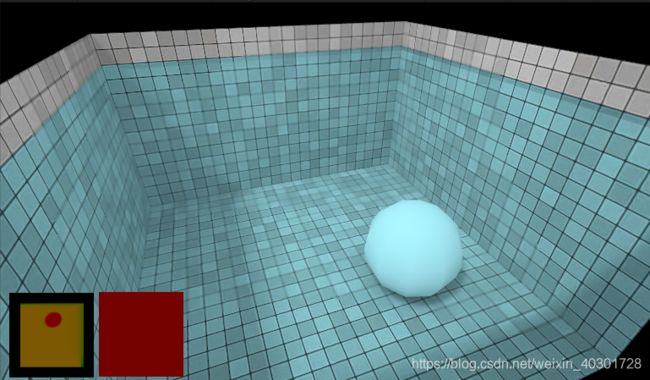
5、全部拥有
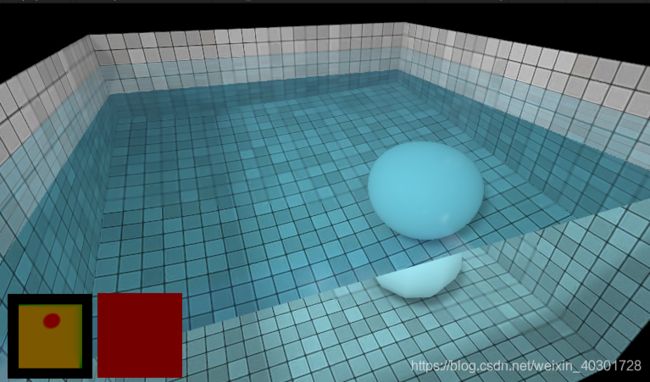
附上一张物件逐渐消失的gif
水面的最终效果如下图
一、将上述效果拆成多个小效果讲解
1、实现水面抖动
实现方式:水面本身只是一张平面,在下面两种效果叠加上产生所看到的波动水面
①通过在顶点着色器中改变其不同顶点的位置,实现方式与这篇实现方式类似
②水面上不同的点的法线是不一样的因此产生了水波纹的效果
首先来看①
下面两张gif 分别是 叠加了顶点波动和为叠加顶点波动的效果图,两者的效果几乎一致,看不出有什么变化
再从侧面观察,可以明显观察到添加了平面波动的,在边缘处有明显的上下水面波动,另一个则没有
主要代码如下:
      v2f vert (appdata v)
      {
        v2f o;
        //关于为什么这里用tex2Dlod,可以简单理解成因为tex2D是在片元着色器中使用的,
		//在顶点着色器中无法使用,tex2Dlod可以在顶点着色器中使用详见链 http://www.ufgame.com/9620.html
		//以及官方文档 https://docs.microsoft.com/en-us/windows/win32/direct3dhlsl/dx-graphics-hlsl-tex2dlod
        float4 info = tex2Dlod(water, float4(v.vertex.xy * 0.5 + 0.5, 0, 0));
        o.position = v.vertex.xzy;
        o.position.y += info.r;
        // 垂直方向上产生偏移,使水面真正的动起来
        o.vertex = UnityObjectToClipPos(o.position);
        return o;
      }
再来看②
也就是我们实际看到的水面上的波纹是如何产生的,查看gif左下角的两张纹理图,这两张纹理图使用Unity自带的 CustomRenderTextureUpdateZone 产生的,通过采样这张帖图产生不同的 法线,就可以利用不同的光照角度产生光圈,原理同法线贴图的原理一致,利用光照强度产生阴影因此纠产生波纹
关于CustomRenderTextureUpdateZone和CustomRenderTexture的简介可以查看该文章
	float2 coord = i.position.xz * 0.5 + 0.5;
	float4 info = tex2D(water, coord);
	float3 normal = float3(info.b, sqrt(1.0 - dot(info.ba, info.ba)), info.a);
2、水面的实现
实现方式:
①镜面反射,这里用的是天空盒子 实现方式与这篇实现方式类似
UnityShader_天空盒子中的反射、折射、聂菲尔效应
另外反射的实现还有下面这种方式
UnityShader_倒影,水波倒影(1)
UnityShader_倒影,水波倒影(2)
在上面可以明显地看到水的表面有云朵,就是反射的天空盒子
关键代码如下
float3 incomingRay = normalize(i.position - eye.xyz);
// 求反射光
float3 reflectedRay = reflect(incomingRay, normal);
color = texCUBE(sky, reflectedRay).rgb;
②水底折射,将水底景色的光经过水面折射产生在水面上
下面这篇也有讲到折射的原理
UnityShader_天空盒子中的反射、折射、菲涅尔效应
关键代码如下
float3 incomingRay = normalize(i.position - eye.xyz);
normal = -normal;
// 求折射光 折射率:水面的是 空气/水中折射率
float3 refractedRay = refract(incomingRay, normal, IOR_AIR / IOR_WATER);
③菲涅尔效应
UnityShader_天空盒子中的反射、折射、聂菲尔效应
关键代码如下
float3 incomingRay = normalize(i.position - eye.xyz);
float fresnel = lerp(0.25, 1.0, pow(1.0 - dot(normal, -incomingRay), 3.0));
fixed4 col = float4(lerp(refractedColor, reflectedColor, fresnel), 1.0);
3、水底的波纹的实现
这里的波纹的实现和水面上的波纹产生原理是不一样,此处虽然也是采样实现水纹,但利用的是函数的性质,
关键代码如下:
// 把ray投射到平面上
      float3 project(float3 origin, float3 ray, float3 refractedLight) {
        // intersectCube 计算出水池的最近端和最远端的距离
        float2 tcube = intersectCube(origin, ray, float3(-1.0, -poolHeight, -1.0), float3(1.0, 2.0, 1.0));
        // 将origin(也就是平面的顶点)按照ray(单位方向)的方向偏移  tcube.y(最远端)的距离,得到新的位置
        origin += ray * tcube.y;
        // underLightPos可以让照射在水里的光进行偏移
        float tplane = (-origin.y -underLightPos) / refractedLight.y;
        // 最后再把新顶点位置 按照 refractedLight的方向偏移 tplane个单位
        return origin + refractedLight * tplane;
      }

      v2f vert (appdata v)
      {
        v2f o;
        //  * 0.5 + 0.5 确保采集到的是一个圈
        float4 info = tex2Dlod(water, float4(v.vertex.xy * 0.5 + 0.5, 0, 0));
        info.zw *= 0.5;
        float3 normal = float3(info.z, sqrt(1.0 - dot(info.zw, info.zw)), info.w);

        /* 沿折射顶点光线投影顶点 */
        // 折射光(直射光和水面)
        float3 refractedLight = refract(-light, float3(0.0, 1.0, 0.0), IOR_AIR / IOR_WATER);
        // 折射光线(直射光和水波纹,因为波纹是上下波动的)
        float3 ray = refract(-light, normal, IOR_AIR / IOR_WATER);
        o.oldPos = project(v.vertex.xzy, refractedLight, refractedLight);
        o.newPos = project(v.vertex.xzy + float3(0.0, info.x, 0.0), ray, refractedLight);
        // 下面这两个就是将对象空间转到剪裁控件,之所以不用Unity自带的UnityObjectToClipPos(v.vertex)
        // 是因为这个水平面比较特殊
        o.vertex = float4(0.75 * (o.newPos.xz + refractedLight.xz / refractedLight.y), 0.0, 1.0);
        o.vertex.y *= -1;
        return o;
      }

      fixed4 frag (v2f i) : SV_Target
      {
        float oldArea = length(ddx(i.oldPos)) * length(ddy(i.oldPos));
        float newArea = length(ddx(i.newPos)) * length(ddy(i.newPos));
        fixed4 col = float4(oldArea / newArea * 0.2, 1.0, 0.0, 0.0);
        ......
      }
产生波纹最关键的代码就是在frag中的那三行,oldArea / newArea<0时 水面整体呈现暗色,oldArea / newArea>0时 水面逐渐变亮,因此可以做一个判断,就是上面的值可以使得亮波纹出的 oldArea / newArea值为一个较大的值, 亮波纹旁边的暗圈值oldArea / newArea较小,因此最终形成的就是gif种左下角那样的一张平面图
上述ddx 和ddy 实际就是求x,y的偏导数,关于偏导数的定义可以查看该文章:偏导数及其几何意义
二、CustomRenderTextureUpdateZone和CustomRenderTexture产生的水波纹图
    void Start()
    {
        texture.Initialize();
        // 屏幕点击产生波纹的碰撞体
        collider = GetComponent<Collider>();

        defaultZone = new CustomRenderTextureUpdateZone();
        defaultZone.needSwap = true;
        defaultZone.passIndex = 0; // integrate
        defaultZone.rotation = 0f;
        defaultZone.updateZoneCenter = new Vector2(0.5f, 0.5f);
        defaultZone.updateZoneSize = new Vector2(1f, 1f);

        normalZone = new CustomRenderTextureUpdateZone();
        normalZone.needSwap = true;
        normalZone.passIndex = 2; // update normals
        normalZone.rotation = 0f;
        normalZone.updateZoneCenter = new Vector2(0.5f, 0.5f);
        normalZone.updateZoneSize = new Vector2(1f, 1f);

        waveZone = new CustomRenderTextureUpdateZone();
        waveZone.needSwap = true;
        waveZone.passIndex = 1; // drop
        waveZone.rotation = 0f;
        // waveZone.updateZoneCenter = uv;
        waveZone.updateZoneSize = new Vector2(dropRadius, dropRadius);
    }
    void AddWave(Vector2 uv)
    {
        waveZone.updateZoneCenter = new Vector2(uv.x, 1f - uv.y);
		new CustomRenderTextureUpdateZone[] { defaultZone, defaultZone, waveZone, normalZone };
    }

    void UpdateZones()
    {
        if (collider == null) return;
        bool leftClick = Input.GetMouseButtonDown(0);
        bool rightClick = Input.GetMouseButtonDown(1);
        if (!leftClick && !rightClick) return;

        RaycastHit hit;
        var ray = Camera.main.ScreenPointToRay(Input.mousePosition);

        if (collider.Raycast(ray, out hit, 100f))
        {
            AddWave(hit.textureCoord2);
        }
    }
}

    void Update()
    {
        UpdateZones();
        if (zones != null)
        {
            // 设置更新区域的列表
            texture.SetUpdateZones(zones);
            zones = null;
        }
        else
        {
            texture.SetUpdateZones(new CustomRenderTextureUpdateZone[] { defaultZone, defaultZone, normalZone });
        }
    }
三、知识补充
如果有下载完整的源码
1、会看到代码中出现一些不同寻常的定义,下面给出资料
MaterialPropertyDrawer官方API,里面描述了各种显示
2、Shader_feature的作用详细可看之前写过的文章UnityShader_多重编译
shader_feature的好处:根据编译选项产生shader变体,避免分支语句导致的性能下降,主要用于材质选项上
unity打包时如果发现没有材质引用shader_feature产生的变体,不会打包该变体
完整代码已上传资源
泳池资源