- 优艾智合完成B系列超3亿元人民币融资 加速移动机器人规模化落地
weixin_51795422
科技财经人工智能
12月28日,工业移动机器人头部企业优艾智合宣布近期完成B系列融资,金额累计超3亿元人民币。两轮分别由方广资本、熙诚金睿领投,IDG、松禾、SIG、蓝驰、软银、HAX等新老股东跟投,均由泰合资本担任独家财务顾问。早期投资机构包括真格、常见、英诺、招商局伯乐、西交1896。作为国内领先的移动机器人及解决方案提供商,优艾智合基于工业物流及智能巡检运维两大业务,深耕于精密电子制造与能源行业中的生产运营场
- Linux 程序员必修课:命令、脚本、程序、进程与线程的全貌
内核程序员kevin
Linux程序员linux进程脚本线程
Linux程序员必修课:命令、脚本、程序、进程与线程的全貌1.Linux命令、脚本、程序、进程与线程的关系对比表概念定义存储形式执行方式是否需要进程是否支持并发示例命令用户输入给shell的指令,可以是内置命令或外部命令直接输入在shell中(无固定存储)由shell解析并执行仅外部命令需要取决于命令,如&可后台运行ls、cd、echo脚本一组命令的集合,存储在文件中,通常是shell脚本文本文件
- RabbitMQ复习
SJLoveIT
rabbitmq分布式
消息中间件的作用:(1)异步处理(2)应用解耦(3)流量削峰消息中间件的缺点:引入了新的东西,也就增加了新的故障点。比如消息中间件挂了,影响系统的可用性。两种框架:JMS和AMQP最大的区别是JMS是是javaapi,对跨平台的支持较差,但在纯java技术栈内首选。AMQP是跨平台的,序列化方式选json,不管你是java,php,C/C++,python,都能处理RabbitMQ实现的事AMQP
- k8s部署Nginx实现外部访问
leetrocken
nginxdockerk8syaml
k8s部署Nginx实现外部访问1.准备k8s环境[root@masteryaml]#kubectlgetnodes##两个节点均为Ready状态NAMESTATUSROLESAGEVERSIONmasterReadymaster3d8hv1.18.1nodeReady3d8hv1.18.12.检查主机上是否存在Nginx镜像[root@mastercicd]#dockerimages|grepn
- 深入解析微服务架构之Spring Cloud
一休哥助手
分布式系统架构微服务springcloud
目录微服务架构简介什么是微服务微服务的优势微服务的挑战SpringCloud概述SpringCloud简介SpringCloud的主要特性SpringCloud的模块划分SpringCloud核心组件详解SpringCloudNetflixSpringCloudConfigSpringCloudGatewaySpringCloudSleuthSpringCloudBus实战案例:构建一个简单的微服
- Grok-3和DeepSeek-R1,谁更胜一筹?
xiaocang668888
人工智能DeepSeek
关于Grok-3(xAI研发)与DeepSeek-R1(深度求索公司产品)的技术竞合,需从核心定位、场景穿透力和战略生态三重维度展开深度解构。两大模型代表两种技术演化路径的终极对决,其胜负取决于问题域的边界定义。一、基础能力的对称平衡能力维度Grok-3DeepSeek-R1参数量级混合专家模型(MoE)架构,总参量4.2T,活跃参数860B稠密神经架构,320B全激活参数知识保鲜动态知识注入(每
- 太翌氏计算机工程蓝图
太翌修仙笔录
deepseek太翌氏格物致知方法论人工智能重构量子计算
###**太翌氏计算机(TaiyiComputingSystem,TCS)工程蓝图**---####**一、核心架构总览***图示说明:三维分形拓扑结构,中心为「太上核心」,辐射出「灵宝量子通道」与「源始流形网络」*---####**
- 技术学习周刊第 3 期:Linux& 容器网络扫盲
艾希逐月
技术学习周刊学习linux网络
#IntroductiontoLinuxinterfacesforvirtualnetworking介绍了Linux中常用的网络概念,比如bridge网桥、veth对、VLAN&VXLAN、MACVLAN等,可以帮助自己对这些概念做一个快速的了解。#AnintroductiontoLinuxvirtualinterfaces:Tunnels算是上一篇文章的姊妹篇,主要介绍了Linux网络隧道相关的
- 边缘AI推理模型更新的秘密武器——Nginx的在线升级魔法
墨夶
Nginx学习资料1人工智能nginx运维
在当今快速发展的物联网和边缘计算时代,如何确保部署于边缘节点上的AI推理模型能够及时、高效地进行在线更新,成为了技术团队面临的一项重要挑战。传统的离线更新方式不仅耗时费力,而且可能导致服务中断,影响用户体验。为此,我们探索了一种基于Nginx的创新解决方案,它允许我们在不影响现有服务的前提下,平滑地完成模型版本迭代。本文将详细介绍这一过程,并分享具体实现方法及代码示例。1.Nginx简介及其优势N
- C C++最全Linux下TCP IP编程--TCP实战_linux tcp,2024最新网易C C++面试题目
2401_84973304
程序员c语言c++学习
网上学习资料一大堆,但如果学到的知识不成体系,遇到问题时只是浅尝辄止,不再深入研究,那么很难做到真正的技术提升。需要这份系统化的资料的朋友,可以添加戳这里获取一个人可以走的很快,但一群人才能走的更远!不论你是正从事IT行业的老鸟或是对IT行业感兴趣的新人,都欢迎加入我们的的圈子(技术交流、学习资源、职场吐槽、大厂内推、面试辅导),让我们一起学习成长!printf("====waitingforcl
- PyCharm极速安装指南:3分钟掌握Python开发环境
三流搬砖艺术家
pythonpythonpycharmide
目录为什么选择PyCharm?️准备工具步骤一:下载安装包⚙️步骤二:安装配置步骤三:首次启动配置步骤四:创建第一个项目效率优化技巧❗常见问题排雷社区版vs专业版为什么选择PyCharm?✅智能代码补全:媲美IDE的语法高亮与提示✅跨平台支持:Windows/macOS/Linux全兼容✅插件生态丰富:支持Web开发、数据分析等场景✅社区版免费:无功能限制,个人开发者首选️准备工具操作系统:Win
- 深入解析 Flutter兼容鸿蒙next全体生态的横竖屏适配与多屏协作兼容架构
淼学派对
flutter_鸿蒙nextflutterharmonyos华为架构windows
✅近期推荐:求职神器https://bbs.csdn.net/topics/619384540欢迎大家订阅系列专栏:flutter_鸿蒙next淼学派语录:只有不断的否认自己和肯定自己,才能走出弯曲不平的泥泞路,因为平坦的大路,太tm无趣了!目录写在前面1.Flutter的基本适配机制1.1响应式布局1.2逻辑像素2.横屏与竖屏的适配2.1方向感知2.2针对方向的布局优化3.多屏协作的实现3.1适
- DeepSeek 提示词:常见指令类型
伏羲栈
人工智能deepseek提示词人工智能
博主简介:CSDN博客专家,历代文学网(PC端可以访问:https://literature.sinhy.com/#/?__c=1000,移动端可微信小程序搜索“历代文学”)总架构师,15年工作经验,精通Java编程,高并发设计,Springboot和微服务,熟悉Linux,ESXI虚拟化以及云原生Docker和K8s,热衷于探索科技的边界,并将理论知识转化为实际应用。保持对新技术的好奇心,乐于分
- 解析Spring:架构与组件
党和人民
技术理论spring
DispatcherServletDispatcherServlet是SpringMVC的前端控制器,它负责接收所有的HTTP请求,并将请求分发到相应的处理器。它是整个SpringMVC框架的核心组件。初始化:DispatcherServlet在启动时会初始化一系列的组件,如HandlerMapping、HandlerAdapter、ViewResolver等。请求处理:接收到请求后,Dispat
- 在Ubuntu中,某个文件的右下角有一把锁的标志是什么意思?
昊虹AI笔记
Linux系统ubuntu
在Ubuntu中,某个文件的右下角有一把锁的标志是什么意思?在Ubuntu(或其他基于GNOME文件管理器的Linux发行版)中,文件或文件夹的右下角出现一把“锁”标志,通常表示你当前的用户没有该文件/文件夹的写入或访问权限。这通常是由于以下原因导致的:可能的原因文件/文件夹归属于root用户例如,如果你使用sudo创建或修改了某个文件,而当前用户不是root,那么你可能无法直接编辑或删除它。权限
- Linux 安装 mysql-5.7.31-linux-glibc2.12-x86_64.tar.gz
weixin_54252682
linuxmysql
一、删除原来安装的mysql1.查询并删除[root@localhost/]#find/-namemysqlfind:‘/run/user/1000/gvfs’:Permissiondenied/etc/selinux/targeted/active/modules/100/mysql/var/lib/mysql/usr/lib64/mysql/usr/share/mysql/usr/local/
- 教程 | 在 Linux 环境中安装 Docker(含2025最新镜像站加速,实测可用)
The god of big data
大Big数据Data容器那点事儿教程linuxdocker运维
在Linux环境中安装Docker的完整教程Docker是一种流行的容器化平台,可帮助用户快速构建、部署和运行应用程序。本教程将指导您如何在常见的Linux发行版(Ubuntu/Debian、CentOS/Fedora)上安装Docker。准备工作系统要求64位Linux系统(内核3.10或更高版本)。确保已安装curl或wget工具。以root用户或具有sudo权限的用户执行以下操作。卸载旧版本
- mysql安装glibc包_mysql-8.0.22-linux-glibc2.12-x86_64.tar.xz安装
区块链小王子
mysql安装glibc包
一、检查系统是否安装mysql或者mariadb,有的话先卸载查看系统是否安装了mysql:rpm-qa|grep-imysql1.1删除mysqlyum-yremovemysql*1.2删除mysql配置rm-rf/etc/my.cnf1.3删除文件rm-rf/var/lib/mysql查看系统是否安装了mariadbrpm-qa|grep-imariadb2.1.删除mariadbyum-yr
- linux mysql glibc 安装_Linux下安装mysql-8.0.21-linux-glibc2.12-x86_64.tar安装步骤
十三周
linuxmysqlglibc安装
1、解压mysqlmysql-8.0.21-linux-glibc2.12-x86_64.tar解压tar-xvfmysql-8.0.21-linux-glibc2.12-x86_64.tartar-xvJfmysql-8.0.21-linux-glibc2.12-x86_64.tarr.xz2、cp-rmysql-8.0.21-linux-glibc2.12-x86_64mysql8.21/3、
- 828华为云征文 | 使用Flexus云服务器X实例部署GLPI资产管理系统
降世神童
高级IT运维技术专栏华为云nginxmysql
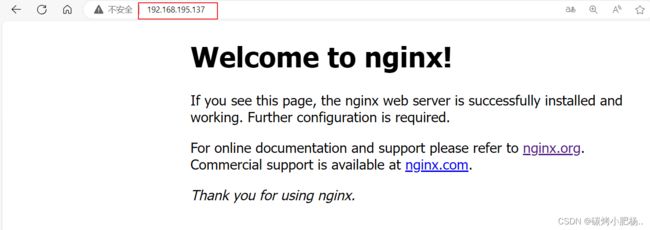
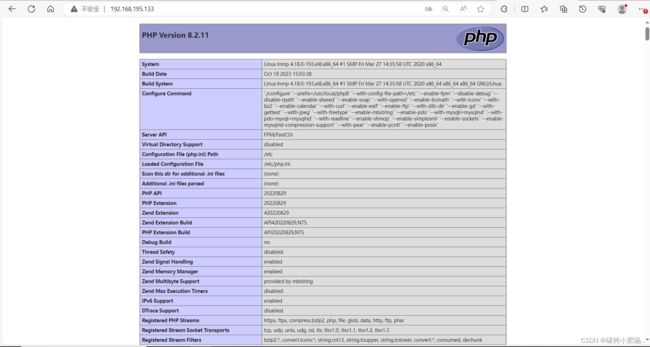
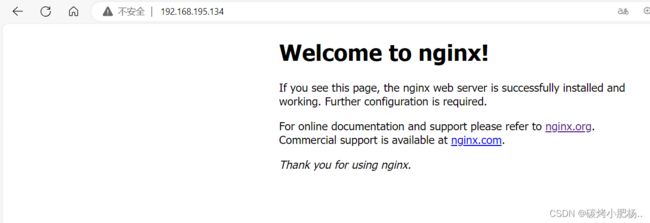
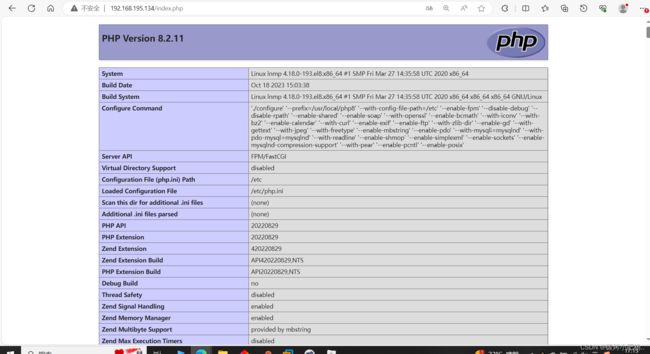
828华为云征文|使用Flexus云服务器X实例部署GLPI资产管理系统1.部署环境说明2.部署基础环境2.1.操作系统基本配置2.2.部署Nginx2.3.部署MySQL2.4.部署PHP3.部署GLPI资产管理系统1.部署环境说明 本次环境选择使用华为云Flexus云服务器X实例,因为其具有高性能的计算能力、灵活的资源配置、稳定的运行环境、高效的网络访问速度、服务的高可用性保证以及多层次的数
- 入门Apache Spark:基础知识和架构解析
juer_0001
javaspark
介绍ApacheSparkSpark的历史和背景ApacheSpark是一种快速、通用、可扩展的大数据处理引擎,最初由加州大学伯克利分校的AMPLab开发,于2010年首次推出。它最初设计用于支持分布式计算框架MapReduce的交互式查询,但逐渐发展成为一种更通用的数据处理引擎,能够处理数据流、批处理和机器学习等工作负载。Spark的特点和优势Spark是一种快速、通用、可扩展的大数据处理框架,
- 【Python爬虫(86)】元宇宙浪潮下,Python爬虫能否乘风破浪?
奔跑吧邓邓子
Python爬虫python爬虫开发语言元宇宙
【Python爬虫】专栏简介:本专栏是Python爬虫领域的集大成之作,共100章节。从Python基础语法、爬虫入门知识讲起,深入探讨反爬虫、多线程、分布式等进阶技术。以大量实例为支撑,覆盖网页、图片、音频等各类数据爬取,还涉及数据处理与分析。无论是新手小白还是进阶开发者,都能从中汲取知识,助力掌握爬虫核心技能,开拓技术视野。目录一、元宇宙:概念与架构的深度剖析1.1元宇宙概念溯源1.2元宇宙架
- pytorch与深度学习随记——AlexNet
黑色的山岗在沉睡
深度学习随记深度学习pytorch人工智能
AlexNet和LeNet的设计理念非常相似,但也存在显著差异:基本结构对比网络深度:AlexNet比LeNet-5要深得多,AlexNet由八层组成:五个卷积层、两个全连接隐藏层和一个全连接输出层。激活函数:AlexNet使用ReLU而不是sigmoid作为其激活函数,这有助于缓解梯度消失问题并加速训练过程。AlexNet架构的创新点局部响应归一化(LRN):AlexNet引入LRN层,可以创建
- Prometheus+Grafana监控
畅云客
Prometheus监控服务器运维linux运维开发grafanaprometheus云计算
目录资源列表一、基础环境关闭防火墙关闭selinux修改主机名节点添加主机名与IP对应关系二、部署Prometheus下载安装包解压创建用于运行Prometheus的组和用户创建Prometheus数据存储目录给Prometheus主目录赋用户Prometheus权限修改配置文件启动三、部署Grafana下载安装包创建grafana用户及数据存放目录修改配置文件启动四、node节点部署node_e
- 内网安装docker、docker-compose和harbor仓库 保姆级教程
passion_flower_
云计算
下图是用到的安装包安装docker1.关闭防火墙firewalld和selinxsystemctlstopfirewalldsed-i'/^SELINUX=/cSELINUX=disabled/'/etc/selinux/config配置systemctl启动dockervim/etc/systemd/system/docker.service[Unit]Description=DockerApp
- U-Boot 之六 详解 U-Boot 及 SPL 的链接脚本、启动流程
ZC·Shou
U-Bootu-bootSPL启动
基本环境 我这里的基本开发环境与运行环境在之前的博文U-Boot之二零基础编译、详解Image镜像及DTB文件已经详细介绍过了,这里就不在赘述。如果在构建时遇到错误,可以参考上面的博文来解决。示例代码 嵌入式Linux运行环境搭建系列博文涉及的所有源代码均放到了我个人的Gitee上:https://gitee.com/itexp/BOARD-STM32F769I-EVAL。这个仓库中包含了的所
- linux Ubuntu 通过mysql-5.7.26-linux-glibc2.12-x86_64.tar.gz安装mysql的步骤
冷冷清清中的风风火火
笔记linuxlinux下安装软件linuxubuntumysql
以下是在Ubuntu系统中通过mysql-5.7.26-linux-glibc2.12-x86_64.tar.gz手动安装MySQL5.7.26的详细步骤:一、准备工作1.安装依赖库sudoaptupdatesudoaptinstalllibaio1libnuma1libtinfo52.创建MySQL用户和组sudogroupaddmysqlsudouseradd-r-gmysql-s/bin/f
- 基于架构的软件设计(Architecture-Based Software Design, ABSD)
丰年稻香
软件架构设计架构
1.引言在现代软件开发中,软件架构不仅决定了系统的可扩展性、可维护性和性能,还直接影响开发效率和成本。基于架构的软件设计(ABSD)采用系统化的方法,通过架构驱动整个软件开发生命周期,以确保系统的稳定性、可扩展性和适应性。本篇博客将介绍基于架构的软件设计的基础、主要活动及其输入输出,帮助软件架构师更好地理解和应用架构设计。2.基于架构的软件设计的基础ABSD方法的核心在于如何从系统需求出发,建立合
- PHP Captcha实现图片验证码生成及识别(附源码)
mayday1102
PHPphpcaptcha
目录什么是Captchacomposer安装思路修改Captcha.php源码调用什么是CaptchaCAPTCHA(CompletelyAutomatedPublicTuringTesttoTellComputersandHumansApart)是区分计算机和人类的一种程序算法。composer安装composerrequirephp-quickorm/captcha思路由于原扩展基于sessi
- 一文搞懂最新NVIDIA GPU满血版和阉割版芯片:A100、H100、A800、H800、H20的差异
神马行空
GPU芯片AI编程gpu算力
目录一、NVIDIAGPU架构1、Blackwell架构2、Hopper架构3、Ampere架构4、Turing架构5、Volta架构二、A100、H100、A800、H800、H20差异对比1.A100:数据中心AI计算的奠基石2.H100:性能提升的算力王者3.A800&H800:中国市场专供版4.H20:新一代受限算力GPU一、NVIDIAGPU架构1、Blackwell架构Blackwel
- HttpClient 4.3与4.3版本以下版本比较
spjich
javahttpclient
网上利用java发送http请求的代码很多,一搜一大把,有的利用的是java.net.*下的HttpURLConnection,有的用httpclient,而且发送的代码也分门别类。今天我们主要来说的是利用httpclient发送请求。
httpclient又可分为
httpclient3.x
httpclient4.x到httpclient4.3以下
httpclient4.3
- Essential Studio Enterprise Edition 2015 v1新功能体验
Axiba
.net
概述:Essential Studio已全线升级至2015 v1版本了!新版本为JavaScript和ASP.NET MVC添加了新的文件资源管理器控件,还有其他一些控件功能升级,精彩不容错过,让我们一起来看看吧!
syncfusion公司是世界领先的Windows开发组件提供商,该公司正式对外发布Essential Studio Enterprise Edition 2015 v1版本。新版本
- [宇宙与天文]微波背景辐射值与地球温度
comsci
背景
宇宙这个庞大,无边无际的空间是否存在某种确定的,变化的温度呢?
如果宇宙微波背景辐射值是表示宇宙空间温度的参数之一,那么测量这些数值,并观测周围的恒星能量输出值,我们是否获得地球的长期气候变化的情况呢?
&nbs
- lvs-server
男人50
server
#!/bin/bash
#
# LVS script for VS/DR
#
#./etc/rc.d/init.d/functions
#
VIP=10.10.6.252
RIP1=10.10.6.101
RIP2=10.10.6.13
PORT=80
case $1 in
start)
/sbin/ifconfig eth2:0 $VIP broadca
- java的WebCollector爬虫框架
oloz
爬虫
WebCollector主页:
https://github.com/CrawlScript/WebCollector
下载:webcollector-版本号-bin.zip将解压后文件夹中的所有jar包添加到工程既可。
接下来看demo
package org.spider.myspider;
import cn.edu.hfut.dmic.webcollector.cra
- jQuery append 与 after 的区别
小猪猪08
1、after函数
定义和用法:
after() 方法在被选元素后插入指定的内容。
语法:
$(selector).after(content)
实例:
<html>
<head>
<script type="text/javascript" src="/jquery/jquery.js"></scr
- mysql知识充电
香水浓
mysql
索引
索引是在存储引擎中实现的,因此每种存储引擎的索引都不一定完全相同,并且每种存储引擎也不一定支持所有索引类型。
根据存储引擎定义每个表的最大索引数和最大索引长度。所有存储引擎支持每个表至少16个索引,总索引长度至少为256字节。
大多数存储引擎有更高的限制。MYSQL中索引的存储类型有两种:BTREE和HASH,具体和表的存储引擎相关;
MYISAM和InnoDB存储引擎
- 我的架构经验系列文章索引
agevs
架构
下面是一些个人架构上的总结,本来想只在公司内部进行共享的,因此内容写的口语化一点,也没什么图示,所有内容没有查任何资料是脑子里面的东西吐出来的因此可能会不准确不全,希望抛砖引玉,大家互相讨论。
要注意,我这些文章是一个总体的架构经验不针对具体的语言和平台,因此也不一定是适用所有的语言和平台的。
(内容是前几天写的,现附上索引)
前端架构 http://www.
- Android so lib库远程http下载和动态注册
aijuans
andorid
一、背景
在开发Android应用程序的实现,有时候需要引入第三方so lib库,但第三方so库比较大,例如开源第三方播放组件ffmpeg库, 如果直接打包的apk包里面, 整个应用程序会大很多.经过查阅资料和实验,发现通过远程下载so文件,然后再动态注册so文件时可行的。主要需要解决下载so文件存放位置以及文件读写权限问题。
二、主要
- linux中svn配置出错 conf/svnserve.conf:12: Option expected 解决方法
baalwolf
option
在客户端访问subversion版本库时出现这个错误:
svnserve.conf:12: Option expected
为什么会出现这个错误呢,就是因为subversion读取配置文件svnserve.conf时,无法识别有前置空格的配置文件,如### This file controls the configuration of the svnserve daemon, if you##
- MongoDB的连接池和连接管理
BigCat2013
mongodb
在关系型数据库中,我们总是需要关闭使用的数据库连接,不然大量的创建连接会导致资源的浪费甚至于数据库宕机。这篇文章主要想解释一下mongoDB的连接池以及连接管理机制,如果正对此有疑惑的朋友可以看一下。
通常我们习惯于new 一个connection并且通常在finally语句中调用connection的close()方法将其关闭。正巧,mongoDB中当我们new一个Mongo的时候,会发现它也
- AngularJS使用Socket.IO
bijian1013
JavaScriptAngularJSSocket.IO
目前,web应用普遍被要求是实时web应用,即服务端的数据更新之后,应用能立即更新。以前使用的技术(例如polling)存在一些局限性,而且有时我们需要在客户端打开一个socket,然后进行通信。
Socket.IO(http://socket.io/)是一个非常优秀的库,它可以帮你实
- [Maven学习笔记四]Maven依赖特性
bit1129
maven
三个模块
为了说明问题,以用户登陆小web应用为例。通常一个web应用分为三个模块,模型和数据持久化层user-core, 业务逻辑层user-service以及web展现层user-web,
user-service依赖于user-core
user-web依赖于user-core和user-service
依赖作用范围
Maven的dependency定义
- 【Akka一】Akka入门
bit1129
akka
什么是Akka
Message-Driven Runtime is the Foundation to Reactive Applications
In Akka, your business logic is driven through message-based communication patterns that are independent of physical locatio
- zabbix_api之perl语言写法
ronin47
zabbix_api之perl
zabbix_api网上比较多的写法是python或curl。上次我用java--http://bossr.iteye.com/blog/2195679,这次用perl。for example: #!/usr/bin/perl
use 5.010 ;
use strict ;
use warnings ;
use JSON :: RPC :: Client ;
use
- 比优衣库跟牛掰的视频流出了,兄弟连Linux运维工程师课堂实录,更加刺激,更加实在!
brotherlamp
linux运维工程师linux运维工程师教程linux运维工程师视频linux运维工程师资料linux运维工程师自学
比优衣库跟牛掰的视频流出了,兄弟连Linux运维工程师课堂实录,更加刺激,更加实在!
-----------------------------------------------------
兄弟连Linux运维工程师课堂实录-计算机基础-1-课程体系介绍1
链接:http://pan.baidu.com/s/1i3GQtGL 密码:bl65
兄弟连Lin
- bitmap求哈密顿距离-给定N(1<=N<=100000)个五维的点A(x1,x2,x3,x4,x5),求两个点X(x1,x2,x3,x4,x5)和Y(
bylijinnan
java
import java.util.Random;
/**
* 题目:
* 给定N(1<=N<=100000)个五维的点A(x1,x2,x3,x4,x5),求两个点X(x1,x2,x3,x4,x5)和Y(y1,y2,y3,y4,y5),
* 使得他们的哈密顿距离(d=|x1-y1| + |x2-y2| + |x3-y3| + |x4-y4| + |x5-y5|)最大
- map的三种遍历方法
chicony
map
package com.test;
import java.util.Collection;
import java.util.HashMap;
import java.util.Iterator;
import java.util.Map;
import java.util.Set;
public class TestMap {
public static v
- Linux安装mysql的一些坑
chenchao051
linux
1、mysql不建议在root用户下运行
2、出现服务启动不了,111错误,注意要用chown来赋予权限, 我在root用户下装的mysql,我就把usr/share/mysql/mysql.server复制到/etc/init.d/mysqld, (同时把my-huge.cnf复制/etc/my.cnf)
chown -R cc /etc/init.d/mysql
- Sublime Text 3 配置
daizj
配置Sublime Text
Sublime Text 3 配置解释(默认){// 设置主题文件“color_scheme”: “Packages/Color Scheme – Default/Monokai.tmTheme”,// 设置字体和大小“font_face”: “Consolas”,“font_size”: 12,// 字体选项:no_bold不显示粗体字,no_italic不显示斜体字,no_antialias和
- MySQL server has gone away 问题的解决方法
dcj3sjt126com
SQL Server
MySQL server has gone away 问题解决方法,需要的朋友可以参考下。
应用程序(比如PHP)长时间的执行批量的MYSQL语句。执行一个SQL,但SQL语句过大或者语句中含有BLOB或者longblob字段。比如,图片数据的处理。都容易引起MySQL server has gone away。 今天遇到类似的情景,MySQL只是冷冷的说:MySQL server h
- javascript/dom:固定居中效果
dcj3sjt126com
JavaScript
<!DOCTYPE html PUBLIC "-//W3C//DTD XHTML 1.0 Transitional//EN" "http://www.w3.org/TR/xhtml1/DTD/xhtml1-transitional.dtd">
<html xmlns="http://www.w3.org/1999/xhtml&
- 使用 Spring 2.5 注释驱动的 IoC 功能
e200702084
springbean配置管理IOCOffice
使用 Spring 2.5 注释驱动的 IoC 功能
developerWorks
文档选项
将打印机的版面设置成横向打印模式
打印本页
将此页作为电子邮件发送
将此页作为电子邮件发送
级别: 初级
陈 雄华 (
[email protected]), 技术总监, 宝宝淘网络科技有限公司
2008 年 2 月 28 日
&nb
- MongoDB常用操作命令
geeksun
mongodb
1. 基本操作
db.AddUser(username,password) 添加用户
db.auth(usrename,password) 设置数据库连接验证
db.cloneDataBase(fromhost)
- php写守护进程(Daemon)
hongtoushizi
PHP
转载自: http://blog.csdn.net/tengzhaorong/article/details/9764655
守护进程(Daemon)是运行在后台的一种特殊进程。它独立于控制终端并且周期性地执行某种任务或等待处理某些发生的事件。守护进程是一种很有用的进程。php也可以实现守护进程的功能。
1、基本概念
&nbs
- spring整合mybatis,关于注入Dao对象出错问题
jonsvien
DAOspringbeanmybatisprototype
今天在公司测试功能时发现一问题:
先进行代码说明:
1,controller配置了Scope="prototype"(表明每一次请求都是原子型)
@resource/@autowired service对象都可以(两种注解都可以)。
2,service 配置了Scope="prototype"(表明每一次请求都是原子型)
- 对象关系行为模式之标识映射
home198979
PHP架构企业应用对象关系标识映射
HELLO!架构
一、概念
identity Map:通过在映射中保存每个已经加载的对象,确保每个对象只加载一次,当要访问对象的时候,通过映射来查找它们。其实在数据源架构模式之数据映射器代码中有提及到标识映射,Mapper类的getFromMap方法就是实现标识映射的实现。
二、为什么要使用标识映射?
在数据源架构模式之数据映射器中
//c
- Linux下hosts文件详解
pda158
linux
1、主机名: 无论在局域网还是INTERNET上,每台主机都有一个IP地址,是为了区分此台主机和彼台主机,也就是说IP地址就是主机的门牌号。 公网:IP地址不方便记忆,所以又有了域名。域名只是在公网(INtERNET)中存在,每个域名都对应一个IP地址,但一个IP地址可有对应多个域名。 局域网:每台机器都有一个主机名,用于主机与主机之间的便于区分,就可以为每台机器设置主机
- nginx配置文件粗解
spjich
javanginx
#运行用户#user nobody;#启动进程,通常设置成和cpu的数量相等worker_processes 2;#全局错误日志及PID文件#error_log logs/error.log;#error_log logs/error.log notice;#error_log logs/error.log inf
- 数学函数
w54653520
java
public
class
S {
// 传入两个整数,进行比较,返回两个数中的最大值的方法。
public
int
get(
int
num1,
int
nu