postgresql + postgis 离线安装
操作系统
centos7
安装版本
postgresql版本 11.9
postgis版本 3.0.6
1. 开始安装
将以下安装包上传至/tools路径下
-
geos-3.8.1.tar.bz2
-
json-c-json-c-0.13.1-20180305.tar.gz.gz
-
proj-6.2.0.tar.gz
-
postgresql-11.9.tar.gz
-
postgis-3.0.6.tar.gz
相关安装包我已上传至我的百度网盘
链接:https://pan.baidu.com/s/10s6CuAXrK-09p5PHX1h7nQ
提取码:y46m
1.1 geos安装
tar -xvf geos-3.8.1.tar.bz2
#指定目录(tar xvfj geos-3.8.1.tar.bz2 -C /tools)
cd geos-3.8.1
./configure --prefix=/opt/geos-3.8.1
make
make install
ln -s /opt/geos-3.8.1 /tools/geos-3.8.1
1.2 json-c安装
tar -zxvf json-c-json-c-0.13.1-20180305.tar.gz.gz
#指定目录(tar xvfz json-c-json-c-0.13.1-20180305.tar.gz.gz -C /tools)
cd json-c-json-c-0.13.1-20180305
./configure --prefix=/opt/json-c-0.13.1
make
make install
ln -s /opt/json-c-0.13.1 /tools/json-c-json-c-0.13.1-20180305
1.3 proj安装
tar -zxvf proj-6.2.0.tar.gz
#指定目录(tar xvfz proj-6.2.0.tar.gz -C /tools)
cd proj-6.2.0
./configure --prefix=/opt/proj-6.2.0
make
make install
ln -s /opt/proj-6.2.0 /tools/proj-6.2.0
注:执行 ./configure --prefix=/opt/proj-6.2.0时若出现如下错误
安装sqlite3
#把sqlite-autoconf-3330000.tar.gz压缩包上传至/tools文件夹下
tar -zxf sqlite-autoconf-3330000.tar.gz
cd sqlite-autoconf-3330000
./configure && make && make install
安装完成之后把PKG_CONFIG_PATH添加到环境变量中
find / -name pkgconfig
我们将搜索结果添加到环境变量
vim /etc/profile
#在末尾添加
export PKG_CONFIG_PATH=/usr/lib64/pkgconfig:/usr/share/pkgconfig:/usr/local/lib/pkgconfig
#执行
source /etc/profile
#重新执行以下命令即可完成配置
./configure --prefix=/opt/proj-6.2.0
1.4 postgresql安装
tar -zxvf postgresql-11.9.tar.gz
#指定目录(tar xvfz postgresql-11.9.tar.gz -C /tools)
cd postgresql-11.9
#添加--with-openssl配置为后面数据库开启ssl传输做准备
./configure --prefix=/opt/postgresql-11.9 --with-openssl
make
make install
ln -s /opt/postgresql-11.9 /tools/postgresql-11.9
1.5 postgis安装
tar -zxvf postgis-3.0.6.tar.gz
#指定目录(tar xvfz postgis-3.0.1.tar.gz -C /tools)
cd postgis-3.0.1
./configure --prefix=/opt/postgis-3.0.6 --with-pgconfig=/opt/postgresql-11.9/bin/pg_config  --with-projdir=/opt/proj-6.2.0 --with-geosconfig=/opt/geos-3.8.1/bin/geos-config  --with-jsondir=/opt/json-c-0.13.1 --without-raster
make
make install
ln -s /opt/postgis-3.0.6 /tools/postgis-3.0.6
注:执行./configure命令时若出现如下错误
将libxml2-2.9.1-6.el7.4.x86_64.rpm和libxml2-devel-2.9.1-6.el7.4.x86_64.rpm文件上传至/tools路径下
#来到/tools目录下执行以下命令
rpm -ivh libxml2-2.9.1-6.el7.4.x86_64.rpm --nodeps --force
rpm -ivh libxml2-devel-2.9.1-6.el7.4.x86_64.rpm --nodeps --force
2. 配置环境
2.1 环境配置
创建用户postgres,默认已经创建,如是可跳过
groupadd postgres

useradd -g postgres postgres
配置postgres用户的环境变量
su - postgres
vi .bash_profile
添加以下内容
export PATH
PGDATA=/data/postgres
PGSQL_HOME=/opt/postgresql-11.9
JSONC_CFLAGS=/opt/json-c-0.13.1/include/json-c
JSONC_LIBS=/opt/json-c-0.13.1/lib
PROJ_HOME=/opt/proj-6.2.0
GEOS_HOME=/opt/geos-3.8.1
JSONC_HOME=/opt/json-c-0.13.1
LD_LIBRARY_PATH=$PGSQL_HOME/lib:$PROJ_HOME/lib:$GEOS_HOME/lib:$JSONC_HOME/lib
PATH=$PGSQL_HOME/bin:$PATH
export PATH PGDATA PGSQL_HOME JSONC_CFLAGS JSONC_LIBS  PROJ_HOME GEOS_HOME LD_LIBRARY_PATH
使配置生效
source ~/.bash_profile
exit退出当前postgres用户,登录管理员账号
授予postgres对data目录的权限
su - root
mkdir /data/postgres
chown -R postgres:postgres /opt/proj-6.2.0
chown -R postgres:postgres /opt/postgresql-11.9
chown -R postgres:postgres /opt/json-c-0.13.1
chown -R postgres:postgres /opt/geos-3.8.1
chown -R postgres:postgres /data/postgres
重新登录posgres用户,环境变量生效
su - postgres
PostgreSQL 数据库初始化及配置
cd /opt/postgresql-11.9/bin
initdb -D /data/postgres
Postgis安装配置
#启动数据库
pg_ctl -D /data/postgres -l /data/postgres/pg.log start
#创建名为postgis的数据库
createdb postgis
#一般这一步不需要
createlang plpgsql postgis
#进入该路径下
cd /tools/postgis-3.0.6/postgis
#执行该命令查看是否有文件缺失
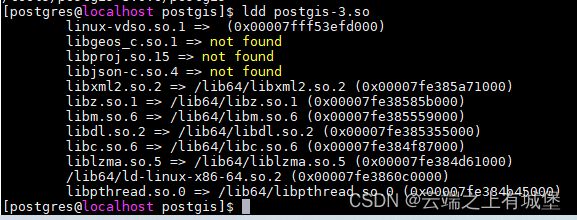
ldd postgis-3.so
若执行ldd postgis-3.so后发现有文件not found
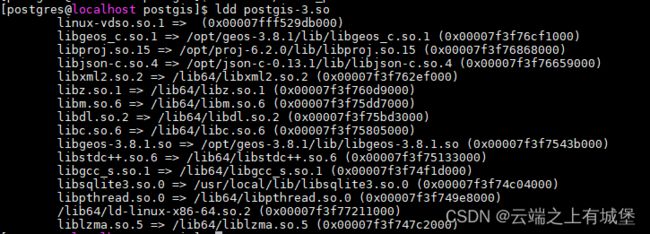
排查是否没在bash_profile添加对应的配置到LD_LIBRARY_PATH,以及配置是否生效
以下为配置正常示例
2.2 设置允许远程连接
(1) 修改/data/postgres/postgresql.conf文件,取消 listen_addresses 的注释,将参数值改为“*”
vi /data/postgres/postgresql.conf
#------------------------------------------------------------------------------
# CONNECTIONS AND AUTHENTICATION
#------------------------------------------------------------------------------

# - Connection Settings -

listen_addresses = '*'                  # what IP address(es) to listen on;
                                        # comma-separated list of addresses;
                                        # defaults to 'localhost'; use '*' for all
                                        # (change requires restart)
#port = 5432                            # (change requires restart)
max_connections = 100                   # (change requires restart)
#superuser_reserved_connections = 3     # (change requires restart)
#unix_socket_directories = '/var/run/postgresql, /tmp'  # comma-separated list of directories
                                        # (change requires restart)
#unix_socket_group = ''                 # (change requires restart)
#unix_socket_permissions = 0777         # begin with 0 to use octal notation
                                        # (change requires restart)
#bonjour = off                          # advertise server via Bonjour
                                        # (change requires restart)
#bonjour_name = ''                      # defaults to the computer name
                                        # (change requires restart)
(2) 修改/var/lib/pgsql/10/data/pg_hba.conf文件,增加以下斜体内容到 #IPv4 local connections
host all all 0.0.0.0/0 md5
进入pg_hba.conf文件
vi /data/postgres/pg_hba.conf
修改,即
# TYPE  DATABASE        USER            ADDRESS                 METHOD
# "local" is for Unix domain socket connections only
local   all             all                                     peer
# IPv4 local connections:
host    all             all             127.0.0.1/32            ident
host    all             all             0.0.0.0/0               md5
# IPv6 local connections:
host    all             all             ::1/128                 ident
# Allow replication connections from localhost, by a user with the
# replication privilege.
local   replication     all                                     peer
host    replication     all             127.0.0.1/32            ident
host    replication     all             ::1/128                 ident
(3) 重启postgresql服务
pg_ctl -D /data/postgres -l /data/postgres/pg.log restart
(4) 修改 postgres 用户的密码
[postgres@localhost postgis]$ psql
psql (11.9)
Type "help" for help.

postgres=# alter user postgres with encrypted password '******';
ALTER ROLE
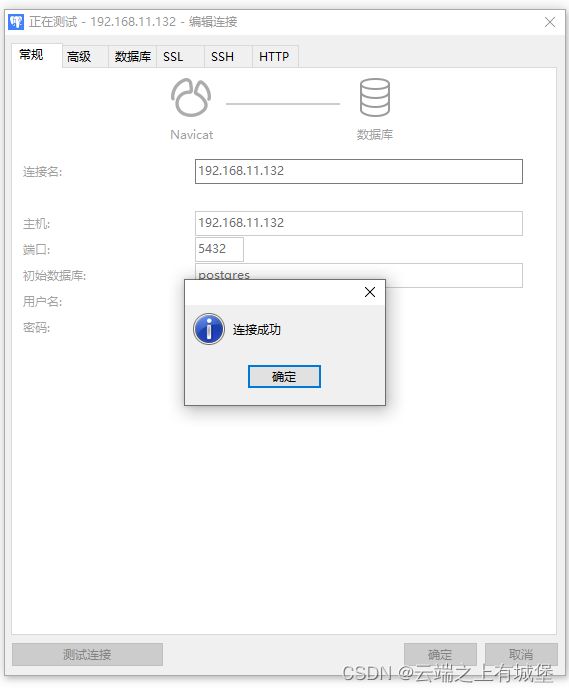
(5) 使用数据库连接工具(Navicat)测试连接
2.3 查看进程的端口情况
ps aux | grep postgres #查看关于“postgres”进程的快照
netstat -npl | grep postgres  #查看postgresql的配置状态
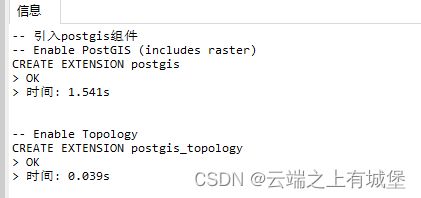
2.4 添加postgis扩展
选定数据库添加postgis扩展
-- Enable PostGIS (includes raster)
CREATE EXTENSION postgis;
-- Enable Topology
CREATE EXTENSION postgis_topology;
3. postgresql日志审计
3.1 开启日志审计
postgresql开启日志审计需要安装pgaudit插件,pgaudit插件不是postgresql自带的,需另外下载安装
github地址 https://github.com/pgaudit/pgaudit
我下载的是pgaudit-1.3.3.tar.gz版本,将pgaudit-1.3.3.tar.gz上传至/tools路径下
#解压
tar -zxvf pgaudit-1.3.3.tar.gz
#将解压后的pgaudit-1.3.3移动到postgresql源码目录下
mv /tools/pgaudit-1.3.3 /tools/postgresql-11.9/contrib
#编译安装
cd /tools/postgresql-11.9/contrib/pgaudit-1.3.3
make install USE_PGXS=1 PG_CONFIG=/opt/postgresql-11.9/bin/pg_config
修改postgresql.conf配置文件,添加shared_preload_libraries参数配置,否则会出现错误
shared_preload_libraries = 'pgaudit'
重新启动服务
pg_ctl -D /data/postgres -l /data/postgres/pg.log restart
添加审计模块扩展
create extension pgaudit;
3.2 pgaudit的配置
查看pgaudit的配置信息
select * from pg_settings where name like '%audit%';
配置参数解释
pgaudit.log
可能的值是:
- READ: SELECT and COPY when the source is a relation or a query.
- WRITE: INSERT, UPDATE, DELETE, TRUNCATE, and COPY when the destination is a relation.
- FUNCTION: Function calls and DO blocks.
- ROLE: Statements related to roles and privileges: GRANT, REVOKE, CREATE/ALTER/DROP ROLE.
- DDL: All DDL that is not included in the ROLE class.
- MISC: Miscellaneous commands, e.g. DISCARD, FETCH, CHECKPOINT, VACUUM.
pg_audit是记录在标准postgresql日志中的,该参数控制审计的类型,可以使用逗号分隔的列表来提供多个类,并且类可以通过使用一种来减少类来减少
默认值为none
-- eg.设置审计类型
set pgaudit.log = read,ddl,write
pgaudit.log_catalog
指定在语句中的所有关系都在pg_catalog中的情况下,应该启用会话日志记录。禁用此设置将减少日志中的噪音,例如psql和PgAdmin等工具,这些工具对目录进行了大量查询。默认值on
pgaudit.log_level
指定用于日志条目的日志级别 (see Message Severity Levels for valid levels) ,但注意ERROR、FATAL和PANIC。此设置用于进行回归测试,也可能对最终用户用于测试或其他目的使用。 默认值为log
| 级别 | 描述 |
|---|---|
| DEBUG1 … DEBUG5 | 调试 |
| INFO | 信息 |
| NOTICE | 通知信息 |
| WARNING | 告警信息 |
| ERROR | 错误信息 |
| LOG | 日志信息 |
| FATAL | 严重错误信息 |
| PANIC | 会话中止的错误信息 |
pgaudit.log_parameter
指定审核日志记录应该包含与语句传递的参数。当参数出现时,在语句文本之后,将以CSV格式包含。 默认值off
pgaudit.log_relation
指定会话审核日志记录是否应该为SELECT或DML语句中引用的每个关系(表、视图等)创建单独的日志项。这是在不使用对象审核日志记录的情况下进行穷举日志记录的一种有用的捷径。 默认值已关闭
pgaudit.logstatementonce
指定日志记录是否包含语句、文本和参数,其中包含statement/substatement组合的第一个日志条目,或与每个条目一起。禁用此设置将导致更少的日志记录,但可能会使确定生成日志项的语句变得更困难,尽管statement/substatement对和进程id应该足以标识使用上一个条目记录的语句文本。 默认值off
pgaudit.log_client
客户端打印审计日志,默认是关闭的
set pgaudit.log_client = on;
pgaudit.role
指定要用于对象审核日志记录的主角色。可以通过将多个审计角色授予主角色来定义多个审计角色。这就允许多个组负责审计日志记录的不同方面。 默认是全部监控
--设置需要审计的用户
set pgaudit.role = 'postgres,zhangsan,lisi';
4. 数据库登录失败锁定
4.1 安装和配置
postgresql数据库没有自带处理用户登录失败锁定的功能,需要安装session_exec插件
github地址 https://github.com/okbob/session_exec
将session_exec-master.zip上传至/tools路径下
#解压并编译安装
unzip session_exec-master.zip
cd session_exec-master/
make pg_config=/opt/postgresql-11.9/bin/pg_config
make pg_config=/opt/postgresql-11.9/bin/pg_config install
注:若出现找不到pg_config命令未找到的错误,则在Makefile中,指定pg_config位置
PG_CONFIG=/opt/postgresql-11.9/bin/pg_config
配置postgresql.conf
logging_collector=on   # 开启
log_destination='csvlog'  # 开启csv日志
log_directory='log'  # 输出日志的路径
session_preload_libraries='session_exec'
session_exec.login_name='login' #添加
session_preload_libraries参数:一个或者多个要在连接开始时预载入的共享库。
shared_preload_libraries参数:一个或者多个要在服务器启动时预载入的共享库。
重启数据库服务
pg_ctl -D /data/postgres -l /data/postgres/pg.log restart
4.2 创建登录验证函数
创建t_login 用户登录表用于存储提取自数据库日志中登录失败的信息
CREATE TABLE public.t_login (
        login_time timestamp with time zone NOT NULL,
        user_name text NOT NULL,
        flag int4 NULL DEFAULT 0
);
CREATE INDEX t_login_time_idx ON public.t_login (login_time);
CREATE INDEX t_login_user_name_flag_idx ON public.t_login (user_name,flag);
COMMENT ON TABLE public.t_login IS '用户登录记录表';

-- Column comments
COMMENT ON COLUMN public.t_login.login_time IS '登录时间';
COMMENT ON COLUMN public.t_login.user_name IS '登录用户';
COMMENT ON COLUMN public.t_login.flag IS '过期表示:0未过期,1过期';
使用file_fdw外部表记录数据库日志信息
file_fdw如果未配置过,参见下面步骤
$ cd /opt/postgresql-12.5/contrib/file_fdw
$ make && make install
添加外部表扩展
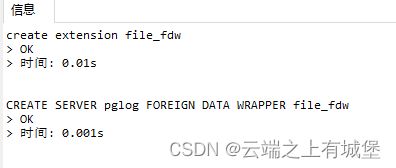
create extension file_fdw;
CREATE SERVER pglog FOREIGN DATA WRAPPER file_fdw;
创建日志表
CREATE FOREIGN TABLE public.postgres_log (
        log_time timestamp(3) NULL,
        user_name text NULL,
        database_name text NULL,
        process_id int4 NULL,
        connection_from text NULL,
        session_id text NULL,
        session_line_num int8 NULL,
        command_tag text NULL,
        session_start_time timestamptz NULL,
        virtual_transaction_id text NULL,
        transaction_id int8 NULL,
        error_severity text NULL,
        sql_state_code text NULL,
        message text NULL,
        detail text NULL,
        hint text NULL,
        internal_query text NULL,
        internal_query_pos int4 NULL,
        context text NULL,
        query text NULL,
        query_pos int4 NULL,
        "location" text NULL,
        application_name text NULL
)
SERVER pglog
OPTIONS (program 'find /data/postgres/log -type f -name "*.csv" -mtime -1 -exec cat {} \;', format 'csv');
创建login函数
create or replace function public.login() returns void as $$
declare
res record;
failed_login_times int = 5;
failed_login int = 0;
-- 用户登录最近时间
failed_login_last_time timestamp(3);
-- 过期时间
expiration_time timestamp(3);
begin

-- 设置登录失败检查时段的起始时间
SELECT now()::timestamp + '-2 hour' into expiration_time;
raise notice 'expiration_start_time: %!', expiration_time;

-- 获取数据库中所有可连接数据库的用户
for res in select rolname from pg_catalog.pg_roles where rolcanlogin= 't' and rolname !='postgres'
loop
  raise notice 'user: %!', res.rolname;

  -- 获取用户上次登录过期时间
  select login_time from public.t_login where user_name=res.rolname
     order by login_time desc limit 1 into failed_login_last_time;
  if failed_login_last_time is null then
    failed_login_last_time = expiration_time;
  end if;
  raise notice 'failed_login_last_time: %!', failed_login_last_time;

  -- 将最新的数据插入t_login表
  insert into public.t_login(login_time,user_name)
  select log_time,user_name from public.postgres_log
      where command_tag='authentication' and error_severity= 'FATAL'
        and user_name = res.rolname and log_time > failed_login_last_time
        and (detail is null or detail not like 'Role % does not exist.%')
        order by log_time desc limit failed_login_times;

  -- 距离现在超过2小时的设置为过期数据
  update public.t_login set flag=1 where user_name=res.rolname and flag=0 and login_time < expiration_time;

  -- 获取当前用户最近连续登录失败次数
  select count(1) from public.t_login WHERE user_name=res.rolname and flag=0 into failed_login ;

  raise notice 'failed_login_times: %! failed_login: %!',failed_login_times,failed_login;
  --用户最近密码输入错误次数达到5次或以上
  if failed_login >= failed_login_times then
    --锁定用户
    EXECUTE format('alter user %I nologin',res.rolname);
    raise notice 'Account % is locked!',res.rolname;
    -- 设置当前表中数据全部过期,重新计算过期次数
    update public.t_login set flag=1 where user_name=res.rolname and flag=0;
  end if;
end loop;
end;
$$ language plpgsql strict security definer set search_path to 'public';
测试
-- 创建测试用户
create user test encrypted password '******';
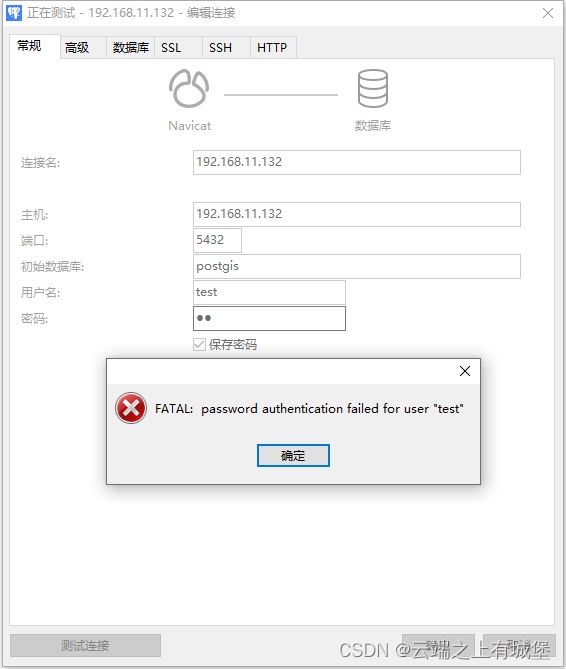
模拟test用户登录失败,输入错误密码
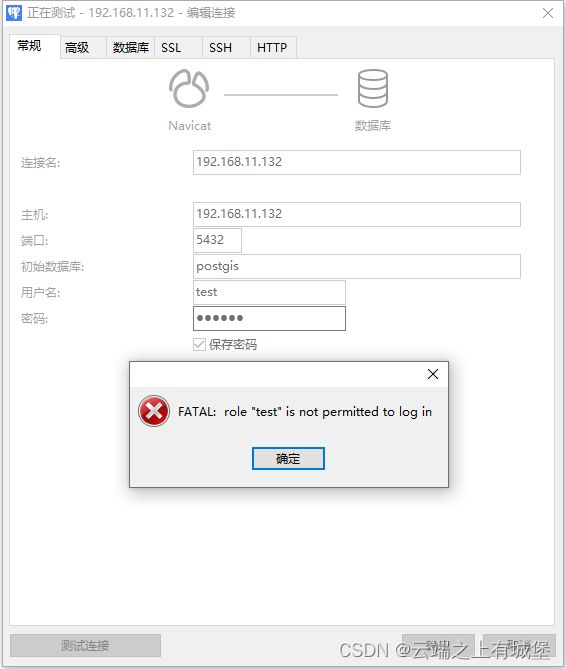
输错5次密码后再输入正确密码,显示用户不允许登录
解锁test用户
alter user test login;
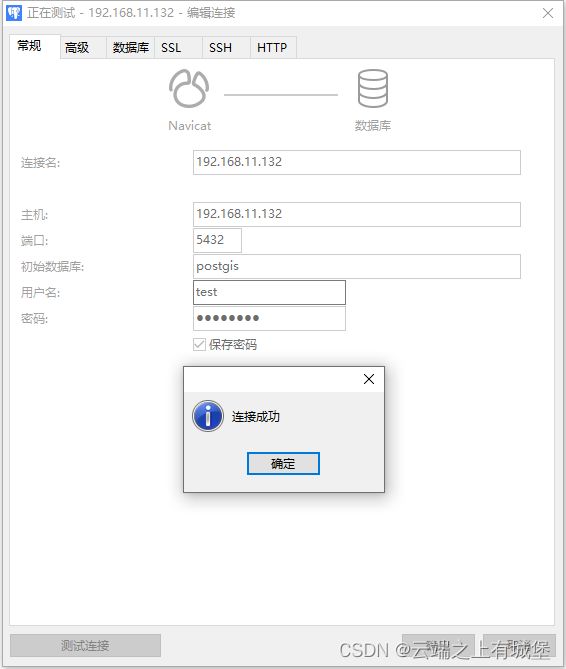
test用户再登录


