Spring Boot
目录
1.Spring boot 创建的认识
1.1 Spring Boot 优点
1.2 打印 Hello World
1.3 约定大于配置
2.SpringBoot 配置文件
2.1 properies 配置
2.2 idea 热部署
2.3 properies 语法
2.4 yml 配置文件
3.properties VS yml
1.Spring boot 创建的认识
快速添加依赖的方法:
1.1 Spring Boot 优点
1️⃣起步依赖(创建的时候就可以方便的添加依赖)
2️⃣内置 Tomcat 容器
3️⃣快速部署,使用 jar 包加上简单的命令直接运行
4️⃣抛弃 XML 的配置方式
5️⃣提供了更多的监控框架,方便的监控系统运行
1.2 打印 Hello World
在创建的项⽬包路径下创建 TestController ⽂件,实现代码:
@Controller
@ResponseBody  //返回数据
public class TestController {
    @RequestMapping("/sayhi")
    public String sayHi() {
        return "你好,Spring Boot";
    }
}
启动项目:
@SpringBootApplication
public class DemoApplication {

	public static void main(String[] args) {
		SpringApplication.run(DemoApplication.class, args);
	}

}
网页访问 http://localhost:8080/sayhi 最终效果如下:
1.3 约定大于配置
目前我们代码目录:
这个时候我们把 TestController 类移动到其他包路径下,重新启动项目:
说明 Spring Boot 项⽬没有将对象注⼊到容器中。这就是所谓的约定大于配置:所有存放到容器中的类,必须要放在和启动类同一个目录或者子目录下,不能放在其他目录
2.SpringBoot 配置文件
Spring Boot 配置文件主要分为两种1️⃣ .properties 2️⃣ .yml
说明:
理论上 properties 和 yml 可以一起存在一个项目中,如果配置文件中出现这种配置,比如 properties 和 yml 中都配置了“server.port”, 那么这个时候会以 properties 中的配置为主也就是 .properties 配置⽂件的优先级最高,但加载完 .properties ⽂件之后,也会加载 .yml ⽂件的配置信息。
2.1 properies 配置
1️⃣系统配置项 ex:server.port
2️⃣用户自定义配置 ex:myimage.path(自己起名字)
对于 系统配置项是给系统使用的,不需要去读,但是用户自定义配置项是开发者自己使用,需要去读
如果在项⽬中,想要主动的读取配置⽂件中的内容,可使用 @Value 注解来实现。@Value 注解使⽤“${ }”的格式读取
@Controller
@ResponseBody  //返回数据
public class TestController {

    @Value("${myimage.path}") //配置项
    private String myImage; //读取配置项,设置到文件中

    @RequestMapping("/sayhi")
    public String sayHi() {
        return "Hello World ->" + myImage;
    }
}
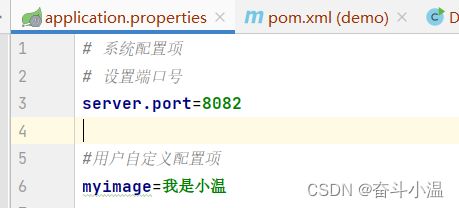
配置文件 application.properties :
# 系统配置项
# 设置端口号
server.port=8082

#用户自定义配置项
myimage.path=struggling-xiaowen
网页访问 http://localhost:8082/sayhi 最终效果如下:
2.2 idea 热部署
写完代码不需要手动重启,新代码可以自动生效:
1️⃣添加 springboot-dev-tool 框架
    org.springframework.boot
	spring-boot-devtools
	runtime
	true
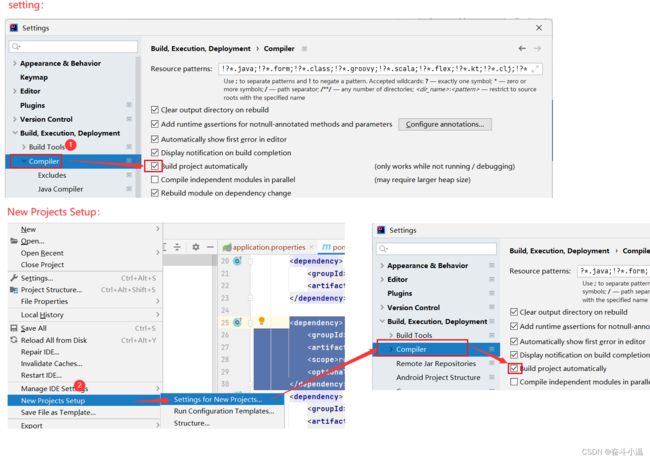
2️⃣在 idea 设置(总共有两个设置)中开启项目的自动编译
3️⃣开启热部署
启动项目,修改代码,新代码自动生效
2.3 properies 语法
properties 是以键值的形式配置的,key 和 value 之间是以“=”连接的,例如MySQL 配置项:
#MySQL 配置项
spring.datasource.url=jdbc:mysql://127.0.0.1.3306/myblog
spring.datasource.username=root
spring.datasource.password=root
spring.datasource.driver-class-name=com.mysql.cj.jdbc.Driver
1️⃣优点:配置文件结构清晰:key=value(适合初学者)
2️⃣缺点:写法比较臃肿
2.4 yml 配置文件
yml 是 YAML 是缩写,它的全称 Yet Another Markup Language 翻译成中⽂就是“另⼀种标记语⾔”。
基本语法:key: value;注意 key 和 value 之间使用英文冒号加空格的方式组成,注意空格不可省略
如果没有空格:
1️⃣使用 yml 连接数据库:
spring:
  datasource:
    url: jdbc:mysql://127.0.0.1:0036/myblog
    username: root
    password: 123456
    driver-class-name: com.mysql.cj.jdbc.Driver
2️⃣配置集合
dbtypes:
   name:
     - mysql
     - sqlserver
- db23.properties VS yml
- properties 是以 key=value 的形式配置的键值类型的配置⽂件,而 yml 使用的是类似 json 格式的树形配置方式进行配置的,yml 层级之间使用换行缩进的方式配置,key 和 value 之间使用“: ”英文冒号加空格的方式设置,并且空格不可省略。
- properties 为早期并且默认的配置⽂件格式,但其配置存在⼀定的冗余数据,使用 yml 可以很好的解决数据冗余的问题
- yml 支持更多的数据类型
- yml 通⽤性更好,⽀持更多语⾔,如 Java、Go、Python 等,如果是云服务器开发,可以使⽤⼀份配置⽂件作为 Java 和 Go 的共同配置⽂件。


