electron学习使用
文章目录
- electron认识和学习
-
- 学习历程
- 一、使用electron安装基础包;
-
- 1,全局安装electron:
- 2,全局安装electron-prebuilt :
- 3,全局安装 electron-packager 打包工具:
- 4,全局安装electron-builder 打包工具:
- 5,全局安装 aser 打包工具:
- 二、使用electron做一个简单的demo-->electron_simpleDemo
-
- 1,初始化package.json
- 2,新增index.html index.js
- 3,演示
- 4,打包
- 5,github地址
-
- Clone this repository
- Go into the repository
- Install dependencies
- Run the app
- 二、使用electron打包vue项目
- 1,将vue项目打包
- 2,打包文件放入electron_simpleDemo项目中,修改index.js
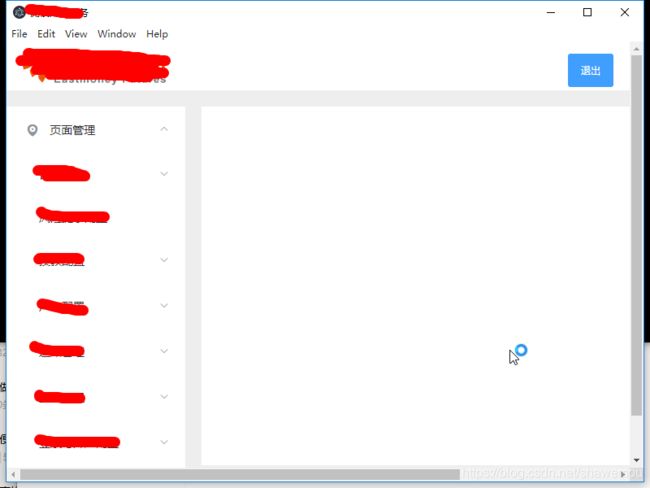
- 3,演示
- 4,打包
electron认识和学习
electron是基于nodejs使用 JavaScript,HTML 和 CSS 构建跨平台的桌面应用程序
学习历程
- 使用electron安装基础包;
- 仅依靠index.html和index.js使用electron;
- electron整合element-ui进行打包;
一、使用electron安装基础包;
1,全局安装electron:
命令:npm install -g electron
使用electron --version 可以查询electron版本,因为打包使用的是electron–builder,所以electron包需要使用7.0.0以上的版本

2,全局安装electron-prebuilt :
cnpm install -g electron-prebuilt
3,全局安装 electron-packager 打包工具:
cnpm install -g electron-packager
4,全局安装electron-builder 打包工具:
cnpm install electron-builder -g
打包命令有两个electron-packager 和 electron-builder,经过网上查询资源,自己只使用了electron-builder,具体区别可以去搜索
5,全局安装 aser 打包工具:
cnpm install -g asar
二、使用electron做一个简单的demo–>electron_simpleDemo
1,初始化package.json
新建项目文件夹,进入项目文件夹,进入cmd,运行npm init
初始化完成后会生成package.json,里面新增electron的依赖,否则最终无法打包
“devDependencies”: {
“electron”: “10.1.4”
}
2,新增index.html index.js
index.html文件:
shawemouDemo
请输入
index.js文件:
const {app, BrowserWindow} = require('electron')
const path = require('path')
const url = require('url')

let window = null

// Wait until the app is ready
app.once('ready', () => {
  // Create a new window
  window = new BrowserWindow({
    // Set the initial width to 800px
    width: 800,
    // Set the initial height to 600px
    height: 600,
    // Set the default background color of the window to match the CSS
    // background color of the page, this prevents any white flickering
    backgroundColor: "#D6D8DC",
    // Don't show the window until it's ready, this prevents any white flickering
    show: false
  })

  // Load a URL in the window to the local index.html path
  window.loadURL(url.format({
    pathname: path.join(__dirname, 'index.html'),
    protocol: 'file:',
    slashes: true
  }))

  // Show window when page is ready
  window.once('ready-to-show', () => {
    window.show()
  })
})
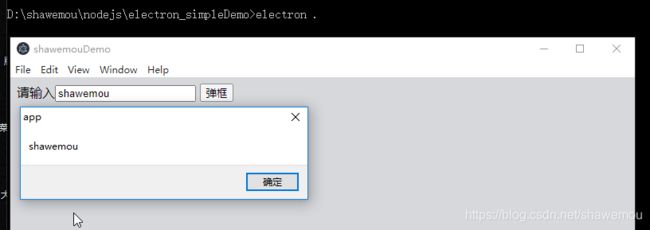
3,演示
4,打包
运行:" electron-builder --win —x64 "


5,github地址
https://github.com/shawemou/electron_simpleDemo
Clone this repository
git clone https://github.com/shawemou/electron_simpleDemo
Go into the repository
cd electron_simpleDemo
Install dependencies
npm install
Run the app
electron .
二、使用electron打包vue项目
关于vue-cli的技术不在这里讲解
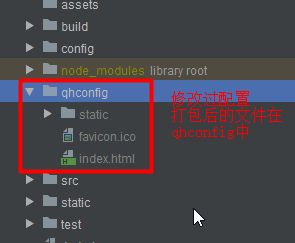
1,将vue项目打包
2,打包文件放入electron_simpleDemo项目中,修改index.js
修改index.js文件,将引用的index.html修改为./qhconfig/index.html
  window.loadURL(url.format({
    pathname: path.join(__dirname, './qhconfig/index.html'),
    protocol: 'file:',
    slashes: true
  }))


