【Free5GC】环境安装搭建
1、安装Ubuntu虚拟机步骤
1.1、下载最新Ubuntu Server LTS镜像文件
搜索 “ubuntu server download",到 Ubuntu 官网 下载最新 Ubuntu Server LTS 的 .iso 镜像文件。(例如在本文撰写当前的 下载页面, 选择 Option 2 Manual server installation 方式下载)。
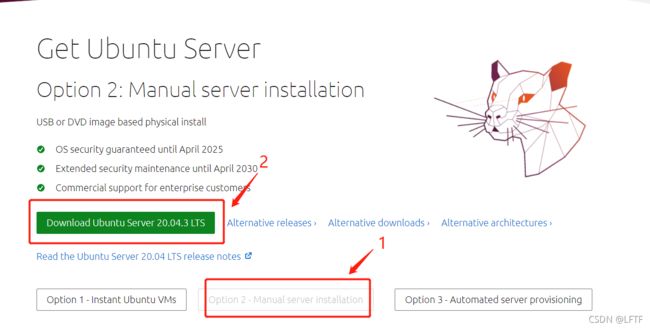
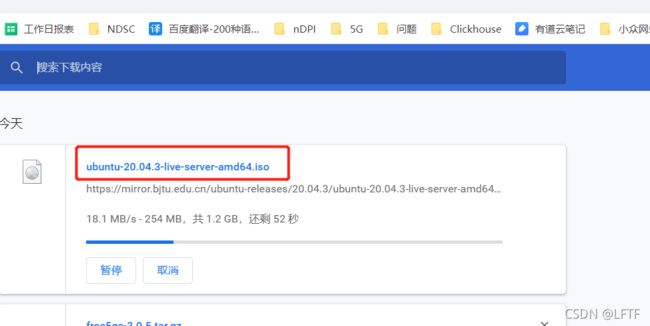
下载的 .iso 名称类似 ubuntu-20.04.3-live-server-amd64.iso, (在浏览器的下载目录下)
1.2、建立一个Ubuntu Server VM
执行 VMware 并使用下载的 Ubuntu Server .iso 建立一個 Ubuntu VM。 使用 Ubuntu Server,而不是 Ubuntu Desktop,是因为我们只需要基本的服务器功能,Server 版本不会安装许多不必要的功能,空间需求较小且开机速度较快。
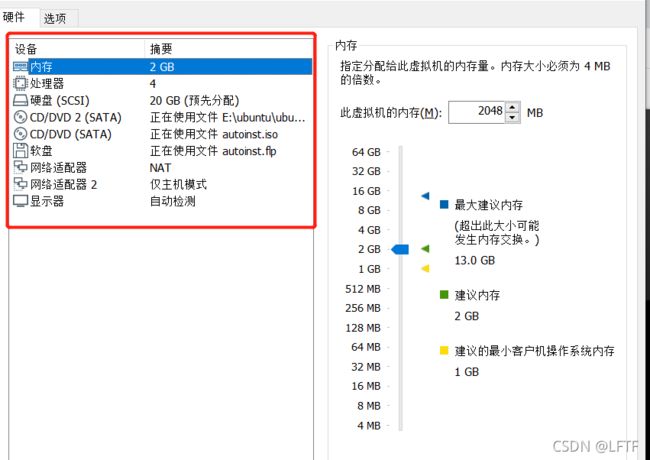
建立新的VM时有几件注意事项:
- 將 VM 名称改为
ubuntu,ubuntu-server, 或ubuntu-20.04 - CPU 可选 1 或 2 个,内存设置到 2048 M,这些都可以在开机前重设。
- 网络设配器除了预设的 NAT 网卡之外,另外再加一个仅限主机的 Host-only 网卡
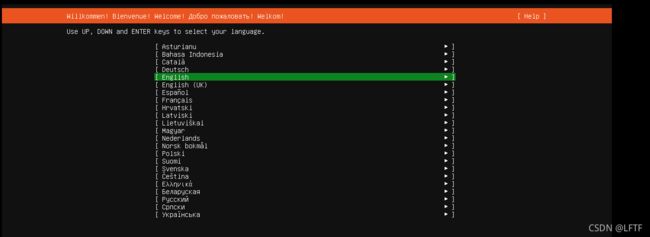
开始安装 Ubuntu
- 使用者名称及密码建议简短好打 (之后会常使用)
- 建议硬盘格式化时不使用 LVM模式 (日后扩展硬盘空间时稍微简单一点)
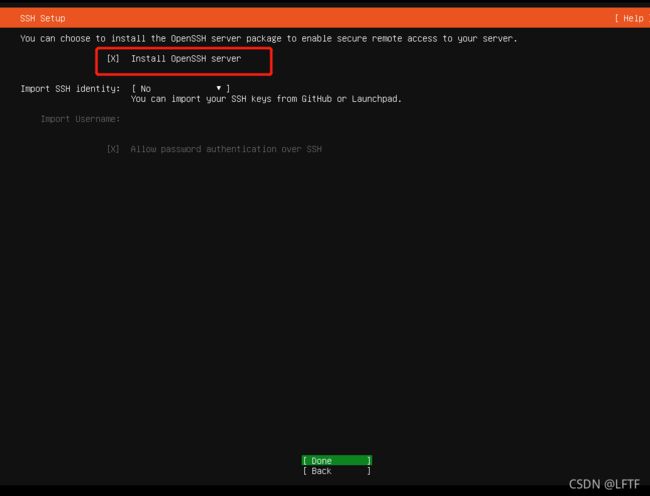
- 选择安裝 SSH Server,并让安全更新下载跑完。

默认语言选择English,下一步:
默认IP地址,不做修改,直接下一步:

不做修改,直接下一步:

不做修改,下一步:

将磁盘Set up this disk as an LVM group选项取消掉,其他不变,下一步:

不做修改,下一步:

选择Continue,下一步:

设置登录账号和密码,下一步:

安装ssh服务,方便远程ssh链接,下一步:
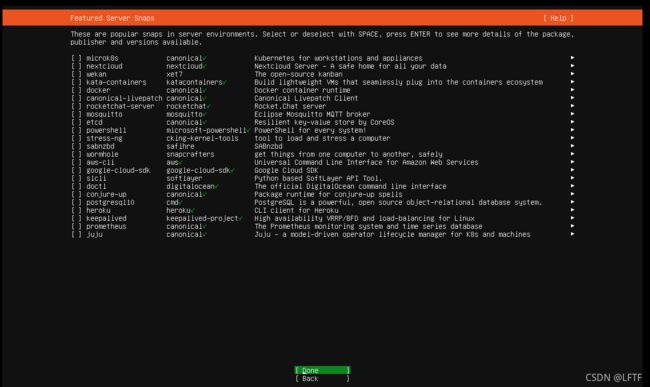
什么都不选择,直接下一步:
出现下面界面,意味着开始安装,等待安装完成:(时间较长,约30~40分钟)

等待安全更新…

安全更新完成后,重启Ubuntu服务器。

登入 Ubuntu
Ubuntu 安裝完后重新开机,进入终端窗口。第一次会有一些初始动作,等一会儿输入账号密码登入:
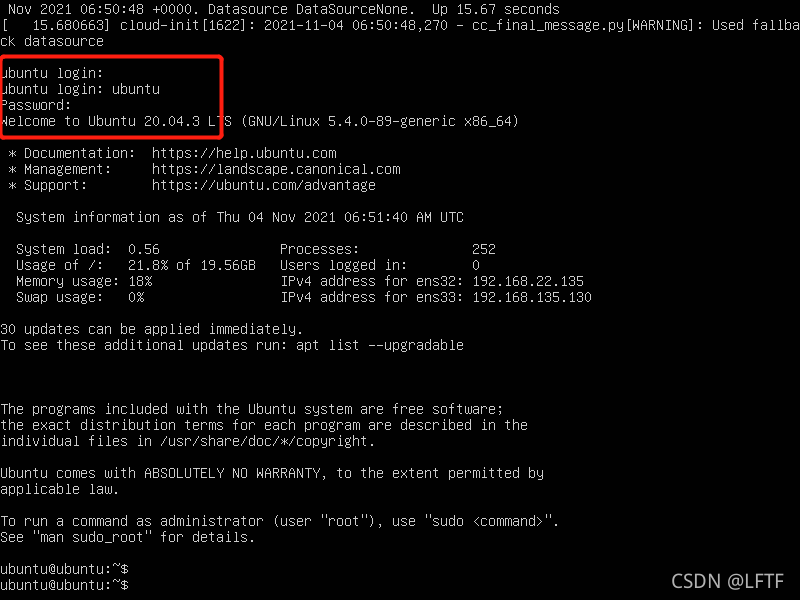
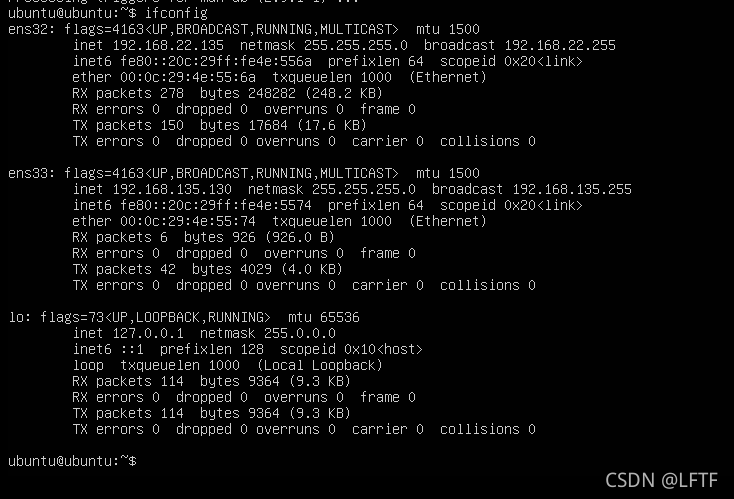
登录后,先试 ifconfig 命令:
ubuntu@ubuntu:~$ ifconfig

Command 'ifconfig' not found, but can be installed with:

sudo apt install net-tools

ubuntu@ubuntu:~$
若有上列结果表示 ifconfig 尚未安装,照其指示下安装命令并输入密碼:
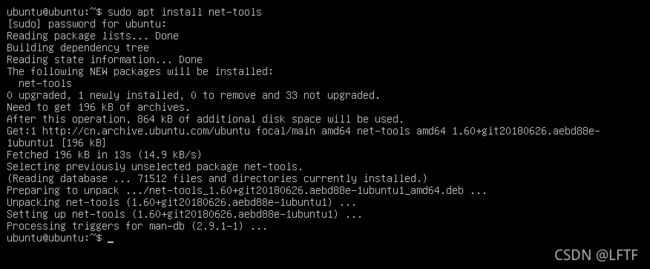
ubuntu@ubuntu:~$ sudo apt install net-tools
下图为安装结果:
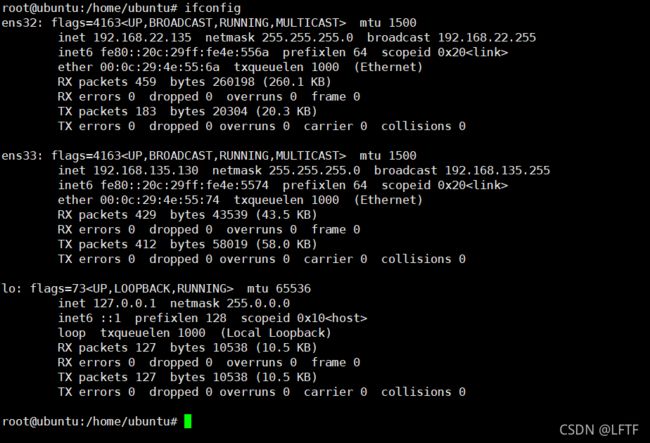
再次执行 ifconfig 检查系统网卡:
你的执行结果根据你的设定可能有些不同,但是注意仅限主机(Host-only)网卡所使用的IP地址。上面的例子为192.168.135.130。你的本机远程可由这个网址与Ubuntu链接。(另一个IP地址192.168.22.135为NAT网卡)。
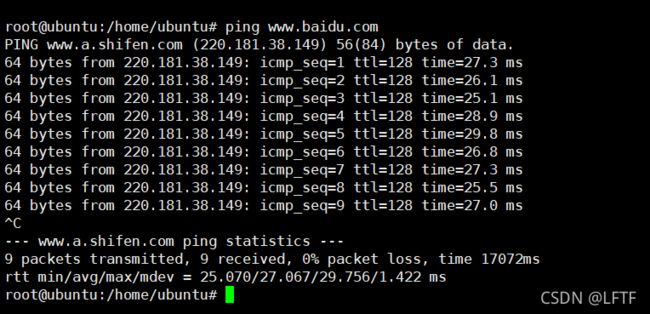
最后试试能否连接至网络:
ubuntu@ubuntu:~$ ping baidu.com
1.3、使用SSH连接到Ubuntu VM
在本机打开xshell软件。使用SSH的好处在于,你可以容易的从本机端Copy and Paste指令到Ubuntu执行,反之亦然,而且可以建立多个SSH链接与Ubuntu进行操作。
xshell连接时发生如下错误:

服务器发送了一个意外的数据包
vim /etc/ssh/sshd_config
在最后一行添加:(先用win10系统自带的cmd命令ssh到服务器然后修改)
KexAlgorithms [email protected],ecdh-sha2-nistp256,ecdh-sha2-nistp384,ecdh-sha2-nistp521,diffie-hellman-group14-sha1
重新加载文件systemctl reload sshd问题即解决。
重复之前 Ubuntu 终端机的简单指令(ping, ifconfig) 看看结果是否相同。成功的话接下來可以从“远端”操作 Ubuntu了。
ifconfig:
ping:
1.4、在SSH里更新 Ubuntu
将Ubunte更新,強化系统安全性。
sudo apt update
sudo apt upgrade
注:sudo passwd进行root账号密码的设置,然后再执行su命令进行root用户的切换。
2、建立 Free5GC VM 及设置网络
如下两个步骤进行:
- 复制现有的 VM,建立一个新的 free5GC VM
- 设定 free5GC VM 网络环境
2.1、检查现有 VM
打开VMware,确认现有的Ubuntu VM(ubuntu)可以开机执行:
- 用 SSH 登入, 登录之后确认可以联网
- 确定做过
sudo apt update及sudo apt upgrade - 关机执行
sudo shutdown -P now
2.2、建立Free5GC VM
先复制新的VM:
- 选择现有的
VM (ubuntu)鼠标右键/管理/克隆/创建链接克隆(需关机执行) - 虚拟机名称
free5gc - 选择链接克隆(也可选择完整克隆)
成功后
- 启动新建立的
free5gc VM,使用相同账号登入 - 用
ping及ifconfig确定链接及Host-only网卡IP地址 - 例如
IP可能为192.168.135.130, 介面名稱為ens33 - 用 SSH 登入
free5gc确认可以连接
2.3、更改hostname
复制而来的 VM hostname 仍为 ubuntu (或你之前给的名字)。 我们将这台电脑取名为 free5gc。 你可以用 vi 或 nano 编辑 /etc/hostname 文件:
sudo vim /etc/hostname # or sudo nano /etc/hostname
将文件里的 ubuntu 改為 free5gc。若你用 nano 编辑,可以按 Ctrl-O存储文件,再 按 Ctrl-X关闭文件。
顺便将 /etc/hosts 里的 ubuntu 改成 free5gc:
sudo vim /etc/hosts # or sudo nano /etc/hosts
新的 /etc/hosts 文件內容像这样:
127.0.0.1 localhost
127.0.1.1 free5gc

...
等待会重新开机时就会生效。
2.4、设置静态IP地址
预设的 Host-only 网卡是由 DHCP 得到 IP 位址。为减少后面指令错误的发生, 这里将 Ubuntu 为 Host-only 网卡设置为静态 IP (将之固定为 192.168.135.101)。
$ cd /etc/netplan
$ ls
00-installer-config.yaml

$ cat 00-installer-config.yaml
原先的文件內容为:
# This is the network config written by 'subiquity'
network:
  ethernets:
    ens32:
      dhcp4: true
    ens33:
      dhcp4: true
  version: 2
代表 VM 有两张网卡,由指令 ifconfig 我们得知 ens33 為 Host-only 网卡。你可以 编辑此文件:
$ sudo vim 00-installer-config.yaml
新的文件内容:
# This is the network config written by 'subiquity'
network:
  ethernets:
    ens32:
      dhcp4: true
    ens33:
      dhcp4: no
      addresses: [192.168.135.101/24]
  version: 2
先测试时候内容无误:
$ sudo netplan try
再应用新的设置
$ sudo netplan apply
执行完之后IP地址发生改变,重新使用``192.168.135.101地址进行ssh连接登录,执行ifconfig` 检查网络设定是否改变:
ubuntu@free5gc:~$ ifconfig
ens32: flags=4163<UP,BROADCAST,RUNNING,MULTICAST>  mtu 1500
        inet 192.168.22.135  netmask 255.255.255.0  broadcast 192.168.22.255
        inet6 fe80::20c:29ff:fef8:bb76  prefixlen 64  scopeid 0x20<link>
        ether 00:0c:29:f8:bb:76  txqueuelen 1000  (Ethernet)
        RX packets 198  bytes 21073 (21.0 KB)
        RX errors 0  dropped 0  overruns 0  frame 0
        TX packets 96  bytes 11384 (11.3 KB)
        TX errors 0  dropped 0 overruns 0  carrier 0  collisions 0

ens33: flags=4163<UP,BROADCAST,RUNNING,MULTICAST>  mtu 1500
        inet 192.168.135.101  netmask 255.255.255.0  broadcast 192.168.135.255
        inet6 fe80::20c:29ff:fef8:bb80  prefixlen 64  scopeid 0x20<link>
        ether 00:0c:29:f8:bb:80  txqueuelen 1000  (Ethernet)
        RX packets 1106  bytes 96876 (96.8 KB)
        RX errors 0  dropped 0  overruns 0  frame 0
        TX packets 858  bytes 134055 (134.0 KB)
        TX errors 0  dropped 0 overruns 0  carrier 0  collisions 0

lo: flags=73<UP,LOOPBACK,RUNNING>  mtu 65536
        inet 127.0.0.1  netmask 255.0.0.0
        inet6 ::1  prefixlen 128  scopeid 0x10<host>
        loop  txqueuelen 1000  (Local Loopback)
        RX packets 92  bytes 7116 (7.1 KB)
        RX errors 0  dropped 0  overruns 0  frame 0
        TX packets 92  bytes 7116 (7.1 KB)
        TX errors 0  dropped 0 overruns 0  carrier 0  collisions 0
检查routing table:
ubuntu@free5gc:~$ route -n
Kernel IP routing table
Destination     Gateway         Genmask         Flags Metric Ref    Use Iface
0.0.0.0         192.168.22.2    0.0.0.0         UG    100    0        0 ens32
192.168.22.0    0.0.0.0         255.255.255.0   U     0      0        0 ens32
192.168.22.2    0.0.0.0         255.255.255.255 UH    100    0        0 ens32
192.168.135.0   0.0.0.0         255.255.255.0   U     0      0        0 ens33
可以知道 Host-only 网络路 192.168.135.0/24 本身沒有连接到 Internet。(但我们可以 在本机于此 VM 连接)。连接到 Internet 是由 NAT 网络 192.168.22.0/24,(gateway 为 192.168.22.2)
3、安装与测试Free5GC核心网络
如下步骤进行:
- 安装必需工具
- 安装 free5GC
- 测试 free5GC
下面的安装流程是參考 free5GC 官网文件。
以后 free5GC 若有版本更新而导致部分指令无法运行,请以官网资料为准。
3.1、确定系统版本
先用uname -r 确定 kernel 版本。若安装 Ubuntu 20.04, 版本应为 5.4.x。
$ uname -r
5.4.0-89-generic
请确认你的版本为5.0.0-23-generic 或 5.4.0 以后版本。
3.2、安装基本工具
3.2.1、确定有没有安装go
$ go version
若有安装的版本,请先刪除 (假设你的 go 是安装在 /usr/local/go):
$ sudo rm -rf /usr/local/go
如果你的系统上未安装go:
$ cd ~
# 下载安装包
$ wget https://dl.google.com/go/go1.15.7.linux-amd64.tar.gz
$ sudo tar -C /usr/local -xzf go1.15.7.linux-amd64.tar.gz
执行wget时如果出现Connecting to golang.org (golang.org)|142.251.42.241|:443... failed: Connection refused错误,需要修改/etc/resolv.conf文件
$ sudo vim /etc/resolv.conf
nameserver x.x.x.x更改为nameserver 114.114.114.114保存退出即可。
安装完成之后直接贴上下面命令:
mkdir -p ~/go/{bin,pkg,src}
echo 'export GOPATH=$HOME/go' >> ~/.bashrc
echo 'export GOROOT=/usr/local/go' >> ~/.bashrc
echo 'export PATH=$PATH:$GOPATH/bin:$GOROOT/bin' >> ~/.bashrc
echo 'export GO111MODULE=auto' >> ~/.bashrc
source ~/.bashrc
查看是否安装成功:
$ go version
3.2.2、控制面依赖包安装
sudo apt -y update
sudo apt -y install mongodb wget git
sudo systemctl start mongodb
3.2.3、用户面依赖包安装
sudo apt -y update
sudo apt -y install git gcc g++ cmake autoconf libtool pkg-config libmnl-dev libyaml-dev
go get -u -v -insecure github.com/sirupsen/logrus
在使用go get -u github.com/sirupsen/logrus时,可能会出现报错package golang.org/x/sys/unix: unrecognized import path "golang.org/x/sys/unix" (https fetch: Get https://golang.org/x/sys/unix?go-get=1: dial tcp 216.239.37.1:443: i/o timeout)。解决方案为
golang在github上建立了一个镜像库,下载github上的镜像库放入GOPATH下即可。
mkdir -p $GOPATH/src/golang.org/x
cd $GOPATH/src/golang.org/x
git clone git://github.com/golang/sync.git
git clone git://github.com/golang/crypto.git
git clone git://github.com/golang/sys.git
- 或者通过添加代理的方式解决。
go env -w GO111MODULE=on
go env -w GOPROXY=https://goproxy.cn,direct  #编译不过去加代理
然后再进行go get -u -v -insecure github.com/sirupsen/logrus操作。
3.3、Ubuntu主机网络设置
sudo sysctl -w net.ipv4.ip_forward=1
sudo iptables -t nat -A POSTROUTING -o ens32 -j MASQUERADE
sudo iptables -A FORWARD -p tcp -m tcp --tcp-flags SYN,RST SYN -j TCPMSS --set-mss 1400
sudo systemctl stop ufw
注意: 上面 ens32 為核網連到 Data Network (Internet) 的介面, 可以由 ifconfig 及 route 得到。若你的介面名稱不同,請記得改。 另外注意這些網路設定在重新開機後會消失,每次開機後要記得重做。
3.4、安装Free5GC核心网络
安装最新版本(v3.0.6)
cd ~
git clone --recursive -b v3.0.6 -j `nproc` https://github.com/free5gc/free5gc.git
如果下载不下来,可以试一下如下步骤:
步骤1:
cd ~
git clone --recursive -b v3.0.6 -j `nproc` git://github.com/free5gc/free5gc.git
步骤2:
cd ~/free5gc/NFs
ls *
发现amf ausf n3iwf nrf nssf pcf smf udm udr文件为空,则
# 删除空文件夹
rm -rf ~/free5gc/NFs/*
# 切换到NFs目录下
cd ~/free5gc/NFs
# 重新手动git
git clone git://github.com/free5gc/amf.git/
git clone git://github.com/free5gc/ausf.git/
git clone git://github.com/free5gc/n3iwf.git/
git clone git://github.com/free5gc/nrf.git/
git clone git://github.com/free5gc/nssf.git/
git clone git://github.com/free5gc/pcf.git/
git clone git://github.com/free5gc/smf.git/
git clone git://github.com/free5gc/udm.git/
git clone git://github.com/free5gc/udr.git/
git clone git://github.com/free5gc/upf.git/

cd ~/free5gc
rm -rf ~/free5gc/NFs/webconsole  # webconsole 文件夹也为空,和处理一样,重新手动git webconsole文件
git clone git://github.com/free5gc/webconsole.git
完成
接着编译free5GC:
cd ~/free5gc
make
安装 gtp5g
cd ~
git clone https://github.com/free5gc/gtp5g.git
cd gtp5g
make
sudo make install
检查 gtp5g 是否安装成功:
lsmod | grep gtp
3.5、测试free5GC
free5GC 提供了一些测试程序,测试一些5G核心网网元的基本功能。先测试基本的测试程序:
cd ~/free5gc
./test.sh TestRegistration
若最后有PASS字眼出现则安装成功!可以继续一一执行下列测试:
./test.sh TestRegistration

./test.sh TestGUTIRegistration

./test.sh TestServiceRequest

./test.sh TestXnHandover

./test.sh TestDeregistration

./test.sh TestPDUSessionReleaseRequest

./test.sh TestPaging

./test.sh TestN2Handover

./test.sh TestNon3GPP

./test.sh TestReSynchronisation

./test_ulcl.sh -om 3 TestRegistration
4、安装UE/RAN模拟器
分两个步骤进行:
- 安装 UERANSIM
- 简单测试 free5GC + UERANSIM
4.1、建立 ueramsim VM
重复free5gc VM的建立步骤,产生一个新的VM
VM命名为ueransim, 记得所有网卡MAC都产生新的- 成功后确定可以联网及使用 SSH 登入
- 更改
hostname为ueransim - 设置
Host-only网卡的静态IP位址为192.168.135.102 - 重启,并启动
free5gc - 在 ueransim
ping 192.168.135.101测试与free5gc的连接, 同样在 free5gcping 192.168.135.102测试与ueransim的连接
4.2、安装 UERANSIM
浏览器搜寻ueransim,得到网址:
- aligungr/UERANSIM: Open source 5G UE and RAN … - GitHub
浏览阅读一下UERAMSIM开源项目的基本信息及用途。进入安装页面
- Installation
下载UERANSIM
cd ~
git clone https://github.com/aligungr/UERANSIM
cd UERANSIM
git checkout v3.1.0
更新系统
sudo apt update
sudo apt upgrade
安装工具
sudo apt install make
sudo apt install g++
sudo apt install libsctp-dev lksctp-tools
sudo apt install iproute2
sudo snap install cmake --classic
编译UERANSIM
cd ~/UERANSIM
make
4.3、安装free5GC WebConsole
free5GC提供一个简单网页界面WebConsole来管理UE注册资料,供各NF使用。WebConsole需要Node.js及Yarn工具编译。
首先SSH登入free5gc(192.168.135.101),先把可能存在的旧工具移除:
sudo apt remove cmdtest
sudo apt remove yarn
安装 Node.js 及 Yarn
curl -sS https://dl.yarnpkg.com/debian/pubkey.gpg | sudo apt-key add -
echo "deb https://dl.yarnpkg.com/debian/ stable main" | sudo tee /etc/apt/sources.list.d/yarn.list
sudo apt-get update
sudo apt-get install -y nodejs yarn
开始建立WebConsole
cd ~/free5gc
make webconsole
4.4、使用WebConsole新增注册资料
先启动WebConsole服务器:
cd ~/free5gc/webconsole
go run server.go
终端机复印出使用网址:5000。然后再本机打开浏览器,输入网址http://192.168.135.101:5000
- 打开网页后,输入账号
admin,密码free5gc - 进入后拉宽浏览器,直到看到左侧
Subscribers - 选取
Subscribers并新增一笔数据 - 注意除了
Operator Code Type选择OP外,其它字段先保留预设数据,供后续模拟器使用 - 新增完成后,终端机按
Ctrl-C就可停止WebConsole
4.5、设定free5GC核心网元参数及UERANSIM参数
在free5gc,我们需要编辑三个配置文件:
~/free5gc/config/amfcfg.yaml~/free5gc/config/smfcfg.yaml~/free5gc/NFs/upf/build/config/upfcfg.yaml
SSH登入free5gc后,更改~/free5gc/config/amfcfg.yaml
cd ~/free5gc
vim config/amfcfg.yaml
将ngapIpList里的IP从127.0.0.1改成192.168.135.101,亦即:
...
  ngapIpList:  # the IP list of N2 interfaces on this AMF
  - 127.0.0.1
改成
...
  ngapIpList:  # the IP list of N2 interfaces on this AMF
  - 192.168.135.101  # 127.0.0.1
接著更改 ~/free5gc/config/smfcfg.yaml
vim config/smfcfg.yaml
将 userplane_information / up_nodes / UPF / interfaces / endpoints 里的 IP 从 127.0.0.8 改成 192.168.135.101,亦即
...

  interfaces: # Interface list for this UPF
   - interfaceType: N3 # the type of the interface (N3 or N9)
     endpoints: # the IP address of this N3/N9 interface on this UPF
       - 127.0.0.8
改成
...
  interfaces: # Interface list for this UPF
   - interfaceType: N3 # the type of the interface (N3 or N9)
     endpoints: # the IP address of this N3/N9 interface on this UPF
       - 192.168.135.101  # 127.0.0.8
最后更改 ~/free5gc/NFs/upf/build/config/upfcfg.yaml,将gtpu里的IP从127.0.0.8改为192.168.135.101,亦即:
...
  gtpu:
  - addr: 127.0.0.8
改成
...
  gtpu:
  - addr: 192.168.135.101  # 127.0.0.8
4.6、设置UERANSIM
在 ueransim,有两个配置文件跟free5GC有关:
~/UERANSIM/config/free5gc-gnb.yaml~/UERANSIM/config/free5gc-ue.yaml
其中第二个文件为UE设定,内容应与free5gc的WebConsole产生的预设注册数据一致,不需更改。
首先SSH登入ueransim后,更改 ~/UERANSIM/config/free5gc-gnb.yaml,将ngaplp及gtpip的IP从127.0.0.1改成192.168.135.102,并将amfConfigs里的地址改成192.168.135.101,亦即
...
  ngapIp: 127.0.0.1   # gNB's local IP address for N2 Interface (Usually same with local IP)
  gtpIp: 127.0.0.1    # gNB's local IP address for N3 Interface (Usually same with local IP)

  # List of AMF address information
  amfConfigs:
    - address: 127.0.0.1
改成
...
  ngapIp: 192.168.135.102  # 127.0.0.1   # gNB's local IP address for N2 Interface (Usually same with local IP)
  gtpIp: 192.168.135.102  # 127.0.0.1    # gNB's local IP address for N3 Interface (Usually same with local IP)

  # List of AMF address information
  amfConfigs:
    - address: 192.168.135.101  # 127.0.0.1
接着可以检查~/UERANSIM/config/free5gc-ue.yaml,看设定资料是否和WebConsole里的资料一致,例如:
# IMSI number of the UE. IMSI = [MCC|MNC|MSISDN] (In total 15 or 16 digits)
supi: 'imsi-208930000000003'
# Mobile Country Code value
mcc: '208'
# Mobile Network Code value (2 or 3 digits)
mnc: '93'

# Permanent subscription key
key: '8baf473f2f8fd09487cccbd7097c6862'
# Operator code (OP or OPC) of the UE
op: '8e27b6af0e692e750f32667a3b14605d'
# This value specifies the OP type and it can be either 'OP' or 'OPC'
opType: 'OP'

...

# Initial PDU sessions to be established
sessions:
  - type: 'IPv4'
    apn: 'internet'
    slice:
      sst: 0x01
      sd: 0x010203

# List of requested S-NSSAIs by this UE
slices:
  - sst: 0x01
    sd: 0x010203

...
与之前新增的注册资料一直。
4.7、测试free5GC + UERANSIM
SSH登入free5gc,若曾重启过free5gc,记得先做:
sudo sysctl -w net.ipv4.ip_forward=1
sudo iptables -t nat -A POSTROUTING -o ens32 -j MASQUERADE
sudo systemctl stop ufw
并执行下列指令:
sudo iptables -I FORWARD 1 -j ACCEPT
确定网络环境及配置文件已更改后,到free5gc执行./run.sh
cd ~/free5gc
./run.sh
此时free5gc核心网启动。
另外需准备三个终端可视窗口执行UERANSIM模拟器:
窗口1,登入ueransim,确定模拟器已编译好,且配置文件也已经改好,执行nr-gnb
cd ~/UERANSIM
build/nr-gnb -c config/free5gc-gnb.yaml
窗口2,登入ueransim,用管理员身份执行nr-gnb。
cd ~/UERANSIM
sudo build/nr-ue -c config/free5gc-ue.yaml
窗口3,登入ueransim,用ping测试模拟器,free5GC核心网及互联网络是否联通。首先,用ifconfig检查是否有建立通道uesimtun0:
# ifconfig
ens32: flags=4163<UP,BROADCAST,RUNNING,MULTICAST>  mtu 1500
        inet 192.168.22.136  netmask 255.255.255.0  broadcast 192.168.22.255
        inet6 fe80::20c:29ff:fed8:883c  prefixlen 64  scopeid 0x20<link>
        ether 00:0c:29:d8:88:3c  txqueuelen 1000  (Ethernet)
        RX packets 161649  bytes 237293716 (237.2 MB)
        RX errors 0  dropped 0  overruns 0  frame 0
        TX packets 33811  bytes 2117737 (2.1 MB)
        TX errors 0  dropped 0 overruns 0  carrier 0  collisions 0

ens33: flags=4163<UP,BROADCAST,RUNNING,MULTICAST>  mtu 1500
        inet 192.168.135.102  netmask 255.255.255.0  broadcast 192.168.135.255
        inet6 fe80::20c:29ff:fed8:8846  prefixlen 64  scopeid 0x20<link>
        ether 00:0c:29:d8:88:46  txqueuelen 1000  (Ethernet)
        RX packets 4950  bytes 365572 (365.5 KB)
        RX errors 0  dropped 0  overruns 0  frame 0
        TX packets 5784  bytes 1009070 (1.0 MB)
        TX errors 0  dropped 0 overruns 0  carrier 0  collisions 0

lo: flags=73<UP,LOOPBACK,RUNNING>  mtu 65536
        inet 127.0.0.1  netmask 255.0.0.0
        inet6 ::1  prefixlen 128  scopeid 0x10<host>
        loop  txqueuelen 1000  (Local Loopback)
        RX packets 1059  bytes 87750 (87.7 KB)
        RX errors 0  dropped 0  overruns 0  frame 0
        TX packets 1059  bytes 87750 (87.7 KB)
        TX errors 0  dropped 0 overruns 0  carrier 0  collisions 0

uesimtun0: flags=4305<UP,POINTOPOINT,RUNNING,NOARP,MULTICAST>  mtu 1500
        inet 60.60.0.1  netmask 255.255.255.255  destination 60.60.0.1
        inet6 fe80::580d:6902:7845:d910  prefixlen 64  scopeid 0x20<link>
        unspec 00-00-00-00-00-00-00-00-00-00-00-00-00-00-00-00  txqueuelen 500  (UNSPEC)
        RX packets 0  bytes 0 (0.0 B)
        RX errors 0  dropped 0  overruns 0  frame 0
        TX packets 2  bytes 96 (96.0 B)
        TX errors 0  dropped 0 overruns 0  carrier 0  collisions 0
接着使用ping:
ping -I uesimtun0 baidu.com
若有回应代表系统及网络成功运作,恭喜~
4.8、常见问题
若安装与执行free5GC及UERANSIM过程中发生问题,先记得有无执行下面几点,完成在开始测试:
free5gc VM若重新启动,有无先执行网络配置:
sudo sysctl -w net.ipv4.ip_forward=1
sudo iptables -t nat -A POSTROUTING -o ens32 -j MASQUERADE
sudo systemctl stop ufw
sudo iptables -I FORWARD 1 -j ACCEPT
free5gc VM若想执行测试./test.sh TestXXX,检查配置文件有无回复原状
~/free5gc/config/amfcfg.yaml
~/free5gc/config/smfcfg.yaml
~/free5gc/NFs/upf/build/config/upfcfg.yaml
可用git diff检查,若测试仍有问题,可先清除MongoDB资料库再试:
$ mongo free5gc
   ...
> db.dropDatabase()
{ "dropped" : "free5gc", "ok" : 1 }
> exit
bye
VM的网卡名称及IP是否正确,且和相关的配置文件或命令相符。可从你的主机ping 192.168.135.101及ping 192.168.135.102,并在你的虚拟机ifconfig及测试对外连接ping。
若已经成功安装测试free5GC及UERANSIM,想知道接下来做什么,可以在执行之后的简单应用。要理解及修改free5GC的程序内容,除了5G标准文件需要研读外,可从test.sh及run.sh着手看网络及程序如何设定。基本网络原理有些参考文件如下:
- 网络设置参考文件
5、free5gGC 小试身手
此示范我们将利用free5GC核网及UE/RAN模拟器操作一些简单的网络应用:
- ping + tcpdump
- wget
- xxx (
ssh root@xxx)
5.1、ping + tcpdump
首先将free5GC核网及UERANSIM启动(free5gc需要一个终端机,ueransim需要两个终端机)。
再开启新的终端机xshell登入ueransim:
ssh 192.168.56.102
用ifconfig确认uesimtun0信道已建立,并用ping试试藉由uesimtun0能否连通:
$ ping baidu.com
PING baidu.com (220.181.38.148) 56(84) bytes of data.
64 bytes from 220.181.38.148 (220.181.38.148): icmp_seq=1 ttl=127 time=21.5 ms
64 bytes from 220.181.38.148 (220.181.38.148): icmp_seq=2 ttl=127 time=21.4 ms
64 bytes from 220.181.38.148 (220.181.38.148): icmp_seq=3 ttl=127 time=21.7 ms
64 bytes from 220.181.38.148 (220.181.38.148): icmp_seq=4 ttl=127 time=22.9 ms
64 bytes from 220.181.38.148 (220.181.38.148): icmp_seq=5 ttl=127 time=22.7 ms
64 bytes from 220.181.38.148 (220.181.38.148): icmp_seq=6 ttl=127 time=22.5 ms
^C
--- baidu.com ping statistics ---
6 packets transmitted, 6 received, 0% packet loss, time 5018ms
rtt min/avg/max/mdev = 21.361/22.102/22.875/0.603 ms
$ ping -I uesimtun0 baidu.com
PING baidu.com (220.181.38.148) from 60.60.0.1 uesimtun0: 56(84) bytes of data.
64 bytes from 220.181.38.148 (220.181.38.148): icmp_seq=1 ttl=127 time=22.4 ms
64 bytes from 220.181.38.148 (220.181.38.148): icmp_seq=2 ttl=127 time=22.7 ms
64 bytes from 220.181.38.148 (220.181.38.148): icmp_seq=3 ttl=127 time=22.2 ms
64 bytes from 220.181.38.148 (220.181.38.148): icmp_seq=4 ttl=127 time=22.9 ms
64 bytes from 220.181.38.148 (220.181.38.148): icmp_seq=5 ttl=127 time=22.3 ms
64 bytes from 220.181.38.148 (220.181.38.148): icmp_seq=6 ttl=127 time=23.3 ms
^C
--- baidu.com ping statistics ---
6 packets transmitted, 6 received, 0% packet loss, time 5010ms
先用route -n命令观察现有的routing table,显示出关于两个网络界面ens32及ens33的规则:
$ route -n
Kernel IP routing table
Destination     Gateway         Genmask         Flags Metric Ref    Use Iface
0.0.0.0         192.168.22.2    0.0.0.0         UG    100    0        0 ens32
192.168.22.0    0.0.0.0         255.255.255.0   U     0      0        0 ens32
192.168.22.2    0.0.0.0         255.255.255.255 UH    100    0        0 ens32
192.168.135.0   0.0.0.0         255.255.255.0   U     0      0        0 ens33
其中192.168.22.0/24网络及ens32界面为VMware NAT网卡所建立。我们先关闭此界面:
$ sudo ifconfig ens32 down
$ route -n
Kernel IP routing table
Destination     Gateway         Genmask         Flags Metric Ref    Use Iface
192.168.135.0   0.0.0.0         255.255.255.0   U     0      0        0 ens33
只剩Host-only 192.168.135.0/24网络。执行ping看看:
#114.114.114.114是国内移动、电信和联通通用的DNS
$ ping 114.114.114.114
ping: connect: Network is unreachable
发现无法连接,但执行:
$ ping -I uesimtun0 114.114.114.114
PING 114.114.114.114 (114.114.114.114) from 60.60.0.1 uesimtun0: 56(84) bytes of data.
64 bytes from 114.114.114.114: icmp_seq=1 ttl=127 time=28.7 ms
64 bytes from 114.114.114.114: icmp_seq=2 ttl=127 time=29.6 ms
^C
--- 114.114.114.114 ping statistics ---
2 packets transmitted, 2 received, 0% packet loss, time 1002ms
rtt min/avg/max/mdev = 28.710/29.162/29.615/0.452 ms
则有反应,因为我们要求ping走free5GC核网路径。想要让ping 8.8.8.8成功,我们可以用uesimtun0界面(IP为60.60.0.1)当作新的预设网关:
$ sudo ip r add default dev uesimtun0
$ route -n
Kernel IP routing table
Destination     Gateway         Genmask         Flags Metric Ref    Use Iface
0.0.0.0         0.0.0.0         0.0.0.0         U     0      0        0 uesimtun0
192.168.135.0   0.0.0.0         255.255.255.0   U     0      0        0 ens33
如此所有192.168.135.0/24以外的封包都会走uesimtun0。因此再执行便可成功:
$ ping 114.114.114.114
PING 114.114.114.114 (114.114.114.114) 56(84) bytes of data.
64 bytes from 114.114.114.114: icmp_seq=1 ttl=127 time=29.8 ms
^C
--- 114.114.114.114 ping statistics ---
1 packets transmitted, 1 received, 0% packet loss, time 0ms
rtt min/avg/max/mdev = 29.757/29.757/29.757/0.000 ms
但若想执行:
$ ping baidu.com
ping: baidu.com: Temporary failure in name resolution
则得到无法辨认网络网址。要解决此问题,我们可以更改配置文件/etc/resolv.conf(但注意要记得恢复):
$ sudo vim /etc/resolv.conf
暂时将nameserver IP改成114.114.114.114
nameserver 114.114.114.114
这时已可以看到反应:
root@ueransim:/home/ubuntu# ping baidu.com
PING baidu.com (220.181.38.251) 56(84) bytes of data.
64 bytes from 220.181.38.251 (220.181.38.251): icmp_seq=1 ttl=127 time=22.8 ms
64 bytes from 220.181.38.251 (220.181.38.251): icmp_seq=2 ttl=127 time=23.8 ms
64 bytes from 220.181.38.251 (220.181.38.251): icmp_seq=3 ttl=127 time=23.4 ms
^C
要进一步确认ping过程的确由free5GC核网接入,我们可以再开另一个终端机登入ueransim,执行下列指令:
$ sudo tcpdump -n -i any host 60.60.0.1 or 192.168.135.101
tcpdump: verbose output suppressed, use -v or -vv for full protocol decode
listening on any, link-type LINUX_SLL (Linux cooked v1), capture size 262144 byte
并在原来终端机再下ping 114.114.114.114指令。几秒后两边都按Ctrl-C。可以观察到相关封包的确藉由uesimtun0送出及回传。
$ sudo tcpdump -n -i any host 60.60.0.1 or 192.168.135.101
tcpdump: verbose output suppressed, use -v or -vv for full protocol decode
listening on any, link-type LINUX_SLL (Linux cooked v1), capture size 262144 bytes
01:47:59.034673 IP 60.60.0.1 > 114.114.114.114: ICMP echo request, id 10, seq 1, length 64
01:47:59.035680 IP 192.168.135.102.2152 > 192.168.135.101.2152: UDP, length 100
01:47:59.063457 IP 192.168.135.101.2152 > 192.168.135.102.2152: UDP, length 100
01:47:59.064005 IP 114.114.114.114 > 60.60.0.1: ICMP echo reply, id 10, seq 1, length 64
01:48:00.038335 IP 60.60.0.1 > 114.114.114.114: ICMP echo request, id 10, seq 2, length 64
01:48:00.038900 IP 192.168.135.102.2152 > 192.168.135.101.2152: UDP, length 100
01:48:00.066075 IP 192.168.135.101.2152 > 192.168.135.102.2152: UDP, length 100
5.2、wget
网络上任意找个网站下载。例如:
$ wget baidu.com
--2021-11-06 01:39:54--  http://baidu.com/
Resolving baidu.com (baidu.com)... 220.181.38.251, 220.181.38.148
Connecting to baidu.com (baidu.com)|220.181.38.251|:80... connected.
HTTP request sent, awaiting response... 200 OK
Length: 81 [text/html]
Saving to: ‘index.html’

index.html                         100%[================================================================>]      81  --.-KB/s    in 0s

2021-11-06 01:39:54 (6.77 MB/s) - ‘index.html’ saved [81/81]
能够下载百度页面主页。
5.3、ssh
可以试试能否连接外网服务器:
ssh [email protected]
参考网站:
https://github.com/free5gc/free5gc
https://blog.csdn.net/weixin_41973619/article/details/109121184
https://www.free5gc.org/installations/stage-3/