springboot源码解读
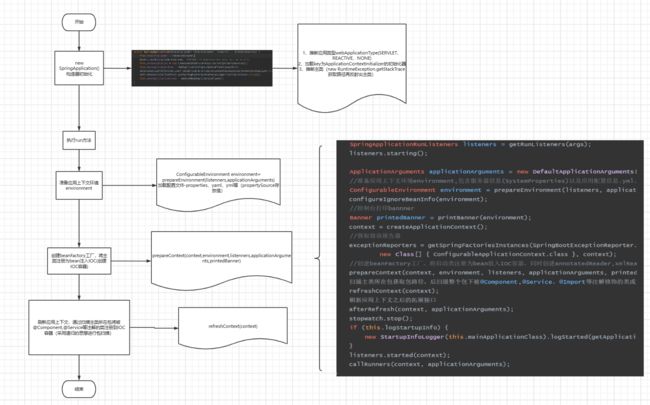
一、源码SpringApplication.class主流程,其中重点在刷新应用上下文refreshContext(context).
            //启动计时器
            StopWatch stopWatch = new StopWatch();
            stopWatch.start();
            //加载SpringApplicationRunListener监听器并开启
            ConfigurableApplicationContext context = null;
            Collection exceptionReporters = new ArrayList<>();
            configureHeadlessProperty();
            SpringApplicationRunListeners listeners = getRunListeners(args);
            listeners.starting();
try {
            ApplicationArguments applicationArguments = new DefaultApplicationArguments(args);
            //准备应用上下文环境environment,包含服务器信息(SystemProperties)以及应用配置信息.yml、.properties
            ConfigurableEnvironment environment = prepareEnvironment(listeners, applicationArguments);
            configureIgnoreBeanInfo(environment);
            //控制台打印bannner
            Banner printedBanner = printBanner(environment);
            context = createApplicationContext();
            //获取错误报告器
            exceptionReporters = getSpringFactoriesInstances(SpringBootExceptionReporter.class,
                    new Class[] { ConfigurableApplicationContext.class }, context);
            //创建beanFactory工厂,将启动类注册为bean放入IOC容器,同时创建annotatedReader,xmlReader,scanner
            prepareContext(context, environment, listeners, applicationArguments, printedBanner);
            扫描主类所在包获取包路径,后扫描整个包下被@Component,@Service,@Import等注解修饰的类或方法注入IOC容器
            refreshContext(context);
            刷新应用上下文之后的拓展接口
            afterRefresh(context, applicationArguments);
            stopWatch.stop();
            if (this.logStartupInfo) {
                new StartupInfoLogger(this.mainApplicationClass).logStarted(getApplicationLog(), stopWatch);
            }
            listeners.started(context);
            callRunners(context, applicationArguments);
        }
        catch (Throwable ex) {
            handleRunFailure(context, ex, exceptionReporters, listeners);
            throw new IllegalStateException(ex);
        }

        try {
            listeners.running(context);
        }
        catch (Throwable ex) {
            handleRunFailure(context, ex, exceptionReporters, null);
            throw new IllegalStateException(ex);
        }
        return context;
源码启动主流程步骤:
二、源码步骤剖析
准备应用上下文环境
SpringApplication.class
listeners.environmentPrepared(environment); //主要目的是获取ConfigFileApplicationListener加载配置文件这里有一个PropertySourceLoader的两个实现类:YamlPropertySourceLoader和PropertiesPropertySourceLoader分别用于加载Yaml配置以及Properties配置文件
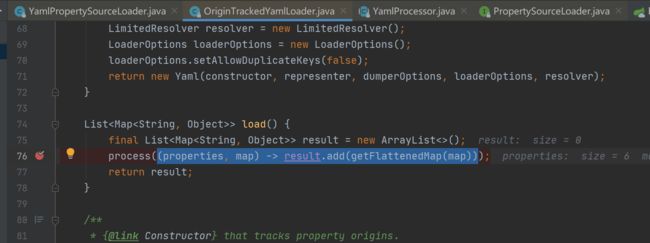
注:在加载配置文件时很重要的监听器是ConfigFileApplicationListener,几乎所有的加载前准备工作都在这个类实现,其中具体以加载yaml类举例:OriginTrackedYamlLoader类的load()方法进行解析source进行加载(获取到的配置的值放入propertySources中),如下图展示:
到这里准备应用上下文环境的主要工作便完成。
创建beanFactory工厂(创建IOC容器并初始化)
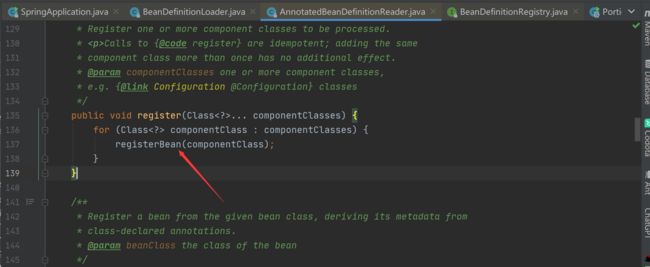
prepareContext(context, environment, listeners, applicationArguments, printedBanner); //创建IOC容器并将主类注册为bean在创建IOC容器时使用了工厂模式,先创建DefaultListableBeanFactory对象,获取里面的beanDefinitionMap(IOC容器,ConcurrentHashMap类型,保证线程安全)对象,并将启动类注入为bean,具体流程如下:
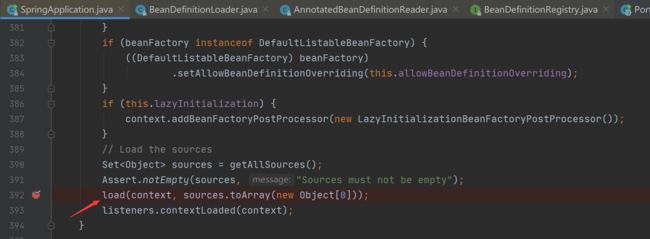
(1)、获取sources里的主类对象调用load()方法将主类注入beandifinitionMap后放入context.
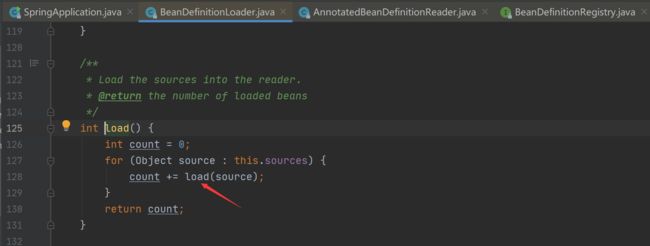
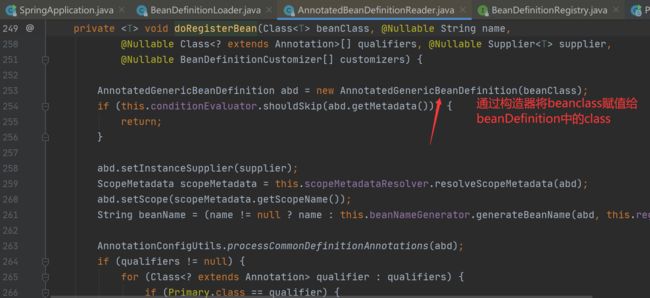
(2)、load()方法细节详情
在注册bean时采用的是adapter适配器模式
至此beanDefinitionMap(IOC)被创建并将主类注册为bean,准备应用上下文工作大致完成。
注:说明一下几个对象之间的包含关系:->表示包含
context(ApplicationContext)->beanFactory(DefaultListableBeanFactory)->beanDefinitionMap
刷新应用上下文环境(将bean注入IOC)
刷新应用上下文的入口
refreshContext(context);//刷新应用上下文,将项目中的bean注入IOC。bean注入时非常重要的方法,从这个方法往下走进行注入bean。
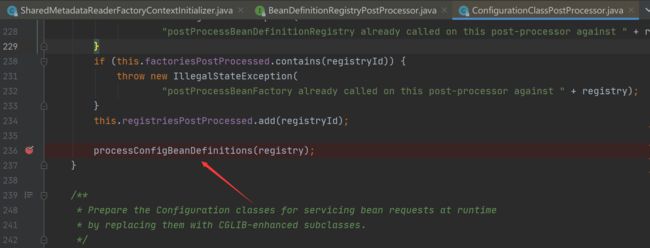
在注入bean的过程中注意ConfigurationClassPostProcessor处理器,通过包扫描获得注解判断是否注入为bean的操作在这个后置处理器里进行。
准备解析文件
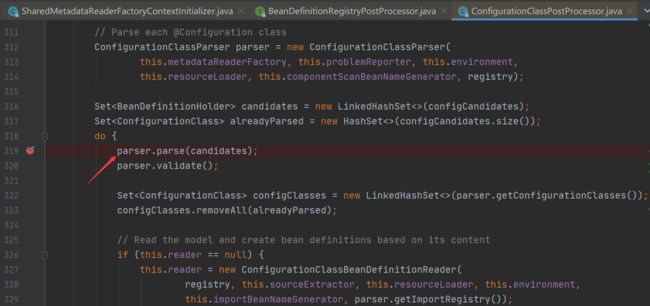
开始解析
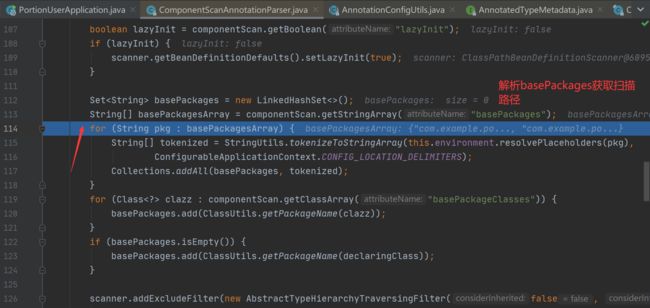
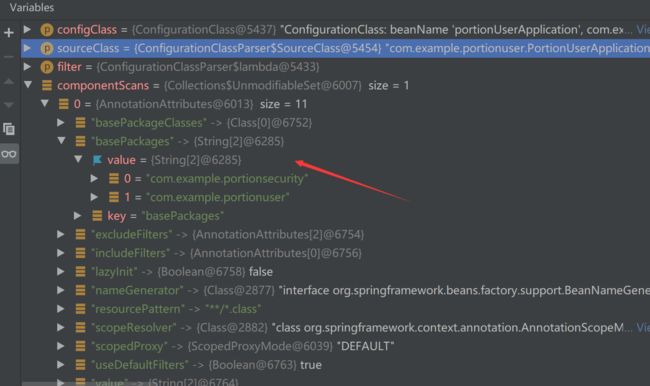
流程解析:(1)、首先获取ComponentScans.class以及ComponentScan.class里的内容(解析的是@SpringBootApplication(scanBasePackages = {"com.example.portionsecurity","com.example.portionuser"})里的内容,其中@SpringBootApplication注解中的scanBasePackages属性与ComponentScan.class中的basePackages等价,如下)
@AliasFor(annotation = ComponentScan.class, attribute = "basePackages")
String[] scanBasePackages() default {};
而后遍历每一个basePackage获取其中需要注册的bean,具体方法为
Setcandidates = findCandidateComponents(basePackage);
之后将bean初始化,返回beanDefinitions
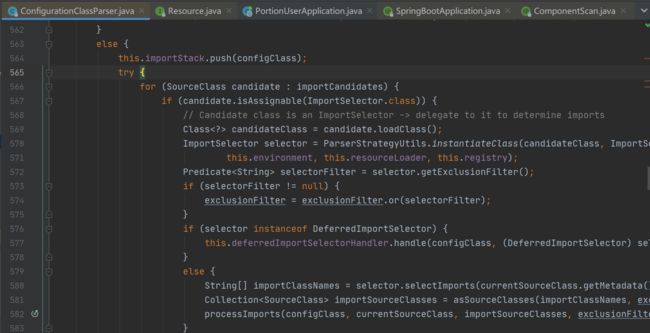
(2)、解决@Import注解
processImports(configClass, sourceClass, getImports(sourceClass), filter, true);
(3)、处理beanMethod(bean中定义了一个bean方法,通常用法为自定义bean设置属性等),如下为具体获取beanMethod的步骤
(4)、其余处理步骤就不再详细赘述(如处理默认的接口实现类,处理父类等)
至此context(应用上下文)刷新完毕,服务中的bean被注入IOC。
以上便是整个springboot源码的主体内容,后面的加载tomcat,dispatcherServlet(前端控制器)在这篇文章中便不在赘述。(后续会持续更新细化的内容,请持续关注。。。)
