【QTC++】不使用QT6PDF模块,200行代码编写一个可编辑PDF的阅读器
QT虽然有PDF模块,但是需要5.15以及6之后的版本,并且只支持加载文档进行阅览,不支持修改PDF文件。
本篇博客使用QT5,不使用QT的PDF模块,通过两百行代码编写一个支持阅览与任意位置插入图片的PDF编辑器,并且还可以拓展其他功能
一、准备工作
PDF文档的显示:我们使用poppler这个pdf库,poppler是一个用于渲染pdf文件的开源库,遵循GPL协议。
对于qt,poppler专门有一个适配的库:poppler-qt
poppler下载链接:Poppler
关于qt使用poppler,我们来看一下官方示例的代码:
加载一个指定的文档:
QString filename;

Poppler::Document* document = Poppler::Document::load(filename);
if (!document || document->isLocked()) {

  // ... error message ....

  delete document;
  return;
}
函数说明:
Poppler::Document::load(QStirng);
返回一个从磁盘上的文件加载了指定文档的document对象。
另外还有从数据流加载PDF的函数
static Document * Poppler::Document::loadFromData ( const QByteArray & fileContents, const QByteArray & ownerPassword = QByteArray(), const QByteArray & userPassword = QByteArray() )
将文档中的某个页面,渲染到QImage上:
// Paranoid safety check
if (document == 0) {
  // ... error message ...
  return;
}

// Access page of the PDF file
Poppler::Page* pdfPage = document->page(pageNumber);  // Document starts at page 0
if (pdfPage == 0) {
  // ... error message ...
  return;
}

// Generate a QImage of the rendered page
QImage image = pdfPage->renderToImage(xres, yres, x, y, width, height);
if (image.isNull()) {
  // ... error message ...
  return;
}

// ... use image ...

// after the usage, the page must be deleted
delete pdfPage;
函数说明:
Page * Poppler::Document::page (int index) const
获取加载文档的某一页。 这个页码时从0开始的,如果加载第一页,那么index的值应该为0。
QImage Poppler::Page::renderToImage ( double xres = 72.0, double yres = 72.0, int x = -1, int y = -1, int w = -1, int h = -1, Rotation rotate = Rotate0 )
将加载的页面,渲染为QImage形式,以便展示在窗口上
参数:
| x |
指定框的左侧 x 坐标(以像素为单位)。 |
| y |
指定框的顶部 y 坐标(以像素为单位)。 |
| w |
指定框的宽度(以像素为单位)。 |
| h |
指定框的高度(以像素为单位)。 |
| Xres |
图形设备的水平分辨率,以每英寸点数为单位 |
| yres |
图形设备的垂直分辨率,以每英寸点数表示 |
| rotate |
如何旋转页面,竖向展示、横向展示等 |
当xywh几个值偶读设置为-1的时候,会根据Xres和yres中指定的水平和垂直分辨率自动计算图像的大小
所有操作完毕,记得释放文档
delete document;编辑PDF文档:使用PDF-Writer来编辑PDF文档
PDF-Writer的github链接:https://github.com/galkahana/PDF-Writer,原名好像是pdfhummus,遵循Apache-2.0 license协议。 wiki上的文档很丰富很详细,编译过程都有说明,这里就不详述了
对于这个库的一个小测试也可以看我这个博文C++编辑修改PDF-CSDN博客
二、使用QT编写PDF编辑器
linux下使用
首先在两个库的github中下载最新的源码包,拷贝到linux系统中,按照github上描述的编译步骤进行编译和安装。然后就能在QT中引用相关库了
windows下可能有一些已经编译好的库,需要注意使用msvc编译器和mingw编译器时,引用的库是否是对应的,否则会报错
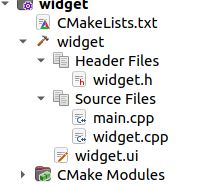
使用QtCreator新建一个Widget项目

pro文件添加:
头文件
INCLUDEPATH += /home/ubuntu/pro/pdf/pdfwriter/PDF-Writer-master/install/include/PDFWriter
INCLUDEPATH += /home/ubuntu/pro/pdf/pdfwriter/PDF-Writer-master/install/include
库
LIBS += -lpoppler
LIBS += -lpoppler-qt5
LIBS+=-L/home/ubuntu/pro/pdf/pdfwriter/PDF-Writer-master/install/lib -lPDFWriter -lFreeType -lLibPng -lLibJpeg -lLibTiff -lLibAesgm -lZlib
这里我的poppler是直接装到默认目录了,如果指定了安装目录,像PDFWriter一样使用-L指定路径就可以了

如果是使用的动态库,系统中有重复的库,记得加上-rpath或者-runpath的后缀指明运行时查找动态库的目录。
打开widget.ui界面,拖动两个按钮到窗体上

分别命名为打开文件和保存文件,用于之后打开要渲染展示的文件和对文件编辑修改后的保存

从工具栏拖动一个scroll Area到窗体上,移动到两个按钮下方。


将scrollArea大小设置为800*800,将其中的widget设置为784*842(一张A4纸的分辨率通常是842×595,所以显示和插入图像时需要进行一下换算) ,用于显示PDF文件
添加一个继承于QWidget的类,用于渲染PDF中的单张页面

在PageWidget中,添加函数insertImg()和deleteQImage(),用于后续插入图片的显示和删除。添加函数SetPageNum()和GetPageNum()用于记录页码与获取页码。重载QWidget的mouseDoubleClickEvent(QMouseEvent *event)函数,用于在鼠标双击的位置获取坐标,插入图片
PageWidget.h:
#ifndef PAGEWIDGET_H
#define PAGEWIDGET_H

#include

class PageWidget : public QWidget
{
    Q_OBJECT
public:
    explicit PageWidget(QImage img,QWidget *parent = nullptr);
    void insertQImage(int x,int y,QPixmap img);
    void deleteQImage(int x,int y);
    void SetPageNum(int num){m_num=num;}
    int GetPageNum(){return m_num;}

signals:
    void doubleclicked(int x,int y,int pages);

protected:
    void mouseDoubleClickEvent(QMouseEvent *event) override;

private:
    int m_num;
};

#endif // PAGEWIDGET_H
PageWidget.cpp
PageWidget::PageWidget(QImage img,QWidget *parent) : QWidget(parent)
{
    // 设置背景图片
    setAutoFillBackground(true);    // 这句要加上, 否则可能显示不出背景图.
    QPalette palette = this->palette();
    palette.setBrush(QPalette::Window,QBrush(QPixmap::fromImage(img)));    // 使用平滑的缩放方式
    this->setPalette(palette);
}

void PageWidget::insertQImage(int x, int y, QPixmap img)
{
    qDebug()<<"insertQImage";
    QLabel *label = new QLabel(this);
    label->move(x,y);
    label->setPixmap(img);
    label->show();
}

void PageWidget::deleteQImage(int x, int y)
{
    QWidget* wdt=this->childAt(x,y);
    if(!wdt)
        wdt->close();//delete wdt
}

void PageWidget::mouseDoubleClickEvent(QMouseEvent *event)
{
    qDebug()<<"x:"<x()<<"y"<y();
	emit doubleclicked(event->x(),event->y(),m_num);
}
进入widget.ui,右键单击之前创建的打开图片按钮,选择“转到槽”创建该按钮的槽函数。添加功能,在单击该按钮时,弹出一个文件选择窗口选择要打开的pdf文件
void Widget::on_button_Open_clicked()
{
QString fileName = QFileDialog::getOpenFileName(this, "open", "./", "document Files (*.pdf)");
if(!fileName.isEmpty())
renderPage(fileName);
}
创建一个渲染函数renderPage(QStinrg),用于渲染PDF文档到窗口上。
void Widget::renderPage(QString filePath)
{
    QString filename=filePath;
    Poppler::Document* document = Poppler::Document::load(filename);
    if(!document||document->isLocked())
    {
        delete document;
        QMessageBox::warning(this,"错误","获取PDF文档出错");
        return;
    }
    int PageNum = document->numPages();

    //计算窗体大小和比率
    Poppler::Page* pdfPageInit = document->page(0);
    if(pdfPageInit==0)
    {
        QMessageBox::warning(this,"错误","获取PDF文件页面出错");
        return;
    }
    QSize pageSize=pdfPageInit->pageSize();
    qDebug()<<"pagesize"<scrollAreaWidgetContents->setGeometry(0,0,pdfwwidth,pageSize.height()*p_rate);
    ui->scrollAreaWidgetContents->setFixedHeight(pageSize.height()*p_rate*PageNum);
    delete pdfPageInit;

    for(int i=0;ipage(i);
        if(pdfPage==0)
        {
            QMessageBox::warning(this,"错误","获取PDF文件页面出错");
            return;
        }

        QImage image = pdfPage->renderToImage(72*p_rate,72*p_rate);
        PageWidget *widget=new PageWidget(image);
        widget->setGeometry(0,0,pdfwwidth,pageSize.height()*p_rate);
        widget->SetPageNum(i+1);
        vlayout->addWidget(widget);
        delete  pdfPage;
    }
    delete  document;
}
效果:
再添加PDF编辑的部分:
创建一个PDFWriter类,添加初始化PDF文档函数int initPDFWriter(QString filename);和指定位置插入的函数 int insertImg(int page,int px,int py,int height,int width,QString imgpath);
pdfwriter.h
#ifndef PDFWRITE_H
#define PDFWRITE_H

#include "PDFWriter.h"//
#include "PDFPage.h"//
#include "PageContentContext.h"//
#include "PDFModifiedPage.h"
#include

class PDFWrite : public QObject
{
    Q_OBJECT
public:
    explicit PDFWrite(QObject *parent = nullptr);
    ~PDFWrite();
    int initPDFWriter(QString filename);
    int DeinitPDFWriter();
    int insertImg(int page,int px,int py,int height,int width,QString imgpath);

signals:

private:
    PDFWriter* pdfWriter;

};

#endif // PDFWRITE_H
pdfwriter.cpp
#include "pdfwrite.h"
#include
PDFWrite::PDFWrite(QObject *parent) : QObject(parent)
{
    pdfWriter=NULL;
}

PDFWrite::~PDFWrite()
{
    DeinitPDFWriter();
}

int PDFWrite::initPDFWriter(QString filename)
{
    if(!pdfWriter)
        pdfWriter=new PDFWriter;
    qDebug()<ModifyPDF(filename.toStdString(), ePDFVersion13, "");
    qDebug()<EndPDF();
        pdfWriter=NULL;
    }
    return 0;
}

int PDFWrite::insertImg(int page, int px, int py, int height, int width, QString imgpath)
{
    if(!pdfWriter)
        return -1;
    qDebug()<<"create modifiedPage"<<"page"<DrawImage(px,py,imgpath.toStdString(),opt);
    int ret=modifiedPage.WritePage();
    qDebug()<<"writepage:"<
然后,将Pagewidget中双击页面与图片插入关联起来。
在widget中添加connect(widget,&PageWidget::doubleclicked,this,&Widget::pages_doublecliked);
添加pages_doublecliked()槽函数
void Widget::pages_doublecliked(int x,int y,int page)
{
    PageWidget *p_page = qobject_cast(sender());
    QString fileName = QFileDialog::getOpenFileName(this, tr("打开一个图像文件"), "./", tr("document Files (*.bmp *.png *.jpg)"));
    if(!fileName.isEmpty())
    {
        QImage img;
        if(img.load(fileName))
        {
            float rate=0.25;
            int scalew=img.width()*rate;
            int scaleh=img.height()*rate;//该值用于pdfwriter插入时限定大小,阅读器上显示还需再进行缩放

            QPixmap pix = QPixmap::fromImage(img).scaled(scalew*m_prate,scaleh*m_prate, Qt::IgnoreAspectRatio, Qt::SmoothTransformation);
            p_page->insertQImage(x,y,pix);

            if(p_pdfwrite!=NULL)
            {
                qDebug()<<"write img";
                p_pdfwrite->insertImg(p_page->GetPageNum(),(x/m_prate),((p_page->height()-(y+pix.height()))/m_prate))),scaleh,scalew,fileName);
            }
        }
    }
}
这里要注意一点,PDF文件的坐标系和QT的坐标系是不同的,在PDF标准协议中,x,y是以左下角为原点的,而在QT中的坐标是以左上角为原点的。所以在插入图片时要稍微转换一下(由于时间和篇幅问题我这里只是简单转换了下)。
图片插入的演示(彦卿图片来源于网络,侵删):
三、待完善
由于时间和篇幅问题,未修改一些bug和完善其他功能,之后有时间再补上
其他待完善的扩展:
创建略缩图,点击略缩图则跳转到对应的页面
制作一个功能栏,添加保存(替换),另存为;添加在指定位置编辑文本的功能;添加页码跳转和打印功能,增加撤销、回撤功能
添加水印
单页面插入以及删除