在虚拟机中安装MySQL(备忘)
1.新建虚拟机
首先新建一个最小安装的LINUX centos 7 的虚拟机
关闭防火墙
systemctl stop firewalld
禁用防火墙
systemctl disable firewalld
进入网络配置文件夹
cd /etc/sysconfig/network-scripts
ls
vi ifcfg-ens33
更改
IPADDR=本地ip
GATEWAY=网关
NETMASK=子关掩码
DNS1=8.8.8.8(公共DNS)
启动网卡服务
systemctl start network.service
/service network start
重启网卡服务
systemctl restart network.service
连上网络后安装vim
yum -y install vim
查看网络状态
systemctl status network.service
关闭网络服务
systemctl stop network.service
重启网络服务
systemctl restart network.service
查看当前网络信息
ip addr
2.安装MySQL
先删除 mariadb
rpm -qa | grep mariadb
rpm -e --nodeps mariadb-libs-5.5.64-1.e17.x86_64
解压安装包
使用xftp将mysql-8.0.30-linux-glibc2.12-x86_64.tar.xz放进/opt/install中,然后解压mysql8
tar -Jxvf mysql-8.0.30-linux-glibc2.12-x86_64.tar.xz -C …/soft/
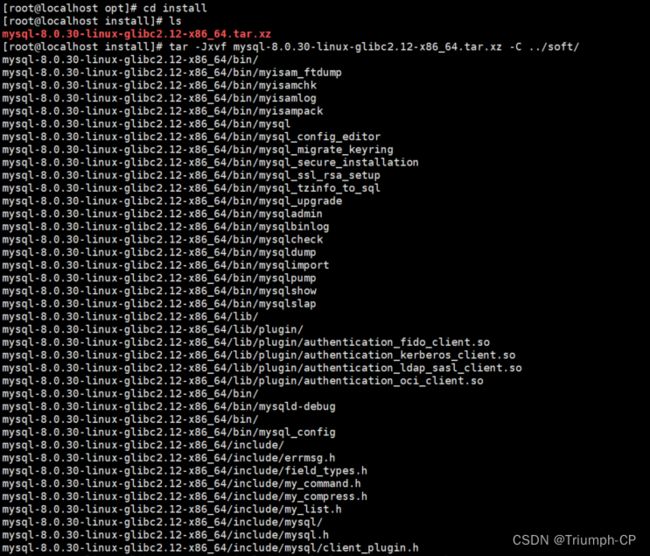
重命名
mv mysql-8.0.30-linux-glibc2.12-x86_64 mysql8
![]()
添加PATH变量
vim /etc/profile
![]()
添加完后记得应用
source /etc/profile
创建用户组和用户
groupadd mysql-------创建用户组
useradd -r -g mysql mysql-------- -r:创建系统用户 -g:指定用户组
创建datas目录
mkdir -p /opt/soft/mysql/datas
给datas权限、分组
chown -R mysql:mysql /opt/soft/mysql/datas
chmod -R 770 /opt/doft/mysql/datas

3.初始化MySQL
在shasha那个一步的mysql8文件夹下创建my.cnf配置文件,用于初始化MySQL数据库

配置文件参考https://blog.csdn.net/weixin_42326851/article/details/123984601
初始化MySQL
mysqld --defaults-file=/opt/soft/mysql8/my.cnf --basedir=/opt/soft/mysql8/ --datadir=/opt/soft/mysql8/datas/mysql --user=mysql --initialize-insecure
启动服务
mysqld_safe --defaults-file=/opt/soft/mysql8/my.cnf &
关闭服务
mysqladmin -uroot -proot shutdown
查看mysql是否启动
ps -ef | grep mysql

登录MySQL
跳过密码登录mysql
mysql -uroot --skip-password
进入mysql后要改密码(改成root)
alter user’root’@‘localhost’ identified with mysql_native_password by ‘root’

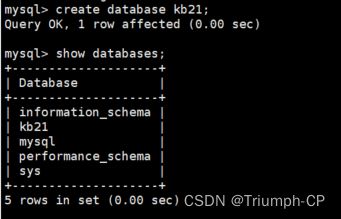
展示数据库
show databases;

退出mysql环境
![]()
4.本地登录、远程登陆
1.本地登录
mysql -uroot -p
2.远程登录
开启远程访问
选择mysql库中的mysql
use mysql

创建库
create database kb21;
开启远程访问
update user set user.Host=‘%’ where user.User=‘root’;

刷新
![]()
远程登录mysql服务(默认禁止外网访问)
mysql -uroot -h192.168.153.140 -p
