简单手写模拟spring底层原理
目录
补充说明
编写基础工程
实现 ApplicationContext
实现@ComponentScan注解
实现@Component注解
spring原理具体简单模拟实现
补充说明
在开始前,先补充一个bean的生成时间。在之前的spring入门使用代码里,是这么写的
AnnotationConfigApplicationContext context = new AnnotationConfigApplicationContext(AppConfig.class);
UserService userService = (UserService) context.getBean("userService");
userService.test();
生成bean,是在我们第一行代码生成的,第二行代码只是去单例池去获取这个bean而已,但是这个是对于普通加载的,如果要生成的bean,声明采用了懒加载的方式,那就不再是第一行代码生成bean了,如果是一个单例bean,我们每次去getBean,都是同一个,但是如果是一个多例bean(也称为原型bean),每次去get,都是创建新的bean
编写基础工程
我们来自己实现一下上面的获取bean的方式
实现 ApplicationContext
package own.study.spring;

public class MyApplicationContext {

    private Class config;

    public MyApplicationContext (Class config) {
        this.config = config;
    }

    public Object getBean (String beanName) {

        return null;
    }

}
做一个配置类
package own.study.spring;

public class Appconfig {
}
做完配置类,我们还需要一个测试类
package own.study.spring;

public class Test {

    public static void main(String[] args) {
        MyApplicationContext myApplicationContext = new MyApplicationContext(Appconfig.class);
        UserService userService = (UserService) myApplicationContext.getBean("userService");
    }

}
写到测试类的时候发现,还需要一个用来当做bean的类
package own.study.spring;

public class UserService {

    public void printMessage () {
        System.out.println("this is userService's method uotput");
    }

}
看似我们就这么实现了,但是这么做肯定不能用,毕竟还有注解,当然,我们说了手动模拟实现,就不能用现成的spring的注解,所以我们也来实现一下注解
实现@ComponentScan注解
package own.study.spring;

import java.lang.annotation.ElementType;
import java.lang.annotation.Retention;
import java.lang.annotation.RetentionPolicy;
import java.lang.annotation.Target;

@Retention(RetentionPolicy.RUNTIME)
@Target(ElementType.TYPE)
public @interface ComponentScan {

    String value() default "";

}
这样,我们就可以使用我们自己的注解
package own.study.spring;

@ComponentScan(value = "own.study.spring")
public class Appconfig {
}
实现@Component注解
package own.study.spring;


import java.lang.annotation.ElementType;
import java.lang.annotation.Retention;
import java.lang.annotation.RetentionPolicy;
import java.lang.annotation.Target;

@Retention(RetentionPolicy.RUNTIME)
@Target(ElementType.TYPE)
public @interface Component {

    String value() default "";

}
package own.study.spring;

@Component(value = "userService")
public class UserService {

    public void printMessage () {
        System.out.println("this is userService's method uotput");
    }

}
spring原理具体简单模拟实现
在第一行,肯定不是直接去创建bean,一定是选需要扫描的,扫描哪些是需要生成bean的
也就是说,首先需要拿到扫描路径,我们可以从传进来的配置类上获取,判断有没有 @ComponentScan 注解
package own.study.spring;

import java.lang.annotation.Annotation;

public class MyApplicationContext {

    private Class config;

    public MyApplicationContext (Class config) {
        this.config = config;
        if (config.isAnnotationPresent(ComponentScan.class)) {
            ComponentScan componentScan = (ComponentScan) config.getAnnotation(ComponentScan.class);
            String sacnPath = componentScan.value();
            System.out.println("sacnPath = " + sacnPath);
        }
    }

    public Object getBean (String beanName) {

        return null;
    }

}
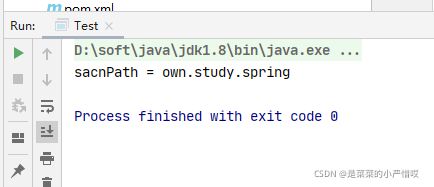
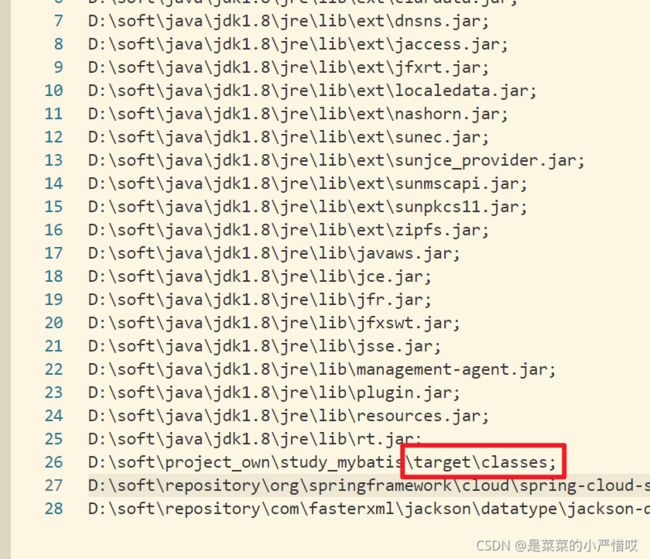
可以看到,我们拿到了这个地址,自定义的扫描路径,拿到了扫描路径之后,我们就可以去对应的target目录下,拿到所有的class文件,然后解析这些class文件上有没有注解,如果仔细看过idea的启动参数信息,也能看到,是去用的target的class文件
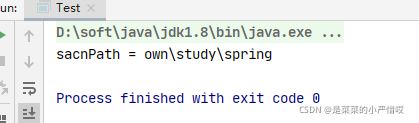
因为这个目录是分隔符,所以我们得把路径换一下格式
package own.study.spring;

import java.io.File;
import java.lang.annotation.Annotation;

public class MyApplicationContext {

    private Class config;

    public MyApplicationContext (Class config) {
        this.config = config;
        if (config.isAnnotationPresent(ComponentScan.class)) {
            ComponentScan componentScan = (ComponentScan) config.getAnnotation(ComponentScan.class);
            String sacnPath = componentScan.value();
            sacnPath = sacnPath.replace(".", "/");
            System.out.println("sacnPath = " + sacnPath);
        }
    }

    public Object getBean (String beanName) {

        return null;
    }

}
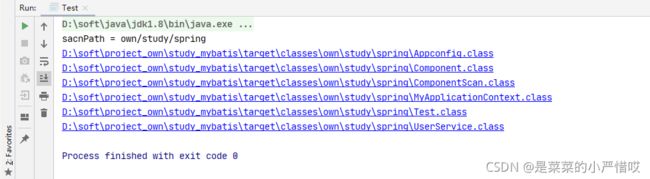
然后我们就可以拿到整个路径下的所有文件
package own.study.spring;

import java.io.File;
import java.lang.annotation.Annotation;
import java.net.URL;

public class MyApplicationContext {

    private Class config;

    public MyApplicationContext (Class config) {
        this.config = config;
        if (config.isAnnotationPresent(ComponentScan.class)) {
            ComponentScan componentScan = (ComponentScan) config.getAnnotation(ComponentScan.class);
            String sacnPath = componentScan.value();
            sacnPath = sacnPath.replace(".", "/");

            System.out.println("sacnPath = " + sacnPath);

            ClassLoader classLoader = MyApplicationContext.class.getClassLoader();
            URL resource = classLoader.getResource(sacnPath);
            File file = new File(resource.getFile());

            if (file.isDirectory()) {
                for (File tmpFile : file.listFiles()) {
                    System.out.println(tmpFile.getAbsolutePath());
                }
            }
        }
    }

    public Object getBean (String beanName) {

        return null;
    }

}
现在我们拿到了这class文件,我们可以把这个类加载进来,然后判断是不是有注解,注意,类加载器只能加载我们之前的以 ‘.’ 为分隔符的路径,所以我们还得替换一下才行(这里因为我的包名和路径名冲突了,所以我把包名从 own 换成了 pri )
package pri.study.spring;

import java.io.File;
import java.net.URL;

public class MyApplicationContext {

    private Class config;

    public MyApplicationContext (Class config) throws ClassNotFoundException {
        this.config = config;
        if (config.isAnnotationPresent(ComponentScan.class)) {
            ComponentScan componentScan = (ComponentScan) config.getAnnotation(ComponentScan.class);
            String sacnPath = componentScan.value();
            sacnPath = sacnPath.replace(".", "/");

            System.out.println("sacnPath = " + sacnPath);

            ClassLoader classLoader = MyApplicationContext.class.getClassLoader();
            URL resource = classLoader.getResource(sacnPath);
            File file = new File(resource.getFile());

            if (file.isDirectory()) {
                for (File tmpFile : file.listFiles()) {
                    System.out.println(tmpFile.getAbsolutePath());
                    String absolutePath = tmpFile.getAbsolutePath();
                    absolutePath = absolutePath.substring(absolutePath.indexOf("pri"), absolutePath.indexOf(".class")).replace("\\", ".");
                    System.out.println("absolutePath = " + absolutePath);

                    Class aClass = classLoader.loadClass(absolutePath);
                    System.out.println(aClass.isAnnotationPresent(Component.class));

                }
            }

        }

    }

    public Object getBean (String beanName) {

        return null;
    }

}

看,我们拿到了有注解的类,说明这是一个bean,当然,现在还不能直接生成,我们需要判断一下是单例bean,还是一个多例(原型)bean
package pri.study.spring;

import java.io.File;
import java.net.URL;

public class MyApplicationContext {

    private Class config;

    public MyApplicationContext (Class config) throws ClassNotFoundException {
        this.config = config;
        if (config.isAnnotationPresent(ComponentScan.class)) {
            ComponentScan componentScan = (ComponentScan) config.getAnnotation(ComponentScan.class);
            String sacnPath = componentScan.value();
            sacnPath = sacnPath.replace(".", "/");

            System.out.println("sacnPath = " + sacnPath);

            ClassLoader classLoader = MyApplicationContext.class.getClassLoader();
            URL resource = classLoader.getResource(sacnPath);
            File file = new File(resource.getFile());

            if (file.isDirectory()) {
                for (File tmpFile : file.listFiles()) {
                    System.out.println(tmpFile.getAbsolutePath());
                    String absolutePath = tmpFile.getAbsolutePath();
                    absolutePath = absolutePath.substring(absolutePath.indexOf("pri"), absolutePath.indexOf(".class")).replace("\\", ".");
                    System.out.println("absolutePath = " + absolutePath);

                    Class aClass = classLoader.loadClass(absolutePath);
                    // 判断是否包含 @Component 注解
                    if (aClass.isAnnotationPresent(Component.class)) {

                        // 判断是否包含 @Scope 注解
                        if (aClass.isAnnotationPresent(Scope.class)) {

                            Scope annotation = aClass.getAnnotation(Scope.class);
                            String value = annotation.value();

                            //todo 判断是单例还是多例(原型)

                        }

                    }

                }
            }

        }

    }

    public Object getBean (String beanName) {

        return null;
    }

}
package pri.study.spring;


import java.lang.annotation.ElementType;
import java.lang.annotation.Retention;
import java.lang.annotation.RetentionPolicy;
import java.lang.annotation.Target;

@Retention(RetentionPolicy.RUNTIME)
@Target(ElementType.TYPE)
public @interface Scope {

    String value() default "";

}
假设,我们判断完了,是一个单例,那就开始创建bean吗?
想一个问题,我们是用 getBean() 方法,获取到的,传进去的一个beanname,返回了一个对象,所以是要用一个beanname来获取对应的类,如果我们找到类之后,还是得判断是单例还是多例的,又得进行和构造方法的内容一样的逻辑,很麻烦,且没必要,那我们能不能在构造方法里,就执行完一堆逻辑存储起来bean的特性呢?让 getBean() 就是单纯的去判断是单例还是多例,单例就直接获取bean,不去执行过多的重复性逻辑
为了保证构造方法的简单,我们将扫描判断的过程单独抽取一个方法出来
private Map beanDefinitionMap = new HashMap<>();


 private void scanpath(Class config) throws ClassNotFoundException {
        if (config.isAnnotationPresent(ComponentScan.class)) {
            ComponentScan componentScan = (ComponentScan) config.getAnnotation(ComponentScan.class);
            String sacnPath = componentScan.value();
            sacnPath = sacnPath.replace(".", "/");


            ClassLoader classLoader = MyApplicationContext.class.getClassLoader();
            URL resource = classLoader.getResource(sacnPath);
            File file = new File(resource.getFile());

            if (file.isDirectory()) {
                for (File tmpFile : file.listFiles()) {
                    String absolutePath = tmpFile.getAbsolutePath();
                    absolutePath = absolutePath.substring(absolutePath.indexOf("pri"), absolutePath.indexOf(".class")).replace("\\", ".");

                    Class aClass = classLoader.loadClass(absolutePath);

                    // 判断是否包含 @Component 注解
                    if (aClass.isAnnotationPresent(Component.class)) {

                        // 获取到自定义的bean的名字
                        Component component = aClass.getAnnotation(Component.class);
                        String beanName = component.value();

                        BeanDefinition beanDefinition = new BeanDefinition();
                        beanDefinition.setBeanType(aClass);

                        // 判断是否包含 @Scope 注解
                        if (aClass.isAnnotationPresent(Scope.class)) {
                            Scope annotation = aClass.getAnnotation(Scope.class);
                            String value = annotation.value();
                            beanDefinition.setScope(value);
                        } else {
                            beanDefinition.setScope("singleton");
                        }

                        beanDefinitionMap.put(beanName, beanDefinition);

                    }

                }
            }

        }
    }
在这里,我们还多了样东西,就是 BeanDefinition,对bean的定义
package pri.study.spring;

public class BeanDefinition {

    private Class beanType;
    private String scope;
    private boolean isLazy;

    public Class getBeanType() {
        return beanType;
    }

    public void setBeanType(Class beanType) {
        this.beanType = beanType;
    }

    public String getScope() {
        return scope;
    }

    public void setScope(String scope) {
        this.scope = scope;
    }

    public boolean isLazy() {
        return isLazy;
    }

    public void setLazy(boolean lazy) {
        isLazy = lazy;
    }
}
我们在解析完扫描完对应的路径下后,就已经知道了所有bean的情况,我们将他们进行记录,放入一个map中,bean的名字为key,定义为value,这个时候,我们继续写构造方法,进行判断,如果是单例的,那我们就生成bean,为了方便,我们再做一个map,存储beanName和对应的bean,仔细想想,getBean()方法,是不是放一个map很方便?
        // 创建单例bean
        for (Map.Entry entry : beanDefinitionMap.entrySet()) {
            String key = entry.getKey();
            BeanDefinition beanDefinition = beanDefinitionMap.get(key);

            if (beanDefinition.getScope().equals("singleton")) {
                Object bean = createBean(key, beanDefinition);
                singletonPool.put(key, bean);
            }

        }
为什么只放单例呢?因为多例每次都需要重新创建,所以没必要创建,可以在getBean()的时候,判断是不是多例,如果是多例,我们再创建bean
那么问题来了,如何创建bean呢?既然单例和多例都需要创建bean,那我们抽取一个共用方法
    private Object createBean (String beanName, BeanDefinition beanDefinition) throws IllegalAccessException, InvocationTargetException, InstantiationException, NoSuchMethodException {
        Class clazz = beanDefinition.getBeanType();
        Constructor constructor = clazz.getConstructor();
        Object bean = constructor.newInstance();
        return bean;
    }
这里为了简单,我们直接使用空参的构造方法
到了这里我们就结束了,可以正常使用我们的spring了
于是整个 xxxApplicationContext的代码就是
package pri.study.spring;

import java.io.File;
import java.lang.reflect.Constructor;
import java.lang.reflect.InvocationTargetException;
import java.net.URL;
import java.util.HashMap;
import java.util.Map;

public class MyApplicationContext {

    private Class config;
    private Map beanDefinitionMap = new HashMap<>();
    // 定义一个单例池
    private Map singletonPool = new HashMap<>();

    public MyApplicationContext (Class config) throws ClassNotFoundException, InvocationTargetException, NoSuchMethodException, InstantiationException, IllegalAccessException {
        this.config = config;

        // 扫描
        scanpath(config);

        // 创建单例bean
        for (Map.Entry entry : beanDefinitionMap.entrySet()) {
            String key = entry.getKey();
            BeanDefinition beanDefinition = beanDefinitionMap.get(key);

            if (beanDefinition.getScope().equals("singleton")) {
                Object bean = createBean(key, beanDefinition);
                singletonPool.put(key, bean);
            }

        }

    }

    private Object createBean (String beanName, BeanDefinition beanDefinition) throws IllegalAccessException, InvocationTargetException, InstantiationException, NoSuchMethodException {
        Class clazz = beanDefinition.getBeanType();
        Constructor constructor = clazz.getConstructor();
        Object bean = constructor.newInstance();
        return bean;
    }

    private void scanpath(Class config) throws ClassNotFoundException {
        if (config.isAnnotationPresent(ComponentScan.class)) {
            ComponentScan componentScan = (ComponentScan) config.getAnnotation(ComponentScan.class);
            String sacnPath = componentScan.value();
            sacnPath = sacnPath.replace(".", "/");


            ClassLoader classLoader = MyApplicationContext.class.getClassLoader();
            URL resource = classLoader.getResource(sacnPath);
            File file = new File(resource.getFile());

            if (file.isDirectory()) {
                for (File tmpFile : file.listFiles()) {
                    String absolutePath = tmpFile.getAbsolutePath();
                    absolutePath = absolutePath.substring(absolutePath.indexOf("pri"), absolutePath.indexOf(".class")).replace("\\", ".");

                    Class aClass = classLoader.loadClass(absolutePath);

                    // 判断是否包含 @Component 注解
                    if (aClass.isAnnotationPresent(Component.class)) {

                        // 获取到自定义的bean的名字
                        Component component = aClass.getAnnotation(Component.class);
                        String beanName = component.value();

                        BeanDefinition beanDefinition = new BeanDefinition();
                        beanDefinition.setBeanType(aClass);

                        // 判断是否包含 @Scope 注解
                        if (aClass.isAnnotationPresent(Scope.class)) {
                            Scope annotation = aClass.getAnnotation(Scope.class);
                            String value = annotation.value();
                            beanDefinition.setScope(value);
                        } else {
                            beanDefinition.setScope("singleton");
                        }

                        beanDefinitionMap.put(beanName, beanDefinition);

                    }

                }
            }

        }
    }

    public Object getBean (String beanName) throws InvocationTargetException, NoSuchMethodException, InstantiationException, IllegalAccessException {
        if (!beanDefinitionMap.containsKey(beanName)) {
            throw new RuntimeException("bean name is error");
        }
        BeanDefinition beanDefinition = beanDefinitionMap.get(beanName);
        if (beanDefinition.getScope().equals("singleton")) {
            // 说明是单例的
            return singletonPool.get(beanName);
        } else {
            // 说明是一个多例(原型)bean,每次都需要创建
            return createBean(beanName, beanDefinition);
        }
    }

}
我们来试试
并且支持单例和多例
单例:
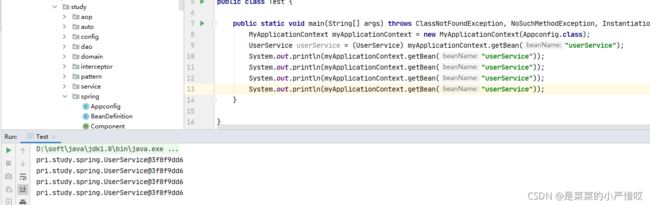
多例

多个bean

但是这样,我们每次使用注解还得自定义bean的名字,否则会报错,但是我们实际在使用spring的时候并不用指定,so,我们进行优化
// 获取到自定义的bean的名字
                        Component component = aClass.getAnnotation(Component.class);
                        String beanName = component.value();

                        if ("".equals(beanName)) {
                            beanName = Introspector.decapitalize(aClass.getSimpleName());
                        }
我们来试试看正常不正常

----------------------------------分割线----------------------------------
现在我们已经可以创建一个bean了,在spring里面,还有一个很重要的玩意,依赖注入
我们先实现一下注解
package pri.study.spring;

import java.lang.annotation.ElementType;
import java.lang.annotation.Retention;
import java.lang.annotation.RetentionPolicy;
import java.lang.annotation.Target;

@Retention(RetentionPolicy.RUNTIME)
@Target(ElementType.FIELD)
public @interface Autowired {

}
现在当然是不能用的,不信我们看结果
package pri.study.spring;
@Component(value = "userService")
@Scope(value = "aad")
public class UserService {
@Autowired
private OrderService orderService;
public void printMessage () {
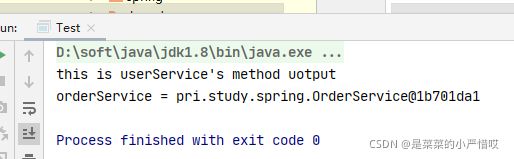
System.out.println("this is userService's method uotput");
System.out.println("orderService = " + orderService);
}
}
package pri.study.spring;
import java.lang.reflect.InvocationTargetException;
public class Test {
public static void main(String[] args) throws ClassNotFoundException, NoSuchMethodException, InstantiationException, IllegalAccessException, InvocationTargetException {
MyApplicationContext myApplicationContext = new MyApplicationContext(Appconfig.class);
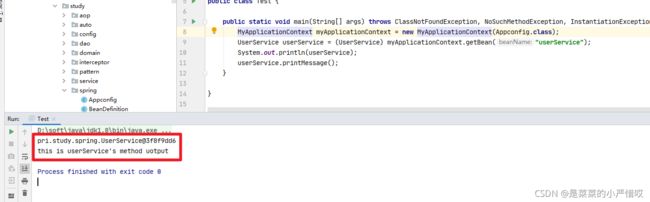
UserService userService = (UserService) myApplicationContext.getBean("userService");
userService.printMessage();
}
}

想一下spring bean的创建流程,在生成bean之前,是不是有一步依赖注入,所以,我们需要改造我们的 createBean 方法
    private Object createBean (String beanName, BeanDefinition beanDefinition) throws IllegalAccessException, InvocationTargetException, InstantiationException, NoSuchMethodException {
        Class clazz = beanDefinition.getBeanType();
        Constructor constructor = clazz.getConstructor();
        Object bean = null;

        bean = constructor.newInstance();

        for (Field field : clazz.getDeclaredFields()) {
            if (field.isAnnotationPresent(Autowired.class)) {
                field.setAccessible(true);
                field.set(bean, getBean(field.getName()));
            }
        }

        return bean;
    }
当然,这里是一个简单实现,是直接从单例池去拿的,会存在问题
1、循环依赖,这个不在这次的分享范围内,暂时认为是OK的
2、流程上是先扫描了,假设创建userService这个bean,进行到了createBean,而内部注入的orderService还没有生成,我们会拿到一个空;所以我们可以加一个判断,如果为空,就创建bean
    public Object getBean (String beanName) throws InvocationTargetException, NoSuchMethodException, InstantiationException, IllegalAccessException {
        if (!beanDefinitionMap.containsKey(beanName)) {
            throw new RuntimeException("bean name is error");
        }
        BeanDefinition beanDefinition = beanDefinitionMap.get(beanName);
        if (beanDefinition.getScope().equals("singleton")) {
            // 说明是单例的
            Object singleBean = singletonPool.get(beanName);
            if (Objects.isNull(singleBean)) {
                singleBean = createBean(beanName, beanDefinition);
                singletonPool.put(beanName, singleBean);
            }
            return singleBean;
        } else {
            // 说明是一个多例(原型)bean,每次都需要创建
            return createBean(beanName, beanDefinition);
        }
    }
在我的上篇文章分享里,介绍了spring bean的创建流程,还涉及到了初始化的东西,也来实现一下
package pri.study.spring;


public interface InitializingBean {

    void afterPropertiesSet() throws Exception;

}
那么具体该怎么实现初始化后的东西呢?看下面,我们可以在createBean之后,判断有没有实现,有,那就强转调用,这个在上篇文档也说过
    private Object createBean (String beanName, BeanDefinition beanDefinition) throws IllegalAccessException, InvocationTargetException, InstantiationException, NoSuchMethodException {
        Class clazz = beanDefinition.getBeanType();
        Constructor constructor = clazz.getConstructor();
        Object bean = null;

        bean = constructor.newInstance();

        for (Field field : clazz.getDeclaredFields()) {
            if (field.isAnnotationPresent(Autowired.class)) {
                field.setAccessible(true);
                field.set(bean, getBean(field.getName()));
            }
        }

        // 判断是否实现了 InitializingBean,如果实现了,那就强转,然后调用
        if (bean instanceof InitializingBean) {
            ((InitializingBean) bean).afterPropertiesSet();
        }

        return bean;
    }
----------------------------------分割线----------------------------------
在spring中,还有一个很重要的接口,BeanPostProcessor ,这个接口有两个方法 postProcessBeforeInitialization 和 postProcessAfterInitialization,这个接口的方法,是针对于所有的bean的,也就是说,如果实现了这个接口,所有的bean都会调用重写的这两个方法
至于该怎么调用呢,其实也简单,我们只要在bean生成之前,判断有没有这个接口的实现,实现了这个接口,那我们就保存下来,在创建完bean之后,去使用,因为可能有多实现,所以我们放在list,然后我们在创建完bean之后,遍历这个集合,进行执行
private void scanpath(Class config) throws ClassNotFoundException, NoSuchMethodException, IllegalAccessException, InvocationTargetException, InstantiationException {
        if (config.isAnnotationPresent(ComponentScan.class)) {
            ComponentScan componentScan = (ComponentScan) config.getAnnotation(ComponentScan.class);
            String sacnPath = componentScan.value();
            sacnPath = sacnPath.replace(".", "/");


            ClassLoader classLoader = MyApplicationContext.class.getClassLoader();
            URL resource = classLoader.getResource(sacnPath);
            File file = new File(resource.getFile());

            if (file.isDirectory()) {
                for (File tmpFile : file.listFiles()) {
                    String absolutePath = tmpFile.getAbsolutePath();
                    absolutePath = absolutePath.substring(absolutePath.indexOf("pri"), absolutePath.indexOf(".class")).replace("\\", ".");

                    Class aClass = classLoader.loadClass(absolutePath);

                    // 判断是否包含 @Component 注解
                    if (aClass.isAnnotationPresent(Component.class)) {

                        // 判断是否有bean实现了 BeanPostProcessor 接口,如果有,就存下来
                        if (BeanPostProcessor.class.isAssignableFrom(aClass)) {
                            BeanPostProcessor beanPostProcessor = (BeanPostProcessor) aClass.getConstructor().newInstance();
                            beanPostProcessorList.add(beanPostProcessor);
                        }

                        // 获取到自定义的bean的名字
                        Component component = aClass.getAnnotation(Component.class);
                        String beanName = component.value();

                        if ("".equals(beanName)) {
                            beanName = Introspector.decapitalize(aClass.getSimpleName());
                        }

                        BeanDefinition beanDefinition = new BeanDefinition();
                        beanDefinition.setBeanType(aClass);

                        // 判断是否包含 @Scope 注解
                        if (aClass.isAnnotationPresent(Scope.class)) {
                            Scope annotation = aClass.getAnnotation(Scope.class);
                            String value = annotation.value();
                            beanDefinition.setScope(value);
                        } else {
                            beanDefinition.setScope("singleton");
                        }

                        beanDefinitionMap.put(beanName, beanDefinition);

                    }

                }
            }

        }
    }
private Object createBean (String beanName, BeanDefinition beanDefinition) throws IllegalAccessException, InvocationTargetException, InstantiationException, NoSuchMethodException {
Class clazz = beanDefinition.getBeanType();
Constructor constructor = clazz.getConstructor();
Object bean = null;
bean = constructor.newInstance();
for (Field field : clazz.getDeclaredFields()) {
if (field.isAnnotationPresent(Autowired.class)) {
field.setAccessible(true);
field.set(bean, getBean(field.getName()));
}
}
// 判断是否实现了 InitializingBean,如果实现了,那就强转,然后调用
if (bean instanceof InitializingBean) {
((InitializingBean) bean).afterPropertiesSet();
}
for (BeanPostProcessor beanPostProcessor : beanPostProcessorList) {
beanPostProcessor.postProcessAfterInitialization(bean, beanName);
}
return bean;
}
仔细看一个东西,BeanPostProcessor 的方法是有返回值的,意味着我们可以把bean返回去,想一想,我们可以对bean做更改,然后返回去,有没有很熟悉?就是AOP,我们完全可以在方法内对指定的bean进行代理,然后返回代理对象,将外部的bean进行更改,改为代理对象