将CSS添加到Angular 2组件的所有方法
Writing styles for large applications can be a really challenging task as styles get easily mixed up and confusing. The major issue is usually encountered when trying to structure your styles and give proper naming of individual styles.
为大型应用程序编写样式可能是一项非常具有挑战性的任务,因为样式容易混合和混淆。 在尝试构建样式并正确命名各个样式时,通常会遇到主要问题。
With time, patterns were introduced to enhance style organization and most of these patterns are implemented when we make use of pre-processors like Sass and Less. The significant thing about these patterns is that they suggest organizing our styles and templates in the form of COMPONENTS.
随着时间的流逝,引入了模式来增强样式组织,并且当我们使用Sass和Less等预处理器时,大多数模式都会实现。 这些模式的重要意义在于它们建议以COMPONENTS的形式组织我们的样式和模板。
Angular 2 is component based which means that every UI functionality is built as a component. Therefore, as component based styling is a recommended pattern, Angular 2 is just about to make writing styles a rather enjoyable experience. We will discuss different styling techniques and how to use them, but before that, we need to understand the concept of Shadow DOM and View Encapsulation.
Angular 2是基于组件的,这意味着每个UI功能都作为一个组件构建。 因此,由于推荐使用基于组件的样式,因此Angular 2即将使书写样式成为一种令人愉快的体验。 我们将讨论不同的样式技术以及如何使用它们,但是在此之前,我们需要了解Shadow DOM和View Encapsulation的概念。
影子DOM和视图封装 ( Shadow DOM and View Encapsulation )
Shadow DOM is included in the Web Components standard by W3C. Shadow DOM basically allows group of DOM implementation to be hidden inside a single element (which is the basic idea of components) and encapsulate styles to the element. This means that encapsulated styles will only be available for that group of DOM elements and nothing more.
W3C将影子DOM包含在Web组件标准中。 Shadow DOM基本上允许将一组DOM实现隐藏在单个元素内(这是组件的基本概念),并将样式封装为该元素。 这意味着封装的样式仅可用于该组DOM元素,仅此而已。
Shadow DOM的抽象 (Abstraction with Shadow DOM)
Remember that the idea of web components and shadow DOM is relatively new and not all browsers can handle the concept. This is where one of the major advantages of Angular 2 comes in as it allows us to choose whether to implement Shadow DOM, just emulate it (default) or not use it at all. This technique of handling Shadow DOM in Angular 2 is know as View Encapsulation.
请记住,Web组件和影子DOM的概念是相对较新的,并非所有的浏览器都可以处理。 这是Angular 2的主要优点之一,因为它使我们能够选择是实现Shadow DOM,只是对其进行仿真(默认)还是完全不使用它。 这种在Angular 2中处理Shadow DOM的技术称为“视图封装”。
The 3 states of view encapsulation are:
视图封装的3种状态是:
None: All elements are spit out - no Shadow DOM at all.
无 :吐出所有元素-完全没有Shadow DOM。
Emulated: This actually tries to emulate Shadow DOM to give us the feel that we are scoping our styles. This is not a real Shadow DOM but a strategy to make all browsers smile at our code.
模拟 :这实际上是试图模拟Shadow DOM,以使我们感觉我们正在确定样式。 这不是真正的Shadow DOM,而是一种使所有浏览器对我们的代码微笑的策略。
Native: This is the real deal as shadow DOM is completely enabled. Older browsers can go to hell.
本机 :这是真正的交易,因为完全启用了影子DOM。 较旧的浏览器可能会崩溃 。
Setting encapsulation is quite simple and is done right inside the @component decorator:
设置封装非常简单,并且可以在@component装饰器内部完成:
@Component({
  templateUrl: 'card.html',
  styles: [`
    .card {
      height: 70px;
      width: 100px;
    }
  `],
  encapsulation: ViewEncapsulation.Native
  // encapsulation: ViewEncapsulation.None
  // encapsulation: ViewEncapsulation.Emulated is default
})
造型技巧 ( Styling Techniques )
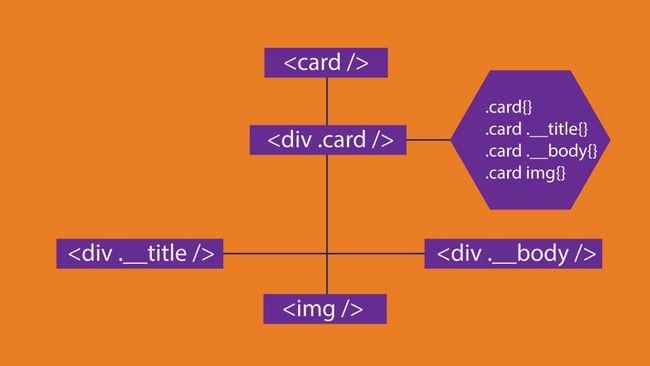
Now that we have taken some time to put Shadow DOM and View Encapsulation straight, we can go ahead to understand the different techniques of styling an Angular component. Cards are common components that we are familiar with, so permit me to use it for the illustrations.
现在我们花了一些时间将Shadow DOM和View Encapsulation摆平,我们可以继续了解对Angular组件进行样式设置的不同技术。 卡是我们熟悉的常见组件,因此请允许我将其用于插图。
组件内联样式 (Component Inline Styles)
This technique is the most obvious styling technique in Angular 2. This is because it is recommended, makes sense with the concept of components in mind and found everywhere in the Angular 2 documentation. It is implemented in the @Component decorator of our component class like so:
该技术是Angular 2中最明显的样式化技术。这是因为建议使用该技术,并牢记组件的概念,并在Angular 2文档中随处可见。 它是在我们的组件类的@Component装饰器中实现的,如下所示:
@Component({
  templateUrl: 'card.html',
  styles: [`
    .card {
      height: 70px;
      width: 100px;
    }
  `],
})
The expected behavior in various view encapsulation techniques are:
各种视图封装技术中的预期行为是:
None: The style is wrapped in a
styletag and pushed to thehead无 :将样式包裹在
style标签中并推到headEmulated: The style is wrapped in a
styletag, pushed toheadand uniquely identified so it can be matched with its component's template. With that, the styles will be used for only the template in the same component.仿真 :将样式包裹在
style标签中,推入head并进行唯一标识,以便可以与其组件的模板匹配。 这样,样式将仅用于同一组件中的模板。Native: Behaves as expected of web components.
本机 :行为符合Web组件的预期。
外部样式表 (External Stylesheets)
Just like our everyday method of including styles from external styles which have an extension of .css, we could also import external styles in an Angular 2 component. It is as simple as importing templates with the templateUrl property in @Component decorator.
就像我们日常使用的方法包括从扩展名为.css外部样式中包含样式一样,我们也可以在Angular 2组件中导入外部样式。 就像在@Component装饰器中使用templateUrl属性导入模板一样简单。
@Component({
  styleUrls: ['css/style.css'],
  templateUrl: 'card.html',
})
The expected behavior in various view encapsulation techniques are:
各种视图封装技术中的预期行为是:
None: The style is wrapped in a
styletag and pushed to thehead. It is appended right after the component inline style.无 :将样式包裹在
style标签中并推到head。 它被附加在组件内联样式之后。Emulated: The style is wrapped in
styletag, pushed toheadand uniquely identified so it can be matched with its component's template just like component inline style. As you can see, you must have guessed wrong if you expected the style to be imported withlink仿真 :样式被包装在
style标签中,推到head并被唯一标识,因此可以像组件内联样式一样与其组件的模板匹配。 如您所见,如果您希望通过link导入样式,则必须猜错了Native: Behaves as expected of web components.
本机 :行为符合Web组件的预期。
模板内联样式 (Template Inline Style)
This is achievable with two methods:
这可以通过两种方法来实现:
1) The styles can be wrapped in a style tag and placed before the templates:
1)样式可以包装在style标签中,并放在模板之前:
@Component({
template: `
Styling Angular Components
`
})2) The style can be written as normal inline styles in the template tags:
2)样式可以在模板标签中写为普通的内联样式:
@Component({
template: 'Styling Angular Components
'
})The expected behavior in various view encapsulation techniques are:
各种视图封装技术中的预期行为是:
None: For method 1, the style is wrapped in a
styletag and pushed to thehead. It is appended right after the component inline and external styles. For method 2, the style just remains in the tag.无 :对于方法1,将样式包裹在
style标签中并推到head。 它被附加在组件内联和外部样式之后。 对于方法2,样式仅保留在标记中。Emulated: For method 1, the style is wrapped in
styletag, pushed toheadand uniquely identified so it can be matched with its component's template just like component inline style. For method 2, the style still remains in the tag.模拟 :对于方法1,将样式包裹在
style标签中,推入head并进行唯一标识,以便可以将其与其组件的模板匹配,就像组件内联样式一样。 对于方法2,样式仍保留在标签中。Native: Behaves as expected of web components.
本机 :行为符合Web组件的预期。
风格优先 ( Style Priority )
This is the point where we need to pay attention to as it can be quite tricky. A demo is provided with Plunker so we can play with later. If you have been following the article carefully, you will realize that component styles, if any, are always appended to the head first.
这是我们需要注意的一点,因为它可能非常棘手。 Plunker提供了一个演示,以便我们以后可以玩。 如果您一直在认真地阅读本文,您将意识到组件样式(如果有的话)总是始终附加在head 。
Where it then becomes confusing is that the first method of template inline styles are appended before the external styles. This makes external styles to take precedence because in CSS the last is the greatest.
令人困惑的是,将模板内联样式的第一种方法附加在外部样式之前。 这使外部样式具有优先权,因为在CSS中,最后一种样式最大。
NB: Kindly, bear in mind that Angular 2 is in Beta and not stable so things like priorities can easily be reconsidered.
注意:请记住,Angular 2是Beta版,并且不稳定,因此可以轻松地重新考虑优先级之类的事情。
玩演示 (Playing With the Demo)
To better understand priorities, I have created a Plunk with all the styling techniques we discussed. What I suggest is that you switch this styles, mess around with it and see the results. The comment section of this article is a great place to discuss your findings.
为了更好地理解优先级,我使用我们讨论的所有样式技术创建了一个Plunk 。 我建议您切换这种样式,弄乱它并查看结果。 本文的评论部分是讨论您的发现的好地方。
结论 ( Conclusion )
Whatever method you choose is accepted and that is the good thing about components and Angular 2. You don't have to listen to the preaching of not using internal styles or inline styles as they are within components and will be scoped. On the other hand, we are now able to organize our code better in a modular pattern.
无论您选择哪种方法,都可以接受,这对于组件和Angular 2来说是件好事。您不必听讲不要在组件内部使用内部样式或内联样式的宣讲,因为它们会在组件范围内。 另一方面,我们现在能够以模块化模式更好地组织代码。
Angular 2 is awesome, right?
Angular 2很棒,对吗?
翻译自: https://scotch.io/tutorials/all-the-ways-to-add-css-to-angular-2-components