粤嵌实训医疗项目--day04(Vue + SpringBoot)

往期回顾
- 粤嵌实训医疗项目--day03(Vue + SpringBoot)-CSDN博客
- 粤嵌实训医疗项目day02(Vue + SpringBoot)-CSDN博客
- 粤嵌实训医疗项目--day01(Vue+SpringBoot)-CSDN博客
目录
一、用户详细信息查询 (查询信息与分页显示)
二、实现信息修改功能(增添、编辑、删除)
一、用户详细信息查询 (查询信息与分页显示)
--前端中创建view包,并在view包下创建对应用户查询信息的页面

UserInfoList页面布局前端代码
搜索
新增
![]()
男
女
绿码
黄码
红码
编辑
删除
![]()
--在前端项目中的Aside.vue进行如下修改

--在路由中添加UserInfoList的访问地址
 --在userinfo实体类中提供username

--在userinfoController中提供查询接口
@RestController
@RequestMapping("/gec/user-info")
public class UserInfoController {

    @Autowired   //注入到容器中
    UserInfoService userInfoService;

    @Autowired
    IUserService userService;
    //json 的解析工具
    ObjectMapper jsonTool = new ObjectMapper();
    @RequestMapping("/list")                                                     //页码
    public String list(@RequestParam("pageNum") Integer pageNum,
                       @RequestParam("pageSize") Integer pageSize,
                       @RequestParam("keyWord") String keyword) throws JsonProcessingException {
        //        1.创建json解析工具
        ObjectMapper json = new ObjectMapper();
        //       2.返回的结果集
        HashMap map = new HashMap<>();
//        提供条件构造器
        QueryWrapper wrapper = new QueryWrapper<>();
//        用什么可以作为查询条件 使用身份证作为查询条件
        wrapper.like("code", keyword);
//        分页工具类
        Page page = new Page<>(pageNum, pageSize);
//        进行分页后的数据
        page = userInfoService.page(page,wrapper);
//         从page中获取分页额度数据
        List infoList = page.getRecords();
//        遍历数据 类型      引用名称  需要遍历的数据
        for (UserInfo userInfo : infoList) {
//               根据 userinfo 查询 user的数据
            User user = userService.getById(userInfo.getUserId());
//               把user对象的name属性 赋值给 userinfo 的userName
            userInfo.setUserName(user.getName());
        }
//           把数据保存到map 传递给前端
        map.put("total", page.getTotal());
        map.put("list", infoList);


        return jsonTool.writeValueAsString(map);
    }
}
实现分页功能,还需要在后端项目的config包下创建pageConfig类,并添加以下代码
package com.example.vaccinum.config;


import com.baomidou.mybatisplus.annotation.DbType;
import com.baomidou.mybatisplus.extension.plugins.MybatisPlusInterceptor;
import com.baomidou.mybatisplus.extension.plugins.inner.PaginationInnerInterceptor;
import org.springframework.context.annotation.Bean;
import org.springframework.context.annotation.Configuration;

@Configuration
public class PageConfig {

    @Bean
    public MybatisPlusInterceptor mybatisPlusInterceptor() {
        MybatisPlusInterceptor interceptor = new MybatisPlusInterceptor();
        //分页插件
        interceptor.addInnerInterceptor(new PaginationInnerInterceptor(DbType.MYSQL));
        return interceptor;
    }
}
功能展示:
1.用户信息功能展示

2.页码分页功能展示


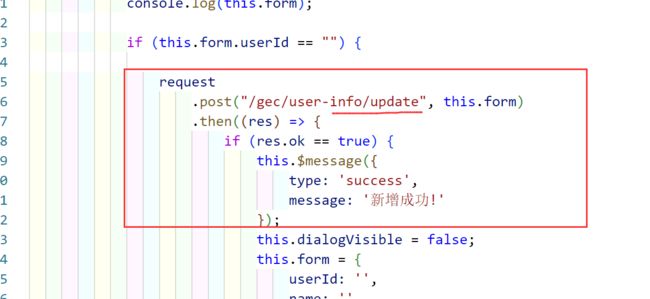
二、实现信息修改功能(增添、编辑、删除)
添加修改功能一起实现
 @RequestMapping("/update")
    public String update(User user, UserInfo userInfo) throws JsonProcessingException {
        //       1.返回的结果集
        HashMap map = new HashMap<>();
//        isEmpty判断为null
        if (ObjectUtils.isEmpty(user.getId())) {
            //            添加
            user.setCodeid(userInfo.getCode());
            boolean save = userService.saveOrUpdate(user);


            userInfo.setUserId(user.getId());
            boolean save1 = userInfoService.save(userInfo);
            map.put("ok", save1 && save);
            map.put("message","添加成功");

        } else {
//            修改
            boolean b = userService.saveOrUpdate(user);
            boolean b1 = userInfoService.saveOrUpdate(userInfo);
            map.put("ok", b && b1);
            map.put("message","修改成功");
        }

        return jsonTool.writeValueAsString(map);
    }
在list方法中添加

新增方法接口名称修改
实现删除功能
前端对应实现方法
//删除方法
        handleDelete(index, row) {

            this.$confirm('此操作将永久删除该用户, 是否继续?', '提示', {
                confirmButtonText: '确定',
                cancelButtonText: '取消',
                type: 'warning'
            }).then(() => {

                //删除操作
                request
                    .get("/gec/user-info/delete", {
                        params: {
                            id: row.userId
                        },
                    })
                    .then((res) => {
                        if (res.ok == true) {
                            this.$message({
                                type: 'success',
                                message: '删除成功!'
                            });
                            this.query();
                        } else {
                            this.$message({
                                type: 'error',
                                message: '删除失败!'
                            });
                        }
                    });

            }).catch(() => {
                this.$message({
                    type: 'info',
                    message: '已取消删除'
                });
            });
        },
可以看到前端是通过参数id实现删除即根据id删除,所以对应的接口如下
  @RequestMapping("/delete")
    public String delete(Integer id) throws JsonProcessingException {
        HashMap map = new HashMap<>();
        boolean save = service.removeById(id);
        boolean save1 = userInfoService.removeById(id);

        map.put("ok",save1&&save);

        return JsonTool.writeValueAsString(map);
    }
功能展示
1.增加用户
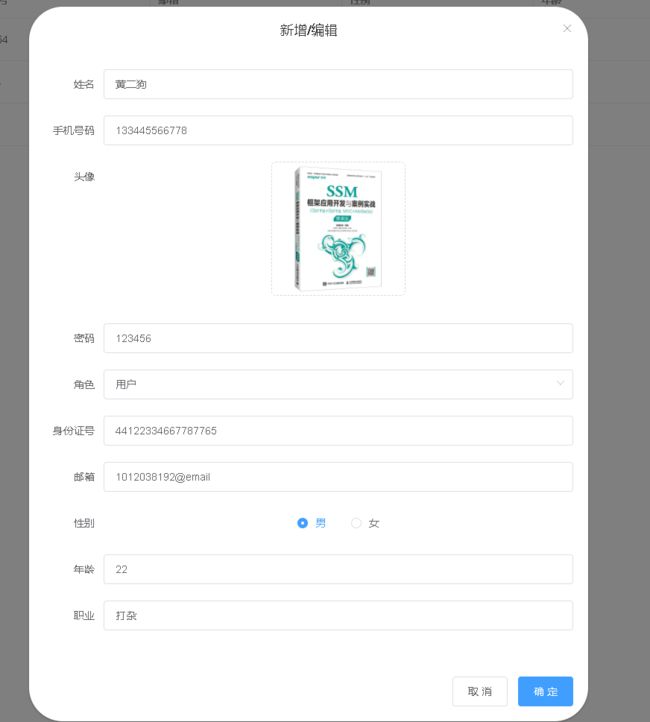
添加后效果如下

2.编辑用户
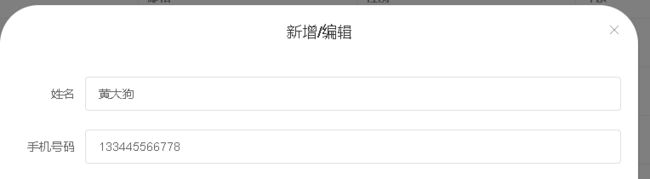
效果如下

3.删除用户

效果如下
