windows11下配置vscode中c/c++环境
本文默认已经下载且安装好vscode,主要是解决环境变量配置以及编译task、launch文件的问题。
自己尝试过许多博客,最后还是通过这种方法配置成功了。
Linux(ubuntu 20.04)配置vscode可以直接跳转到配置task、launch文件,不需要下载mingw与配置环境变量,只需要在终端下载好gcc与g++即可。
linux系统打开终端:运行下面两条指令下载完毕后直接跳转到配置task、launch文件,windows与linux的launch文件内容不同。Linux的task、launch配置补充在了文档最下方。
$sudo apt-get install g++$sudo apt-get install gccWindows:
1.下载MinGW
Mingw下载地址:https://sourceforge.net/projects/mingw-w64/files/mingw-w64/mingw-w64-release/
下载压缩包——×86_64-posix-sjlj
下载好后解压放到自己方便找到的文件夹
进入bin目录复制bin文件目录路劲,比如我这里是D:\binbin-download\mingw64\bin
配置环境变量:在windows搜索框输入环境变量就出来了
点开环境变量
选择系统变量下的path,双击
点击新建,然后粘贴刚刚复制的mingw中的bin的路劲,之后逐步确定。
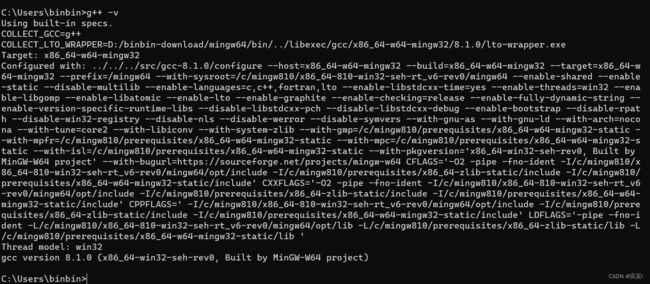
快捷键win+R打开cmd运行gcc -v或者g++ -v
 出现这个提示框 最后显示gcc version证明配置环境变量成功。
打开vscode,点击扩展,在顶端搜索c/c++,chinese,下载c/c++、chinese插件。(图中第一个就好)
关键的一步来了,首先建立一个文件夹名字为Code,用来存放c/c++代码,然后再在Code文件夹下创建一个.vscode,再在Code根目录下创建一个c/c++测试文件test.cpp,
如图(.vscode里面的文件后面配置)
编写一个简易的c/c++程序
#include
#include
using namespace std;

int main()
{
    printf("Hello World\n");
    return 0;
}
进入调试界面添加配置环境,选择 C++(GDB/LLDB),再选择 g++.exe,之后会自动生成 launch.json 配置文件,涉及到mingw的路劲的将其改为自己mingw里文件的路劲名。
之后配置task_json、launch_json
task_json:
{
    "tasks": [
        {
            "type": "cppbuild",
            "label": "C/C++: g++.exe 生成活动文件",
            "command": "D:\\binbin-download\\mingw64\\bin\\g++.exe",//改成自己g++的路劲名
            "args": [
                "-fdiagnostics-color=always",
                "-g",
                "${file}",
                "-o",
                "${fileDirname}\\${fileBasenameNoExtension}.exe"
            ],
            "options": {
                "cwd": "${fileDirname}"
            },
            "problemMatcher": [
                "$gcc"
            ],
            "group": {
                "kind": "build",
                "isDefault": true
            },
            "detail": "调试器生成的任务。"
        }
    ],
    "version": "2.0.0"
}
launch.json:
{

        "version": "0.2.0",
        "configurations": [
             {
                 "name": "g++.exe build and debug active file",
                 "type": "cppdbg",
                 "request": "launch",
                 "program": "${fileDirname}\\${fileBasenameNoExtension}.exe",
                 "args": [],
                 "stopAtEntry": false,
                  "cwd": "${workspaceFolder}",
                "environment": [],
                "externalConsole": true,      //修改此项,让其弹出终端
                "MIMode": "gdb",
                "miDebuggerPath": "D:\\binbin-download\\mingw64\\bin\\gdb.exe",
                "setupCommands": [
                    {
                        "description": "Enable pretty-printing for gdb",
                        "text": "-enable-pretty-printing",
                        "ignoreFailures": true
                    }
                ],
                "preLaunchTask": "C/C++: g++.exe 生成活动文件" //将此项修改成task.json一样
            }
        ]
    }
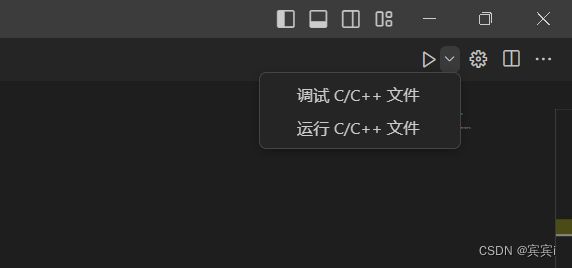
配置成功,在左侧点击光标,按F5调试运行,直接运行按F11或者右上角。
配置成功!
ubuntu下的VScode配置与这个步骤大差不差,唯一不同的差别是ubuntu不需要下载mingw,只需要在终端上下载好gcc与g++即可,且也不需要配置环境变量,直接跳转到配置task与launch即可。且ubuntu下载vscode可以在ubuntu的软件中心直接下载不需要通过官网。
补充:
Linux下的task、launch:
task.json
{
    // See https://go.microsoft.com/fwlink/?LinkId=733558
    // for the documentation about the tasks.json format
    "version": "2.0.0",
    "tasks": [
    {
    "label": "build",
    "type": "shell",
    "command": "g++",
    "args": ["-g", "${file}", "-std=c++11", "-o", "${fileBasenameNoExtension}.out"]
    }
    ]
   }
launch.json
{

    "version": "0.2.0",
    "configurations": [
    {
        "name": "(gdb) Launch",
        "type": "cppdbg",
        "request": "launch",
        "program": "${workspaceFolder}/${fileBasenameNoExtension}.out",
        "args": [],
        "stopAtEntry": false,
        "cwd": "${workspaceFolder}",
        "environment": [],
        "externalConsole": true,
        "MIMode": "gdb",
        "preLaunchTask": "build",
        "setupCommands": [
            {
            "description": "Enable pretty-printing for gdb",
            "text": "-enable-pretty-printing",
            "ignoreFailures": true
            }
        ]
    }
    ]
}


