idea中Run/Debug Python项目报错 Argument for @NotNull parameter ‘module‘ of ...
idea中Run/Debug Python项目报错 Argument for @NotNull parameter 'module' of ...
idea中运行Python项目main.py时报错:
Error running 'main': Argument for @NotNull parameter 'module' of com/intellij/openapi/roots/ModuleRootManager.getInstance must not be null
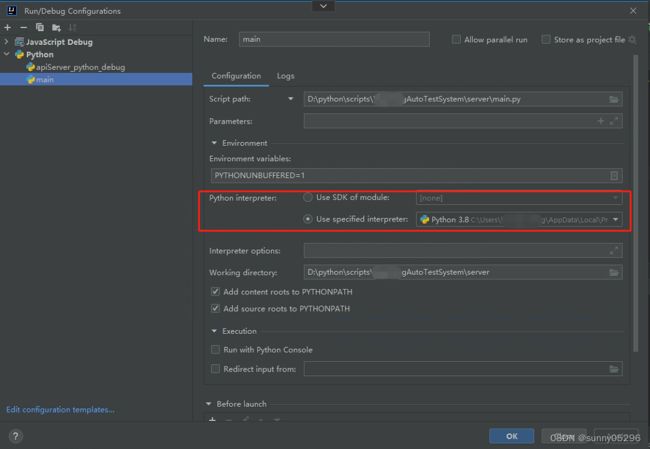
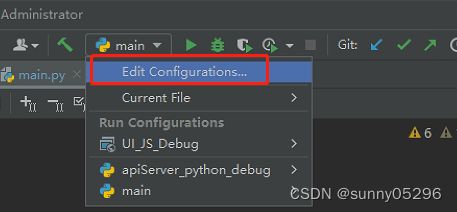
检查Run/Debug配置:
排查方案如下:
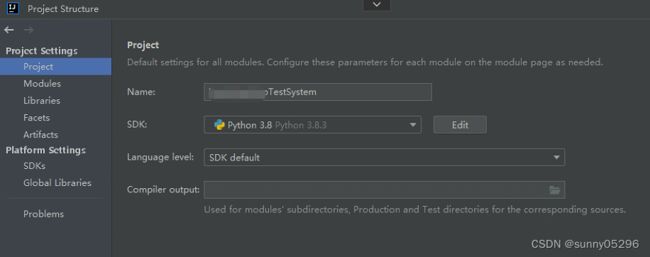
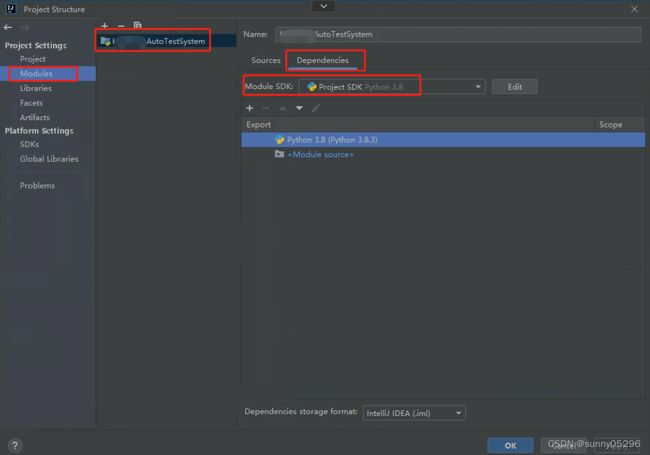
1)File -> Project Structure-> Project,检查 SDK 参数是否指定了 Python SDK,如果是
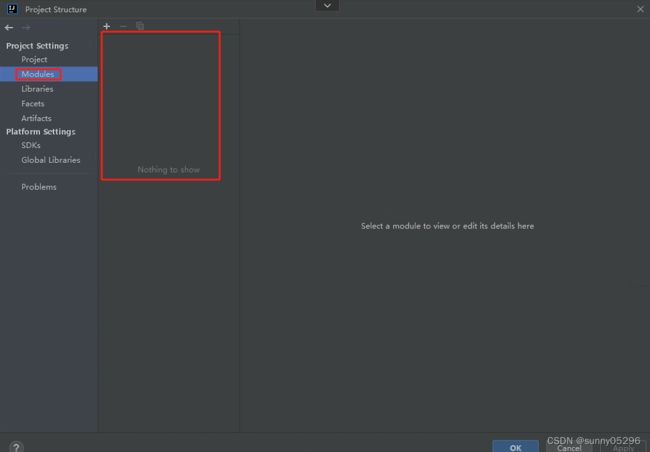
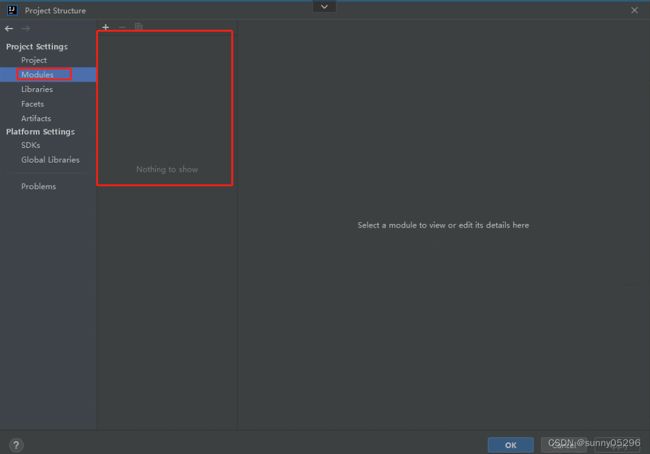
2)File -> Project Structure-> Modules,检查 Modules 是否为空:
如果为空(可能是因为项目根目录下的 idea 项目文件 "项目名.iml" 误删或丢失了 ),则点“+”操作:Import Modules 或 New Modules。
我之前出现该错误的时候,就是不知是什么原因导致该Modules为空了,所以我尝试重新创建 Modules:
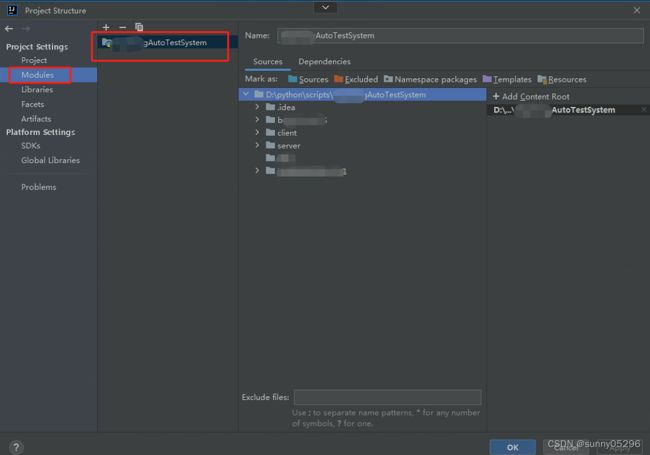
New Modules :Create module from existing sources,选择对应 Python 项目的根目录。
创建以后Modules配置如下:
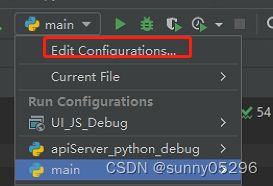
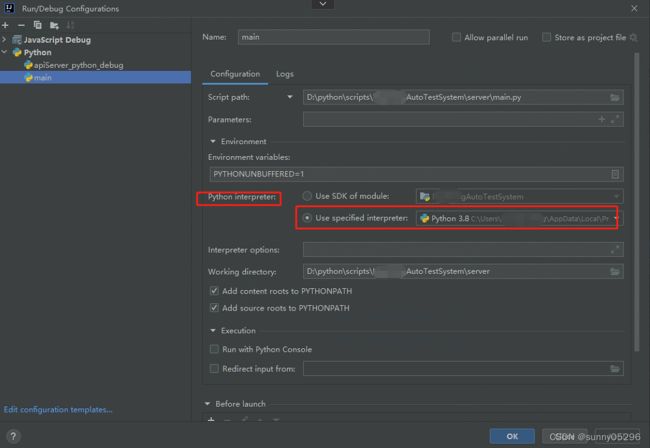
3)前面确认 Module 有了以后,再回到三角形的运行按钮的左侧的 Run/Debug Configurations 列表中,Edit Configurations,打开编辑界面:
a)检查: Configuration -> Script path:是否指定了正确的运行的python脚本,我指定的是我项目下的 main.py 脚本;
b)检查:Configuration -> Python Interpretor 参数,有两个选项,之前一直选择的是第二个选项 Use specified interpretor
1. Use SDK of Module:显示前面创建的Python项目
2. Use specified interpretor:pythoh.exe执行文件路径
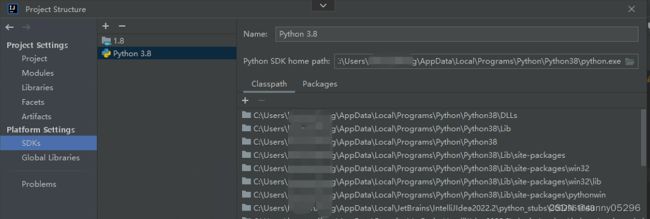
之前一直指定的是 Python 3.8(python.exe执行文件路径),但此时运行时还是会报同样的错误。
感觉我创建Module后,这个配置界面貌似有点不同,第一个选项之前有问题的时候好像是空的。
此时,尝试修改配置,切换成第一个选项 Use SDK of Module(对应我前面创建的项目):
然后 Applay & OK 确认后,再点击三角形RUN按钮,结果问题解决了,RUN 成功了,不再报错了。
接下来我再尝试,改成回第二个选项,Run/Debug Configurations 列表中,Edit Configurations,打开编辑界面,将 Configuration -> Python Interpretor 参数改回第二个选项 Use specified interpretor:
然后我再RUN/Debug ,也正常了。
我本次的问题已经得到解决。
如果实在不行的话,可以考虑重新在idea中创建python项目的流程走一遍:
idea中创建python项目
一、创建Python项目的步骤
1. 打开idea,Create New Project。
2. 在New Project窗口中选择Python。
3. 在Python窗口中填写项目名称和项目路径。
4. 选择Python SDK版本和虚拟环境路径,如果没有安装Python SDK,则需要先安装Python SDK。
5. 点击Create按钮,创建Python项目。
二、Python SDK的安装方法
在创建Python项目之前,需要安装Python SDK。Idea支持多个版本的Python SDK,可以根据自己的需要选择不同版本的Python SDK。创建 Python SDK 步骤如下:
1. 下载Python SDK安装包。
2. 安装Python SDK,安装过程中需要注意选择Python SDK的安装路径和添加Python到环境变量中。
3. 在Idea中添加Python SDK,打开Idea的Settings窗口,在Project Interpreter中选择Add New,然后选择已经安装的Python SDK。
三、虚拟环境的创建方法
虚拟环境是Python开发中非常重要的一个概念,可以用来隔离不同项目的依赖关系,避免不同项目之间的依赖冲突。下面介绍虚拟环境的创建方法:
1. 打开Idea,选择Create New Project。
2. 在New Project窗口中选择Python。
3. 在Python窗口中填写项目名称和项目路径。
4. 选择Python SDK版本和虚拟环境路径。
5. 点击Create按钮,创建Python项目。
6. 在Idea中打开Terminal窗口,输入以下命令创建虚拟环境:
python -m venv venv
7. 激活虚拟环境:
source venv/bin/activate
四、创建Python文件的方法
1. 在idea中选择File -> New -> Python File。
2. 在New Python File窗口中填写文件名和文件路径后确认完成文件的创建。
五、idea中运行Python:
方法1:Run -> Run 'filename'
方法2:终端 Terminal 中输入命令运行:python filename.py

