(一) spring boot 项目初始化 + 配置swagger页面
1 SpringBoot是什么
Spring Boot 是由 Pivotal 团队提供的全新框架,其设计目的是用来简化新 Spring 应用的初始搭建以及开发过程。该框架使用了特定的方式来进行配置,从而使开发人员不再需要定义样板化的配置。通过这种方式,Spring Boot 致力于在蓬勃发展的快速应用开发领域 (rapid application development) 成为领导者。
2 为什么要使用SpringBoot
在使用 spring 的框架时,避免不了各种繁琐的 xml 的配置。随着 spring 的迭代更新,更多的是约定大于配置,所以我们也就可以使用 springboot 来将这些进行整合,统一之后我们就可以使用 springboot 框架来进行开发。
这样所带来的好处:配置方便,开发速度快是 springboot 框架最大的特点。
下面首先简单介绍搭建一下 springboot 项目。
3 创建项目
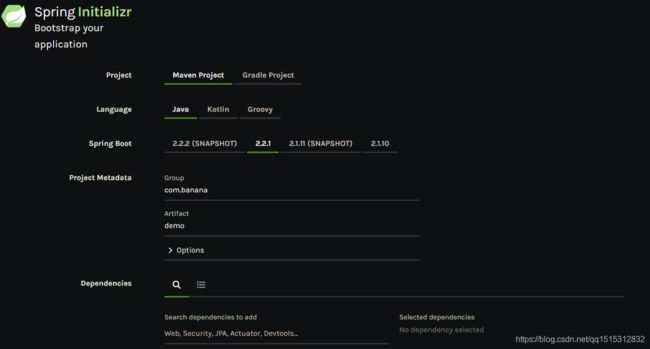
为了方便,我们在 start.spring.io 网站进行 springboot 项目的创建:

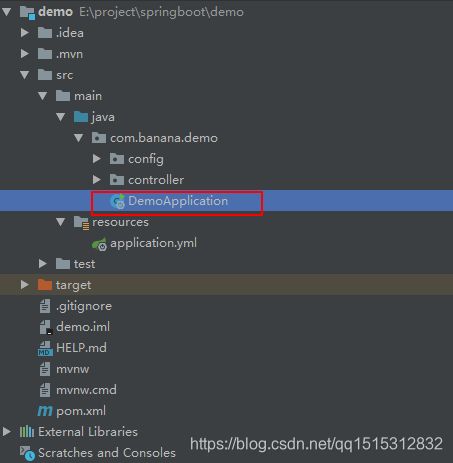
创建好项目之后下载,通过idea打开,找到DemoApplication运行即可使用

4 配置接口
4.1 添加项目依赖
        <dependency>
            <groupId>org.springframework.bootgroupId>
            <artifactId>spring-boot-starter-webartifactId>
        dependency>
4.2 创建controller类,添加接口
package com.banana.demo.controller;

import org.springframework.web.bind.annotation.GetMapping;
import org.springframework.web.bind.annotation.RestController;

@RestController
public class HelloWorldController {
    @GetMapping("/hello")
    public String index() {
        return "Hello World";
    }
}
4.3 运行访问
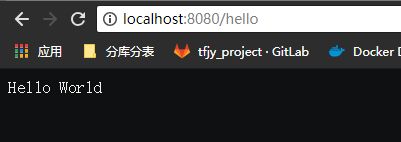
此时项目以经配置好接口,我们已经可以访问接口,通过DemoApplication启动项目,访问接口
localhost:8080/hello

5 配置测试类
5.1 添加依赖
        <dependency>
            <groupId>junitgroupId>
            <artifactId>junitartifactId>
            <scope>testscope>
        dependency>
5.2 添加测试类
在test包下的com.banana.demo包中创建HelloTests类,类中添加了对于之前写的接口的测试,用来测试接口是否正确。
package com.banana.demo;

import com.banana.demo.controller.HelloWorldController;
import org.junit.Before;
import org.junit.Test;
import org.junit.runner.RunWith;
import org.springframework.boot.test.context.SpringBootTest;
import org.springframework.http.MediaType;
import org.springframework.test.context.junit4.SpringRunner;
import org.springframework.test.web.servlet.MockMvc;
import org.springframework.test.web.servlet.request.MockMvcRequestBuilders;
import org.springframework.test.web.servlet.setup.MockMvcBuilders;

import static org.hamcrest.Matchers.equalTo;
import static org.springframework.test.web.servlet.result.MockMvcResultMatchers.content;
import static org.springframework.test.web.servlet.result.MockMvcResultMatchers.status;

@RunWith(SpringRunner.class)
@SpringBootTest
public class HelloTests {
    private MockMvc mvc;
    @Before
    public void setUp() throws Exception{
        mvc = MockMvcBuilders.standaloneSetup(new HelloWorldController()).build();
    }
    @Test
    public void getHello() throws Exception{
        mvc.perform(MockMvcRequestBuilders.get("/hello").accept(MediaType.APPLICATION_JSON))
                .andExpect(status().isOk())
                .andExpect(content().string(equalTo("Hello World")));
    }
}
5.3 执行测试类
点击绿色开始箭头执行测试类

在控制台我们能看到测试类执行的结果

6 配置swagger页面
6.1 添加依赖
        <dependency>
            <groupId>io.springfoxgroupId>
            <artifactId>springfox-swagger2artifactId>
            <version>2.9.2version>
        dependency>
        <dependency>
            <groupId>io.springfoxgroupId>
            <artifactId>springfox-swagger-uiartifactId>
            <version>2.9.2version>
        dependency>
6.2 添加SwaggerConfig类
在com.banana.demo.config包下添加swagger的配置类SwaggerConfig
package com.banana.demo.config;

import org.springframework.context.annotation.Bean;
import org.springframework.context.annotation.Configuration;
import springfox.documentation.builders.PathSelectors;
import springfox.documentation.builders.RequestHandlerSelectors;
import springfox.documentation.spi.DocumentationType;
import springfox.documentation.spring.web.plugins.Docket;
import springfox.documentation.swagger2.annotations.EnableSwagger2;

@Configuration
@EnableSwagger2
public class SwaggerConfig {
    @Bean
    public Docket api() {
        return new Docket(DocumentationType.SWAGGER_2)
                .select()
                .apis(RequestHandlerSelectors.any())
                .paths(PathSelectors.any())
                .build();
    }
}
6.3 访问swagger-ui页面
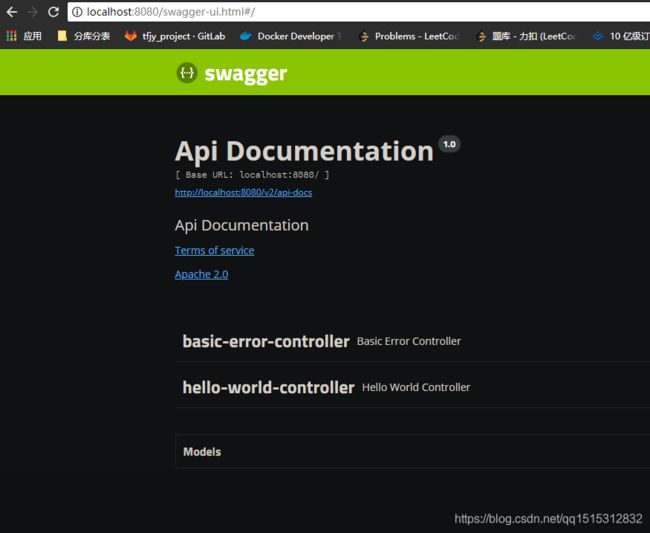
至此以经配置完毕,我们可以访问swagger页面了
localhost:8080/swagger-ui.html

7 结语
至此springboot的项目已经可以成功运行,可以进行一些简单的接口编写
参考纯洁的微笑springboot系列,有改动
8 本系列文章
Banana的SpringBoot系列博客
(一) SpringBoot 项目初始化 + 配置swagger页面
(二) SpringBoot 整合 MyBatis-plus
(三) SpringBoot之使用Swagger配置详解
(四) spring boot 多环境配置
(五) spring boot 配置使用 redis