python+selenium自动化测试
文章目录
- 前言
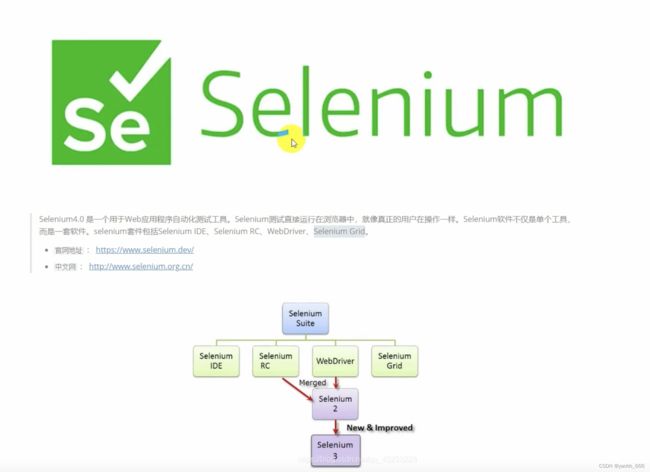
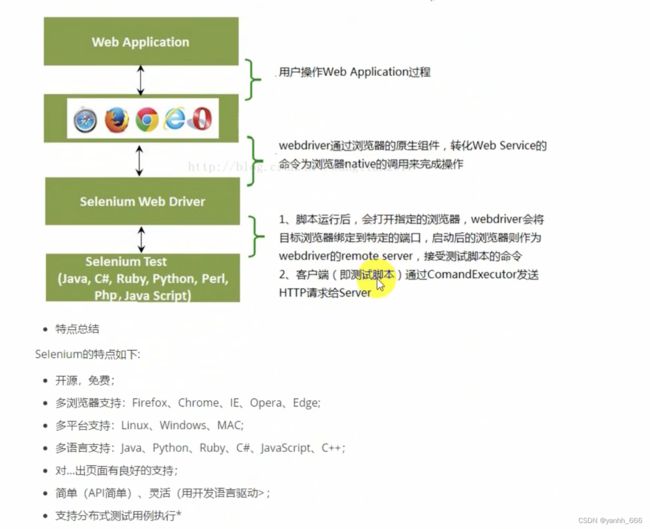
- 一、selenium简介
- 二、selenium环境搭建
- 自动化测试环境搭建
-
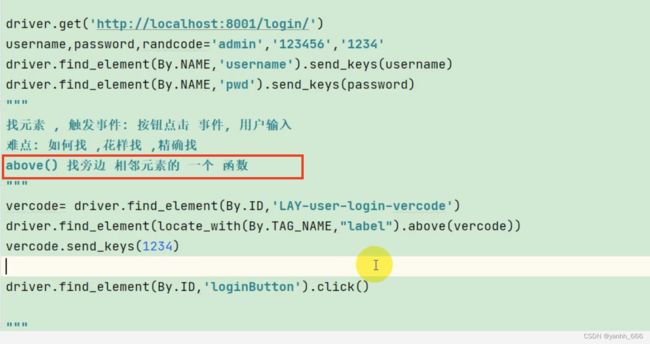
- 1、selenium4定位的新特性locate_with
- 2、三种等待
- 3、断言流程
- 4、业务流程
- 5、参数化
- 6、流程封装
- 7、用例优化
-
- 1)控件参数 单选按钮radio
- 2)日期控件 当前日期格式化
- 8、整合unittest
- 9、beautiful报告生成
- 10、devOps持续集成、持续交付、持续部署
前言
一、selenium简介

二、selenium环境搭建

pip3 install selenium -i https://pypi.douban.com/simple/
文件安装(放置)位置:可以把这个文件理解成一个脚本入口。就是把下的 chromedriver 文件复制到相应的位置。

两个位置:

1...\python\Scripts复制一份到安装Python的文件夹中的Scripts文件夹中;

2.如果是Pycharm,复制一份到..\python\sitepackages\selenium\webdriver\chrome文件中。
写一个简单的例子
seleniumDemo.py
# _*_ coding : utf-8 _*_
# @Time : 2023/4/5 7:46 PM
# @Author : yanhh
# @File : seleniumDemo
# @Project : pydemo1
from selenium import webdriver

driver = webdriver.Chrome()
driver.get("http://www.baidu.com")
自动化测试环境搭建
1、selenium4定位的新特性locate_with
2、三种等待
显示等待:不常用

隐士等待:用于加载页面后
# 3、传入对应url地址
driver.get("http://demo.liumatest.cn/#/login")
# 隐士等待,直到页面出来之后,就过,元素一直没出来就等;只要元素出来立刻加载,没出来等5秒,一般用于获取地址的后面,等待页面加载完
driver.implicitly_wait(5)
强制等待:
# 强制等待:不管出没出来,就强制等待
time.sleep(5)
3、断言流程
assertObject = driver.find_element(By.CSS_SELECTOR, '#app > section > aside > div > ul > div > span')
if assertObject and assertObject.text == '流马测试平台':
    print("测试通过")
else:
    print("测试不通过")
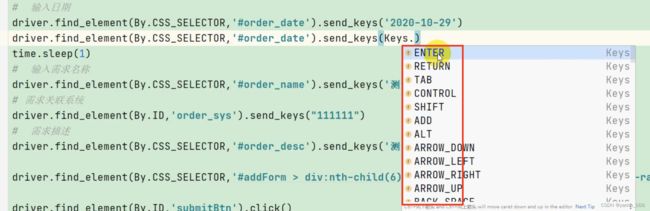
4、业务流程
frame标签需要切换

有的需要键盘输入,应用场景是选择日期后,回车后弹框消失,进入下一输入框
显示等待,等待10秒,直到找到一个元素(场景应用:一般是定位弹框中显示的字)

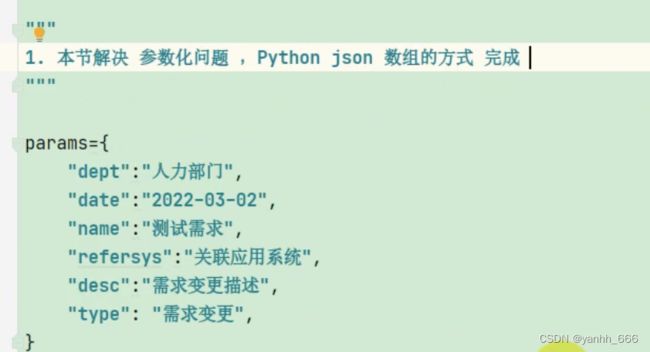
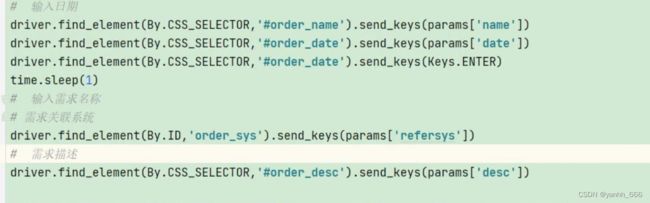
5、参数化
另一例子代码
# _*_ coding : utf-8 _*_
# @Time : 2023/4/5 10:51 PM
# @Author : yanhh
# @File : test_case_04
# @Project : pydemo1
from selenium import webdriver
import time

from selenium.webdriver.common.by import By

# 2、通过driver打开对应的浏览器
driver = webdriver.Chrome()
# 3、传入对应url地址
driver.get("http://demo.liumatest.cn/#/login")
# 隐士等待,直到页面出来之后,就过,元素一直没出来就等;只要元素出来立刻加载,没出来等5秒,一般用于获取地址的后面,等待页面加载完
driver.implicitly_wait(5)
username, password = 'admin', '123456'
driver.find_element(By.ID, 'username').send_keys(username)
driver.find_element(By.ID, 'password').send_keys(password)
driver.find_element(By.ID, 'login').click()
# 强制等待:不管出没出来,就强制等待
time.sleep(2)
print("#############################测试用例1###############################################")
params = {
    "id": "10240"
}
driver.find_element(By.XPATH, '//*[@id="app"]/section/aside/div/ul/div/img').click()
time.sleep(1)
driver.find_element(By.XPATH, '//*[@id="app"]/section/aside/div/ul/li[3]/div/span').click()
time.sleep(1)
driver.find_element(By.XPATH, '//*[@id="app"]/section/aside/div/ul/li[3]/ul/li/ul/li[4]/span').click()
time.sleep(1)
driver.find_element(By.XPATH, '//*[@id="app"]/section/section/main/div/form/div[1]/div/div/input').click()
driver.find_element(By.XPATH, '//*[@id="app"]/section/section/main/div/form/div[1]/div/div/input').send_keys(
    params['id'])
time.sleep(1)
driver.find_element(By.XPATH, '//*[@id="app"]/section/section/main/div/form/div[3]/div/button[1]/span').click()
time.sleep(2)
driver.quit()
6、流程封装
# _*_ coding : utf-8 _*_
# @Time : 2023/4/5 10:51 PM
# @Author : yanhh
# @File : test_case_04
# @Project : pydemo1
from selenium import webdriver
import time

from selenium.webdriver.common.by import By

# 2、通过driver打开对应的浏览器
driver = webdriver.Chrome()
# 3、传入对应url地址
driver.get("http://demo.liumatest.cn/#/login")
# 隐士等待,直到页面出来之后,就过,元素一直没出来就等;只要元素出来立刻加载,没出来等5秒,一般用于获取地址的后面,等待页面加载完
driver.implicitly_wait(5)
username, password = 'admin', '123456'
driver.find_element(By.ID, 'username').send_keys(username)
driver.find_element(By.ID, 'password').send_keys(password)
driver.find_element(By.ID, 'login').click()
# 强制等待:不管出没出来,就强制等待
time.sleep(2)
print("#############################测试用例1###############################################")


# 入口封装用例中心
def gotoPage():
    # 点击图标
    driver.find_element(By.XPATH, '//*[@id="app"]/section/aside/div/ul/div/img').click()
    time.sleep(1)
    # 点击用例中心
    driver.find_element(By.XPATH, '//*[@id="app"]/section/aside/div/ul/li[3]/div/span').click()
    time.sleep(1)
    # 点击用例管理
    driver.find_element(By.XPATH, '//*[@id="app"]/section/aside/div/ul/li[3]/ul/li/ul/li[4]/span').click()
    time.sleep(1)


def todoSelect():
    # 点击输入框
    driver.find_element(By.XPATH, '//*[@id="app"]/section/section/main/div/form/div[1]/div/div/input').click()
    # 输入编码id
    driver.find_element(By.XPATH, '//*[@id="app"]/section/section/main/div/form/div[1]/div/div/input').send_keys(
        params['id'])
    time.sleep(1)
    # 点击搜索
    driver.find_element(By.XPATH, '//*[@id="app"]/section/section/main/div/form/div[3]/div/button[1]/span').click()
    time.sleep(2)


def assertObjct():
    element = driver.find_element(By.XPATH,
                                  '//*[@id="app"]/section/section/main/div/div[2]/div[1]/div[3]/table/tbody/tr/td[2]/div/button/span/a')
    assertText = element.text
    if assertText == '验证登录模块':
        print('测试通过')
    else:
        print('测试失败')


# 1、正常登录
params = {
    "id": "10240"
}
# 2、打开菜单
gotoPage()
# 3、查询操作
todoSelect()
# 4、断言封装
assertObjct()
# 5、刷新
driver.refresh()

# 6、关闭
driver.quit()
新版本api去除警告

7、用例优化
1)控件参数 单选按钮radio
定义了一个列表

1、type_list.index() 返回的是索引号,赋值给%d(这里代表数字变量)
2、params[‘type’]是根据json数据取的值
![]()
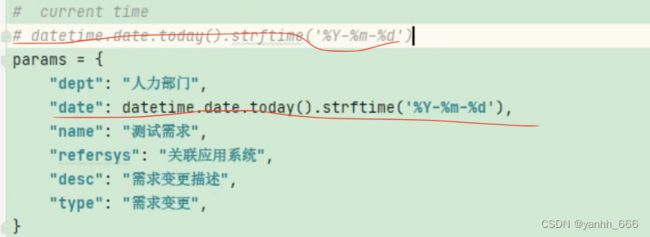
2)日期控件 当前日期格式化
8、整合unittest
# _*_ coding : utf-8 _*_
# @Time : 2023/4/6 12:59 PM
# @Author : yanhh
# @File : test_case_06
# @Project : pydemo1
import time
import unittest
from selenium import webdriver
from selenium.webdriver.common.by import By


class LoginTestCase(unittest.TestCase):
    # 打开浏览器
    def setUp(self) -> None:
        self.driver = webdriver.Chrome()
        self.driver.get('http://demo.liumatest.cn/#/login')

    # 关闭浏览器
    def tearDown(self) -> None:
        self.driver.close()

    # 元素定位及传参
    def do_input(self, username=None, password=None):
        if username:
            self.driver.find_element(By.ID, 'username').send_keys(username)
        if password:
            self.driver.find_element(By.ID, 'password').send_keys(password)

    ###################################登录场景测试用例###############################################################
    # 用例1、用户名、密码正确
    def test_1_normal(self):
        username, password = 'admin', '123456'
        self.do_input(username=username, password=password)
        self.driver.find_element(By.ID, 'login').click()
        page_title = self.driver.title
        self.assertEqual(page_title, '流马测试平台')
        time.sleep(2)

    # 用例2、用户名错误、密码正确
    def test_2_no_bad_user(self):
        username, password = 'admin2', '123456'
        self.do_input(username=username, password=password)
        self.driver.find_element(By.ID, 'login').click()
        time.sleep(2)
        # 拿到弹出框,文案显示
        remsg = self.driver.find_element(By.XPATH, "/html/body/div[@role='alert']/p").text
        self.assertEqual('登录失败 用户不存在', remsg)
        time.sleep(2)

    # 用例3、用户名正确、密码错误
    def test_3_no_bad_password(self):
        username, password = 'admin', '1234567'
        self.do_input(username=username, password=password)
        self.driver.find_element(By.ID, 'login').click()
        time.sleep(2)
        # 拿到弹出框,文案显示
        remsg = self.driver.find_element(By.XPATH, "/html/body/div[@role='alert']/p").text
        self.assertEqual('登录失败 账户密码校验失败', remsg)
        time.sleep(2)

    # 用例4、不输入用户名
    def test_4_not_user(self):
        username, password = '', '1234567'
        self.do_input(username=username, password=password)
        self.driver.find_element(By.ID, 'login').click()
        time.sleep(2)
        # 拿到弹出框,文案显示
        remsg = self.driver.find_element(By.XPATH, "//*[@id='app']/div/form/div[1]/div/div[2]").text
        self.assertEqual('账号不能为空', remsg)
        time.sleep(2)

    # 用例5、不输入密码
    def test_5_not_password(self):
        username, password = 'admin', ''
        self.do_input(username=username, password=password)
        self.driver.find_element(By.ID, 'login').click()
        time.sleep(2)
        # 拿到弹出框,文案显示
        remsg = self.driver.find_element(By.XPATH, "//*[@id='app']/div/form/div[2]/div/div[2]").text
        self.assertEqual('密码不能为空', remsg)
        time.sleep(2)


if __name__ == '__main__':
    unittest.main(verbosity=2)
清理数据

import pymysql
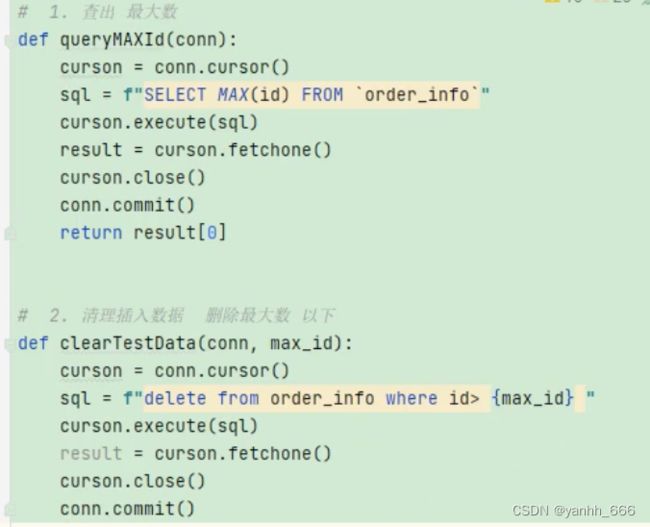
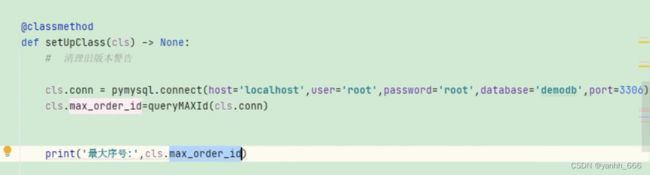
连接数据库,并查询最大序号
最新加载中
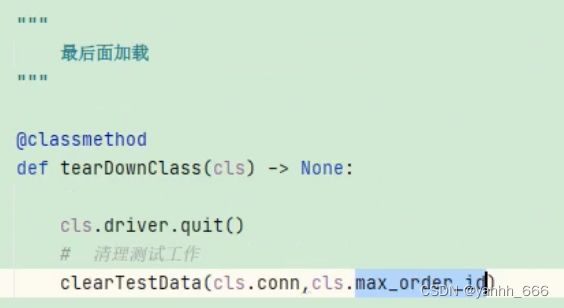
最后加载
清理测试数据
9、beautiful报告生成
# _*_ coding : utf-8 _*_
# @Time : 2023/4/6 11:00 PM
# @Author : yanhh
# @File : main1
# @Project : pydemo1
from test_case_06 import LoginTestCase
import unittest
import os
from BeautifulReport import BeautifulReport
#多个用例
testcase = [LoginTestCase('test_1_normal'),LoginTestCase('test_2_no_bad_user')]

loader = unittest.TestLoader()
alltests = unittest.TestSuite()
alltests.addTests(testcase)

br = BeautifulReport(alltests)
br.report(description='测试报告', filename='bReport.html', report_dir=os.getcwd())
结果

10、devOps持续集成、持续交付、持续部署
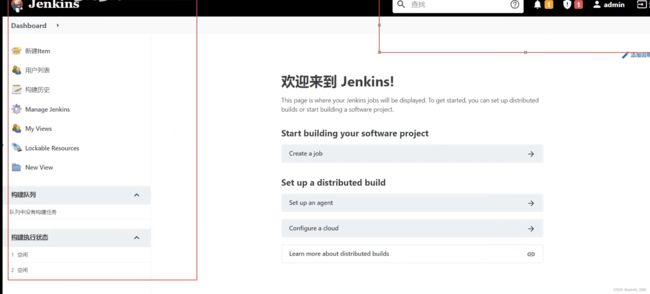
create job
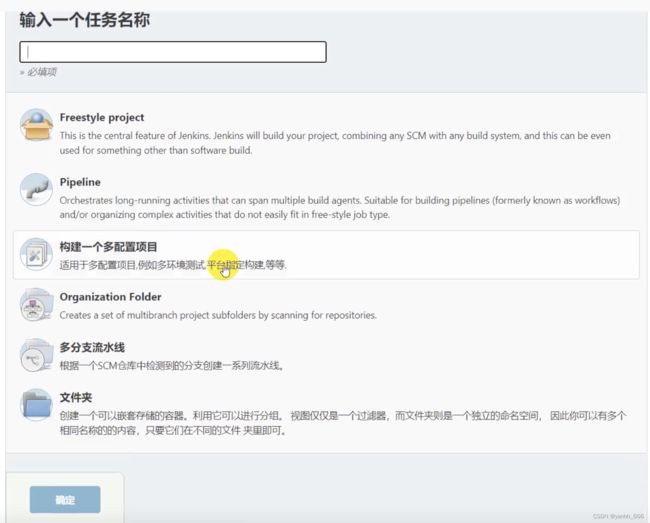
freestyle
1)、 project->genernal-描述 自动化测试
2)、源码管理
a、无: 在本地
b、管理:git地址及密码
3)、构建
mac选择: excute shell
cd /Users/yingyan/PycharmProjects/pydemo1
python main1.py
4)、点击保存
jenkins需要安装python插件
1、manage jenkins ->manage plugins->可选插件(python)->install with start
2、built schudule
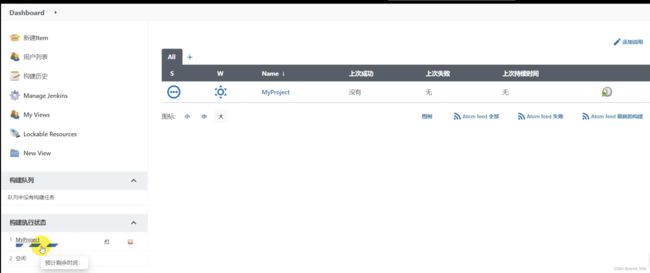
定时运行
构建触发器->jenkins cron 格式
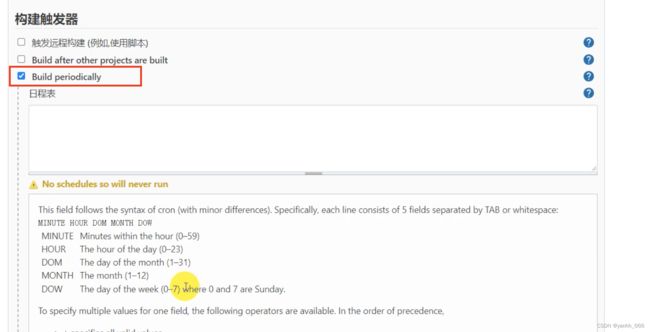
Jenkins定时构建采用cron语法。
demo举例:

# 每1分钟
*/1 * * * *
# 每5分钟
H/5 * * * *
# 每30分钟
H/30 * * * *
# 每1小时
H */1 * * *
# 每2小时
H */2 * * *
# 每天早上8点
0 8 * * *
# 每天中午11点30
30 11 * * *
# 每天中午12点
0 12 * * *
# 每天下午18点30
30 18 * * *
# 每天晚上11点45
45 23 * * *
# 每天晚上12点(凌晨0点)
0 0 * * *


在Jenkins job配置中填写cron语法后,点击Apply按钮来测试语法是否正确。

也可以到 https://crontab.guru 网站来测试。

常见cron语法例子:

https://crontab.guru/examples.html
邮件通知
manage jenkins->configure System->邮件通知
1、smtp服务器
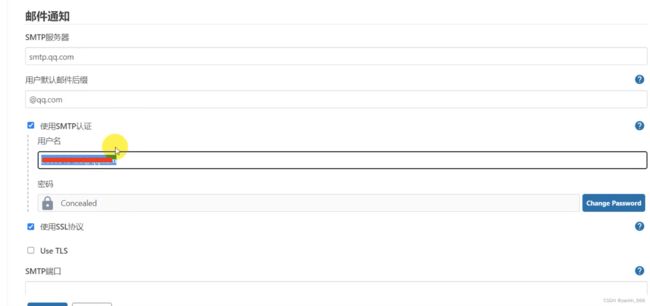
密码设置
1、qq设置->开启服务->发送短信->得到授权码->写到jenkins的密码中
2、勾选ssl协议
3、通过发送测试邮件配置->test configuration
4、应用->保存
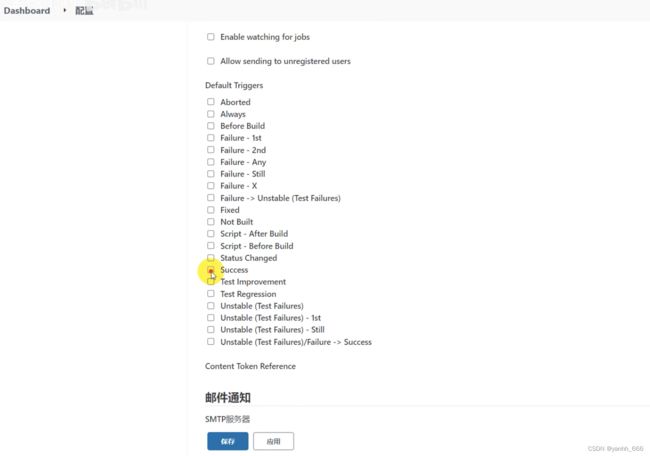
构建后操作
jenkins->右键项目中选择配置->构建后操作选择email- notification

高级->默认触发器 default Triger