新手引导蒙层的多种实现方式
当前发现很多页面做蒙层引导,还是使用图片形式来做。
图片引导蒙层有几大缺点:
- 图片大,影响加载
- 图片的内容都是假的,和真实的底部内容没对上
- 全屏蒙层图片,图片的宽高和屏幕宽高不一致,显示两边留黑,或者有压缩的效果。
- 图片的引导位置不能点击。
- low ? not cool ?
本文讲述三种思路来实现引导蒙层
- border实现
- box-shadow实现
- z-index + opacity实现
以上三种引导蒙层实现思路,基本都能满足业务需求,从不同角度来实现了引导蒙层。就个人而言,更加推荐骨架屏式的动态opacity蒙层实现,更有趣更酷!!!
思路一:使用border的方式来实现
没错,就是普遍不能在普遍的border了,且看如下:
div {
    border:1px solid #red;
}
那用border怎么实现引导蒙层呢?
1、先了解下三角形
先看一个简单的例子:
<div class="border_1">div>
.border_1{
    width: 100px;
    height: 100px;
    border-top:50px solid red;
    border-right: 50px solid transparent;
    border-bottom: 50px solid transparent;
    border-left: 50px solid transparent;
    box-sizing:border-box;
}
实现了一个倒三角,这个应用场景是不是就比较多了,很多tips的指引,标注等都会用到。我就看到过这种倒三角使用一张图片代替的做法。
仔细看这段代码,主要有实现了三点:
- 四边都设置了边框
- 宽高都为100px,即上下、左右表框之和,其实小于等于这个值都行。
- 只有顶部边框是红色,其他边框是透明的。
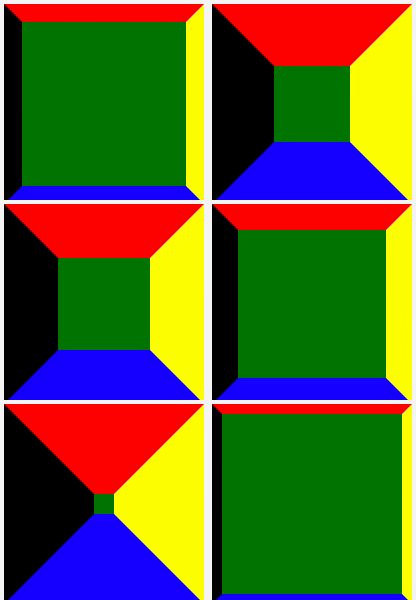
为了理解上面的实现,我们来看下如下代码:
.border_2{
    width: 100px;
    height: 100px;
    background-color:green;
    border-style:solid;
    border-color:red yellow blue black;
    border-width:50px;
    animation:border_ani 2s linear infinite alternate;
    box-sizing:border-box;
}
@keyframes border_ani {
    from {
        border-width:50px;
    }
    to {
      border-width:0;
    }
  }
从图中我们可以清晰的看到,随着border-width的变化,整个div的绿色背景在跟随变化。
- 当border-width=0的时候,整个页面只有绿色背景,即都是内容的大小
- 当border-width=50的时候,整个div的大小都被border给充满了,上下左右均分1/4,就是四个倒三角。
这样我们就清晰的能得到:
当border-right,border-left,border-bottom都transparent透明,border-top是红色的时候,所看到的就是一个倒三角。
同理我们还可以设置边框的大小不一致,可以实现斜三角:
.border_3{
    width: 0;
    height: 0;
    border-top:30px solid red;
    border-right: 10px solid transparent;
    border-bottom: 20px solid transparent;
    border-left: 100px solid transparent;
    box-sizing:border-box;
}
还可以实现工作中经常碰到的梯形:
.border_4{
    width: 150px;
    height: 150px;
    border-top:50px solid red;
    border-right: 50px solid transparent;
    border-bottom: 50px solid transparent;
    border-left: 50px solid transparent;
    box-sizing:border-box;
}
好了,这里不累赘了,感兴趣的可以各种尝试。遇到这种简单边线图,就不要动不动使用图片了。
2、再看实现引导蒙层
了解了上面的三角形的实现之后,估计你也能想出怎么做引导蒙层了。一个div有四个边框,如果我们把边框都设置成半透明,然后中间的区域(上面border_2的green)设置成全透明会不就可以实现区域引导蒙层了吗?然后再把边框设置成超过屏幕的大小呢,就是全景引导蒙层了!
.border_5{
    width: 150px;
    height: 150px;
    border-top:50px solid rgba(0,0,0,.5);
    border-right: 50px solid rgba(0,0,0,.5);
    border-bottom: 50px solid rgba(0,0,0,.5);
    border-left: 50px solid rgba(0,0,0,.5);
    box-sizing:border-box;
}
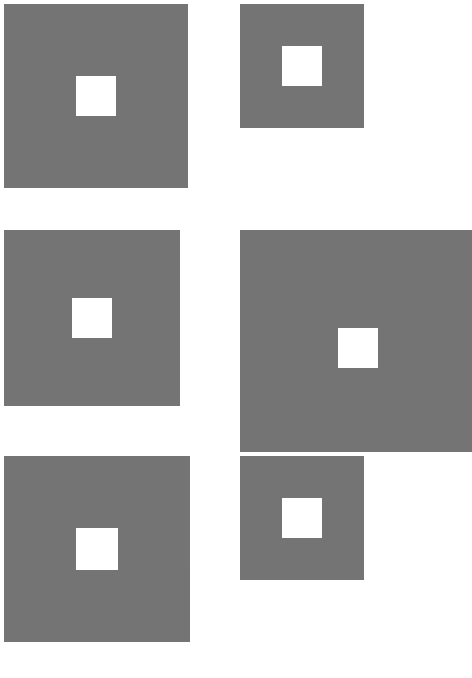
这是一个150px的区域蒙层,我们看下如下示例就能很明白了:
.border_6{
    width: 20px;
    height: 20px;
    border-style:solid;
    border-color:rgba(0,0,0,.5);
    border-width:20px;
    animation:border_ani 2s linear infinite alternate;
    box-sizing:content-box;
}
@keyframes border_ani {
    from {
        border-width:20px;
    }
    to {
      border-width:100px;
    }
  }
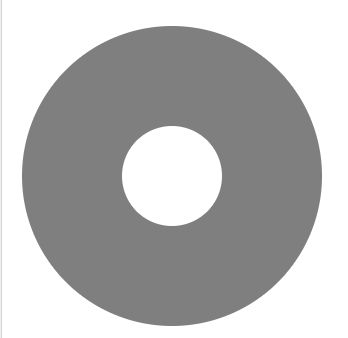
当然,我们还可以设置border-radius来实现圆形的蒙层区域,如下:
如果是椭圆呢?
总结:
border可以实现各种边线的形状,可以实现引导蒙层,页面指定区域透明,之外的都半透明来实现即可。
思路二、使用box-shadow来实现
box-shadow,大伙都不陌生,就是盒子的阴影,我们先来了解下它的基本用法:
.boxshadow_1{
    width:50px;
    height:50px;
    background:blue;
    box-shadow: 10px 10px 5px 4px #000;
}
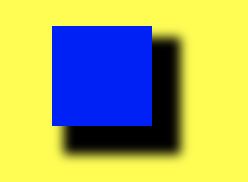
在宽高为50px的div,它的阴影水平和垂直都是10px,阴影模糊距离是5px,阴影的尺寸是4px,阴影是#000的颜色(这里给body增加了一个yellow的背景色以便于区分)。
首先我们把阴影透明:
.boxshadow_2{
    width:50px;
    height:50px;
    background:blue;
    box-shadow: 10px 10px 5px 4px rgba(0,0,0,.5);
}
那怎么让阴影遮盖整个页面呢?
- 阴影的水平和垂直距离是指距离原dev的距离,这个调整达不到效果,只会让阴影更多的偏离元素。
- 阴影的模糊距离值阴影的边缘渐变模糊的距离,蒙层是一样的半透明,模糊距离起不到作用。
- 阴影的尺寸,这个是指多大的阴影,那我们将阴影尺寸设置很大呢?
看如下的例子,我们调整阴影的尺寸:
.boxshadow_3 {
  width:50px;
  height:50px;
  background:blue;
  box-shadow: 0px 0px 5px 0px rgba(0,0,0,.5);
  animation:box_ani 2s linear infinite alternate;
}
@keyframes box_ani {
    from {
        box-shadow: 10px 10px 5px 0px rgba(0,0,0,.5);
    }
    to {
        box-shadow: 10px 10px 5px 100px rgba(0,0,0,.5);
    }
  }
如上,我们只需要把阴影尺寸加大就可以实现引导蒙层了。
如果需要引导蒙层状态下还能响应事件呢?只需要加一个pointer-events属性即可。
box-shadow的阴影距离切勿盲目设置过大,经过测试这个值如果过大,比如4000px,在部分手机上阴影无法显示出来。经过实践,设置为2000px为佳。
思路三:使用z-index + opacity来实现
1、直接使用遮罩层
这个好理解,页面元素都是有层级的,我们只需要把最上层的元素设为蒙层区域,在蒙层区域之下设置一个遮罩层即可。 我们来看一个简单例子。
.z1{
  position:absolute;
  left:50px;
  top:50px;
  width:50px;
  height:50px;
  background:blue;
  z-index:1;
}
.z2{
  position:absolute;
  left:60px;
  top:60px;
  width:50px;
  height:50px;
  background:red;
  z-index:2;
}
.z3{
  position:absolute;
  left:70px;
  top:70px;
  width:50px;
  height:50px;
  background:yellow;
  z-index:3;
}
[外链图片转存失败(img-ohaxTVxc-1568005418133)(https://raw.githubusercontent.com/antiter/blogs/master/images/image-guide_z-index_1.png)]
我们修改一下z2的样式。
.z2{
  position:absolute;
  left:50px;
  top:50px;
  width:50px;
  height:50px;
  background:black;
  opacity:0.5;
  z-index:2;
  animation:z_index 2s linear infinite alternate;
}
@keyframes z_index {
    from {
      left:50px;
      top:50px;
      width:50px;
      height:50px;
    }
    to {
      left:0px;
      top:0px;
      width:200px;
      height:200px;
    }
  }
只要在布局页面元素的时候,把需要做蒙层的元素确定好,配合js,动态的设置元素的z-index + opacity,就可以很好的做到页面的引导蒙层效果。
2、将非蒙层元素半透明
我们不再新增蒙层,而是完全操作页面节点,将需要遮罩的节点都设置为半透明,蒙层显现内容则完全显示出来,页面的效果和蒙层不太一样,对于空白地方,我们仍然是不透明,只是将有内容的元素给透明,类似骨架屏的效果。
为了演示效果,我们看如下例子:
页面设置6个元素。
<div class="wrap">
    <div class="z z1">div>
    <div class="z z2">div>
    <div class="z z3">div>
    <div class="z z4">div>
    <div class="z z5">div>
    <div class="z z6">div>
  div>
将元素内容用flex并排布局。
.wrap{
  display:flex;
  flex-wrap:wrap;
  width:150px;
}
.z{
  width:50px;
  height:50px;
  transition:all 1s;
}
.z1{
  background:blue;
}
.z2{
  background:black;
}
.z3{
  background:yellow;
}
.z4{
  background:red;
}
.z5{
  background:green;
}
.z6{
  background:orange;
}
使用js操作,依次半透明其他元素,显示当前元素来模拟蒙层。
let arry = Array.from(document.querySelectorAll(".z"));
let index = -1;
let direct = 1;
setInterval(()=>{
  if(index>=5) direct = -1;
  else if(index<=0) direct = 1;
  index = index+direct;
  arry.forEach((d,i)=>{
    d.style.opacity = 1;
  });
  setTimeout(()=>{
    arry.forEach((d,i)=>{
      if(i==index) return;
      d.style.opacity = 0.1;
    });
  },1000);
},2000)
[外链图片转存失败(img-NhkarS0L-1568005493851)(https://raw.githubusercontent.com/antiter/blogs/master/images/image-guide_z-index_3.gif)]
看了这个例子,我们清晰的看到这个蒙层的实现过程。这种蒙层其实更好玩有趣,有点类似当前流行的骨架屏,其他已有元素需要遮罩的内容就是骨架屏的灰色部分,需要显现的就是重点的蒙层内容。
有趣!!!


