【Ubuntu 系统使用进入,自动进入base虚拟环境解决最全】
项目场景:
在Ubuntu上安装完anaconda后,发现每次打开终端后都会自动进入到base的虚拟环境中去,虽然在这些环境下使用问题不大,但一些软件的安装在虚拟环境下有影响。每次使用conda deactivate退出也很麻烦。
问题描述
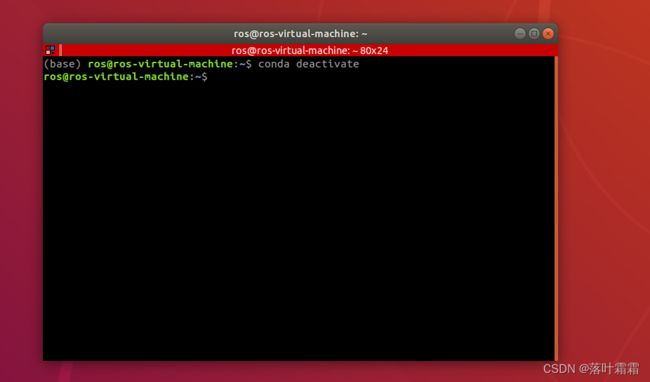
安装玩之后,打开终端,发现前面带有“base”,此时,可以输入如下命令,退出base环境:
conda deactivate
解决方案:
方法一:
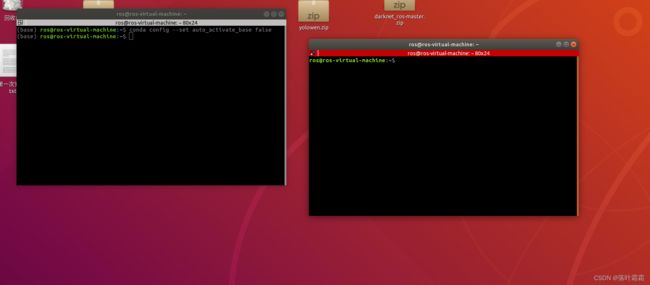
打开终端,有base环境的,直接输入下面代码,然后新开终端,新开的便会退出环境
conda config --set auto_activate_base false
方法二:
永久取消base字样办法:
1、在新终端中输入:gedit ~/.bashrc
2、在打开的文件最后加上一句命令:conda deactivate
3、重新打开终端即可消除base字样。
若在终端中输入conda deactivate,也可消除base字样,但是一次性的,再次打开终端依然存在base字样。在.bashrc文件添加命令:conda deactivate可以永久消除base字样。
1,通过将auto_activate_base参数设置为false实现:
conda config --set auto_activate_base false
2,那要进入的话通过conda activate base
3,如果反悔了还是希望base一直留着的话通过
conda config --set auto_activate_base true
恢复
@Override
	public void run() {
		bytes = mmInStream.read(buffer);
		mHandler.obtainMessage(READ_DATA, bytes, -1, buffer).sendToTarget();
	}
解决:在anaconda安装时选择的初始化,.bashrc中的对应文件如下
#作用应该是一打开终端就初始化conda环境

# >>> conda initialize >>>
# !! Contents within this block are managed by 'conda init' !!
__conda_setup="$('/home/s/anaconda3/bin/conda' 'shell.bash' 'hook' 2> /dev/null)"
if [ $? -eq 0 ]; then
    eval "$__conda_setup"
else
    if [ -f "/home/s/anaconda3/etc/profile.d/conda.sh" ]; then
        . "/home/s/anaconda3/etc/profile.d/conda.sh"
    else
        export PATH="/home/s/anaconda3/bin:$PATH"
    fi
fi
unset __conda_setup
# <<< conda initialize <<<
把这段注释掉,如下
#不让conda自己初始化
# >>> conda initialize >>>
# !! Contents within this block are managed by 'conda init' !!
#__conda_setup="$('/home/s/anaconda3/bin/conda' 'shell.bash' 'hook' 2> /dev/null)"
#if [ $? -eq 0 ]; then
#    eval "$__conda_setup"
#else
#    if [ -f "/home/s/anaconda3/etc/profile.d/conda.sh" ]; then
#        . "/home/s/anaconda3/etc/profile.d/conda.sh"
#    else
#        export PATH="/home/s/anaconda3/bin:$PATH"
#    fi
#fi
#unset __conda_setup
# <<< conda initialize <<<
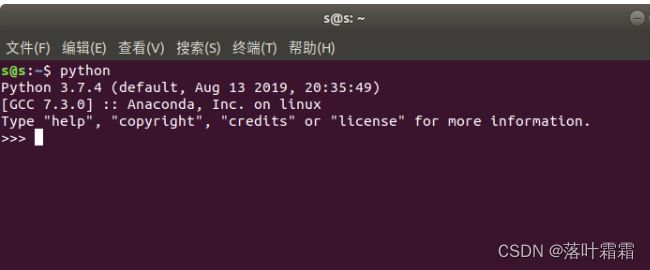
此时没有了(base)标志,但是输入python默认的是python2.7.这就是问题2
问题2:消除base后,在终端输入python时发现,此时python的版本不是对应anaconda版本里的
解决:在.bashrc文件末尾加上anaconda的路径,如下
# ~/.bashrc: executed by bash(1) for non-login shells.
# see /usr/share/doc/bash/examples/startup-files (in the package bash-doc)
# for examples

# If not running interactively, don't do anything
case $- in
    *i*) ;;
      *) return;;
esac

# don't put duplicate lines or lines starting with space in the history.
# See bash(1) for more options
HISTCONTROL=ignoreboth

# append to the history file, don't overwrite it
shopt -s histappend

# for setting history length see HISTSIZE and HISTFILESIZE in bash(1)
HISTSIZE=1000
HISTFILESIZE=2000

# check the window size after each command and, if necessary,
# update the values of LINES and COLUMNS.
shopt -s checkwinsize

# If set, the pattern "**" used in a pathname expansion context will
# match all files and zero or more directories and subdirectories.
#shopt -s globstar

# make less more friendly for non-text input files, see lesspipe(1)
[ -x /usr/bin/lesspipe ] && eval "$(SHELL=/bin/sh lesspipe)"

# set variable identifying the chroot you work in (used in the prompt below)
if [ -z "${debian_chroot:-}" ] && [ -r /etc/debian_chroot ]; then
    debian_chroot=$(cat /etc/debian_chroot)
fi

# set a fancy prompt (non-color, unless we know we "want" color)
case "$TERM" in
    xterm-color|*-256color) color_prompt=yes;;
esac

# uncomment for a colored prompt, if the terminal has the capability; turned
# off by default to not distract the user: the focus in a terminal window
# should be on the output of commands, not on the prompt
#force_color_prompt=yes

if [ -n "$force_color_prompt" ]; then
    if [ -x /usr/bin/tput ] && tput setaf 1 >&/dev/null; then
	# We have color support; assume it's compliant with Ecma-48
	# (ISO/IEC-6429). (Lack of such support is extremely rare, and such
	# a case would tend to support setf rather than setaf.)
	color_prompt=yes
    else
	color_prompt=
    fi
fi

if [ "$color_prompt" = yes ]; then
    PS1='${debian_chroot:+($debian_chroot)}\[\033[01;32m\]\u@\h\[\033[00m\]:\[\033[01;34m\]\w\[\033[00m\]\$ '
else
    PS1='${debian_chroot:+($debian_chroot)}\u@\h:\w\$ '
fi
unset color_prompt force_color_prompt

# If this is an xterm set the title to user@host:dir
case "$TERM" in
xterm*|rxvt*)
    PS1="\[\e]0;${debian_chroot:+($debian_chroot)}\u@\h: \w\a\]$PS1"
    ;;
*)
    ;;
esac

# enable color support of ls and also add handy aliases
if [ -x /usr/bin/dircolors ]; then
    test -r ~/.dircolors && eval "$(dircolors -b ~/.dircolors)" || eval "$(dircolors -b)"
    alias ls='ls --color=auto'
    #alias dir='dir --color=auto'
    #alias vdir='vdir --color=auto'

    alias grep='grep --color=auto'
    alias fgrep='fgrep --color=auto'
    alias egrep='egrep --color=auto'
fi

# colored GCC warnings and errors
#export GCC_COLORS='error=01;31:warning=01;35:note=01;36:caret=01;32:locus=01:quote=01'

# some more ls aliases
alias ll='ls -alF'
alias la='ls -A'
alias l='ls -CF'

# Add an "alert" alias for long running commands.  Use like so:
#   sleep 10; alert
alias alert='notify-send --urgency=low -i "$([ $? = 0 ] && echo terminal || echo error)" "$(history|tail -n1|sed -e '\''s/^\s*[0-9]\+\s*//;s/[;&|]\s*alert$//'\'')"'

# Alias definitions.
# You may want to put all your additions into a separate file like
# ~/.bash_aliases, instead of adding them here directly.
# See /usr/share/doc/bash-doc/examples in the bash-doc package.

if [ -f ~/.bash_aliases ]; then
    . ~/.bash_aliases
fi

# enable programmable completion features (you don't need to enable
# this, if it's already enabled in /etc/bash.bashrc and /etc/profile
# sources /etc/bash.bashrc).
if ! shopt -oq posix; then
  if [ -f /usr/share/bash-completion/bash_completion ]; then
    . /usr/share/bash-completion/bash_completion
  elif [ -f /etc/bash_completion ]; then
    . /etc/bash_completion
  fi
fi


#不让conda自己初始化
# >>> conda initialize >>>
# !! Contents within this block are managed by 'conda init' !!
#__conda_setup="$('/home/s/anaconda3/bin/conda' 'shell.bash' 'hook' 2> /dev/null)"
#if [ $? -eq 0 ]; then
#    eval "$__conda_setup"
#else
#    if [ -f "/home/s/anaconda3/etc/profile.d/conda.sh" ]; then
#        . "/home/s/anaconda3/etc/profile.d/conda.sh"
#    else
#        export PATH="/home/s/anaconda3/bin:$PATH"
#    fi
#fi
#unset __conda_setup
# <<< conda initialize <<<


#显示conda下的Python
export PATH="/home/s/anaconda3/bin:$PATH"
执行
source .bashrc
参考:
ubuntu18.04安装anaconda后终端出现base字样


