分布式事务 Seata 的安装配置及基础使用 Windows 基于 若依RuoYi 框架微服务版学习
seata 官网:
https://seata.io/zh-cn/index.html
下载Seata:
https://seata.io/zh-cn/blog/download.html windows环境下选择指定版本直接下载binary(二进制) .zip 包;(本示例为 1.6.1)
使用步骤
1,服务端
1. 解压zip包;
2. 使用nacos作为注册中心,修改配置文件;
>1,修改 conf/application.yml 文件,将你本地对应的nacos 的地址、用户名、密码做下修改;(可参照同级目录下 application.example.yml 这个文件内的内容示例);
seata:
  config:
    # support: nacos, consul, apollo, zk, etcd3
    type: nacos
    nacos:
      server-addr: 127.0.0.1:8848
      namespace:
      group: SEATA_GROUP
      username: naocs
      password: naocs
      context-path:
  registry:
    # support: nacos, eureka, redis, zk, consul, etcd3, sofa
    type: nacos
    nacos:
      application: seata-server
      server-addr: 127.0.0.1:8848
      group: SEATA_GROUP
      namespace:
      cluster: default
      username: naocs
      password: naocs
      context-path:
2,在seata 目录下建立一个 config.txt 文件,并将以下内容复制进去;(注意修改你本地的数据库连接信息)
service.vgroupMapping.seata-order-group=default
store.mode=db
store.db.datasource=druid
store.db.dbType=mysql
store.db.driverClassName=com.mysql.cj.jdbc.Driver
store.db.url=jdbc:mysql://127.0.0.1:3306/ry-seata?useUnicode=true&characterEncoding=utf8&zeroDateTimeBehavior=convertToNull&useSSL=true&serverTimezone=GMT%2B8
store.db.user=root
store.db.password=1234
store.db.minConn=5
store.db.maxConn=30
store.db.globalTable=global_table
store.db.branchTable=branch_table
store.db.queryLimit=100
store.db.lockTable=lock_table
store.db.maxWait=5000
3,在 conf 目录下建立一个 nacos-config.sh 文件,再将以下内容贴进去;
#!/usr/bin/env bash
# Copyright 1999-2019 Seata.io Group.
#
# Licensed under the Apache License, Version 2.0 (the "License");
# you may not use this file except in compliance with the License.
# You may obtain a copy of the License at、
#
#      http://www.apache.org/licenses/LICENSE-2.0
#
# Unless required by applicable law or agreed to in writing, software
# distributed under the License is distributed on an "AS IS" BASIS,
# WITHOUT WARRANTIES OR CONDITIONS OF ANY KIND, either express or implied.
# See the License for the specific language governing permissions and
# limitations under the License.


while getopts ":h:p:g:t:u:w:" opt
do
  case $opt in
  h)
    host=$OPTARG
    ;;
  p)
    port=$OPTARG
    ;;
  g)
    group=$OPTARG
    ;;
  t)
    tenant=$OPTARG
    ;;
  u)
    username=$OPTARG
    ;;
  w)
    password=$OPTARG
    ;;
  ?)
    echo " USAGE OPTION: $0 [-h host] [-p port] [-g group] [-t tenant] [-u username] [-w password] "
    exit 1
    ;;
  esac
done


urlencode() {
  for ((i=0; i < ${#1}; i++))
  do
    char="${1:$i:1}"
    case $char in
    [a-zA-Z0-9.~_-]) printf $char ;;
    *) printf '%%%02X' "'$char" ;;
    esac
  done
}


if [[ -z ${host} ]]; then
    host=localhost
fi
if [[ -z ${port} ]]; then
    port=8848
fi
if [[ -z ${group} ]]; then
    group="SEATA_GROUP"
fi
if [[ -z ${tenant} ]]; then
    tenant=""
fi
if [[ -z ${username} ]]; then
    username=""
fi
if [[ -z ${password} ]]; then
    password=""
fi


nacosAddr=$host:$port
contentType="content-type:application/json;charset=UTF-8"


echo "set nacosAddr=$nacosAddr"
echo "set group=$group"


failCount=0
tempLog=$(mktemp -u)
function addConfig() {
  curl -X POST -H "${contentType}" "http://$nacosAddr/nacos/v1/cs/configs?dataId=$(urlencode $1)&group=$group&content=$(urlencode $2)&tenant=$tenant&username=$username&password=$password" >"${tempLog}" 2>/dev/null
  if [[ -z $(cat "${tempLog}") ]]; then
    echo " Please check the cluster status. "
    exit 1
  fi
  if [[ $(cat "${tempLog}") =~ "true" ]]; then
    echo "Set $1=$2 successfully "
  else
    echo "Set $1=$2 failure "
    (( failCount++ ))
  fi
}


count=0
for line in $(cat $(dirname "$PWD")/config.txt | sed s/[[:space:]]//g); do
  (( count++ ))
    key=${line%%=*}
    value=${line#*=}
    addConfig "${key}" "${value}"
done


echo "========================================================================="
echo " Complete initialization parameters,  total-count:$count ,  failure-count:$failCount "
echo "========================================================================="


if [[ ${failCount} -eq 0 ]]; then
    echo " Init nacos config finished, please start seata-server. "
else
    echo " init nacos config fail. "
fi
4,在 conf 目录下进入 cmd 黑窗口内,去执行下刚刚建立的 nacos-config.sh 文件;执行以下命令;
nacos-config.sh 127.0.0.1
127.0.0.1 是本机的nacos 服务地址;执行以上脚本会 弹出git bach窗口,然后会将 第2步的 txt文件内的所有配置注册到 nacos 配置中心内, 日后配置有需要修改便可以直接从配置中心进行修改即可;
如下图:

3. 启动seata;
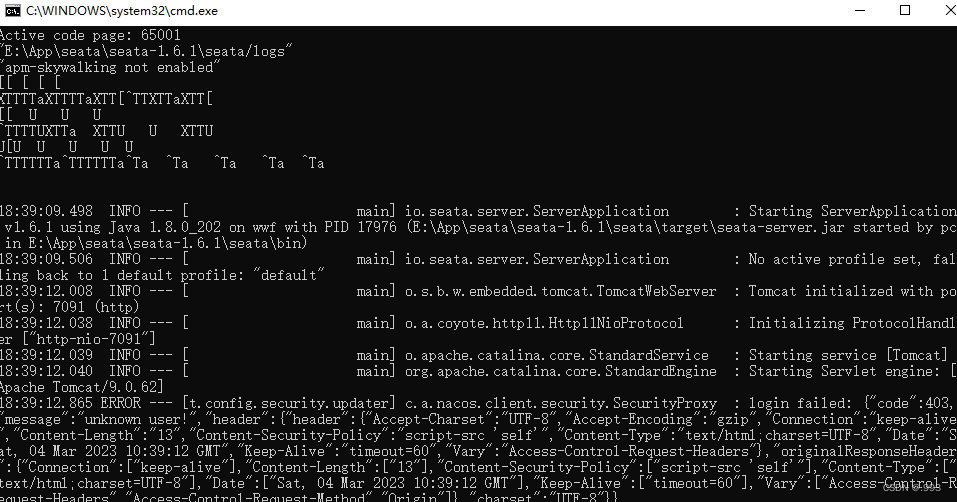
双击 bin目录下的 seata-server.bat 脚本文件即可(会弹出日志窗口);

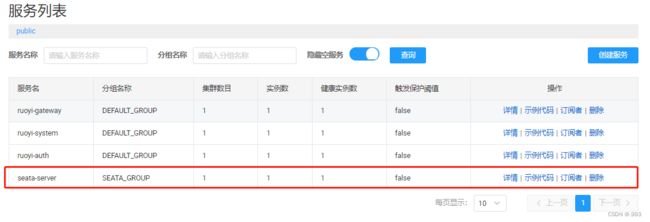
看nacos 注册中心是否已成功注册;

2,客户端
基于 若依 Ruoyi微服务版 进行学习 若依官方微服务版地址;
<!-- SpringCloud Alibaba Nacos 注册中心-->

    com.alibaba.cloud</groupId>
    spring-cloud-starter-alibaba-nacos-discovery</artifactId>
</dependency>


<!-- SpringCloud Alibaba Nacos Config 配置中心 -->

    com.alibaba.cloud</groupId>
    spring-cloud-starter-alibaba-nacos-config</artifactId>
</dependency>
<!-- ruoyi common datasource -->

    com.ruoyi</groupId>
    ruoyi-common-datasource</artifactId>
</dependency>

    com.ruoyi</groupId>
    ruoyi-common-security</artifactId>
</dependency>

    com.ruoyi</groupId>
    ruoyi-common-swagger</artifactId>
</dependency>
<!-- 分布式事务 -->

    com.ruoyi</groupId>
    ruoyi-common-seata</artifactId>
</dependency>


<!-- Mysql Connector -->

    mysql</groupId>
    mysql-connector-java</artifactId>
</dependency>
3. 添加配置文件;
# spring配置
spring:
  application:
    name: seata-order
  cloud:
    nacos:
      discovery:
        # 服务注册地址
        server-addr: 127.0.0.1:8848
      config:
        # 配置中心地址
        server-addr: 127.0.0.1:8848
  redis:
    host: localhost
    port: 6379
    password:
  datasource:
    druid:
      stat-view-servlet:
        enabled: true
        loginUsername: admin
        loginPassword: 123456
    dynamic:
      druid:
        initial-size: 5
        min-idle: 5
        maxActive: 20
        maxWait: 60000
        timeBetweenEvictionRunsMillis: 60000
        minEvictableIdleTimeMillis: 300000
        validationQuery: SELECT 1 FROM DUAL
        testWhileIdle: true
        testOnBorrow: false
        testOnReturn: false
        poolPreparedStatements: true
        maxPoolPreparedStatementPerConnectionSize: 20
        filters: stat,wall,slf4j
        connectionProperties: druid.stat.mergeSql\=true;druid.stat.slowSqlMillis\=5000
      datasource:
        # 主库数据源
        master:
          driver-class-name: com.mysql.cj.jdbc.Driver
          url: jdbc:mysql://localhost:3306/ry-cloud?useUnicode=true&characterEncoding=utf8&zeroDateTimeBehavior=convertToNull&useSSL=true&serverTimezone=GMT%2B8
          username: root
          password: 1234
        # seata_order数据源
        order:
          username: root
          password: 1234
          url: jdbc:mysql://localhost:3306/seata_order?useUnicode=true&characterEncoding=utf8&zeroDateTimeBehavior=convertToNull&useSSL=true&serverTimezone=GMT%2B8
          driver-class-name: com.mysql.cj.jdbc.Driver
        # seata_account数据源
        account:
          username: root
          password: 1234
          url: jdbc:mysql://localhost:3306/seata_account?useUnicode=true&characterEncoding=utf8&zeroDateTimeBehavior=convertToNull&useSSL=true&serverTimezone=GMT%2B8
          driver-class-name: com.mysql.cj.jdbc.Driver
        # seata_product数据源
        product:
          username: root
          password: 1234
          url: jdbc:mysql://localhost:3306/seata_product?useUnicode=true&characterEncoding=utf8&zeroDateTimeBehavior=convertToNull&useSSL=true&serverTimezone=GMT%2B8
          driver-class-name: com.mysql.cj.jdbc.Driver
      seata: true    #开启seata代理,开启后默认每个数据源都代理,如果某个不需要代理可单独关闭


# seata配置
seata:
  enabled: true
  # Seata 应用编号,默认为 ${spring.application.name}
  application-id: seata-order
  # Seata 事务组编号,用于 TC 集群名
  tx-service-group: seata-order-group
  # 关闭自动代理
  enable-auto-data-source-proxy: false
  # 服务配置项
  service:
    # 虚拟组和分组的映射
    vgroup-mapping:
      ruoyi-system-group: default
    # 分组和 Seata 服务的映射
    grouplist:
      default: 127.0.0.1:8091
  config:
    type: nacos
    nacos:
      serverAddr: 127.0.0.1:8848
      group: SEATA_GROUP
      namespace:
  registry:
    type: nacos
    nacos:
      application: seata-server
      server-addr: 127.0.0.1:8848
      namespace:


# mybatis配置
mybatis:
  # 搜索指定包别名
  typeAliasesPackage: com.ruoyi.seataorder
  # 配置mapper的扫描,找到所有的mapper.xml映射文件
  mapperLocations: classpath:mapper/**/*.xml


# swagger配置
swagger:
  title: 系统模块接口文档
  license: Powered By ruoyi
  licenseUrl: https://ruoyi.vip
server:
  port: 8800
4. 模块内加入 若依官方 示例代码,及初始化示例脚本,按照官网示例进行操作即可;
#####补充######
Seata AT模式依赖的表结构获取 (基础依赖表+回滚日志表)
基础依赖表:
官网下载中心:
https://seata.io/zh-cn/blog/download.html
1,找到所需要的对应版本;

2,选择source 下载源码;

3,解压缩文件,进入 seata-1.6.1\script\server\db 目录;

4,找到所需对应数据库sql脚本粘出来执行即可;
回滚日志表:
进入Seata AT模式官方文档;
https://seata.io/zh-cn/docs/dev/mode/at-mode.html
进入连接翻到最下面

-- 注意此处0.7.0+ 增加字段 context
CREATE TABLE `undo_log` (
`id` bigint(20) NOT NULL AUTO_INCREMENT, `branch_id` bigint(20) NOT NULL,
`xid` varchar(100) NOT NULL, `context` varchar(128) NOT NULL,
`rollback_info` longblob NOT NULL, `log_status` int(11) NOT NULL,
`log_created` datetime NOT NULL,
`log_modified` datetime NOT NULL,
PRIMARY KEY (`id`),
UNIQUE KEY `ux_undo_log` (`xid`,`branch_id`)
) ENGINE=InnoDB AUTO_INCREMENT=1 DEFAULT CHARSET=utf8;
over…
