Day29_SpringBoot—请求处理、响应处理
文章目录
- 一、请求处理
-
-
- 1.Rest风格的请求
- 2.普通参数与基本注解
- 3.矩阵变量
- 4.自定义配置的三种方案
- 5.复杂参数:
- 6.自定义参数
-
- 二、响应处理
-
-
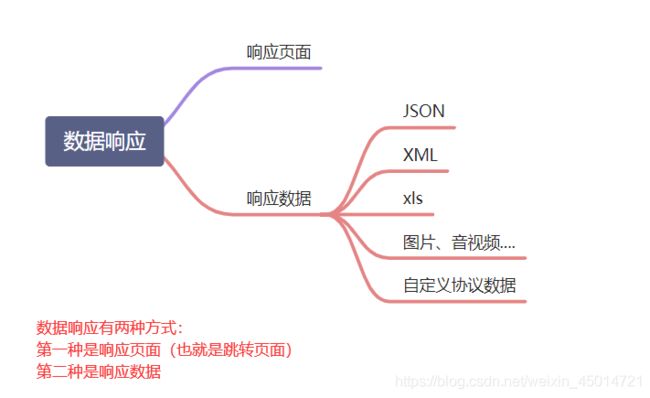
- 1.响应json数据
- 2.响应文件数据
- 2.内容协商功能
- 3.视图解析—Thymeleaf
-
一、请求处理
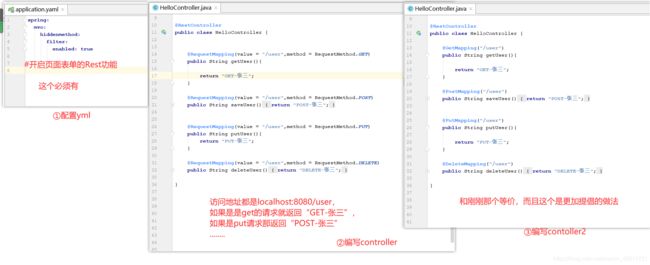
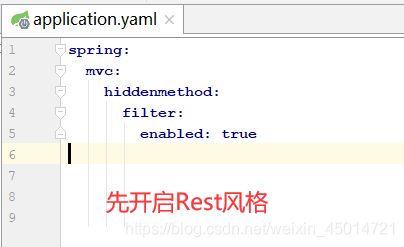
1.Rest风格的请求
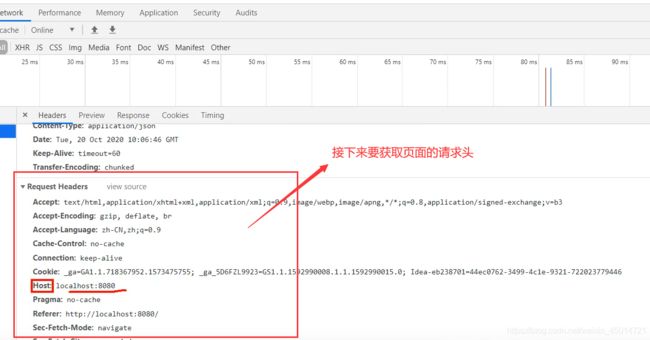
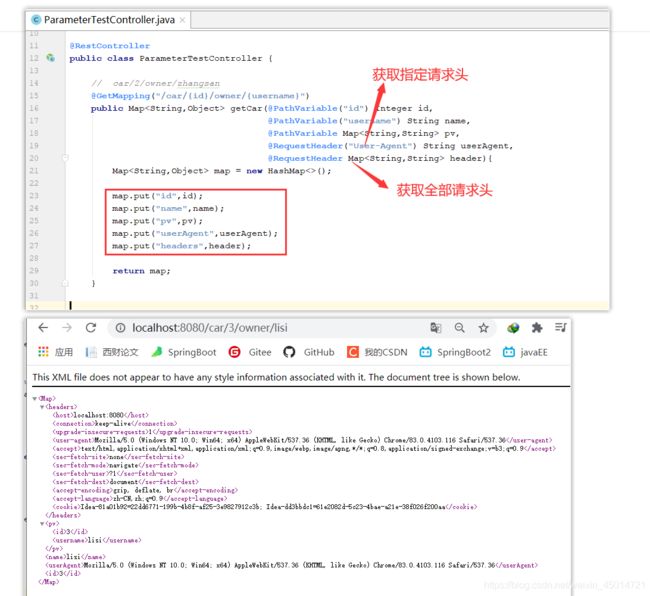
2.普通参数与基本注解
3.矩阵变量
1.矩阵变量的用途
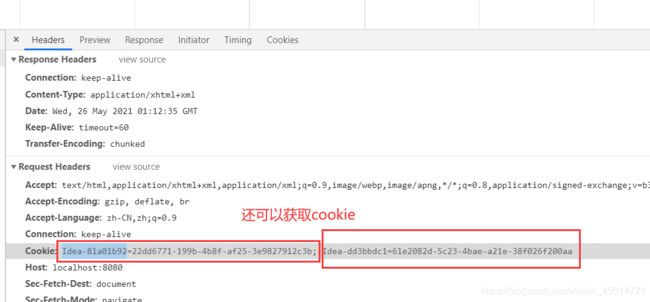
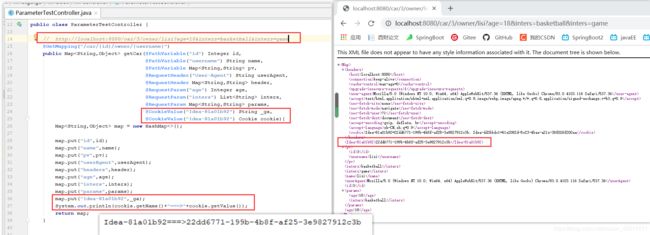
cookie 和 session 的机制就是,session里面保存一个k-v的值,然后每个人都有一个jsessionid,这个jsessionid 会被保存在cookie里面,每次用户发送请求cookie 都会携带jsessionid 。如果把cookie 禁用掉,我们要获取session 的k获取v ,肯定要通过jsessionid来拿到这个session对象,但是jsession有保存在cookie 所以无法从session对象的v。
这里我们可以使用 矩阵变量来获取 session 如 /user;jessionid=xxx 用过url 重写,把cookie的值使用矩阵变量的方式进行传递。
一句话就是矩阵变量是用来传递session/cookie的,它不是传递普通参数的。
2.矩阵变量的传参方式
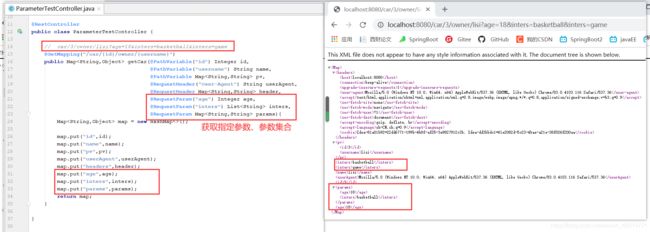
- 普通传递参数的方式:/cars/{path}?aaa=aa&ccc=cc,这是我们常见的传递参数的方式(例如car/lisi?age=18&inters=basketball&inters=game)
- 矩阵变量传递参数的方式:有以下三种:
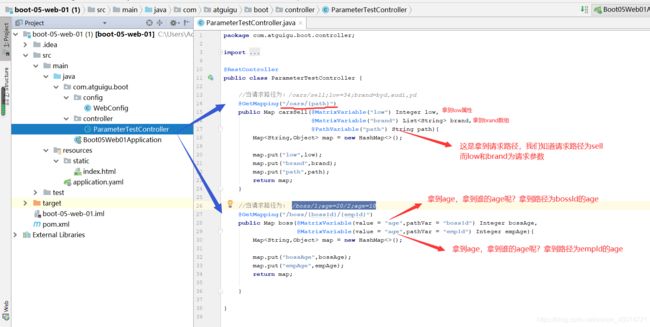
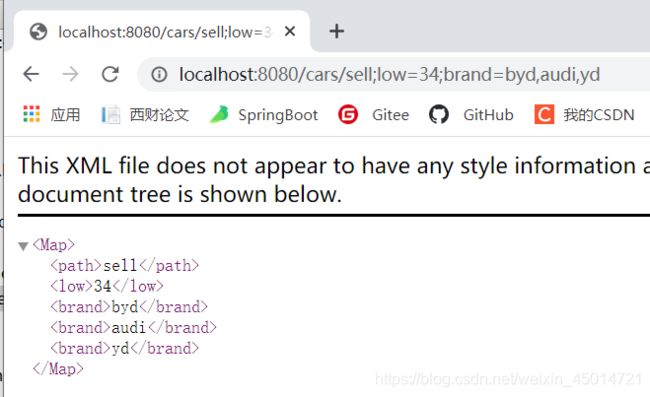
- 第一种:/cars/{path};key1=value;key2=value1,value2,value3 (key=value之间用分号分隔;因为key2有三个vlaue,这三个value用逗号分隔。)比如/cars/sell;low=34;brand=byd,audi,yd含义就是卖车的url是/car/sell,最低价是34万,商标是byd或audi或yd这三种
- 第二种:/cars/{path};key1=value;key2=value1;key2=value2;key2=value3(key=value之间用分号分隔;因为key2有三个vlaue,这三个value也用分号分隔。)比如/cars/sell;low=34;brand=byd;brand=audi;brand=yd含义就是卖车的url是/car/sell,最低价是34万,商标是byd或audi或yd这三种
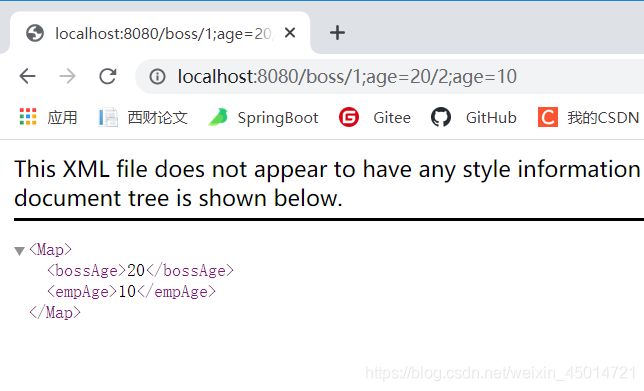
- 第三种:/boss/1;age=20/2;age=10它的含义就是传过来两个boss:一个id=1,age=20;另一个id=2,age=10。要注意它的访问路径是/boss/1/2,而age=20只是1的属性,age=10只是2的属性
- 矩阵变量传递参数的方式有三种,所以对应的得有三种处理请求的方式
3.开启springboot的矩阵变量功能
springboot 默认是禁用了矩阵变量的功能,我们需要手动开启,这就需要我们定制化springboot的组件。
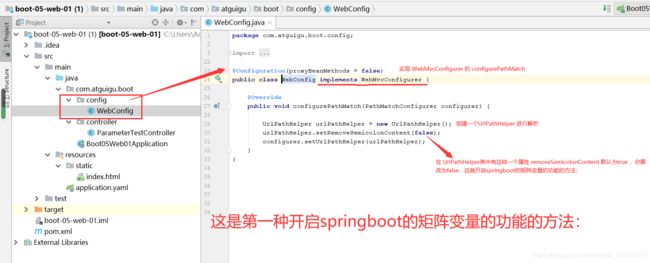
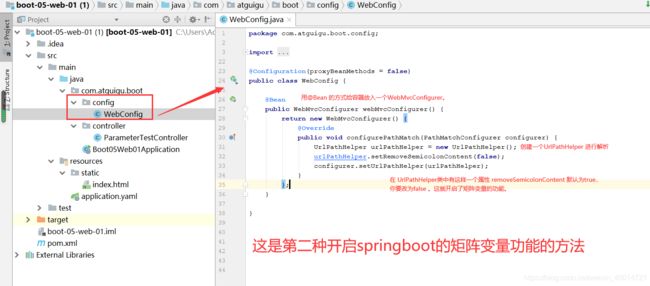
开启springboot的矩阵变量的功能的方式也有两种:1是实现 WebMvcConfigurer 的 configurePathMatch 2是 @Bean 的方式给容器放入一个WebMvcConfigurer。
不管哪种方式,你都要 创建一个UrlPathHelper 进行解析(创建方式:UrlPathHelper urlPathHelper = new UrlPathHelper(); ) 其中在 UrlPathHelper类中有这样一个属性 removeSemicolonContent 默认为true,你要改为false 。这就开启了矩阵变量的功能。
4.自定义配置的三种方案
开启springboot的矩阵变量功能其实就是自定配置,在springMVC种自定义配置有三种方案
方法1
(很重要,你经常会看到)
不用@EnableWebMvc注解。使用 @Configuration + WebMvcConfigurer 自定义规则。( @Configuration就代表你自定义的这个类是容器中的一个组件,然后你让你的类实现WebMvcConfigurer)

方法2
声明 WebMvcRegistrations 改变默认底层组件(了解)
方法3
使用 @EnableWebMvc+@Configuration+DelegatingWebMvcConfiguration 全面接管SpringMVC(了解)
5.复杂参数:
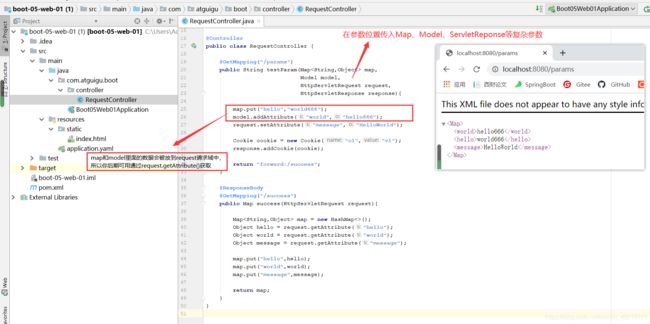
①Map、②Model(map、model里面的数据会被放在request的请求域 request.setAttribute)、
③RedirectAttributes( 重定向携带数据)、
④ServletResponse(response)

6.自定义参数
二、响应处理
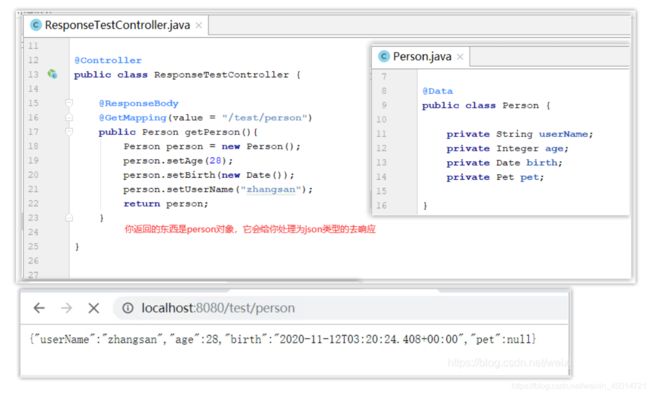
1.响应json数据
        <dependency>
            <groupId>org.springframework.boot</groupId>
            <artifactId>spring-boot-starter-web</artifactId>
        </dependency>

当你引入web场景自动引入了json场景,所以你就不用配置json了,给前端自动返回json数据;
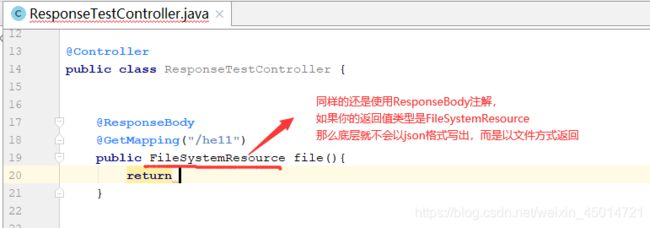
2.响应文件数据
2.内容协商功能
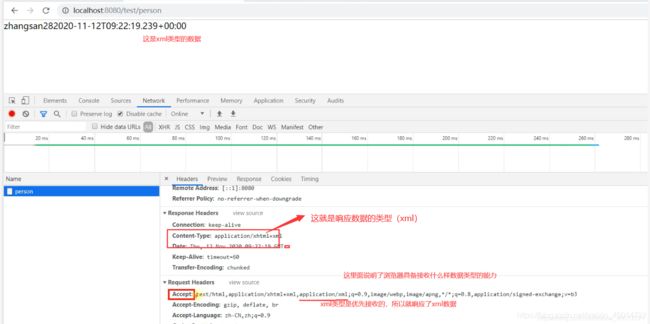
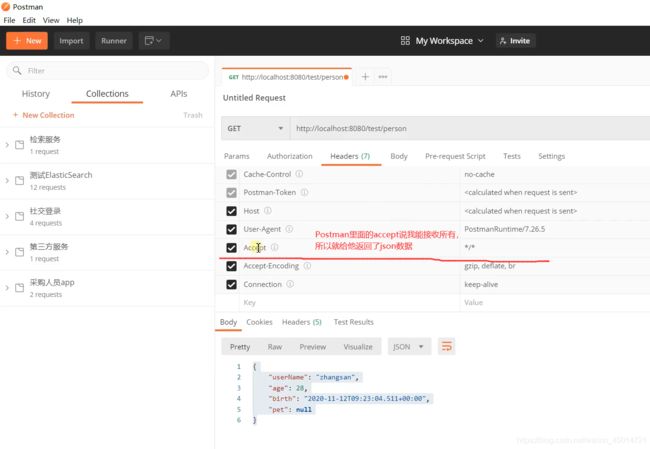
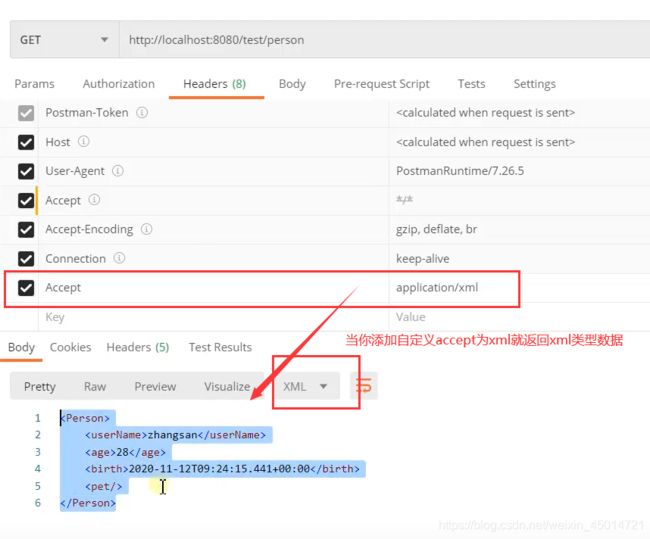
根据客户端接收能力不同,返回不同媒体类型的数据。浏览器说我能接收json数据,那么返回json数据;另一个客户端说我能接收xml数据,那么返回xml数据;还有一个客户端说我能接收所有类型的数据,那么就返回它优先想要的数据类型。
1.服务端得导入支持相关类型数据的jar包
服务端要返回xml数据那肯定得支持xml数据才能行。(json不用你导入,你引入web场景自动引入了json场景)
先引入xml依赖
 <dependency>
            <groupId>com.fasterxml.jackson.dataformat</groupId>
            <artifactId>jackson-dataformat-xml</artifactId>
</dependency>
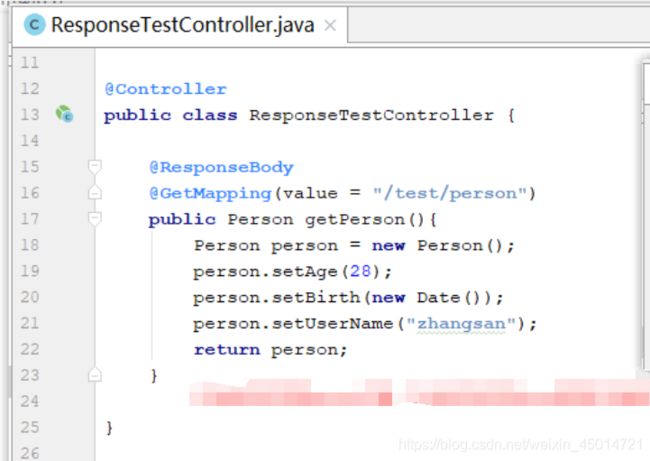
2.测试
3.开启浏览器协商
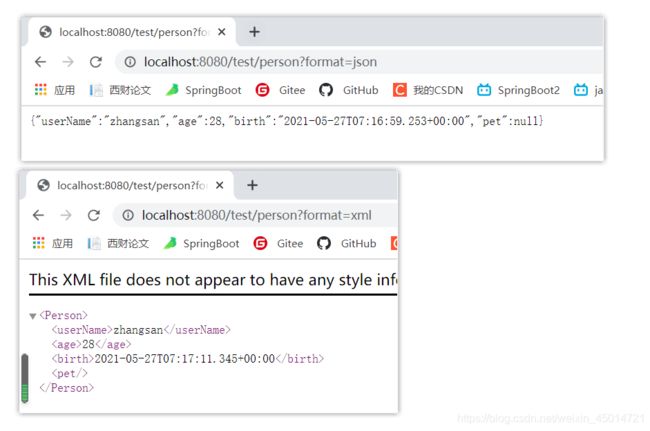
如果想让浏览器接收json数据,你发送的url可以是http://localhost:8080/test/person?format=json;
如果想让浏览器接收xml数据,你发送的url可以是http://localhost:8080/test/person?format=xml
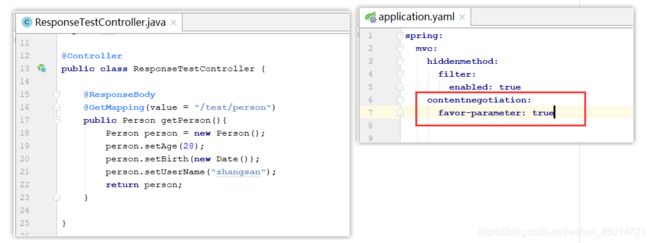
但是你还得在application.yaml里面添加开启基于请求参数的内容协商功能。
spring:
    contentnegotiation:
      favor-parameter: true  #开启请求参数内容协商模式
3.视图解析—Thymeleaf
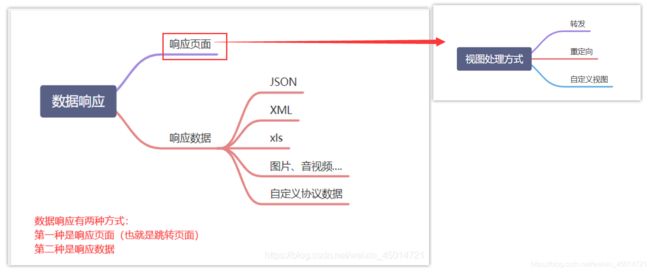
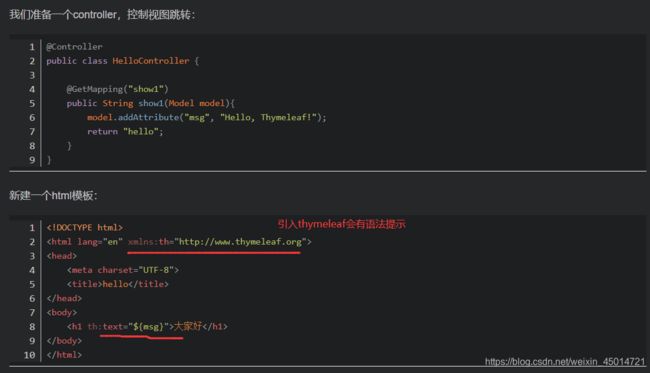
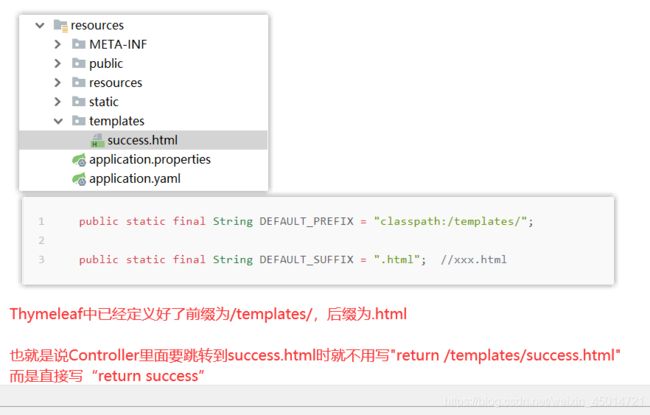
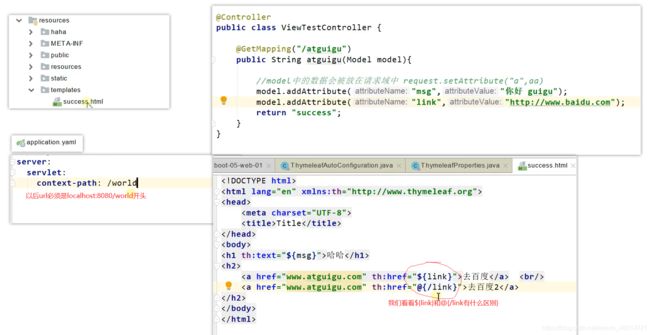
视图解析:SpringBoot默认不支持 JSP,需要引入第三方模板(Thymeleaf)引擎技术实现页面渲染。
Thymeleaf是类似于JSP语法的。
1.快速开始
2.变量
先建一个User类
public class User {
    String name;
    int age;
    User friend;// 对象类型属性
}
Controller类
@GetMapping("show2")
public String show2(Model model){
    User user = new User();
    user.setAge(21);
    user.setName("Jack Chen");
    user.setFriend(new User("李小龙", 30));

    model.addAttribute("user", user);
    return "show2";
}
前端获取
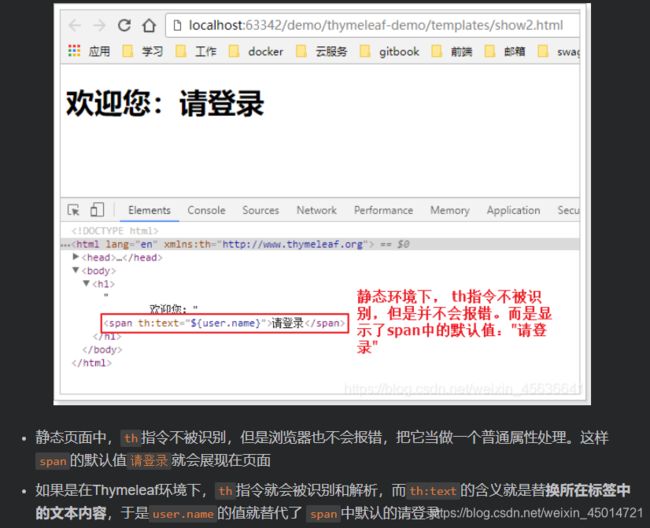
<h1>
    欢迎您:<span th:text="${user.name}">请登录</span>
</h1>
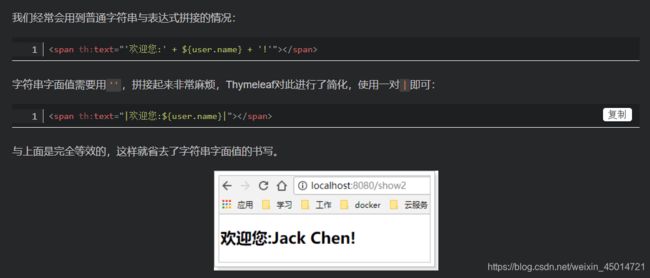
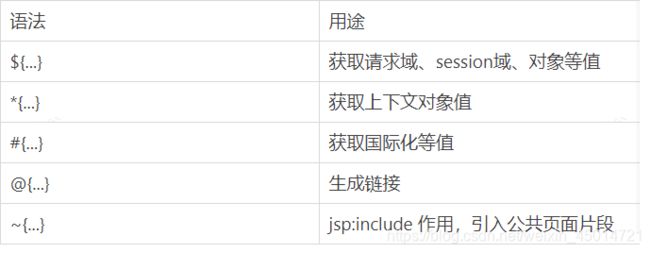
- Thymeleaf通过${}来获取model中的变量,注意这不是el表达式,但是语法非常像。
- 和EL区别在于:我们的表达式写在一个名为:th:text的标签属性中,这个叫做指令。
- 后面的“请登录”是默认值,只有在${user.name}取不到值的时候才用
3.自定义变量
<h2>
    <p>Name: <span th:text="${user.name}">Jack</span>.</p>
    <p>Age: <span th:text="${user.age}">21</span>.</p>
    <p>friend: <span th:text="${user.friend.name}">Rose</span>.</p>
</h2>
当数据量比较多的时候,频繁的写user.就会非常麻烦。
<h2 th:object="${user}">
    <p>Name: <span th:text="*{name}">Jack</span>.</p>
    <p>Age: <span th:text="*{age}">21</span>.</p>
    <p>friend: <span th:text="*{friend.name}">Rose</span>.</p>
</h2>
- 首先在 h2上 用
th:object="${user}"获取user的值,并且保存 - 然后,在h2内部的任意元素上,可以通过
*{属性名}的方式,来获取user中的属性,这样就省去了大量的user.前缀了
3.方法
<h2 th:object="${user}">
    <p>FirstName: <span th:text="*{name.split(' ')[0]}">Jack</span>.</p>
    <p>LastName: <span th:text="*{name.split(' ')[1]}">Li</span>.</p>
</h2>
- 表达式本身就支持方法调用,这里我们调用了name(是一个字符串)的split方法。
@GetMapping("show3")
public String show3(Model model){
    model.addAttribute("today", new Date());
    return "show3";
}
<p>
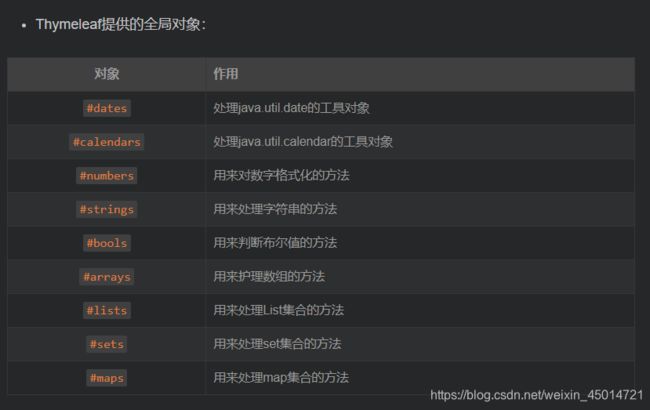
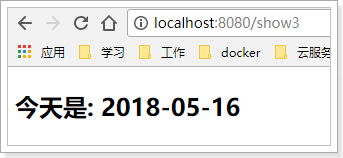
  今天是: <span th:text="${#dates.format(today,'yyyy-MM-dd')}">2018-04-25</span>
</p>
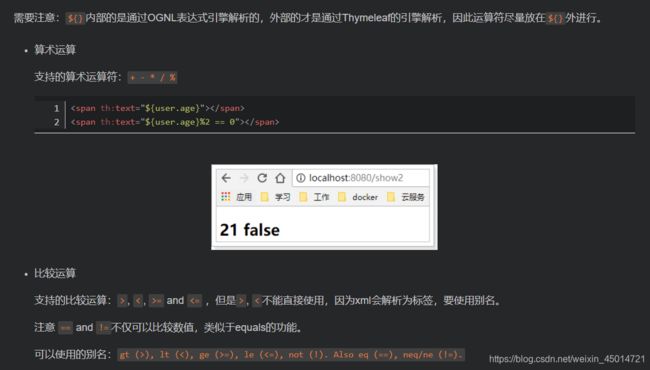
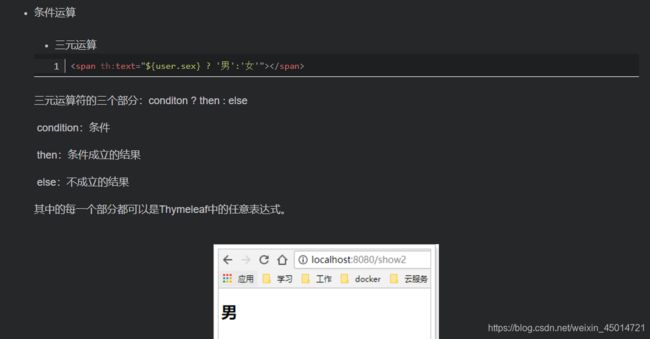
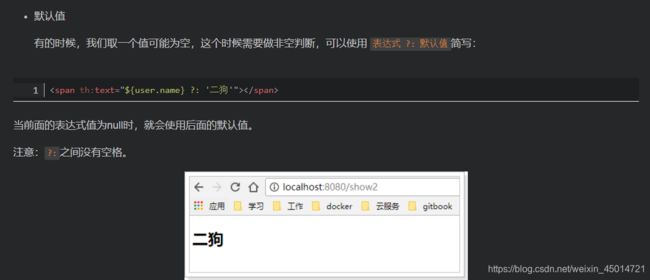
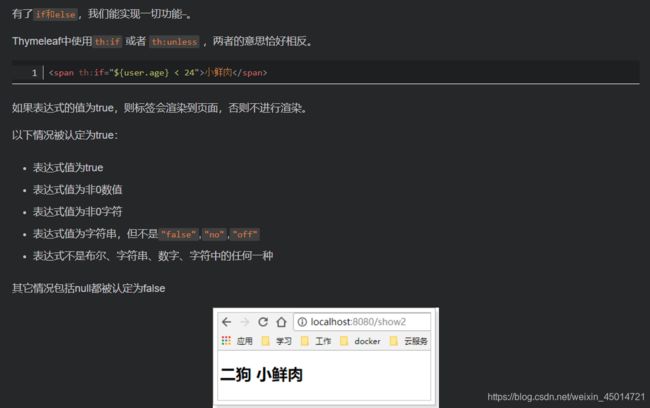
6.运算
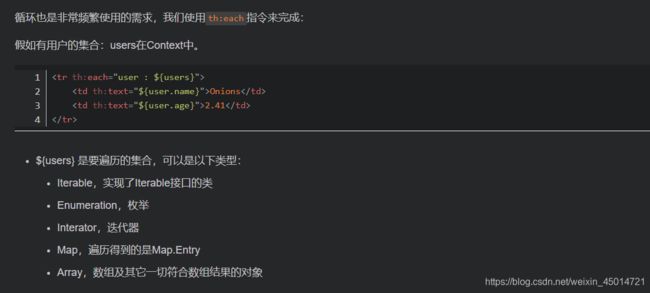
7.循环
感谢浏览和收藏

