微前端三:qiankun 协作开发和上线部署
我们先看qiankun怎么上线部署:
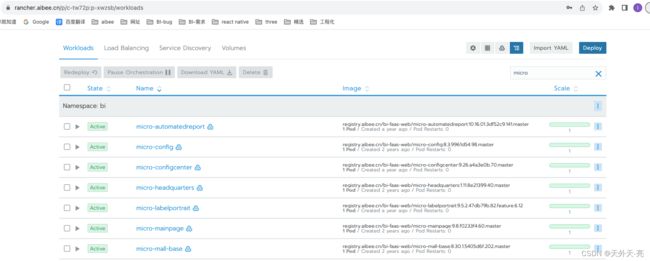
我这边用的是yaml 文件在 rancher上部署的:

base是基座,这里每个应用都是一个服务,这个还是跟之前一样并没有区别,那如何在一个域名上挂载多个服务呢?
最开始我们主要是在ingress上配置:

这样的好处是每一个域名对应的服务是单独配置的,可以做到定制化配置,域名没有配置的服务肯定是访问不到的。但这么做有一个问题,就是当域名很多了,会有一个很长的ingress需要维护,很不方便。
后期我们做了优化,将配置放到了基座服务对应的 nginx 中,
worker_processes  1;
user root;
events {
  worker_connections  10240;
}

http {
  include       mime.types;
  default_type  application/octet-stream;
  rewrite_log on;

  sendfile        on;
  #tcp_nopush     on;

  keepalive_timeout  65;

  gzip  on;

  #include /etc/nginx/conf.d/*.conf;
  client_max_body_size 100M;

  client_header_buffer_size    128k;
  large_client_header_buffers  4  128k;
  server {
    listen    80;
    server_name  *.aibee.cn;
    root  /usr/share/nginx/html;
    #定义服务器的默认网站根目录位置
    #root /usr/share/nginx/html;
	# 这里是base对应的请求后端接口
	location /union/portal {
	proxy_pass http://union-portal-backend:8080;
	}
	# 这里是子应用入口 /configcenter是 registerMicroApps 注册app的 entry值
	location /configcenter {
	proxy_pass http://micro-configcenter:80;
	}
    #默认请求
    location / {
      try_files $uri $uri/ /index.html;
      #定义首页索引文件的名称
      index index.php index.html index.htm;
        sub_filter '数智全息驾驶舱' '测试';
    }

    location ~ .*\.(?:htm|html)$ {
      add_header Cache-Control "no-cache";
    }
    #禁止访问 .htxxx 文件
    location ~ /.ht {
      deny all;
    }
  }
}
这样的好处是只需要在基座的 nginx中配置一次,ingress配置:

还是按照一个域名指向一个服务(基座对应的服务),简洁了很多。然后在前端代码中限制访问的app,因为nginx中配置了所有对应的子应用。
qiankun 协作开发
qiankun独立开发,微前端开发两种方式:
1、本地启动基座服务和子应用
2、本地只启用子应用服务
很显然第二种更加适用,在多团队协作中,我们不大可能所有人都有基座的权限,一般都是本地启动自己的服务开发、上线;
我们现在的做法是 基座作为入口,即登陆逻辑在基座,登陆信息通过props下发到各个子应用。
我们先看下本地开发时基座 - 我们的base代码的vue.config.js 配置:
// vue.config.js 配置
module.exports = {
  devServer: {
    https: false,
    hotOnly: false,
    disableHostCheck: true,
    headers: {
      // 允许子应用跨域
      'Access-Control-Allow-Origin': '*'
    },
    proxy: {
      '^/union/portal': {
        target: 'https://micro-test.ai.cn/',
        ws: false,
        changeOrigin: true,
        secure: false
      },
      '^/configcenter': {
        target: 'http://localhost:3002',
        changeOrigin: true,
        secure: false
      }
    }
  },
  productionSourceMap: false
};
之前我们已经将微前端部署在了线上,基座即base直接 target 到线上域名,这样可以通过线上服务的nginx请求对应的后端地址
/mallbi 和 /configcenter 这个数值即注册微服务的entey数值,通过它进入子应用
再看下对应子应用configcenter的vue.config.js 配置:
/* eslint-disable */
const { name } = require('./package');
/* eslint-enable */
module.exports = {
  publicPath: '/configcenter',
  lintOnSave: false,
  devServer: {
    https: false,
    hotOnly: false,
    disableHostCheck: true,
    port: 3002,
    proxy: {
      '^/configcenter/union/api': {
        target: 'https://micro-test.ai.cn/',
        changeOrigin: true,
        secure: false,
        pathRewrite: {
          '^/configcenter/union/api': '/configcenter/union/api'
        }
      },
      // '^/': {
      //   target: 'https://micro-test.ai.cn/'
      // }
    }
  },
  configureWebpack: {
    output: {
      library: `${name}-[name]`,
      libraryTarget: 'umd', // 把微应用打包成 umd 库格式
      jsonpFunction: `webpackJsonp_${name}`
    }
  },
  productionSourceMap: false
};
publicPath 设置为注册微服务的entey数值,
port 端口要和 基座配置的端口保持一致,
proxy 第一组数据是匹配路径请求到已经部署在了线上微前端,通过线上服务的nginx请求到对应的后端地址
通过上面两个 vue.config.js 配置,我们就可以实现第一种开发方案,通过本地启动基座服务和子应用开发项目。
而当我们打开子应用的 proxy的第二组,就可以实现第二种更便捷的方式开发项目,原理是:
当我们单独启动子应用时,一开始服务 会走proxy的第二组拉取 域名对应的静态资源,没有token就会拉取到基座的静态资源,然后登陆调转到子应用,entey数值configcenter,就会通过本地的publicPath: ‘/configcenter’,打到本地服务。