小程序自定义分享卡片
小程序自定义分享卡片
在微信小程序项目开发中,有将分享卡片,发送到微信群或者发送给个人的需求文章目录
- 小程序自定义分享卡片
- 前言
- 一、分享功能介绍
- 二、代码实现
-
- 1.实现思路一
- 2.实现思路二
- 总结
前言
简要描述
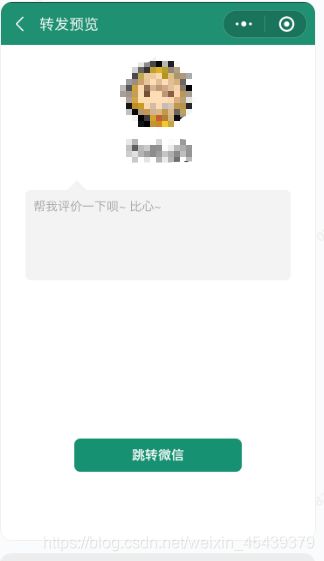
(1)在小程序中点击“跳转微信”,去微信分享卡片
(2)分享卡片效果
此处可以分享至微信群或者微信好友,点击卡片即可跳转到微信小程序指定页面
一、分享功能介绍
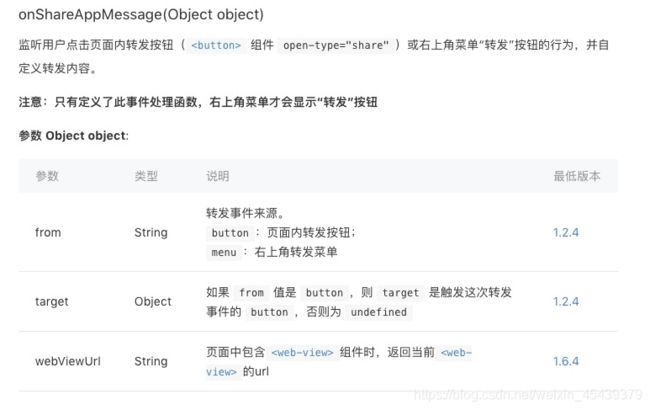
小程序的分享有自己的机制,在页面点击右上角,或者页面中的button 采用open-type=share方式也可以触发onShareAppMessage方法。
二、代码实现
此处讲述的是卡片自定义内容,若无需自定义的话直接将参数imageUrl配置为固定路径即可。
1.实现思路一
中间预览页面,将预览页面动态渲染,自动截屏,实现自定义卡片内容及内容的动态渲染
上代码,
wxml
<button class="upinfo" data-name="shareBtnfriend" open-type="share">跳转微信</button>
js
  let that = this
    let openid = app.globalData.open_id
    let urldata
    if (res.target.dataset.name == "shareBtnfriend") {//转发微信-好友
      urldata = '/pages/friendComment/friendComment?type=1&states=' + that.data.states + '&openid=' + openid + '&id=' + that.data.id
    } else if (res.target.dataset.name == "shareBtngroup") {//转发微信-群
      urldata = '/pages/friendComment/friendComment?type=2&states=' + that.data.states + '&openid=' + openid + '&id=' + that.data.id
    }
    return {
      title: '我的小可爱', // 转发标题
      path: urldata, // 必须是以 / 开头的完整路径
      imageUrl: '',
    }
  },
此处imageUrl我们没有配置参数,使用默认当前预览页面的截图,当前预览页面动态渲染
2.实现思路二
canvas生成图片,在分享逻辑中,将canvas生成的图片返,并配置到return的imageUrl参数中
上代码,
canvas画图封装并暴露
function fillTextToCanvas(cxt, text, beginWidth, beginHeight) {
    const lineLength = 24;// 行高
    let item = '';
    let count = 0;
    const stringLength = text.length;
    const newText = text.split('');
    const context = cxt;
    let beginHeightNew = beginHeight;
    context.textAlign = 'left';
    for (let i = 0; i <= stringLength; i++) {
        if (count === 15) { // count一行显示多少个字
            context.fillText(item, beginWidth, beginHeightNew);
            beginHeightNew += lineLength;
            item = '';
            count = 0;
        }
        if (i === stringLength) {
            context.fillText(item, beginWidth, beginHeightNew);
            item = '';
            count = 0;
        }
        item += newText[0];
        count += 1;
        newText.shift();
    }
}
//  canvas绘制文字自动换行
function drawLongText(longText, cxt, beginWidth, beginHeight) {
    const lines = longText.split('\n');
    const linesLen = lines.length;
    const lineLength = 24;// 行高
    if (linesLen >= 0) {
        for (let t = 0; t < linesLen; t++) {
            const beginHeightNew = beginHeight + lineLength * t;
            fillTextToCanvas(cxt, lines[t], beginWidth, beginHeightNew);
        }
    }
}

// 绘制分享图片
function createSharePicUrl(self, avatar, nickname, college, content, callback) {
    const shareCtx = wx.createCanvasContext('shareCanvas', self);
    shareCtx.rect(0, 0, 250, 200);
    shareCtx.setFillStyle('white');
    // 画头部个人信息
    wx.downloadFile({
        url: avatar,
        success(res) {
            const avatarWidth = 40; // 绘制的头像宽度
            const avatarHeight = 40; // 绘制的头像高度
            const avatarX = 12; // 绘制的头像在画布上的位置
            const avatarY = 15; // 绘制的头像在画布上的位置
            shareCtx.save();
            shareCtx.beginPath(); // 开始绘制
            // 先画个圆   前两个参数确定了圆心 (x,y) 坐标  第三个参数是圆的半径  四参数是绘图方向  默认是false,即顺时针
            shareCtx.arc(avatarWidth / 2 + avatarX,
                avatarHeight / 2 + avatarY,
                avatarWidth / 2,
                0,
                Math.PI * 2,
                false);
            shareCtx.clip();
            shareCtx.drawImage(res.tempFilePath,
                avatarX, avatarY,
                avatarWidth,
                avatarHeight); // 推进去图片,必须是https图片
            shareCtx.restore(); // 恢复之前保存的绘图上下文 恢复之前保存的绘图上下午即状态 还可以继续绘制
            // 画中间帖子内容
            shareCtx.setTextAlign('left'); // 文字居中
            shareCtx.setFillStyle('#333333');
            shareCtx.setFontSize(15); // 文字字号:15px
            shareCtx.fillText(nickname, 64, 31, 100);
            shareCtx.setFillStyle('#999999');
            shareCtx.setFontSize(12); // 文字字号:12px
            shareCtx.fillText(college, 64, 52, 100);
            shareCtx.setFillStyle('#070707');
            shareCtx.setFontSize(15); // 文字字号:15px
            drawLongText(content, shareCtx, avatarX, 75 + 10);
            shareCtx.draw(false, setTimeout(callback, 200));
        },
    });
}
module.exports = {
    drawLongText,
    createSharePicUrl,
};
引入,
const createSharePic = require('../../utils/createSharePic');
生成图片并保存,
createSharePic.createSharePicUrl(this,
    item.avatar,
     item.nickname,
     item.collegeName,
     item.body, () => {
     wx.canvasToTempFilePath({
         canvasId: 'shareCanvas',
         x: 0,
         y: 0,
         width: 250,
         height: 200,
         success(res) {
             console.log(res.tempFilePath);
             that.setData({
                 sharePicUrl: res.tempFilePath,
             });
         },
     }, that);
 });
将图片res.tempFilePath的路径直接配置即可
总结
两种方实现思路,玩转小程序自定义卡片分享
文章参考:https://blog.csdn.net/m0_37792830/article/details/90260073
站在巨人肩膀上的自我总结


