OpenMV4 H7 PLUS摄像头模板匹配
使用OpenMV4 H7 PLUS摄像头进行矩形、三角形、圆三种形状的模板匹配:
![]()
参考:
官网:https://book.openmv.cc
函数库:https://docs.singtown.com/micropython/zh/latest/openmvcam/library/omv.sensor.html?highlight=sensor#module-sensor
环境下载:https://openmv.io/pages/download
函数:
find_template函数:
image.find_template(template, threshold[, roi[, step=2[, search=image.SEARCH_EX]]])
尝试使用归一化互相关(NCC)算法在图像中找到第一个模板匹配的位置。返回匹配位置的边界框元组(x, y, w, h),否则返回None。
template 是一个与这个图像对象相匹配的小图像对象。注意:两图像须都为灰度图。
threshold 是浮点数(0.0-1.0),其中较小的值在提高检测速率同时增加误报率。相反,较高的值会降低检测速率,同时降低误报率。
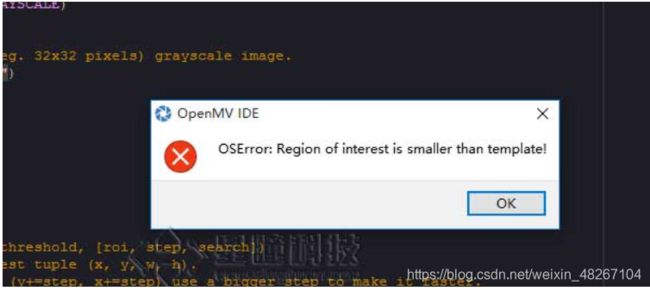
roi 是感兴趣区域的矩形元组(x,y,w,h)。如果未指定,ROI即整个图像的图像矩形。 操作范围仅限于 roi 区域内的像素。
step 是查找模板时需要跳过的像素数量。跳过像素可大大提高算法运行的速度。该方法只适用于SERACH_EX模式下的算法。
search 可为 image.SEARCH_DS or image.SEARCH_EX. image.SEARCH_DS 搜索模板所用算法较 image.SEARCH_EX 更快,但若模板位于图像边缘周围,可能无法成功搜索。 image.SEARCH_EX 可对图像进行较为详尽的搜索,但其运行速度远低于 image.SEARCH_DS 。
仅支持灰度图像。
r = img.find_template(template, 0,7, roi=(10,0,80,60), step=4, search=SEARCH_EX) threshold中的0.7是相似度阈值,roi是进行匹配的区域(左上顶点为(10,0),长80宽60的矩形),注意roi的大小要比模板图片大,比frambuffer小。
限制:
使用NCC算法进行模板匹配对大小要求和角度要求都较严格,大小或角度变化稍微打一点可能就很难识别出来了。所有我们需要多采集一些不同大小不同角度的模板来避免这一问题。
templates1 = ["/300.pgm","/301.pgm","/302.pgm","/303.pgm","/310.pgm","/311.pgm","/312.pgm","/313.pgm","/320.pgm","/321.pgm","/322.pgm","/323.pgm"] #保存三角形多个模板
templates2 = ["/100.pgm","/101.pgm","/102.pgm","/103.pgm","/110.pgm","/111.pgm","/112.pgm","/113.pgm","/120.pgm","/121.pgm","/122.pgm","/123.pgm"] #保存矩形多个模板
templates3 = ["/000.pgm","/001.pgm","/002.pgm","/003.pgm","/010.pgm","/011.pgm","/012.pgm","/013.pgm","/020.pgm","/021.pgm","/022.pgm","/023.pgm"] #保存圆多个模板
如果运行程序后出现以下问题:
1.模版图片太大,建议模版图片小于80*60

2.OpenMV4内存不够,要把像素减低,例如将QQVGA改成QQCIF

实现:
注意,由于我们的模板图片大小要超过openmv内置的flash,所以我们需要插上sd卡后进行下列步骤。(注意先插sd卡再上电哦) 而且此模板匹配只能用于1.6及以上版本的固件哦,否则运行时会提示 “can not find SEARCH_EX”哦
首先,我们需要创建或导入一个模板,注意这个模板必须得是pgm格式的,而且大小有限制,不能超过openmv的像素大小。 我们可以直接从openmv里面截取一个模板图像,可以先运行拍照代码,让frambuffer显示出图像,然后进行截取。

选择 save image selection to pc,注意从openmv里面直接截取保存的图片是bmp格式的,我们需要把它转换成pgm格式。可以在这个网站进行在线转换https://convertio.co/zh/bmp-pgm/
这里我是自己直接改后缀名也可以用。
然后,我们将转换完的pgm模板保存到sd卡中。我们打开模板匹配的程序就可以进行匹配了。
代码:
本此任务实现使用下面多模板匹配就可以完成,单模板匹配不使用:
拍照:
#
#模板匹配简单拍照程序
#

import time, sensor, image
from image import SEARCH_EX, SEARCH_DS
#从imgae模块引入SEARCH_EX和SEARCH_DS。使用from import仅仅引入SEARCH_EX,
#SEARCH_DS两个需要的部分,而不把image模块全部引入。

sensor.reset() #初始化传感器(摄像头)
# 设置传感器
sensor.set_contrast(1)
sensor.set_gainceiling(16)
sensor.set_framesize(sensor.LCD) #分辨率,用LCD屏幕的话需要设为LCD。和模板匹配程序一样。
sensor.set_pixformat(sensor.GRAYSCALE) #照片模式,灰度图像方式
sensor.skip_frames(time = 200) #延时跳过一些帧,等待感光元件变稳定。
sensor.set_auto_gain(False) # 颜色跟踪必须关闭自动增益
sensor.set_auto_whitebal(False) #关闭白平衡。
sensor.set_auto_exposure(False,16777) #设置曝光,需要更改

clock = time.clock() # 跟踪FPS帧率

while(True):
    clock.tick()  # 追踪两个snapshots()之间经过的毫秒数.
    img = sensor.snapshot().lens_corr(strength = 1.8, zoom = 1.0)   #去畸变()
    print("FPS %f" % clock.fps()) # 注意: 当连接电脑后,OpenMV会变成一半的速度。当不连接电脑,帧率会增加。
单模板匹配:
# NCC模板匹配示例-Normalized Cross Correlation (NCC)
#
# 这个例子展示了如何使用OpenMV的NCC功能将小部分图像与图像的各个部分
# 进行匹配...期望获得极其可控的环境 NCC并不总是有用的。
#
# 警告:NCC支持需要重做!到目前为止,这个功能需要做大量的工作才能有用。
# 这个脚本将重新表明功能的存在,但在目前的状态是不足的。

import time, sensor, image
from image import SEARCH_EX, SEARCH_DS
#从imgae模块引入SEARCH_EX和SEARCH_DS。使用from import仅仅引入SEARCH_EX,
#SEARCH_DS两个需要的部分,而不把image模块全部引入。

# 重置传感器
sensor.reset()

# 设置传感器
sensor.set_contrast(1)
sensor.set_gainceiling(16)
# Max resolution for template matching with SEARCH_EX is QQVGA
# 模板与SEARCH_EX匹配的最大分辨率是QQVGA
sensor.set_framesize(sensor.QQVGA)
# 你可以设置windowing窗口来减少搜索图片。
#sensor.set_windowing(((640-80)//2, (480-60)//2, 80, 60))
sensor.set_pixformat(sensor.GRAYSCALE)#灰度图像。

# 加载模板。
# 模板应该是一个小的(例如。32x32像素)灰度图像。
template = image.Image("/1.pgm")

clock = time.clock()

#运行模板匹配
while (True):
    clock.tick()
    img = sensor.snapshot()

    # find_template(template, threshold, [roi, step, search])
    # ROI: 感兴趣区域元组 (x, y, w, h).
    # Step:使用的循环步长(y+= Step, x+= Step) 使用更大的步长使其更快。
    # search 为image.SEARCH_EX进行详尽搜索,或者为image.SEARCH_DS进行菱形搜索
    #
    # Note1: ROI必须比图像小,比模板大。
    # Note2:在菱形diamond搜索中,step和ROI都被忽略。
    r = img.find_template(template, 0.70, step=4, search=SEARCH_EX) #, roi=(10, 0, 60, 60))
    # find_template(template, threshold, [roi, step, search]),
    # threshold中的0.7是相似度阈值,roi是进行匹配的区域(左上顶点为(10,0),长80宽60的矩形),
    # 注意roi的大小要比模板图片大,比frambuffer小。
    # 把匹配到的图像标记出来
    if r:
        img.draw_rectangle(r)
        print("匹配")

    print(clock.fps())
多模板匹配:
# 使用NCC算法实现模板匹配
#
# 这个例子展示了如何使用OpenMV凸轮的NCC功能将小部分图像与图像的各个部分进行匹配...期望获得极其可控的环境NCC并不是全部有用的。
#
# 警告:NCC支持需要重做!到目前为止,这个功能需要做大量的工作才能有用。
# 这个脚本将重新表明功能的存在,但在目前的状态是不足的。

import time, sensor, image
from image import SEARCH_EX, SEARCH_DS
#从imgae模块引入SEARCH_EX和SEARCH_DS。使用from import仅仅引入SEARCH_EX,
#SEARCH_DS两个需要的部分,而不把image模块全部引入。

sensor.reset() #初始化传感器(摄像头)
# 设置传感器
sensor.set_contrast(1)
sensor.set_gainceiling(16)
sensor.set_framesize(sensor.LCD) #分辨率,用LCD屏幕的话需要设为LCD。SEARCH_EX 最大用 QQVGA
sensor.set_pixformat(sensor.GRAYSCALE) #照片模式,灰度图像方式
sensor.skip_frames(time = 200) #延时跳过一些帧,等待感光元件变稳定。
sensor.set_auto_gain(False) # 颜色跟踪必须关闭自动增益
sensor.set_auto_whitebal(False) #关闭白平衡。
sensor.set_auto_exposure(False,16777)# 设置曝光,需要更改

#sensor.set_windowing(((640-80)//2, (480-60)//2, 80, 60)) #子分辨率。可设置windowing窗口来减少搜索图片

templates1 = ["/300.pgm","/301.pgm","/302.pgm","/303.pgm","/310.pgm","/311.pgm","/312.pgm","/313.pgm","/320.pgm","/321.pgm","/322.pgm","/323.pgm"] #保存三角形多个模板
templates2 = ["/100.pgm","/101.pgm","/102.pgm","/103.pgm","/110.pgm","/111.pgm","/112.pgm","/113.pgm","/120.pgm","/121.pgm","/122.pgm","/123.pgm"] #保存矩形多个模板
templates3 = ["/000.pgm","/001.pgm","/002.pgm","/003.pgm","/010.pgm","/011.pgm","/012.pgm","/013.pgm","/020.pgm","/021.pgm","/022.pgm","/023.pgm"] #保存圆多个模板


clock = time.clock() #跟踪FPS帧率

#运行模板匹配
while (True):
    clock.tick() # 追踪两个snapshots()之间经过的毫秒数.
    img = sensor.snapshot().lens_corr(strength = 1.8, zoom = 1.0) #去畸变

    #初始化计数常量
    n1 = 0
    n2 = 0
    n3 = 0

    for t in templates1:  #如果与模板匹配
        template = image.Image(t) #template获取图片
        r = img.find_template(template, 0.70, step=4, search=SEARCH_EX) #进行相关设置,可以设置roi缩小区域
        if r: #如果有目标
            img.draw_rectangle(r) #画矩形,框出匹配的目标
            n1 = n1 + 1

    for t in templates2:
        template = image.Image(t)
        r = img.find_template(template, 0.70, step=4, search=SEARCH_EX) #, roi=(10, 0, 60, 60))
        if r:
            img.draw_rectangle(r)
            n2 = n2 + 1

    for t in templates3:
        template = image.Image(t)
        r = img.find_template(template, 0.70, step=4, search=SEARCH_EX) #, roi=(10, 0, 60, 60))
        if r:
            img.draw_rectangle(r)
            n3 = n3 + 1

        #打印模板名字
        tuple([n1,n2,n3])
        tu = tuple([n1,n2,n3])
        max_value = max(tu) #获取最大匹配度的模板
        max_value_index = tu.index(max_value) #获取最大匹配度的模板下标
        if max_value_index == 0:
            print("三角形")
        if max_value_index ==1 :
            print("矩形")
        if max_value_index == 2:
            print("圆形")

        print('模板元组{}中最大值为:{},下标为:{}'.format(tu,max_value,max_value_index))

print(clock.fps())