jQuery案例专题
jQuery案例专题
本学期主要担任的课程是js和jQuery,感觉用到的有一些案例挺有意思的,就对其进行了一下整理。
目录:
- 电影院的幕帘特效
- 手风琴特效
- 星光闪烁
- 网页轮播图
1.电影院的幕帘特效代码如下
`html
DOCTYPE html >
<html>
<head>
<meta http-equiv="Content-Type" content="text/html; charset=gb2312" />
<title>幕帘效果title>
head>
<script type="text/javascript" src="JS/jquery-1.12.4.js">script>
<script type="text/javascript">
$(document).ready(function() {
	var curtainopen = false;//定义布尔型变量
	$(".rope").click(function(){//当单击超链接时
		$(this).blur();//使超链接失去焦点
		if (curtainopen == false){ //判断变量值是否为false
			$(this).text("关闭幕帘");//设置超链接文本
			$(".leftcurtain").animate({width:'60px'}, 2000 );//设置左侧幕帘动画
			$(".rightcurtain").animate({width:'60px'},2000 );//设置右侧幕帘动画
			curtainopen = true;//变量值设为true
		}else{
			$(this).text("拉开幕帘"); //设置超链接文本
			$(".leftcurtain").animate({width:'50%'}, 2000 );//设置左侧幕帘动画
			$(".rightcurtain").animate({width:'51%'}, 2000 );//设置右侧幕帘动画
			curtainopen = false;//变量值设为false
		}
	});
});
script>
	<style type="text/css">
	    *{
	    	margin:0;
	    	padding:0;
	    }
	    body {
			color: #FFFFFF;
	    	text-align: center;
	    	background: #4f3722 url('images/darkcurtain.jpg') repeat-x;
	    }
	    img{
			border: none;
		}
		p{
		margin-bottom:10px;
		color:#FFFFFF;
		}
	    .leftcurtain{
			width: 50%;
			height: 495px;
			top: 0px;
			left: 0px;
			position: absolute;
			z-index: 2;
		}
		 .rightcurtain{
			width: 51%;
			height: 495px;
			right: 0px;
			top: 0px;
			position: absolute;
			z-index: 3;
		}
		.rightcurtain img, .leftcurtain img{
			width: 100%;
			height: 100%;
		}
		.rope{
			position: absolute;
			top: 70%;
			left: 60%;
			z-index: 100;
			font-size:36px;
			color:#FFFFFF;
		}
	style>
head>

<body>
欢迎来到小红棉戏班<hr />
	<div class="leftcurtain"><img src="images/frontcurtain.jpg"/>div>
	<div class="rightcurtain"><img src="images/frontcurtain.jpg"/>div>
	<a class="rope" href="#">
		拉开幕布
	a>
body>
html>
效果图如下:


2.手风琴特效代码如下:
```html
DOCTYPE html PUBLIC "-//W3C//DTD XHTML 1.0 Transitional//EN" "http://www.w3.org/TR/xhtml1/DTD/xhtml1-transitional.dtd">
<html xmlns="http://www.w3.org/1999/xhtml">
<head>
<meta http-equiv="Content-Type" content="text/html; charset=utf-8" />
<title>无标题文档title>
<style type="text/css">
*{ margin:0;  padding:0; list-style:none;}
.all{
width:1200px;
height:300px;
border:1px solid #000;
margin:100px auto;
overflow:hidden;   /*在ul的父级上增加溢出隐藏*/
}
.all ul{
width:2000px;
}/*设置ul宽度很大,防止li大于200px往下掉*/
.all li{
width:200px;
height:300px;
background:url(images/pic/01.jpg) no-repeat 0 0;  /*加载一张相同图片*/
float:left; cursor:pointer;}

style>
<body>
<div class="all">
	<ul>
    	<li>li>
        <li>li>
        <li>li>
        <li>li>
        <li>li>
        <li>li>
    ul>
div>
body>
<script src="js/jquery-1.8.3.min.js">script>
<script type="text/javascript">
$(function(){
$(".all li").each(function(index,obj){
		var num=index+1;
		$(obj).css("background","url(img/pic/0"+num+".jpg)");
/*动态加载图片,不必在li中添加*/
	});
	$(".all li").hover(function(){       	  //hover事件就有鼠标移上和离开两个功能
		$(this).stop().animate({width:500},200).siblings().stop().animate({width:140},200)
/*链式写法:$(this)的图片从200变为500,其余siblings()从200变为140*/
		},function(){
		$(".all li").stop().animate({width:200},200);   /*鼠标离开所有图的宽度还原为200*/
		});
})
script>
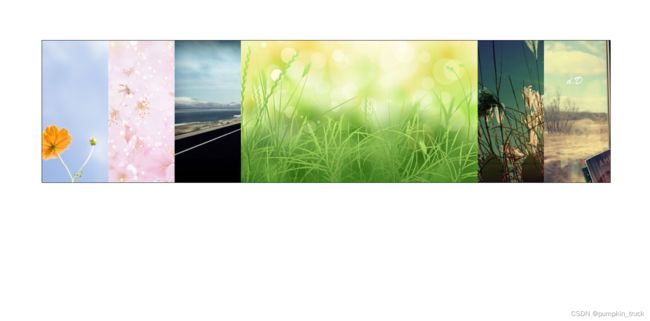
效果图如下:
3.星光闪烁代码如下:
html代码
DOCTYPE html>
<html>
  <head>
    <meta charset="UTF-8">
    <title>星空闪烁动画title>
    <link rel="stylesheet" href="css/style.css">
    <script src="js/jquery-1.12.4.js">script>
  head>
  <body>
    <input type="button" value="星空展示">
    <div class="sky">
      <img class="wrap" src="images/night.jpg" width="920" height="450">
      <div class="starWrap">
        <img src="images/star.png" width="150" height="150">
        <img src="images/star2.png" width="60" height="60">
        <img src="images/star.png" width="150" height="150">
        <img src="images/star2.png" width="60" height="60">
        <img src="images/star.png" width="150" height="150">
        <img src="images/star2.png" width="60" height="60">
      div>
    div>
    <script src="js/nightSky.js">script>
  body>
html>
css代码如下:
* {
    margin: 0;
    padding: 0;
}
div.sky {
    margin: 0 auto;
    width: 920px;
    height: 450px;
}
.wrap {
    display: none;
}
div .starWrap {
    position: absolute;
    top: 0;
    background: pink;
    width: 920px;
}
div .starWrap img {
    position: absolute;
    top: 20px;
    left: 50px;
    display: none;
}
div .starWrap img:nth-child(2) {
    position: absolute;
    top: 50px;
    left: 680px;
}
div .starWrap img:nth-child(3) {
    position: absolute;
    top: 80px;
    left: 180px;
}
div .starWrap img:nth-child(4) {
    position: absolute;
    top: 280px;
    left: 180px;
}
div .starWrap img:nth-child(5) {
    position: absolute;
    top: 180px;
    left: 380px;
}
div .starWrap img:nth-child(6) {
    position: absolute;
    top: 110px;
    left: 480px;
}
jquery代码如下:
 $('input').click(function() {
            $('.wrap').slideDown(1500,function() {
                setInterval(twinkle, 500);
            });
        });
        function twinkle() {
            $('.starWrap img:even').toggle(10);
            $('.starWrap img:odd').fadeToggle(300);
        }
效果图如下:

4.网页轮播图代码如下:
DOCTYPE html>
<html>
	<head>
		<meta charset="utf-8">
		<title>网页轮播图效果title>
		<link href="css/wylbt.css" rel="stylesheet">
	head>
	<body>
		<div id="box">
			<div id="pic">

				<img class="tp" src="img/01.jpg">
				<img class="tp" src="img/02.jpg">
				<img class="tp" src="img/03.jpg">
				<img class="tp" src="img/04.jpg">
			div>

			<ul>
				<li class="num">1li>
				<li>2li>
				<li>3li>
				<li>4li>
			ul>

			<a class="btn1" href="#"><a>
			<a class="btn2" href="#">>a>
		div>
	body>

	<script src="js/jquery-1.12.4.js">script>
	<script src="js/wylbt.js">script>
html>
```css
*{
	margin: 0;
	padding: 0;
}

ul,li,a{
	list-style: none;
	text-decoration: none;
}

#box{
	width: 1210px;
	height: 360px;
	border: 1px solid red;
	margin:  50px auto;
	overflow: hidden;
}

#box #pic{
	width: 100%;
}

#box #pic .tp{
	position: absolute;
}


#box #pic img{
	float: left;
	width: 1210px;
	height: 360px;
}

#box ul{
	position: relative;
	top:85%;
	left:45%;
}

#box ul li{
	display: inline-block;
	background: #ffff00;
	height: 30px;
	width: 30px;
	border-radius: 50%;
	text-align: center;
	line-height: 30px;
	margin: 10px;
	cursor: pointer;
}


#box ul li.num{
	background: red;
	color:#fff;
}

.btn1{
	position: relative;
	top:33%;
	width: 40px;
	height: 40px;
	background: #ccc;
	color:#ff5500;
	text-align: center;
	font-size: 30px;
}
.btn2{
	position: relative;
	top:33%;
	left:1160px;
	width: 40px;
	height: 40px;
	background: #ccc;
	color:#ff5500;
	text-align: center;
	font-size: 30px;
}
```javascript
//1.需要定义全局变量
var i=0; //i是控制图片的个数
var timer; //timer是一个计时器

/*
3个效果
(1) 自动轮播效果
(2) 鼠标移入移出效果
(3) 左右按钮的单击效果
*/

$(function(){
//2.需要显示第一张图片,其他的图片隐藏
//显示第0张class为tp的图片,同时兄弟级siblings(同级)的其它图片隐藏
	$(".tp").eq(0).show().siblings().hide();
//3.完成自动轮播  编写一个函数( class 类  类名 理解为函数  java叫方法)
	showpic();


//4.完成鼠标的移入移出
	$("li").hover(
		//移入
		function(){
			//需要获取当前li的序号
			i=$(this).index();
			//调用show函数直接切换
			show();
			//需要将计时器函数清0  重新开始计时
			//通常情况  setInterval()和	clearInterval(timer)是配对使用的
			clearInterval(timer);
		},
		function(){
			showpic();
		});

	//对左边的按钮进行单击事件 向左展示
	$(".btn1").click(function(){
		//计时器清0
		clearInterval(timer);
		//如果是第一个li 则点击之后变成最后一个li
		if(i==0){
			i=4;
		}
		i--;
		//调用show函数
		show();
	});

	$(".btn2").click(function(){
		clearInterval(timer);
		i++;
		if(i==4){
			i=0;
		}
		show();
	});

});

//showpic函数完成每隔三秒进行一次切换
function showpic(){
	//setInterval(a,b)b为时间  a必须是一个函数
	timer=setInterval("s()",3000);
}

//完成图片切换
function show(){
	//设置当前第i张class名称是tp图片,设置淡入效果fadeIn为300毫秒
	//同时再次设置同级的其它tp为淡出效果fadeOut
	$(".tp").eq(i).fadeIn(300).siblings().fadeOut();
	//设置当前li的颜色
	$("li").eq(i).addClass("num").siblings().removeClass("num");
}


function s(){
		//从第1张切换到第2张  再从第2张切换到第3张
		i++;
		//如果是最后一张,则再次由第1张开始切换
		if(i==4){
			i=0;
		}
		//show()函数的目的就是进行图片切换
		show();
	}
效果图如下:
