mybatis在springboot当中的使用
1.当使用Mybatis实现数据访问时,主要:
- 编写数据访问的抽象方法
- 配置抽象方法对应的SQL语句
关于抽象方法:
- 必须定义在某个接口中,这样的接口通常使用`Mapper`作为名称的后缀,例如`AdminMapper`
- Mybatis框架底层将通过接口代理模式来实现
- 方法的返回值类型:如果要执行的数据操作是增、删、改类型的,统一使用`int`作为返回值类型,表示“受影响的行数”,也可以使用`void`,但是不推荐;如果要执行的是查询操作,返回值类型只需要能够装载所需的数据即可
- 方法的名称:自定义,不要重载,建议风格如下:
- 插入数据使用`insert`作为方法名称中的前缀或关键字
- 删除数据使用`delete`作为方法名称中的前缀或关键字
- 更新数据使用`update`作为方法名称中的前缀或关键字
- 查询数据时:
- 如果是统计,使用`count`作为方法名称中的前缀或关键字
- 如果是单个数据,使用`get`或`find`作为方法名称中的前缀或关键字
- 如果是列表,使用`list`作为方法名称中的前缀或关键字
- 如果操作数据时有条件,可在以上前缀或关键字右侧添加`by字段名`,例如`deleteById`
- 方法的参数列表:取决于需要执行的SQL语句中有哪些参数,如果有多个参数,可将这些参数封装到同一个类型中,使用封装的类型作为方法的参数类型
2.建立实体类
@Data
@AllArgsConstructor
@NoArgsConstructor
public class Admin {
   private Integer id;
    private String username;
    private String password;
    private String nickname;
    private String avatar;
    private String phone;
    private String email;
    private String description;
    private Integer isEnable;
    private String lastLoginIp;
    private Integer loginCount;
    private LocalDateTime gmtLastLogin;
    private LocalDateTime gmtCreate;
    private LocalDateTime gmtModified;
}
create table ams_admin (
id bigint unsigned auto_increment,
username varchar(50) default null unique comment '用户名',
password char(64) default null comment '密码(密文)',
nickname varchar(50) default null comment '昵称',
avatar varchar(255) default null comment '头像URL',
phone varchar(50) default null unique comment '手机号码',
email varchar(50) default null unique comment '电子邮箱',
description varchar(255) default null comment '描述',
is_enable tinyint unsigned default 0 comment '是否启用,1=启用,0=未启用',
last_login_ip varchar(50) default null comment '最后登录IP地址(冗余)',
login_count int unsigned default 0 comment '累计登录次数(冗余)',
gmt_last_login datetime default null comment '最后登录时间(冗余)',
gmt_create datetime default null comment '数据创建时间',
gmt_modified datetime default null comment '数据最后修改时间',
primary key (id)
) comment '管理员表' charset utf8mb4;以上是表的结构
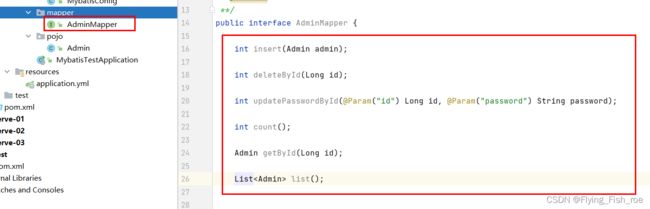
3.接下来在接口中插入抽象方法:
public interface AdminMapper {

    int insert(Admin admin);

    int deleteById(Long id);

    int updatePasswordById(@Param("id") Long id, @Param("password") String password);

    int count();

    Admin getById(Long id);

    List list();


}
4.
所有用于Mybatis处理数据的接口都必须被Mybatis识别,有2种做法:
- 在每个接口上添加`@Mapper`注解
- 推荐:在配置类上添加`@MapperScan`注解,指定接口所在的根包
@Configuration
@MapperScan("com.fish.mapper")
public class MybatisConfig {

}
注意:因为Mybatis会扫描以上配置的包,并自动生成包中各接口中的代理对象,所以,千万不要放其它接口文件!
接下来,需要配置抽象方法对应的SQL语句,这些SQL语句推荐配置在XML文件中,可以从 http://doc.canglaoshi.org/config/Mapper.xml.zip 下载到XML文件。在项目的`src/main/resources`下的自己创建一个包我的是com.fish,并将下载得到的XML文件复制到此文件夹中,重命名为`AdminMapper.xml`。
        insert into ams_admin (
            username, password, nickname, avatar,
            phone, email, description, is_enable,
            last_login_ip, login_count, gmt_last_login, gmt_create,
            gmt_modified
        ) values (
            #{username}, #{password}, #{nickname}, #{avatar},
            #{phone}, #{email}, #{description}, #{isEnable},
            #{lastLoginIp}, #{loginCount}, #{gmtLastLogin}, #{gmtCreate},
            #{gmtModified}
        )
最后,还需要将`DataSource`配置给Mybatis框架,并且,为Mybatis配置这些XML文件的路径
mybatis:
  mapper-locations: classpath:com.fish/*.xml
接下来,在`
原有代码
当配置完成后,Mybatis执行此插入数据的操作后,会将自动编号的id赋值到参数`Admin admin`的`id`属性中,以上`keyProperty`指的就是将自动编号的值放回到参数对象的哪个属性中!
5.利用springboot自带的测试进行代码的测试,验证mybatis是否被集成了
