Spring实战(第4版)第一篇-装配Bean
文章目录
- 前言
- 一、学习准备
- 二、章节演示
-
- 2 装配bean
-
- 2.2 自动化装配bean
-
- 2.2.1 创建可被发现的bean
- 2.2.2 为组件扫描的bean命名
- 2.2.3 设置组件扫描的基础包
- 2.2.4 通过为bean添加注解实现自动装配
- 2.2.5 验证自动装配
- 2.3 通过java代码装配bean
-
- 2.3.1 创建配置类
- 2.3.2 声明简单的bean
- 2.3.3 借助JavaConfig实现注入
- 2.4 通过XML装配bean
-
- 2.4.1 创建XML配置规范
- 2.4.2 声明一个简单的bean
- 2.4.3 借助构造器注入初始化bean||2.4.4 设置属性
-
- 将字面量注入到属性中
- 2.5 导入和混合配置
-
- 2.5.1 在JavaConfig中引用XML配置
- 2.5.2 在XML配置中引用JavaConfig
- 3 高级装配
前言
Spring实战(第4版)学习过程中,在此做总结分享,包含书本所有源码整理调试,每段源码亲测有效(书籍自带源码挺乱的,本文针对每一小章节代码重新整理实测)(持续更新中。。。)。
一、学习准备
- 源码下载地址:链接: https://www.manning.com/books/spring-in-action-fourth-edition
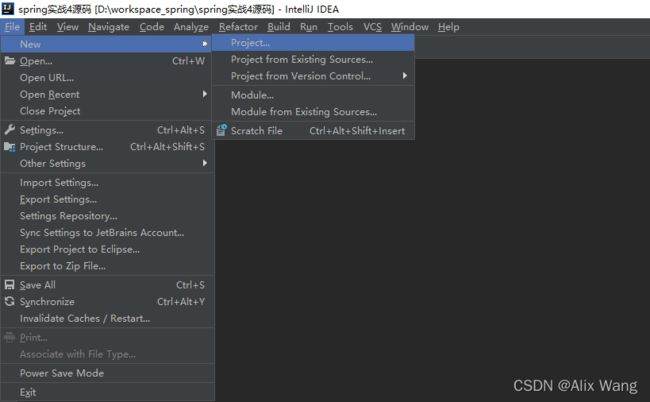
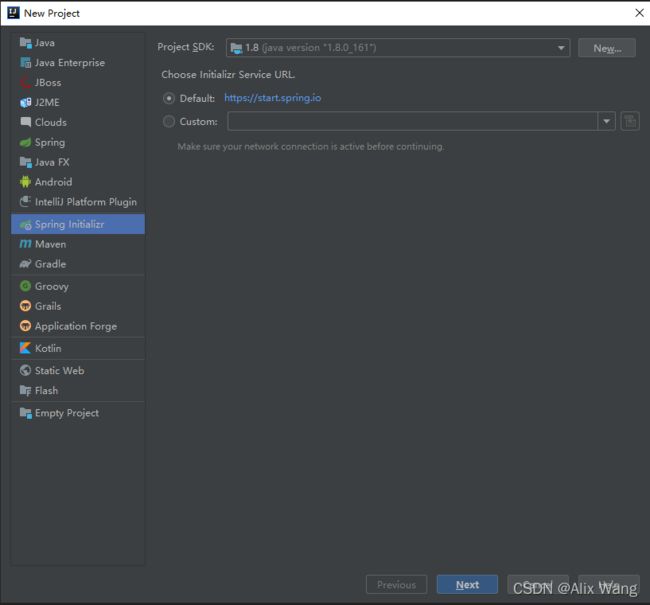
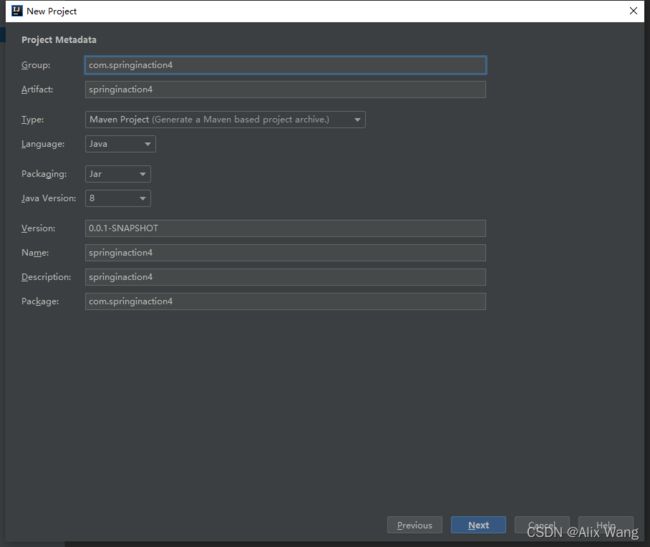
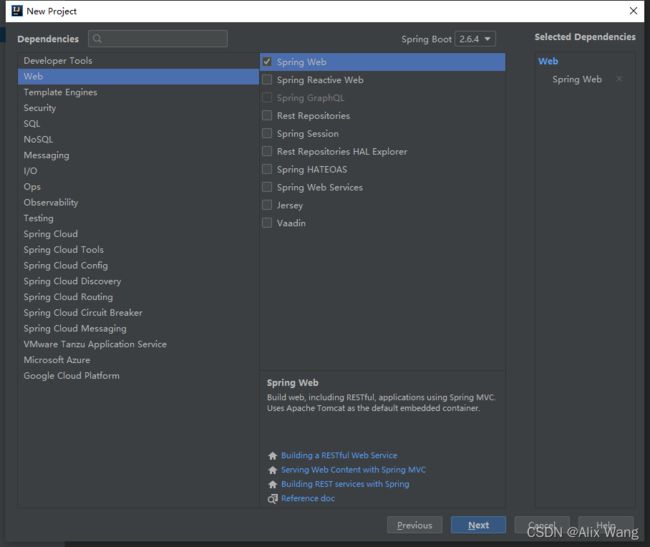
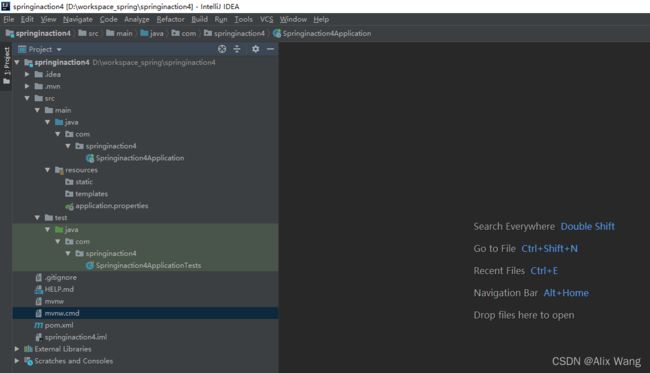
- 新建Spring工程
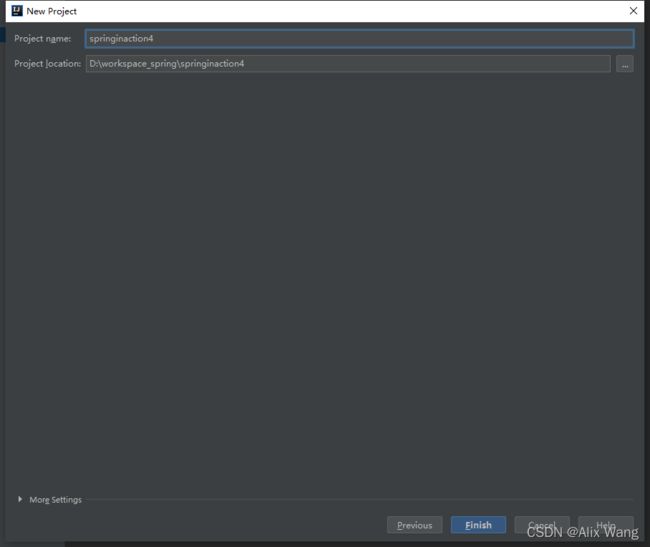
创建一个简单类测试一下
package com.springinaction4;

import org.springframework.web.bind.annotation.RequestMapping;
import org.springframework.web.bind.annotation.RestController;


@RestController
@RequestMapping("/helloWorld")
public class HelloWorldController {
    @RequestMapping("/index")
    public String index() {
        return "hello world!";
    }
}
运行自带的启动类
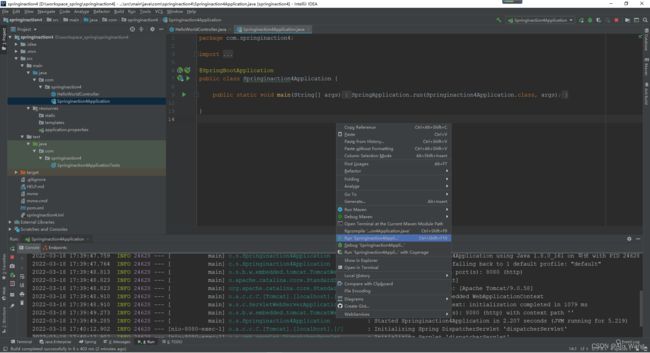
访问地址: http://localhost:8080/helloWorld/index
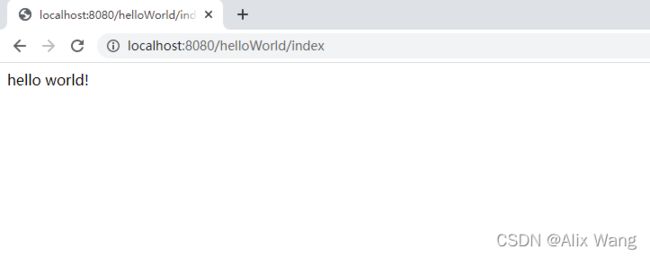
愉快的开始吧。
本文从第1部分 Spring的核心----第2章 装配Bean开始。
二、章节演示
2 装配bean
2.2 自动化装配bean
2.2.1 创建可被发现的bean
不多说,先上代码:
package com.springinaction4.demo1;

public interface CompactDisc {
  void play();
}
package com.springinaction4.demo1;

import org.springframework.stereotype.Component;

@Component
public class SgtPeppers implements CompactDisc {

    private String title = "Sgt. Pepper's Lonely Hearts Club Band";
    private String artist = "The Beatles";

    public void play() {
        System.out.println("Playing " + title + " by " + artist);
    }

}
package com.springinaction4.demo1;

import org.springframework.context.annotation.ComponentScan;
import org.springframework.context.annotation.Configuration;

@Configuration
@ComponentScan
public class CDPlayerConfig {
}
pom添加引入
        <dependency>
            <groupId>junit</groupId>
            <artifactId>junit</artifactId>
            <version>4.13</version>
            <scope>test</scope>
        </dependency>
        <dependency>
            <groupId>org.junit.jupiter</groupId>
            <artifactId>junit-jupiter-api</artifactId>
            <version>5.8.2</version>
            <scope>compile</scope>
        </dependency>
新建测试类
package com.springinaction4.demo1;

import org.junit.Test;
import org.junit.runner.RunWith;
import org.springframework.beans.factory.annotation.Autowired;
import org.springframework.test.context.ContextConfiguration;
import org.springframework.test.context.junit4.SpringJUnit4ClassRunner;

import static org.junit.jupiter.api.Assertions.assertNotNull;

@RunWith(SpringJUnit4ClassRunner.class)
@ContextConfiguration(classes = CDPlayerConfig.class)
public class CDPlayerTest {


    @Autowired
    private CompactDisc cd;

    @Test
    public void cdShouldNotBeNull() {
        assertNotNull(cd);
    }
}
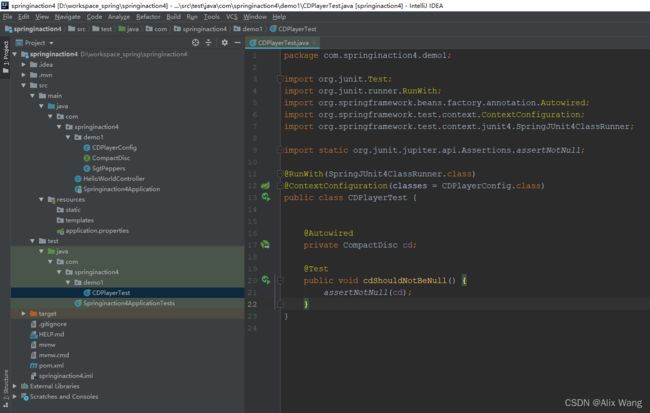
都新建完成后,目录结构应该是下图的样子
运行cdShouldNotBeNull

这大概就是作者希望你出现的绿色吧。(xml配置暂时略过,后面有详解)
**
总结
**
在我理解在中,大致流程为:@ContextConfiguration发现CDPlayerConfig中的@ComponentScan,@ComponentScan扫描发现SgtPeppers并创建CompactDiscBean,@Autowired将CompactDiscBean注入到测试代码。(刚学,不一定对,狗头保命-.-)
- CompactDisc:定义一个接口
- SgtPeppers:其中,@Component 注解表明该类会作为组件类
- CDPlayerConfig:其中,@ComponentScan 注解会扫描与配置类相同的包,查找带有@Component注解的类,从而发现CompactDisc
- CDPlayerTest:其中,SpringJUnit4ClassRunner 在测试开始的时候自动创建Spring的应用上下文(不用管,暂时就当测试类使用工具)。注解@ContextConfiguration会告诉它需要在CDPlayerConfig中加载配置,从而启用@ComponentScan。@Autowired 注解自动注入CompactDisc(不理解后面会深入,不急)。assertNotNull 判断cd是否为null(当作一个判断语句就行,cd为null时运行会异常)。
2.2.2 为组件扫描的bean命名
了解就行
@Component("lonelyHeartsClub")
public class SgtPeppers implements CompactDisc {
...
}
2.2.3 设置组件扫描的基础包
@ComponentScan会扫描当前所在包,同时,当你想指定包扫描时,@ComponentScan有value属性
@Configuration
@ComponentScan("soundsystem")
public class CDPlayerConfig {}
如果你想更加清晰地表明你所设置的是基础包,那么你可以通过basePackages属性进行配置
@Configuration
@ComponentScan(basePackages="soundsystem")
public class CDPlayerConfig {}
复数形式
@Configuration
@ComponentScan(basePackages={"soundsystem", "video"})
public class CDPlayerConfig {}
上述基础包是以String类型表示,不安全,@ComponentScan还提供了另外一种方法,那就是将其指定为包中所包含的类或接口
@Configuration
@ComponentScan(basePackageClasses={CDPlayer.class, DVDPlayer.class})
public class CDPlayerConfig {}
2.2.4 通过为bean添加注解实现自动装配
书上的文字就不赘述了,一定要看书(pdf或京东读书,电子版方便电脑查看),方便理解。
这里不理解没关系,前面这些都是基础讲解,后面有实例可以运行,再回头理解就方便了。
这里了解@Autowired注解是干嘛的就行,setter等后面内容有实例。
package com.springinaction4.demo1;

import org.springframework.beans.factory.annotation.Autowired;
import org.springframework.stereotype.Component;

@Component
public class CDPlayer implements MediaPlayer {
    private CompactDisc cd;

    @Autowired
    public CDPlayer(CompactDisc cd) {
        this.cd = cd;
    }

    public void play() {
        cd.play();
    }

}
package com.springinaction4.demo1;

public interface MediaPlayer {
  void play();
}
2.2.5 验证自动装配
此时修改CDPlayerTest以便测试
package com.springinaction4.demo1;

import org.junit.Test;
import org.junit.runner.RunWith;
import org.springframework.beans.factory.annotation.Autowired;
import org.springframework.test.context.ContextConfiguration;
import org.springframework.test.context.junit4.SpringJUnit4ClassRunner;

import static org.junit.jupiter.api.Assertions.assertNotNull;

@RunWith(SpringJUnit4ClassRunner.class)
@ContextConfiguration(classes = CDPlayerConfig.class)
public class CDPlayerTest {

    @Autowired
    private MediaPlayer player;

    @Autowired
    private CompactDisc cd;

    @Test
    public void cdShouldNotBeNull() {
        assertNotNull(cd);
    }

    @Test
    public void play() {
        player.play();
    }
}
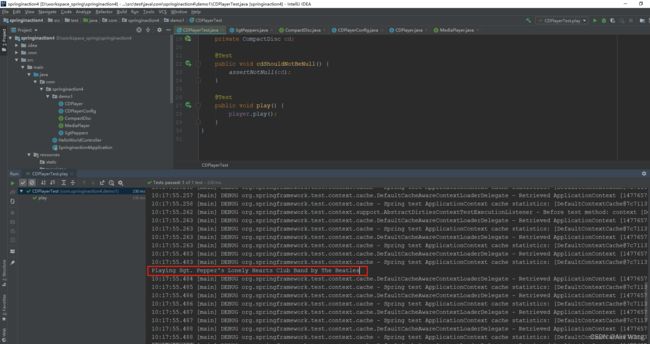
添加了play()方法,书上的断言我觉得没必要,运行成功后,出现下图字样说明调用成功
**
总结
**
有兴趣的话,可以在player.play();处打个断点,观测一下它的调用过程。
我理解中大致是这样的,@ContextConfiguration扫描@Component,发现了SgtPeppers并创建CompactDiscBean,CDPlayer中this.cd = cd将SgtPeppers赋给CDPlayer.cd,扫描@Component发现了CDPlayer并创建MediaPlayerBean,CDPlayerTest中@Autowired将MediaPlayerBean注入测试类,CDPlayerTest中play()方法调用CDPlayer.play(),此时CDPlayer中cd为this.cd所赋值的SgtPeppers,最终调用SgtPeppers中的sout。
2.3 通过java代码装配bean
2.3.1 创建配置类
修改CDPlayerConfig,去除@ComponentScan扫描
package com.springinaction4.demo1;

import org.springframework.context.annotation.ComponentScan;
import org.springframework.context.annotation.Configuration;

@Configuration
public class CDPlayerConfig {
}
2.3.2 声明简单的bean
@Bean注解实现声明,name属性指定bean名称
@Bean
public CompactDisc sgtPeppers() {
  return new SgtPeppers();
}
@Bean(name="lonelyHeartsClubBand")
public CompactDisc sgtPeppers() {
  return new SgtPeppers();
}
2.3.3 借助JavaConfig实现注入
了解就行,后面实例运行再理解好理解点
@Bean
public CDPlayer cdPlayer(CompactDisc compactDisc) {
  return new CDPlayer(compactDisc);
}
@Bean
public CDPlayer cdPlayer(CompactDisc compactDisc) {
  CDPlayer cdPlayer = new CDPlayer(compactDisc);
  cdPlayer.setCompactDisc(compactDisc);
  return cdPlayer;
}
2.4 通过XML装配bean
2.4.1 创建XML配置规范
<?xml version="1.0" encoding="UTF-8"?>
<beans xmlns="http://www.springframework.org/schema/beans"
       xmlns:xsi="http://www.w3.org/2001/XMLSchema-instance"
       xsi:schemaLocation="http://www.springframework.org/schema/beans
	http://www.springframework.org/schema/beans/spring-beans-4.3.xsd">


</beans>
2.4.2 声明一个简单的bean
<bean id="compactDisc" class="soundsystem.SgtPeppers" />
2.4.3 借助构造器注入初始化bean||2.4.4 设置属性
新建BlankDisc
package com.springinaction4.demo1;

import java.util.List;


public class BlankDisc implements CompactDisc {
    private String title;
    private String artist;
    private List<String> tracks;

    public BlankDisc(String title, String artist, List<String> tracks) {
        this.title = title;
        this.artist = artist;
        this.tracks = tracks;
    }

    public void play() {
        System.out.println("Playing " + title + " by " + artist);
        for (String track : tracks) {
            System.out.println("-Track: " + track);
        }
    }
}
修改CDPlayer
package com.springinaction4.demo1;

import org.springframework.beans.factory.annotation.Autowired;
import org.springframework.stereotype.Component;

@Component
public class CDPlayer implements MediaPlayer {

    private CompactDisc compactDisc;

    @Autowired
    public void setCompactDisc(CompactDisc compactDisc) {
        this.compactDisc = compactDisc;
    }

    public void play() {
        compactDisc.play();
    }
}
新建bean
<?xml version="1.0" encoding="UTF-8"?>
<beans xmlns="http://www.springframework.org/schema/beans"
       xmlns:xsi="http://www.w3.org/2001/XMLSchema-instance"
       xsi:schemaLocation="http://www.springframework.org/schema/beans
	http://www.springframework.org/schema/beans/spring-beans-4.3.xsd">


    <bean id="compactDisc" class="com.springinaction4.demo1.BlankDisc">
        <constructor-arg value="Sgt. Pepper's Lonely Hearts Club Band"/>
        <constructor-arg value="The Beatles"/>
        <constructor-arg>
            <list>
                <value>list1</value>
                <value>list2</value>
                <value>list3</value>
            </list>
        </constructor-arg>
    </bean>

    <bean id="cdPlayer" class="com.springinaction4.demo1.CDPlayer">
        <property name="compactDisc" ref="compactDisc"/>
    </bean>
</beans>
添加pom
        <dependency>
            <groupId>com.github.stefanbirkner</groupId>
            <artifactId>system-rules</artifactId>
            <version>1.18.0</version>
            <scope>test</scope>
        </dependency>
新建测试类CDPlayerXMLConfigTest
package com.springinaction4.demo1;

import org.junit.Rule;
import org.junit.Test;
import org.junit.contrib.java.lang.system.StandardOutputStreamLog;
import org.junit.runner.RunWith;
import org.springframework.beans.factory.annotation.Autowired;
import org.springframework.test.context.ContextConfiguration;
import org.springframework.test.context.junit4.SpringJUnit4ClassRunner;

@RunWith(SpringJUnit4ClassRunner.class)
@ContextConfiguration(locations="classpath:/com/springinaction4/demo1/beans.xml")
public class CDPlayerXMLConfigTest {

  @Rule
  public final StandardOutputStreamLog log = new StandardOutputStreamLog();

  @Autowired
  private MediaPlayer player;

  @Autowired
  private CompactDisc cd;

  @Test
  public void play() {
    player.play();
  }
}
运行CDPlayerXMLConfigTest.play(),出现下图效果即运行成功

将字面量注入到属性中
修改BlankDisc
package com.springinaction4.demo1;

import java.util.List;


public class BlankDisc implements CompactDisc {
    private String title;
    private String artist;
    private List<String> tracks;

    public void setTitle(String title) {
        this.title = title;
    }

    public void setArtist(String artist) {
        this.artist = artist;
    }

    public void setTracks(List<String> tracks) {
        this.tracks = tracks;
    }

    public void play() {
        System.out.println("Playing " + title + " by " + artist);
        for (String track : tracks) {
            System.out.println("-Track: " + track);
        }
    }
}
修改beans.xml
 <bean id="compactDisc" class="com.springinaction4.demo1.BlankDisc">

    </bean>

    <bean id="cdPlayer" class="com.springinaction4.demo1.CDPlayer">
        <property name="compactDisc" ref="compactDisc"/>
    </bean>
运行CDPlayerXMLConfigTest.play(),此时就会出现书上说的
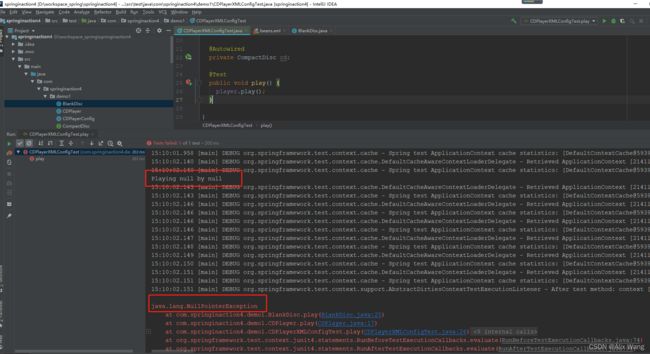
修改beans.xml
<bean id="compactDisc" class="com.springinaction4.demo1.BlankDisc">
        <property name="title" value="Sgt. Pepper's Lonely Hearts Club Band"/>
        <property name="artist" value="The Beatles"/>
        <property name="tracks">
            <list>
                <value>list4</value>
                <value>list5</value>
                <value>list6</value>
            </list>
        </property>
    </bean>

    <bean id="cdPlayer" class="com.springinaction4.demo1.CDPlayer">
        <property name="compactDisc" ref="compactDisc"/>
    </bean>
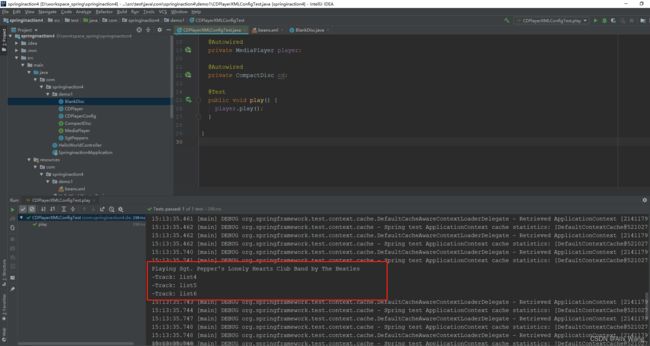
再运行
**
总结
**
property元素为属性的Setter方法所提供的功能与constructor-arg元素为构造器所提供的功能一样,它引用了ID为compactDisc的bean(通过ref属性),并将其注入到compactDisc属性中(通过setCompactDisc()方法)。
c-命名暂时不管。
2.5 导入和混合配置
2.5.1 在JavaConfig中引用XML配置
-
使用@Import 在javacofig中引用另一个config
@Import(CDConfig.class) -
创建一个更高级别的Config,在这个类中使用@Import将两个配置类组合在一起
@Import({CDPlayerConfig.class, CDConfig.class}) -
在config中同时引用config及xml
@Import(CDPlayerConfig.class)
@ImportResource("classpath:cd-config.xml")
2.5.2 在XML配置中引用JavaConfig
了解就行
   <bean class="soundsystem.CDConfig" />
   <import resource="cdplayer-config.xml" />