Nignx及负载均衡&动静分离
目录
一.Nginx负载均衡
1.1.下载
1.2.安装
1.3.负载均衡
二.前端部署
2.1. 准备工作
2.2.部署
好啦今天就到这里了哦!!!希望能帮到你哦!!!
一.Nginx负载均衡
1.1.下载
输入命令 : cd javaCloudJun/software 进入到资源文件目录
安装 Nginx 的4个依赖
输入命令 : yum -y install gcc zlib zlib-devel pcre-devel openssl openssl-devel
输入命令 : tar -xvf nginx-1.13.7.tar.gz ( 解压 Nginx)
解压后进入其文件
命令 : cd nginx-1.13.7
编译,执行配置: 考虑到后续安装ssl证书 添加两个模块
命令 : ./configure --with-http_stub_status_module --with-http_ssl_module
1.2.安装
之后进行安装
命令 : make && make install
安装完后,进入该目录
输入命令 : cd /usr/local/nginx
进入 /usr/local/nginx/sbin 目录下启动:
输入命令 : cd sbin/
启动前安装 lsof 命令
输入命令 : yum install -y lsof
设置防火墙 开放 80 端口
输入命令 : firewall-cmd --zone=public --add-port=80/tcp --permanent
更新防火墙的端口并且查看已开放的端口
输入命令 : firewall-cmd --reload && firewall-cmd --list-port
# 启动
命令 : ./nginx
#查看
命令 : lsof -i:80
在浏览器中,输入虚拟机【Linux】-Centos的IP地址进行搜索
以上就是Nginx 的使用配置并且开启完成了哦。
1.3.负载均衡
在资源文件夹中,创建一个tomcat文件夹,来存放Tomcat
输入命令 : mkdir tomcat
并且将tomcat服务解压到指定目录,刚刚创建的tomcat文件夹中。
输入命令 : tar -xvf apache-tomcat-8.5.tar.gz -C tomcat
进入tomcat文件夹中
命令 : cd tomcat/
复制一个tomcat,准备2个tomcat
命令 : cp -r apache-tomcat-8.5.20/ apache-tomcat-8.5.20_8081/
查看命令 : ll
将其中的一个tomcat修改端口,避免两个服务同时开启时端口被占用的情况。
命令 : cd apache-tomcat-8.5.20/conf ( 进入到tomcat的conf文件中 )
找到server.xml 文件进行修改端口
命令 : vim server.xml ( 编辑文件修改端口 )
修改端口号:
![]()
修改后的所以代码 :
注 : 将该服务器tomcat的所以端口都进行了修改,以免其他所有端口也有冲突。
并且将这个服务器的页面显示内容进行修改,访问时容易分辨是哪个tomcat端口进入的
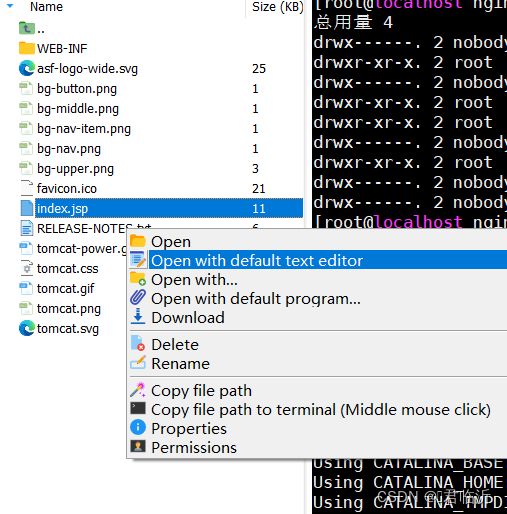
在tomcat根目录的webapps中的ROOT目录中,找到index.jsp文件,在MobaXterm工具的左边选中这个文件,右键点击第二个进行打开文件,并且修改编辑文件。
编辑后的所有内容如下 :
<%-- Licensed to the Apache Software Foundation (ASF) under one or more contributor license agreements. See the NOTICE file distributed with this work for additional information regarding copyright ownership. The ASF licenses this file to You under the Apache License, Version 2.0 (the "License"); you may not use this file except in compliance with the License. You may obtain a copy of the License at http://www.apache.org/licenses/LICENSE-2.0 Unless required by applicable law or agreed to in writing, software distributed under the License is distributed on an "AS IS" BASIS, WITHOUT WARRANTIES OR CONDITIONS OF ANY KIND, either express or implied. See the License for the specific language governing permissions and limitations under the License. --%> <%@ page session="false" pageEncoding="UTF-8" contentType="text/html; charset=UTF-8" %> <% java.text.SimpleDateFormat sdf = new java.text.SimpleDateFormat("yyyy"); request.setAttribute("year", sdf.format(new java.util.Date())); request.setAttribute("tomcatUrl", "http://tomcat.apache.org/"); request.setAttribute("tomcatDocUrl", "/docs/"); request.setAttribute("tomcatExamplesUrl", "/examples/"); %><%=request.getServletContext().getServerInfo() %> 8081
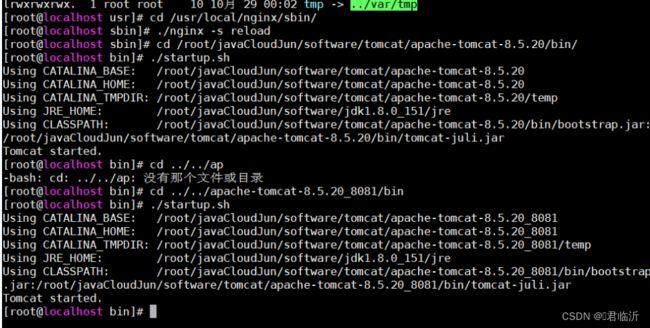
返回到tomcat目录,并且开其两个服务(tomcat)
命令: cd apache-tomcat-8.5.20/bin ( 进入到tomcat的bin目录中 )
命令: ./startup.sh ( 开启服务 )
再到 nginx的目录中
命令: cd /usr/local/nginx
![]()
并且进入 : sbin目录
输入 : cd sbin
命令 : ./nginx -s reload
注 : 重新开启nginx
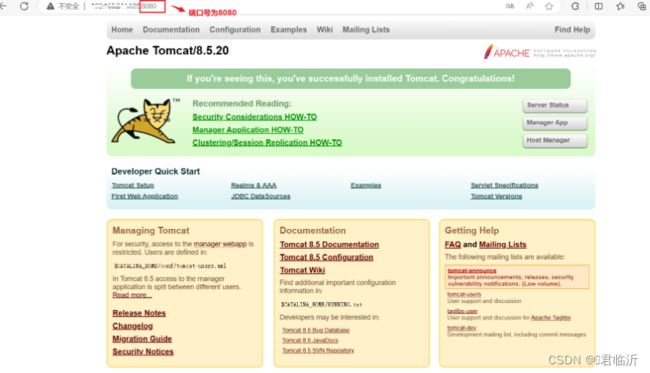
之后在浏览器中访问,就有两个服务在运行用一个了
8080:
8081:
二.前端部署
2.1. 准备工作
前端项目打包之前需要增加以下的设置
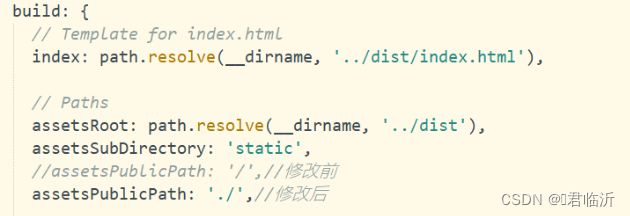
在前端项目中 config文件下的index.js中要增加以下代码 :
assetsPublicPath: './',//修改后
在前端项目中 build文件下的 utils.js 中增加以下代码 :
// 解决icon路径加载错误
publicPath:'../../'
在前端项目的跟目录中,cmd打开命令窗口
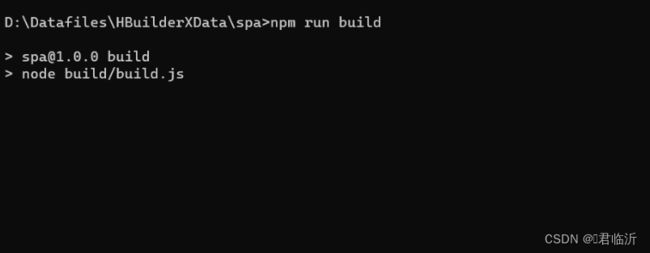
输入命令 : npm run build ( 进行前端项目打包 )
命令执行后,会出现如图中以下文件 dist
在 /usr/local/ 目录下创建一个文件夹,为mypor ,并且进入文件夹,之后将dist文件拖入mypor文件夹中
并且选中zip解压的命令 : yum install -y unzip
将该文件进行解压
输入命令 : unzip dist.zip
2.2.部署
输入命令 : cd /usr/local/nginx/conf/ 找到nginx.conf进行编辑
以下是所有代码 :
#user  nobody;
worker_processes  1;

#error_log  logs/error.log;
#error_log  logs/error.log  notice;
#error_log  logs/error.log  info;

#pid        logs/nginx.pid;


events {
    worker_connections  1024;
}


http {
    include       mime.types;
    default_type  application/octet-stream;

    #log_format  main  '$remote_addr - $remote_user [$time_local] "$request" '
    #                  '$status $body_bytes_sent "$http_referer" '
    #                  '"$http_user_agent" "$http_x_forwarded_for"';

    #access_log  logs/access.log  main;

    sendfile        on;
    #tcp_nopush     on;

    #keepalive_timeout  0;
    keepalive_timeout  65;

    #gzip  on;


        #服务器的集群
    upstream  tomcat_list {  #服务器集群名字
        server    127.0.0.1:8080  weight=1;   #服务器1   weight是权重的意思,权重越大,分配的概率越大。
        server    127.0.0.1:8081  weight=2;   #服务器2   weight是权重的意思,权重越大,分配的概率越大
    }


    server {
        listen       80;
        server_name  localhost;

        #charset koi8-r;

        #access_log  logs/host.access.log  main;

        location / {
            root   /usr/local/mypro/dist;
            #proxy_pass   http://tomcat_list;
            index  index.html index.htm;
        }

       	location  ^~/api/ {
	       #^~/api/表示匹配前缀是api的请求,proxy_pass的结尾有/, 则会把/api/*后面的路径直接拼接到后面,即移除api
        proxy_pass http://tomcat_list/;
        }


        #error_page  404              /404.html;

        # redirect server error pages to the static page /50x.html
        #
        error_page   500 502 503 504  /50x.html;
        location = /50x.html {
            root   html;
        }

        # proxy the PHP scripts to Apache listening on 127.0.0.1:80
        #
        #location ~ \.php$ {
        #    proxy_pass   http://127.0.0.1;
        #}

        # pass the PHP scripts to FastCGI server listening on 127.0.0.1:9000
        #
        #location ~ \.php$ {
        #    root           html;
        #    fastcgi_pass   127.0.0.1:9000;
        #    fastcgi_index  index.php;
        #    fastcgi_param  SCRIPT_FILENAME  /scripts$fastcgi_script_name;
        #    include        fastcgi_params;
        #}

        # deny access to .htaccess files, if Apache's document root
        # concurs with nginx's one
        #
        #location ~ /\.ht {
        #    deny  all;
        #}
    }


    # another virtual host using mix of IP-, name-, and port-based configuration
    #
    #server {
    #    listen       8000;
    #    listen       somename:8080;
    #    server_name  somename  alias  another.alias;

    #    location / {
    #        root   html;
    #        index  index.html index.htm;
    #    }
    #}


    # HTTPS server
    #
    #server {
    #    listen       443 ssl;
    #    server_name  localhost;

    #    ssl_certificate      cert.pem;
    #    ssl_certificate_key  cert.key;

    #    ssl_session_cache    shared:SSL:1m;
    #    ssl_session_timeout  5m;

    #    ssl_ciphers  HIGH:!aNULL:!MD5;
    #    ssl_prefer_server_ciphers  on;

    #    location / {
    #        root   html;
    #        index  index.html index.htm;
    #    }
    #}

}
输入命令 : cd /usr/local/nginx/sbin/
输入命令 :./nginx -s reload 重启nginx
在将后端的war包 传入tomcat服务器中。
并且输入命令 : ./startup.sh (开启访问)
在浏览器中进行访问 使用虚拟机的IP加tomcat的端口
在到文件资源管理器中进入到 以下本地目录
C:\Windows\System32\drivers\etc
找到 hosts 文件进行修改IP的请求
在进浏览器中进行访问 使用虚拟机的IP加tomcat的端口,即可哦!!!


