Linux下Elasticsearch离线安装
先去下载离线安装包(我这里是7.10.0):
Past Releases of Elastic Stack Software | Elastic
上传到/usr/local下
解压:tar -zxvf elasticsearch-7.10.0-linux-x86_64.tar.gz
改名:mv elasticsearch elasticsearch-7.10.0
因为Elasticsearch自带jdk,所以为了避免和原来的jdk冲突,需要添加配置:
cd /usr/local/elasticsearch/bin
vim ./elasticsearch
在最下面加入这段配置:
# 将jdk修改为es中自带jdk的配置目录
export JAVA_HOME=/usr/local/softwore/elasticsearch-7.15.2/jdk
export PATH=$JAVA_HOME/bin:$PATH
if [ -x "$JAVA_HOME/bin/java" ]; then
JAVA="/usr/local/softwore/elasticsearch-7.15.2/jdk/bin/java"
else
JAVA=`which java`
fi
ES为了安全不允许使用root用户启动,添加es用户并授权文件夹权限
useradd es
chmod u+w /etc/sudoers
编辑/etc/sudoers文件,找到:root ALL=(ALL:ALL) ALL
vim /etc/sudoers
在 root ALL=(ALL:ALL) ALL下面添加:es ALL=(ALL) ALL
为了安全撤销文件的写权限:chmod u-w /etc/sudoers
给es用户授理访问文件权限:chown -R es:es /usr/local/elasticsearch
切换到es用户:su es
在elasticsearch/bin下进行后台启动:./elasticsearch -d
我这里启动报错:
java.lang.IllegalStateException: failed to obtain node locks, tried [[/usr/local/elasticsearch/data]] with lock id [0]; maybe these locations are not writable or multiple nodes were started without increasing [node.max_local_storage_nodes] (was [1])?
解决办法:切换到elasticsearch/config下编辑elasticsearch.yml文件
在里面加入这一行:node.max_local_storage_nodes: 2
然后重新启动,报错:
ElasticsearchException[failed to bind service]; nested: AccessDeniedException[/usr/local/elasticsearch/data/nodes/1];
Likely root cause: java.nio.file.AccessDeniedException: /usr/local/elasticsearch/data/nodes/1
解决办法:切换回root用户:
chown -R es:es /usr/local/elasticsearch/data/nodes
然后在切换回es用户,重新启动,没有报错
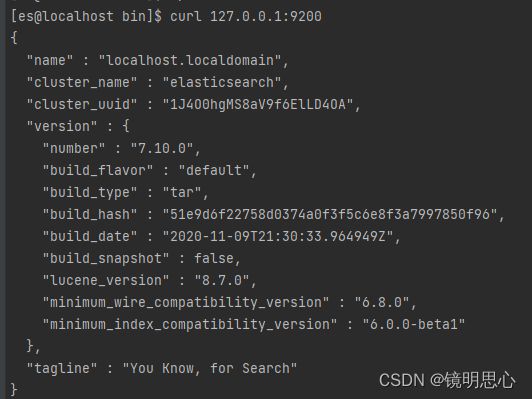
输入curl 127.0.0.1:9200进行测试
这代表 Elasticsearch已经安装成功。
开启远程访问
在elasticsearch/config下编辑文件elasticsearch.yml
使用/name找到network.host 将后面的ip改为0.0.0.0
重新启动ES,发现报错:
[1]: max virtual memory areas vm.max_map_count [65530] is too low, increase to at least [262144]
[2]: the default discovery settings are unsuitable for production use; at least one of [discovery.seed_hosts, discovery.seed_providers, cluster.initial_master_nodes] must be configured
可以看到报了两个错,先解决第一个错:
切换root用户
vim /etc/sysctl.conf
根据系统加入下面某一行:
vm.max_map_count=655360 #centos7 系统
vm.max_map_count=262144 #ubuntu 系统
配置生效:sysctl -p
解决第二个错:
切换es用户
vim elasticsearch.yml
找到cluster.initial_master_nodes,里面有两个节点,去掉2,保留["node-1"]
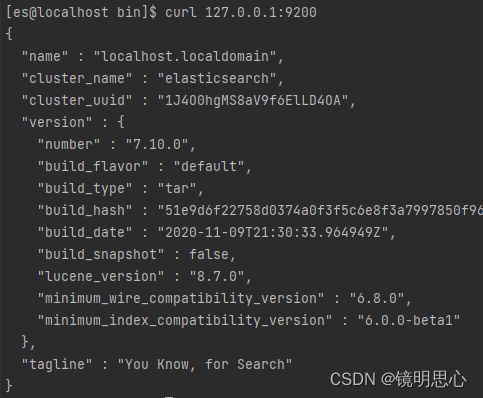
再重启ES,这次没有报错,我们来测试一下:
curl 127.0.0.1:9200
至此Elasticsearch已全部安装完成。
如果帮助到您,请点个小赞,谢谢!!!


