SORT详解: 代码解读
论文翻译:
SORT: https://blog.csdn.net/zjc910997316/article/details/83962462
DEEPSORT: https://blog.csdn.net/zjc910997316/article/details/83721573代码:
SORT代码: https://github.com/abewley/sort
(sort原作者abewley // github上的名字 abewley/sort)
DEEPSORT代码: https://github.com/nwojke/deep_sort
(deep sort原作者nwojke // github上的名字 nwojke/deep_sort)
DEEPSORT代码,YOLOv3直接运行版:https://github.com/Qidian213/deep_sort_yolov3
(北京邮电大学一个学生对DEEPSORT做了修改 // github上的名字 Qidian213/deep_sort_yolov3
需要装好后面文件就可以运行: tensorflow1.6.0 keras2.2.4 )
下面是我的电脑上的各种深度学习安装配件的版本详情:
https://blog.csdn.net/zjc910997316/article/details/83692047数据集下载地址:
2D MOT 2015 : https://motchallenge.net/data/2D_MOT_2015/#download
请点击中间的 “Jump to download ” —> Get all data (1.3 GB)关于讨论群:
大家可以加入我的群来讨论这个算法
QQ群:712790258
群名为:CV目标检测跟踪YoloSSDMaskRcnn
当然你也可以加入北邮那个同学的qq群:姿态检测&跟踪 781184396ps:我觉得自己理解的更深入,哈哈~ 强烈建议加入我的群来讨论712790258
abewley这篇开源的SORT写的非常简洁实用,算法构思骨骼惊奇~
关于SORT论文我也做了翻译,请参考我的博文:
论文翻译:sort : SIMPLE ONLINE AND REALTIME TRACKING
https://blog.csdn.net/zjc910997316/article/details/83962462
因而我写这篇博客全面的解读下这个5页的代码。
SORT这个算法是建立在一个因检测算法的不断发展而爆红的 基于检测的跟踪框架之下(也就是detection by tracking)。
本文中采用的detection可以是任何检测算法,随着技术更新可以用更好的检测算法,越好的检测算法会让检测效果更好。
SORT原文才用了FAST RCNN的检测算法(应该是,这个不重要),我的改进是使用了SSD,我的是tensorflow框架,我用SSD比较熟悉,你也可以用别的。
因为作者的代码是离线的,检测结果被用来做后面的数据处理跟踪。
我们只需要得到检测结果就行了,检测速度不会被SORT算入计算时间,检测和跟踪是两个阶段。
而我要做的任务就是把这种分离开的两阶段模式融合成一个实时的算法,用于我们的工程。这点可以参考deepsort它就是实时的。
deepsort论文翻译,详见我的博客:
论文翻译:Deep SORT: Simple Online and Realtime Tracking with a Deep Association Metric
https://blog.csdn.net/zjc910997316/article/details/83721573
目标:把SORT这种分离开的两阶段模式融合成一个实时的算法
完成此目标的前提是读懂SORT,下面我们来一起分析SORT源码
从SORT代码: https://github.com/abewley/sort
(sort原作者abewley // github上的名字 abewley/sort)
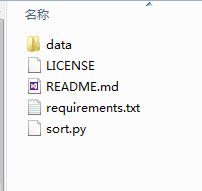
下载下来文件之后,会发现文件夹内的5个项目:
PS:本文介绍过分详细,如有需要可以跳到文件5:sort.py去看核心代码
目录:
---分别介绍五个文件
文件1:data
文件2:LISENCE
文件3:README.md
文件4:requirements.txt
文件5:sort.py
---核心是第五个文件(文件5:sort.py)其中分开介绍
1_说明:
2_头文件:
3_计算IOU:
4_ box格式转换为[x, y, s, r]:
5_ box格式转换为[x1, y1, x2, y2]:
6_ 卡尔曼
7_关联检测与跟踪
8_class Sort(object) 这里是此算法的正文了
9_关于解析的参数 def parse_args():
10_主函数 if __name__ == '__main__':
---对最后一个(10_主函数 if __name__ == '__main__':)详细介绍
@第一部分:准备工作
这部分结构分为:
- @1.关于colours:
- @2.关于os.path.exists:
- @3.关于plt.ion()
- @4.关于os.makedirs:
@第二部分:
这部分结构分为:
- @1
- @2
- @3 如果展示
- @4 tracker
- @5 最终结果提示
---输出结果output
这五个文件:
文件1:data

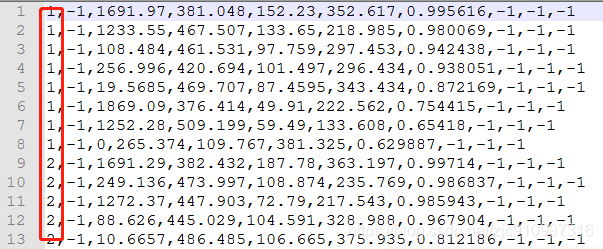
里面存储的是检测器对视频的检测结果,本代码tracking by detection 两阶段分离,是对检测结果的跟踪处理。离线处理过程,不过可以通过改进代码改成在线的,可以参考deepsort。
一共是11个文件夹,11个场景
文件夹打开之后是txt文件![]()
txt打开之后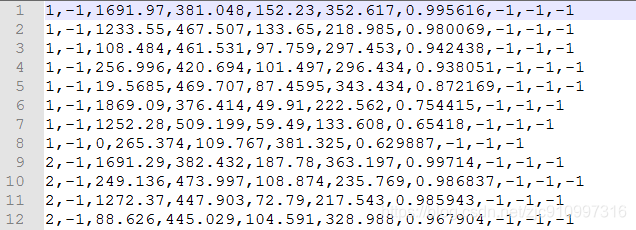
文件2:LISENCE
里面是作者讲的关于此代码的一些使用说明,主要是关于商用,版权的问题,跟我们学习此算法关系不大。
文件3:README.md
这是作者介绍的使用说明
我也写了博客介绍它,
SORT的readme: https://blog.csdn.net/zjc910997316/article/details/84837655
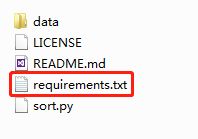
文件4:requirements.txt
这里面写的是运行之前的一些准备工作,需要安装的一些库
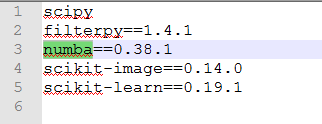
打开如下:
scipy
filterpy==1.4.1
numba==0.38.1
scikit-image==0.14.0
scikit-learn==0.19.1
1 scipy:
numpy是一个高性能的多维数组的计算库,
SciPy是构建在numpy的基础之上的,它提供了许多的操作numpy的数组的函数。
SciPy是一款方便、易于使用、专为科学和工程设计的python工具包,它包括了统计、优化、整合以及线性代数模块、傅里叶变换、信号和图像图例,常微分方差的求解等
2 filterpy:
这里导入此库主要是为了用卡尔曼滤波器
from filterpy.kalman import KalmanFilter3 numba:
python是一种动态语言,如果能够让它静态一点,速度会好很多,于是有了 cpython。
然后 cpython 还是有诸多不便。
于是 numba 就成了一个强大而又方便的替代品。
它对 for 循环有很好的效果
sort中用到了numba中的jit, 即
from numba import jitnumba对 for 循环有很好的效果
实例1:sort.py 中涉及此部分的代码如下:
求交并比IOU,暂时看不懂也没关系,文件5:sort.py 中会详细介绍
IOU就是 Intersection over Union 可参考:https://blog.csdn.net/iamoldpan/article/details/78799857
@jit
def iou(bb_test,bb_gt):
  """
  Computes IUO between two bboxes in the form [x1,y1,x2,y2]
  """
  xx1 = np.maximum(bb_test[0], bb_gt[0])
  yy1 = np.maximum(bb_test[1], bb_gt[1])
  xx2 = np.minimum(bb_test[2], bb_gt[2])
  yy2 = np.minimum(bb_test[3], bb_gt[3])
  w = np.maximum(0., xx2 - xx1)
  h = np.maximum(0., yy2 - yy1)

  wh = w * h  // 计算出交叠区域的面积, 红色区域面积

  o = wh / ((bb_test[2]-bb_test[0])*(bb_test[3]-bb_test[1])
    + (bb_gt[2]-bb_gt[0])*(bb_gt[3]-bb_gt[1]) - wh)
  // 分母是总面积=黄色矩形面积+蓝色矩形面积-红色区域面积

  return(o)
x1 y1 就是 bb_test[0] bb_test[1]
x2 y2 就是 bb_test[2] bb_test[3]
x1 y1 就是 bb_gt[0] bb_gt[1]
x2 y2 就是 bb_gt[2] bb_gt[3]
wh 是中间红色部分面积
numba对 for 循环有很好的效果,
实例2:一个博客的实例如下:
from numba import jit
from numpy import arange
import time

@jit
def sum_1(arr):
    M, N = arr.shape
    result = 0.0
    for i in range(M):
        for j in range(N):
            result += arr[i,j]
    return result

a = arange(9999999).reshape(3333333,3)

start = time.time()
print(sum_1(a))
stop = time.time()
print(stop-start)
其中的a为: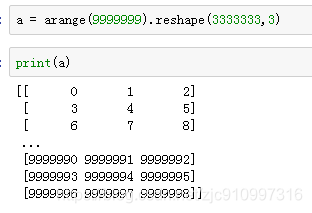
a = arange(99..999).reshape(333..3,3)
这里的内容是生成一个 333...3行3列 的矩阵,其中的内容则是 0到999..8.
本算法是所有内容相加。
使用@jit 后的运行时间如下,大概是0.086秒![]()
注释掉@jit之后的运行时间大约是4.28s,慢了太多,numba对 for 循环有很好的效果![]()
此博客写的非常详细:
详细介绍了语法糖——装饰器,但是我还是有点蒙,不管他了~这不重要
https://blog.csdn.net/m0_37324740/article/details/79713339
4 scikit-image
scikit-image是基于numpy,因此需要安装numpy和scipy,同时需要安装matplotlib进行图片的实现等。
SORT算法用到了,io子模块
io 模块 :读取,保存和显示图片和视频
from skimage import ioscikit-image子库的详细介绍参考此博客:https://blog.csdn.net/u012300744/article/details/80083282
5 scikit-learn
from sklearn.utils.linear_assignment_ import linear_assignmentSORT中 utils.linear_assignment_
主要用于线性分配,匈牙利匹配的实现,后面详细说,应该是这样~
Scikit-learn(sklearn)的定位是通用机器学习库,如维度压缩、特征选择等
其他库:
numpy是一个高性能的多维数组的计算库,
文件5:sort.py
这里是本文的核心部分
1_说明:
还是关于许可证之类的云云,用处不大,可以跳过
"""
    SORT: A Simple, Online and Realtime Tracker
    Copyright (C) 2016 Alex Bewley alex@dynamicdetection.com

    This program is free software: you can redistribute it and/or modify
    it under the terms of the GNU General Public License as published by
    the Free Software Foundation, either version 3 of the License, or
    (at your option) any later version.

    This program is distributed in the hope that it will be useful,
    but WITHOUT ANY WARRANTY; without even the implied warranty of
    MERCHANTABILITY or FITNESS FOR A PARTICULAR PURPOSE.  See the
    GNU General Public License for more details.

    You should have received a copy of the GNU General Public License
    along with this program.  If not, see .
"""
"""
SORT:一个简单,在线和实时跟踪
Alex Bewley alex@dynamicdetection.com版权所有
本程序是自由软件:您可以根据自由软件基金会发布的GNU通用公共许可证条款(许可的第3版)或任何后续版本(由您选择)重新发布和/或修改它。
本程序的发布是希望它将是有用的,但没有任何保证;甚至没有隐含的适销性或适合某一特定用途的保证。有关更多细节,请参阅GNU通用公共许可证。
您应该已经收到了GNU通用公共许可证的副本以及这个程序。如果没有,请参见。
"""
2_头文件:
# 参见前面
指的是前面的文件4:requirements.txt 介绍的提前安装的库已经做了提前介绍
from __future__ import print_function

from numba import jit  # 参见前面
import os.path
import numpy as np  # 参见前面
import matplotlib.pyplot as plt
import matplotlib.patches as patches
from skimage import io  # 参见前面
from sklearn.utils.linear_assignment_ import linear_assignment  # 参见前面
import glob
import time
import argparse
from filterpy.kalman import KalmanFilter  # 参见前面
下面是没有进行介绍的,太基础,待补充~
from __future__ import print_function
import os.path
import matplotlib.pyplot as plt
import matplotlib.patches as patches
import glob
import time
import argparse
3_计算IOU:
input: iou(bb_test,bb_gt) 是 [x1y1x2y2], [x1y1x2y2] 两个框
output: o 为交并比IOU
于是 numba 就成了一个强大而又方便的替代品。
它对 for 循环有很好的效果
sort中用到了numba中的jit, 即
from numba import jitnumba对 for 循环有很好的效果
实例1:sort.py 中涉及此部分的代码如下:
求交并比IOU:
IOU就是 Intersection over Union 可参考:https://blog.csdn.net/iamoldpan/article/details/78799857
@jit
def iou(bb_test,bb_gt):
  """
  Computes IUO between two bboxes in the form [x1,y1,x2,y2]
  """
  xx1 = np.maximum(bb_test[0], bb_gt[0])
  yy1 = np.maximum(bb_test[1], bb_gt[1])
  xx2 = np.minimum(bb_test[2], bb_gt[2])
  yy2 = np.minimum(bb_test[3], bb_gt[3])
  w = np.maximum(0., xx2 - xx1)
  h = np.maximum(0., yy2 - yy1)
  wh = w * h
  o = wh / ((bb_test[2]-bb_test[0])*(bb_test[3]-bb_test[1])
    + (bb_gt[2]-bb_gt[0])*(bb_gt[3]-bb_gt[1]) - wh)
  return(o)
x1 y1 就是 bb_test[0] bb_test[1]
x2 y2 就是 bb_test[2] bb_test[3]
x1 y1 就是 bb_gt[0] bb_gt[1]
x2 y2 就是 bb_gt[2] bb_gt[3]
wh 是中间红色部分面积
numba对 for 循环有很好的效果
4_ box格式转换为[x, y, s, r]:
convert_bbox_to_z
input: bbox [x1, y1, x2, y2]
output: [ center x, center y, s, r ] 4行1列
"""
以形式[x1,y1,x2,y2]获取一个边界框,并以形式返回z
[x,y,s,r]其中x,y是盒子的中心,s是面积,r是w/h
"""
[x1,y1,x2,y2]
x1,y1 is the top left
x2,y2 is the bottom right
[x,y,s,r]
x,y is the centre of the box
s is the scale/area 面积
r is the aspect ratio 纵横比 w/h
def convert_bbox_to_z(bbox):
  """
  Takes a bounding box in the form [x1,y1,x2,y2] and returns z in the form
    [x,y,s,r] where x,y is the centre of the box and s is the scale/area and r is
    the aspect ratio
  """
  w = bbox[2]-bbox[0]  # x2 - x1
  h = bbox[3]-bbox[1]  # y2 - y1
  x = bbox[0]+w/2.  # 中心x
  y = bbox[1]+h/2.  # 中心y
  s = w*h    #scale is just area
  r = w/float(h)
  return np.array([x,y,s,r]).reshape((4,1))
5_ box格式转换为[x1, y1, x2, y2]:
convert_x_to_bbox
input: [ center x, center y, s, r ]
output: bbox [x1, y1, x2, y2]
[x,y,s,r]
x,y is the centre of the box
s is the scale/area 面积
r is the aspect ratio 纵横比 w/h
[x1,y1,x2,y2]
x1,y1 is the top left
x2,y2 is the bottom right
def convert_x_to_bbox(x,score=None):
  """
  Takes a bounding box in the centre form [x,y,s,r] and returns it in the form
    [x1,y1,x2,y2] where x1,y1 is the top left and x2,y2 is the bottom right
  """
  w = np.sqrt(x[2]*x[3])
  h = x[2]/w  # 求得 w h
  if(score==None):
    return np.array([x[0]-w/2.,x[1]-h/2.,x[0]+w/2.,x[1]+h/2.]).reshape((1,4))  # 计算x1y1x2y2
  else:
    return np.array([x[0]-w/2.,x[1]-h/2.,x[0]+w/2.,x[1]+h/2.,score]).reshape((1,5))
6_ 卡尔曼
KalmanBoxTracker
整体结构如下:
class KalmanBoxTracker(object):
1 __init__(): 初始化
2 update(): 更新
3 predict(): 预测
4 get_state(): 得到状态 将 [ center x, center y, s, r ] 格式转化为 box [x1, y1, x2, y2]
class KalmanBoxTracker(object):
  """
  This class represents the internel state of individual tracked objects observed as bbox.
    # 该类表示作为bbox观察到的单个跟踪对象的内部状态。
  """
  count = 0
  def __init__(self,bbox):
    """
    Initialises a tracker using initial bounding box.
    # 使用初始边界框初始化跟踪器。
    """
    #define constant velocity model
    self.kf = KalmanFilter(dim_x=7, dim_z=4)
    self.kf.F = np.array([[1,0,0,0,1,0,0],[0,1,0,0,0,1,0],[0,0,1,0,0,0,1],[0,0,0,1,0,0,0],  [0,0,0,0,1,0,0],[0,0,0,0,0,1,0],[0,0,0,0,0,0,1]])
    self.kf.H = np.array([[1,0,0,0,0,0,0],[0,1,0,0,0,0,0],[0,0,1,0,0,0,0],[0,0,0,1,0,0,0]])

    self.kf.R[2:,2:] *= 10.
    self.kf.P[4:,4:] *= 1000. #give high uncertainty to the unobservable initial velocities
    self.kf.P *= 10.
    self.kf.Q[-1,-1] *= 0.01
    self.kf.Q[4:,4:] *= 0.01

    self.kf.x[:4] = convert_bbox_to_z(bbox)
    self.time_since_update = 0
    self.id = KalmanBoxTracker.count
    KalmanBoxTracker.count += 1
    self.history = []
    self.hits = 0
    self.hit_streak = 0
    self.age = 0

  def update(self,bbox):
    """
    Updates the state vector with observed bbox.
    # 用观察到的bbox更新状态向量。
    """
    self.time_since_update = 0
    self.history = []
    self.hits += 1
    self.hit_streak += 1
    self.kf.update(convert_bbox_to_z(bbox))

  def predict(self):
    """
    Advances the state vector and returns the predicted bounding box estimate.
    # 推进状态向量 并返回预测的边界框估计值。
    """
    if((self.kf.x[6]+self.kf.x[2])<=0):
      self.kf.x[6] *= 0.0
    self.kf.predict()
    self.age += 1
    if(self.time_since_update>0):
      self.hit_streak = 0
    self.time_since_update += 1
    self.history.append(convert_x_to_bbox(self.kf.x))
    return self.history[-1]

  def get_state(self):
    """
    Returns the current bounding box estimate.
    # 返回当前边框估计值。
    """
    return convert_x_to_bbox(self.kf.x)
7_关联检测与跟踪
associate_detections_to_trackers()
input: 检测框detections, 跟踪器trackers, iou阈值
output: 匹配的数组matches, 不匹配检测数组np.array(unmatched_detections), 不匹配跟踪器数组np.array(unmatched_trackers)
def associate_detections_to_trackers(detections,trackers,iou_threshold = 0.3):
  """
  Assigns detections to tracked object (both represented as bounding boxes)

  Returns 3 lists of matches, unmatched_detections and unmatched_trackers
    # 将detections分配给被跟踪对象(都表示为bbox)
    # 返回3个列表: matches,unmatched_detections和unmatched_trackers
  """
  if(len(trackers)==0):
    return np.empty((0,2),dtype=int), np.arange(len(detections)), np.empty((0,5),dtype=int)
  iou_matrix = np.zeros((len(detections),len(trackers)),dtype=np.float32)

  for d,det in enumerate(detections):
    for t,trk in enumerate(trackers):
      iou_matrix[d,t] = iou(det,trk)
  matched_indices = linear_assignment(-iou_matrix)  # 得到匹配项


  unmatched_detections = []
  for d,det in enumerate(detections):
    if(d not in matched_indices[:,0]):
      unmatched_detections.append(d)  # 获得不匹配检测框
  unmatched_trackers = []
  for t,trk in enumerate(trackers):
    if(t not in matched_indices[:,1]):
      unmatched_trackers.append(t)  # 获得不匹配跟踪器


  #filter out matched with low IOU
    # 过滤掉IOU低的匹配项
  matches = []
  for m in matched_indices:
    if(iou_matrix[m[0],m[1]]
8_class Sort(object) 这里是此算法的正文了
class Sort(object):
def __init__ 初始化
self.max_age = max_age # 最大年龄值(未被检测更新的跟踪器随帧数增加),超过之后会被删除
self.min_hits = min_hits
self.trackers = []
self.frame_count = 0
def update 更新
class Sort(object):
def __init__(self,max_age=1,min_hits=3):
"""
Sets key parameters for SORT
设置SORT的关键参数
"""
self.max_age = max_age
self.min_hits = min_hits
self.trackers = []
self.frame_count = 0
def update(self,dets):
"""
Params:
dets - a numpy array of detections in the format [[x1,y1,x2,y2,score],[x1,y1,x2,y2,score],...]
Requires: this method must be called once for each frame even with empty detections.
Returns the a similar array, where the last column is the object ID.
NOTE: The number of objects returned may differ from the number of detections provided.
参数:
dets—以[[x1,y1,x2,y2,score],[x1,y1,x2,y2,score],…
要求:即使检测为空,也必须对每个帧调用此方法一次。
返回一个类似的数组,其中最后一列是对象ID。
注意:返回的对象数量可能与提供的检测数量不同。
"""
self.frame_count += 1
# get predicted locations from existing trackers.
# 从现有跟踪器获取预测位置。
trks = np.zeros((len(self.trackers),5))
to_del = []
ret = []
for t,trk in enumerate(trks):
pos = self.trackers[t].predict()[0]
trk[:] = [pos[0], pos[1], pos[2], pos[3], 0]
if(np.any(np.isnan(pos))):
to_del.append(t)
trks = np.ma.compress_rows(np.ma.masked_invalid(trks))
for t in reversed(to_del):
self.trackers.pop(t)
matched, unmatched_dets, unmatched_trks = associate_detections_to_trackers(dets,trks)
# update matched trackers with assigned detections
# 用分配的检测器更新匹配成功的跟踪器
for t,trk in enumerate(self.trackers):
if(t not in unmatched_trks):
d = matched[np.where(matched[:,1]==t)[0],0]
trk.update(dets[d,:][0])
# create and initialise new trackers for unmatched detections
# 为无法匹配的检测创建和初始化新的跟踪器
for i in unmatched_dets:
trk = KalmanBoxTracker(dets[i,:])
self.trackers.append(trk)
i = len(self.trackers)
for trk in reversed(self.trackers):
d = trk.get_state()[0]
if((trk.time_since_update < 1) and (trk.hit_streak >= self.min_hits or self.frame_count <= self.min_hits)):
ret.append(np.concatenate((d,[trk.id+1])).reshape(1,-1)) # +1 as MOT benchmark requires positive
i -= 1
# remove dead tracklet
# 删除死掉的跟踪序列
if(trk.time_since_update > self.max_age): // 大于最大年龄
self.trackers.pop(i)
if(len(ret)>0):
return np.concatenate(ret)
return np.empty((0,5))
9_关于解析的参数 def parse_args():
解析输入参数
这部分请参考我的另一篇CSDN博客:
详细解读parse_args():https://blog.csdn.net/zjc910997316/article/details/85319894
原文内容:
# sort原文
def parse_args():
"""Parse input arguments."""
# 2建立解析对象
parser = argparse.ArgumentParser(description='SORT demo')
# 3添加属性
parser.add_argument('--display', dest='display', help='Display online tracker output (slow) [False]',action='store_true')
'''
'--display', 可选
dest='display', dest 允许自定义ArgumentParser的参数属性名称
help='Display online tracker output (slow) [False]',
action='store_true' 默认为1
'''
# 4属性赋予实例args
args = parser.parse_args()
return args
上述sort原文,稍加修改,写入test.py文件,如下:
# 改进sort:
# 用于被我验证这部分的使用方法
# 1导入模块
import argparse
# 2建立解析对象
parser = argparse.ArgumentParser(description='SORT demo')
# 3添加属性
parser.add_argument('--display', dest='display', help='Display online tracker output (slow) [False]',action='store_true')
# 4属性赋予实例args
args = parser.parse_args()
print("{}".format(args.display))
在文件位置打开终端输入 python test.py --display

‘--display’是可选选项,也可以不输入,直接 python test.py

dest:如果提供dest,例如dest="display",那么可以通过args.display访问该参数
(PS:但是去掉dest='display' 也是一样可以通过args.display访问该参数,所以为什么作者写这个暂时没明白,这不重要~)
dest 允许自定义ArgumentParser的参数属性名称,参考https://mp.csdn.net/postedit/85319894
10_主函数 if __name__ == '__main__':
这里是完整代码,后面拆解分析
if __name__ == '__main__':
# @第一部分:准备工作
# all train
# 所有训练集文件名
sequences = ['PETS09-S2L1','TUD-Campus','TUD-Stadtmitte','ETH-Bahnhof','ETH-Sunnyday','ETH-Pedcross2','KITTI-13','KITTI-17','ADL-Rundle-6','ADL-Rundle-8','Venice-2']
args = parse_args() # PS:有点迷??
display = args.display # 如果输入python sort.py --display 则这里display为true
phase = 'train'
total_time = 0.0
total_frames = 0
colours = np.random.rand(32,3) # used only for display 仅用于展示
if(display):
if not os.path.exists('mot_benchmark'):
print('\n\tERROR: mot_benchmark link not found!\n\n Create a symbolic link to the MOT benchmark\n (https://motchallenge.net/data/2D_MOT_2015/#download). E.g.:\n\n $ ln -s /path/to/MOT2015_challenge/2DMOT2015 mot_benchmark\n\n')
exit()
plt.ion()
fig = plt.figure()
if not os.path.exists('output'):
os.makedirs('output')
for seq in sequences:
mot_tracker = Sort() # create instance of the SORT tracker 创建排SORT跟踪器的实例
seq_dets = np.loadtxt('data/%s/det.txt'%(seq),delimiter=',') # load detections 读取检测结果
with open('output/%s.txt'%(seq),'w') as out_file:
print("Processing %s."%(seq))
for frame in range(int(seq_dets[:,0].max())):
frame += 1 # detection and frame numbers begin at 1 检测和帧号从1开始
dets = seq_dets[seq_dets[:,0]==frame,2:7]
dets[:,2:4] += dets[:,0:2] #convert to [x1,y1,w,h] to [x1,y1,x2,y2] 转换为x1y1x2y2
total_frames += 1
if(display):
ax1 = fig.add_subplot(111, aspect='equal')
fn = 'mot_benchmark/%s/%s/img1/%06d.jpg'%(phase,seq,frame)
im =io.imread(fn)
ax1.imshow(im)
plt.title(seq+' Tracked Targets')
start_time = time.time()
trackers = mot_tracker.update(dets)
cycle_time = time.time() - start_time
total_time += cycle_time
for d in trackers:
print('%d,%d,%.2f,%.2f,%.2f,%.2f,1,-1,-1,-1'%(frame,d[4],d[0],d[1],d[2]-d[0],d[3]-d[1]),file=out_file)
if(display):
d = d.astype(np.int32)
ax1.add_patch(patches.Rectangle((d[0],d[1]),d[2]-d[0],d[3]-d[1],fill=False,lw=3,ec=colours[d[4]%32,:]))
ax1.set_adjustable('box-forced')
if(display):
fig.canvas.flush_events()
plt.draw()
ax1.cla()
print("Total Tracking took: %.3f for %d frames or %.1f FPS"%(total_time,total_frames,total_frames/total_time))
if(display):
print("Note: to get real runtime results run without the option: --display")
@第一部分:准备工作
这部分结构分为:
- @1.关于colours:
- @2.关于os.path.exists:
- @3.关于plt.ion()
- @4.关于os.makedirs:
# @第一部分:准备工作
# all train
# 所有训练集文件名
sequences = ['PETS09-S2L1','TUD-Campus','TUD-Stadtmitte','ETH-Bahnhof','ETH-Sunnyday','ETH-Pedcross2','KITTI-13','KITTI-17','ADL-Rundle-6','ADL-Rundle-8','Venice-2']
args = parse_args() # PS:有点迷??
display = args.display # 如果输入python sort.py --display 则这里display为true
phase = 'train'
total_time = 0.0
total_frames = 0
# 生成32行3列的0的矩阵,每个位置值为0到1的随机数。used only for display 仅用于展示
# @1.关于colours:
colours = np.random.rand(32,3)
if(display):
# @2.关于os.path.exists:
if not os.path.exists('mot_benchmark'): # 此文件应放在sort.py文件目录下,如果不存在此文件执行如下
print('\n\tERROR: mot_benchmark link not found!\n\n Create a symbolic link to the MOT benchmark\n (https://motchallenge.net/data/2D_MOT_2015/#download). E.g.:\n\n $ ln -s /path/to/MOT2015_challenge/2DMOT2015 mot_benchmark\n\n')
exit() # 退出
# @3.关于plt.ion()
plt.ion() # 打开交互模式
fig = plt.figure() # 图片
# @4.关于os.makedirs:
if not os.path.exists('output'): # 如果不存在文件output就创建一个
os.makedirs('output')
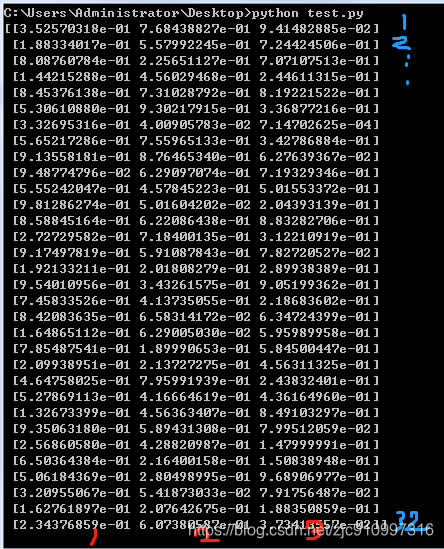
1.关于colours:我写了一个小代码跑了下
import numpy as np
colors = np.random.rand(32,3)
print(colors)
结果:e-01的意思就是左边的数除以10
2.关于os.path.exists:
判断这个路径下是否存在这个文件
import numpy as np
import os
path = os.path.exists('test.py')
print(path)
sort文中如果路径不存在mot就print如下,然后退出exit()
'''
\n\tERROR: mot_benchmark link not found!\n\n
Create a symbolic link to the MOT benchmark\n
(https://motchallenge.net/data/2D_MOT_2015/#download). E.g.:\n\n
$ ln -s /path/to/MOT2015_challenge/2DMOT2015 mot_benchmark\n\n'
'''
3.关于plt.ion()
matplotlib 画动态图以及plt.ion()和plt.ioff()的使用:https://blog.csdn.net/zbrwhut/article/details/80625702
此博客中一个例子:
import matplotlib.pyplot as plt
plt.ion() # 打开交互模式
# 打开窗口显示图片
plt.figure() #图片一
plt.imshow(i1)
# 显示前关掉交互模式
plt.ioff()
plt.show()
在plt.show()之前一定不要忘了加 plt.ioff(),如果不加,界面会一闪而过,并不会停留。
4.关于os.makedirs
import os, sys
path = 'D:\\abc' # win下\\ ubuntud:/abc
os.makedirs(path)
print("路径被创建")
@第二部分:
这部分结构分为:
- @1
- @2
- @3 取相应帧中的第2到7项:
- @4 如果展示
- @5 tracker
- @6 最终结果提示
for seq in sequences: # seq是sequences列表中的每一个元素
mot_tracker = Sort() # 实例化 SORT tracker
# @1读取np.loadtxt()
seq_dets = np.loadtxt('data/%s/det.txt'%(seq),delimiter=',') # 读取检测数据 且去除其中,逗号
with open('output/%s.txt'%(seq),'w') as out_file: # w模式,写入out/ADL-Rundle-6.txt
print("Processing %s."%(seq)) # 显示正在处理中
# @2 int(seq_dets[:,0].max())
for frame in range(int(seq_dets[:,0].max())):
frame += 1 # 从第一帧开始detection and frame numbers begin at 1
# @3 取相应帧中的第2到7项
dets = seq_dets[seq_dets[:,0]==frame,2:7]
dets[:,2:4] += dets[:,0:2] #convert to [x1,y1,w,h] to [x1,y1,x2,y2]
total_frames += 1
# @3 如果展示
if(display):
ax1 = fig.add_subplot(111, aspect='equal')
fn = 'mot_benchmark/%s/%s/img1/%06d.jpg'%(phase,seq,frame)
im =io.imread(fn)
ax1.imshow(im)
plt.title(seq+' Tracked Targets')
start_time = time.time() # 开始时间
# mot_tracker = Sort()
trackers = mot_tracker.update(dets) # input: dets & output: trackers ,更新过程mot_tracker.update()
cycle_time = time.time() - start_time # 循环时间 = 结束时间 - 开始时间
total_time += cycle_time # 片段的循环时间加起来得到总的时间
# @4 tracker
for d in trackers:
print('%d,%d,%.2f,%.2f,%.2f,%.2f,1,-1,-1,-1'%(frame,d[4],d[0],d[1],d[2]-d[0],d[3]-d[1]),file=out_file)
if(display):
d = d.astype(np.int32)
ax1.add_patch(patches.Rectangle((d[0],d[1]),d[2]-d[0],d[3]-d[1],fill=False,lw=3,ec=colours[d[4]%32,:]))
ax1.set_adjustable('box-forced')
if(display):
fig.canvas.flush_events()
plt.draw()
ax1.cla()
# @5 最终结果提示
print("Total Tracking took: %.3f for %d frames or %.1f FPS"%(total_time,total_frames,total_frames/total_time))
if(display):
print("Note: to get real runtime results run without the option: --display")
@1读取np.loadtxt():
# @1读取np.loadtxt()
seq_dets = np.loadtxt('data/%s/det.txt'%(seq),delimiter=',') # 读取检测数据 且去除其中,逗号
with open('output/%s.txt'%(seq),'w') as out_file: # w模式,写入out/ADL-Rundle-6.txt
print("Processing %s."%(seq)) # 显示正在处理中
for seq in sequences: 循环读取
seq_dets = np.loadtxt('data/%s/det.txt'%(seq),delimiter=',') # 读取检测数据 load detections
sequences = ['PETS09-S2L1','TUD-Campus','TUD-Stadtmitte','ETH-Bahnhof','ETH-Sunnyday','ETH-Pedcross2','KITTI-13','KITTI-17','ADL-Rundle-6','ADL-Rundle-8','Venice-2']
以第一个为例:
在sort.py目录下(H:\SORT\sort-master)创建test.py文件
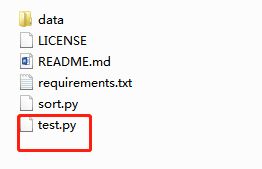
运行python test.py
# test.py
import os, sys
import numpy as np
sequences = ['PETS09-S2L1','TUD-Campus','TUD-Stadtmitte','ETH-Bahnhof','ETH-Sunnyday','ETH-Pedcross2','KITTI-13','KITTI-17','ADL-Rundle-6','ADL-Rundle-8','Venice-2']
seq = sequences[0]
seq_dets = np.loadtxt('data/%s/det.txt'%(seq),delimiter=',') # 读取检测数据 load detections
print (seq_dets)
结果:
运行python test.py
# test.py
import os, sys
import numpy as np
sequences = ['PETS09-S2L1','TUD-Campus','TUD-Stadtmitte','ETH-Bahnhof','ETH-Sunnyday','ETH-Pedcross2','KITTI-13','KITTI-17','ADL-Rundle-6','ADL-Rundle-8','Venice-2']
seq = sequences[0]
seq_dets = np.loadtxt('data/%s/det.txt'%(seq),delimiter=',') # 读取检测数据 load detections
print (type(seq_dets))
多维数组

@2 int(seq_dets[:,0].max()):
# @2 int(seq_dets[:,0].max())
for frame in range(int(seq_dets[:,0].max())):
frame += 1 # 从第一帧开始detection and frame numbers begin at 1
所有行第一列中的最大值,也就是一共多少帧,795帧
for frame in range( int(seq_dets[:,0].max()) ) :
for frame in range( 795帧 ):
@3 取相应帧中的第2到7项:
# @3 取相应帧中的第2到7项
dets = seq_dets[seq_dets[:,0]==frame,2:7]
dets[:,2:4] += dets[:,0:2] #convert to [x1,y1,w,h] to [x1,y1,x2,y2]
total_frames += 1
dets = seq_dets[ seq_dets[:,0]==frame , 2:7 ]
行:相应循环里面的对应的帧
列:2到7
以第一帧数据为例:(seq_dets[:,0]==1 , 2:7)
test.py:
#test.py 本文件是可以独立运行,用于测试sort部分代码
import os, sys
import numpy as np
sequences = ['PETS09-S2L1','TUD-Campus','TUD-Stadtmitte','ETH-Bahnhof','ETH-Sunnyday','ETH-Pedcross2','KITTI-13','KITTI-17','ADL-Rundle-6','ADL-Rundle-8','Venice-2']
seq = sequences[0]
seq_dets = np.loadtxt('data/%s/det.txt'%(seq),delimiter=',') # 读取检测数据 load detections
dets = seq_dets[ seq_dets[:,0]==1 , 2:7 ]
print (dets)
python test.py
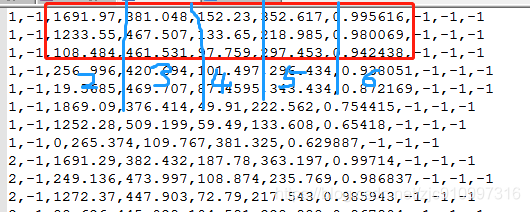
实际得到的是2,3,4,5,6列
源文件H:\SORT\sort-master\data\PETS09-S2L1\det.txt
test.py :
对test.py程序再做修改:
python test.py
#test.py 本文件是可以独立运行,用于测试sort部分代码
import os, sys
import numpy as np
sequences = ['PETS09-S2L1','TUD-Campus','TUD-Stadtmitte','ETH-Bahnhof','ETH-Sunnyday','ETH-Pedcross2','KITTI-13','KITTI-17','ADL-Rundle-6','ADL-Rundle-8','Venice-2']
seq = sequences[0]
seq_dets = np.loadtxt('data/%s/det.txt'%(seq),delimiter=',') # 读取检测数据 load detections
dets = seq_dets[ seq_dets[:,0]==1 , 2:7 ]
print ("dets为\n{}".format(dets))
dets[:,2:4] += dets[:,0:2]
print("新的dets为\n{}".format(dets))
dets[:,2:4] += dets[:,0:2] 其实就是把 01列 加到了 23列:

convert to [x1,y1,w,h] to [x1,y1,x2,y2]
@4 如果展示:
plt.figure()的使用请参考此博客:https://blog.csdn.net/m0_37362454/article/details/81511427
# @3 如果展示
if(display):
ax1 = fig.add_subplot(111, aspect='equal') # equal这里貌似是保持平等的,具体可以查一下,不过111这种无所谓吧~
# phase = 'train' seq在第一次循环里是PETS09-S2L1 %06d
# 'mot_benchmark/train/PETS09-S2L1/img1/000001.jpg'
fn = 'mot_benchmark/%s/%s/img1/%06d.jpg'%(phase, seq, frame)
im =io.imread(fn)
ax1.imshow(im)
plt.title(seq+' Tracked Targets')
start_time = time.time() # 开始时间
# mot_tracker = Sort()
trackers = mot_tracker.update(dets) # input: dets & output: trackers ,更新过程mot_tracker.update()
cycle_time = time.time() - start_time # 循环时间 = 结束时间 - 开始时间
total_time += cycle_time # 片段的循环时间加起来得到总的时间
@4.1
在第一部分的 @3.关于plt.ion()
plt.ion() # 打开交互模式
fig = plt.figure() # 绘图
#test.py 本文件是可以独立运行,用于测试sort部分代码
import matplotlib.pyplot as plt
# 创建自定义图像
fig=plt.figure(figsize=(4,3),facecolor='blue')
plt.show()
python test.py
结果
@4.2
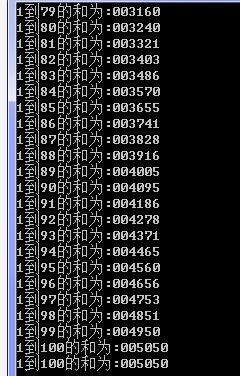
关于%06d:就是这个数左边补充0到一共6个数,如:i = 5050 通过 print("%d" %i)变为 -> 005050
参考博客:在Python中,输出格式:%d , %6d , %-6d, %06d , %.6f的一些区分: https://www.cnblogs.com/ywk-1994/p/9364232.html
#test.py 本文件是可以独立运行,用于测试sort部分代码
i = 1
sum = 0
while i <= 100:
sum += i
i += 1
print("1到%d的和为:%06d" % (i-1,sum))
print("1到100的和为:%06d" % sum)
python test.py
@4.3 fig.add_subplot(111, aspect='equal')
参考博客:画子图(add_subplot & subplot) https://blog.csdn.net/you_are_my_dream/article/details/53439518
利用python进行数据分析-绘图和可视化1:https://blog.csdn.net/zhuhengv/article/details/51699701?utm_source=blogxgwz0
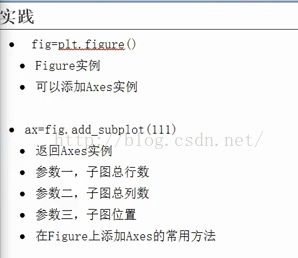
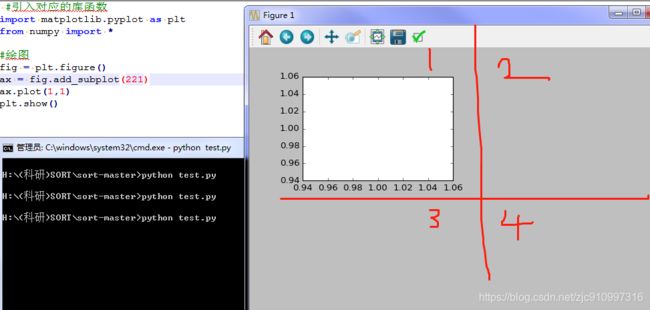
111表示一行, 一列, 子图位置
python test.py
#test.py 本文件是可以独立运行,用于测试sort部分代码
#引入对应的库函数
import matplotlib.pyplot as plt
from numpy import *
#绘图
fig = plt.figure()
ax = fig.add_subplot(221)
ax.plot(1,1)
plt.show()
# 注意这里windows下一定要\\
#test.py 本文件是可以独立运行,用于测试sort部分代码
#引入对应的库函数
import matplotlib.pyplot as plt
from numpy import *
import os
from skimage import io
#绘图
fig = plt.figure()
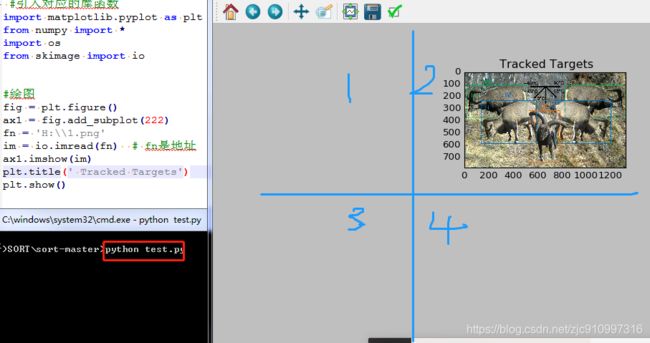
ax1 = fig.add_subplot(222)
fn = 'H:\\1.png' # 注意这里windows下一定要\\
im = io.imread(fn) # fn是地址
ax1.imshow(im)
plt.title(' Tracked Targets')
plt.show()
python test.py
@5 tracker
for d in trackers:
print('%d,%d,%.2f,%.2f,%.2f,%.2f,1,-1,-1,-1'%(frame,d[4],d[0],d[1],d[2]-d[0],d[3]-d[1]),file=out_file)
# print(帧 -1 xywh 1 -1 -1 -1)
# '%d, %d, %.2f, %.2f, %.2f, %.2f, 1,-1,-1,-1'
# (frame, d[4], d[0], d[1], d[2]-d[0], d[3]-d[1]
# 第几帧, -1, x, y, w, h, 1,-1,-1,-1
# d[0]->x1, d[1]->y1, d[2]->x2, d[3]->y2
if(display):
d = d.astype(np.int32) # 转换为整数
# d[0],d[1]),d[2]-d[0],d[3]-d[1]
# x, y, w, h
ax1.add_patch(patches.Rectangle((d[0],d[1]),d[2]-d[0],d[3]-d[1],fill=False,lw=3,ec=colours[d[4]%32,:]))
ax1.set_adjustable('box-forced')
if(display):
fig.canvas.flush_events()
plt.draw()
ax1.cla() # Clear axis即清除当前图形中的当前活动轴。其他轴不受影响。
@5.1 关于d = d.astype(np.int32)
请参考博客:Numpy数据类型转换astype,dtype
https://blog.csdn.net/A632189007/article/details/77989287
@5.2 关于ax1.cla:
cla() # Clear axis即清除当前图形中的当前活动轴。其他轴不受影响。
clf() # Clear figure清除所有轴,但是窗口打开,这样它可以被重复使用。
close() # Close a figure window
@5.3 关于ec=colours[ d[4]%32,: ]:
在
@第一部分: 准备工作 中的
@1.关于colours:
colours = np.random.rand(32,3) #used only for display
随机生成了32个颜色
@5.4 关于 ax1.add_patch
ax1.add_patch( patches.Rectangle( (d[0],d[1]),d[2]-d[0],d[3]-d[1],fill=False,lw=3,ec=colours[d[4]%32,:] ) )
# ax1.add_patch( patches.Rectangle( (x,y), w, h, fill=False, lw=3, ec=colours[ d[4]%32,: ] ) )
(x,y), w, h: 位置大小
fill=False: ??
lw=3: 边框粗细
ec=colours[ d[4]%32,: ]: d[4]不是-1吗
独立代码解析:
#test.py 本文件是可以独立运行,用于测试sort部分代码
#引入对应的库函数
import matplotlib.pyplot as plt
import numpy as np
import os
from skimage import io
import matplotlib.patches as patches
#绘图
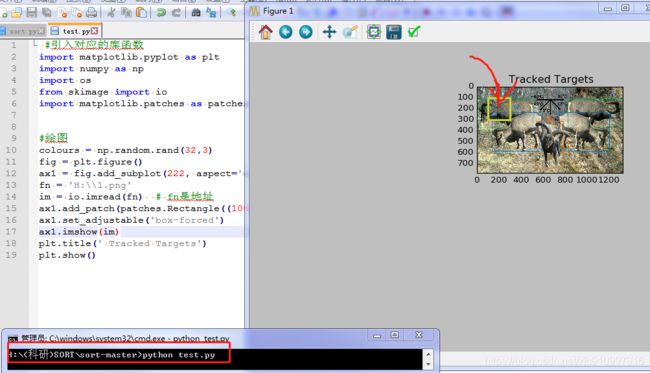
colours = np.random.rand(32,3) #随机生成32个颜色
fig = plt.figure()
ax1 = fig.add_subplot(222, aspect='equal')
fn = 'H:\\1.png'
im = io.imread(fn) # fn是地址
#
ax1.add_patch(patches.Rectangle((100,100),200,200,fill=False,lw=3, ec=colours[10%32,:]))
ax1.set_adjustable('box-forced')
ax1.imshow(im)
plt.title(' Tracked Targets')
plt.show()
python test.py
运行结果:
[Matplotlib] subplot 理解 https://blog.csdn.net/u012762410/article/details/78968708
matplotlib.axes.Axes.add_patch 将补丁p添加到轴补丁列表中;剪辑框将设置为 Axes 剪切框。 如果未设置变换,则将其设置为 transData。返回补丁。
matplotlib.axes.Axes.set_adjustable 定义 Axes 将更改哪个参数以实现给定面。
SORT 多目标跟踪算法笔记 博客:https://blog.csdn.net/yiran103/article/details/89421140
@6 最终结果提示
# 一共运行时间, 一共的帧数, 每秒多少帧也就是FPS
print("Total Tracking took: %.3f for %d frames or %.1f FPS"%(total_time,total_frames,total_frames/total_time))
# 想得到真正的实时结果就别用 --display
if(display):
print("Note: to get real runtime results run without the option: --display")
---输出结果output
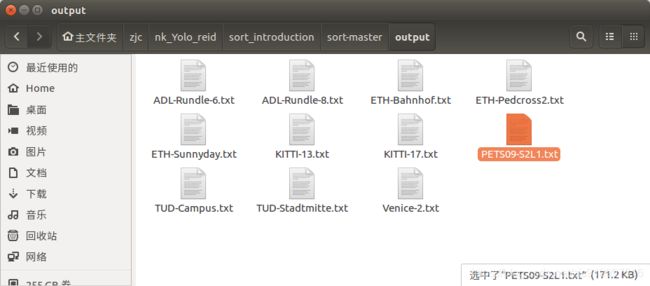
@1.分析结果
->点开
->
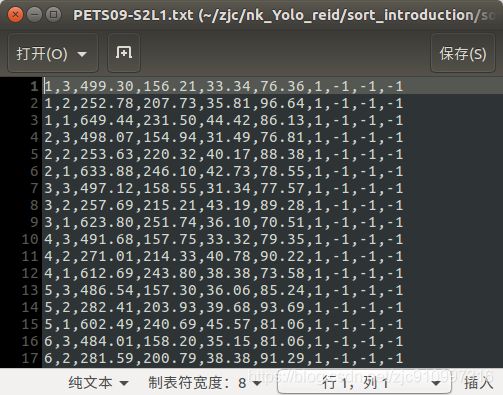
->这是如下代码的输出结果:
for d in trackers:
print('%d,%d,%.2f,%.2f,%.2f,%.2f,1,-1,-1,-1'%(frame,d[4],d[0],d[1],d[2]-d[0],d[3]-d[1]),file=out_file)
# print(帧 -1 xywh 1 -1 -1 -1)
# '%d, %d, %.2f, %.2f, %.2f, %.2f, 1,-1,-1,-1'
# (frame, d[4], d[0], d[1], d[2]-d[0], d[3]-d[1]
# 第几帧, -1, x, y, w, h, 1,-1,-1,-1
# d[0]->x1, d[1]->y1, d[2]->x2, d[3]->y2
if(display):
d = d.astype(np.int32) # 转换为整数
# d[0],d[1]),d[2]-d[0],d[3]-d[1]
# x, y, w, h
ax1.add_patch(patches.Rectangle((d[0],d[1]),d[2]-d[0],d[3]-d[1],fill=False,lw=3,ec=colours[d[4]%32,:]))
ax1.set_adjustable('box-forced')
位于目录的如下位置
---对最后一个(10_主函数 if __name__ == '__main__':)详细介绍
@第二部分:
@4 tracker
下面是output结果的分析:
# //input:
# print(帧 -1 xywh 1 -1 -1 -1)
# 第几帧, -1, x, y, w, h, 1,-1,-1,-1
# //output:
# d[0]->x1, d[1]->y1, d[2]->x2, d[3]->y2
# '%d, %d, %.2f, %.2f, %.2f, %.2f, 1,-1,-1,-1'
# frame, d[4], d[0], d[1], d[2]-d[0], d[3]-d[1] 1,-1,-1,-1
# 1, 3, 499.30, 156.21, 33.34, 76.36, 1,-1,-1,-1
1,3,499.30,156.21,33.34,76.36,1,-1,-1,-1
1,2,252.78,207.73,35.81,96.64,1,-1,-1,-1
1,1,649.44,231.50,44.42,86.13,1,-1,-1,-1
2,3,498.07,154.94,31.49,76.81,1,-1,-1,-1
2,2,253.63,220.32,40.17,88.38,1,-1,-1,-1
2,1,633.88,246.10,42.73,78.55,1,-1,-1,-1
3,3,497.12,158.55,31.34,77.57,1,-1,-1,-1
3,2,257.69,215.21,43.19,89.28,1,-1,-1,-1
3,1,623.80,251.74,36.10,70.51,1,-1,-1,-1
4,3,491.68,157.75,33.32,79.35,1,-1,-1,-1
4,2,271.01,214.33,40.78,90.22,1,-1,-1,-1
4,1,612.69,243.80,38.38,73.58,1,-1,-1,-1
5,3,486.54,157.30,36.06,85.24,1,-1,-1,-1
5,2,282.41,203.93,39.68,93.69,1,-1,-1,-1
5,1,602.49,240.69,45.57,81.06,1,-1,-1,-1
6,3,484.01,158.20,35.15,81.06,1,-1,-1,-1
6,2,281.59,200.79,38.38,91.29,1,-1,-1,-1
6,1,596.37,237.88,47.30,86.56,1,-1,-1,-1
7,3,476.84,157.11,43.87,87.88,1,-1,-1,-1
7,2,288.21,205.65,39.08,91.68,1,-1,-1,-1
7,1,587.15,238.51,42.77,82.27,1,-1,-1,-1
8,3,474.89,161.57,40.41,83.04,1,-1,-1,-1
8,2,296.64,204.94,40.02,91.88,1,-1,-1,-1
8,1,576.68,239.16,41.74,81.37,1,-1,-1,-1
9,3,468.71,160.89,37.55,80.96,1,-1,-1,-1
9,2,294.37,202.18,40.96,90.99,1,-1,-1,-1
9,1,568.58,237.78,40.15,81.46,1,-1,-1,-1
10,3,467.57,162.71,37.83,79.12,1,-1,-1,-1
10,2,300.24,205.52,40.63,90.64,1,-1,-1,-1
10,1,560.37,234.77,47.98,86.17,1,-1,-1,-1
PS:这里里面的d[4]我认为是人的ID号
@2.分析d[4],也就需要分析trackers:
需要去前面找trackers
for d in trackers:
trackers是由mot_tracker.update生成,需要找mot_tracker
trackers = mot_tracker.update(dets)
在这里mot_tracker实际上就是Sort()
mot_tracker = Sort()
所以要看Sort里面的update,
输入是:dets(就是object ) & self
PS: dets 参考@第二部分: @3 取相应帧中的第2到7项:
输出是:
if(len(ret)>0):
return np.concatenate(ret) # 如果有跟踪数据的结果那就输出ret
return np.empty((0,5)) # 如果没有就输出[]
下面是详细Sort()这部分的代码:
class Sort(object):
def __init__(self,max_age=1,min_hits=3):
"""
Sets key parameters for SORT
"""
self.max_age = max_age
self.min_hits = min_hits
self.trackers = []
self.frame_count = 0
def update(self,dets):
"""
Params:
dets - a numpy array of detections in the format [[x1,y1,x2,y2,score],[x1,y1,x2,y2,score],...]
Requires: this method must be called once for each frame even with empty detections.
Returns the a similar array, where the last column is the object ID.
NOTE: The number of objects returned may differ from the number of detections provided.
"""
self.frame_count += 1
#get predicted locations from existing trackers.
trks = np.zeros((len(self.trackers),5))
to_del = []
ret = []
for t,trk in enumerate(trks):
pos = self.trackers[t].predict()[0]
trk[:] = [pos[0], pos[1], pos[2], pos[3], 0]
if(np.any(np.isnan(pos))):
to_del.append(t)
trks = np.ma.compress_rows(np.ma.masked_invalid(trks))
for t in reversed(to_del):
self.trackers.pop(t)
matched, unmatched_dets, unmatched_trks = associate_detections_to_trackers(dets,trks)
#update matched trackers with assigned detections
for t,trk in enumerate(self.trackers):
if(t not in unmatched_trks):
d = matched[np.where(matched[:,1]==t)[0],0]
trk.update(dets[d,:][0])
#create and initialise new trackers for unmatched detections
for i in unmatched_dets:
trk = KalmanBoxTracker(dets[i,:])
self.trackers.append(trk)
i = len(self.trackers)
for trk in reversed(self.trackers):
d = trk.get_state()[0]
# TODO 1
print("trk.get_state()为:\n{}".format(trk.get_state()))
# [[ 1017.51854387 435.87434633 1117.02892785 672.21479349]]
print("trk.get_state()[0]为:\n{}".format(trk.get_state()[0]))
# [ 1017.51854387 435.87434633 1117.02892785 672.21479349]
# d = trk.get_state()[0], [x1y1x2y2]
print("trk.id为:\n{}".format(trk.id))
print("链接d与trk.id+1:\n{}".format(np.concatenate((d, [trk.id + 1]))))
print("链接d与trk.id+1并reshape(1,-1):\n{}".format(np.concatenate((d,[trk.id+1])).reshape(1,-1)))
'''
trk.get_state()为:[[ 1859.11179029 412.77162455 1914.66116315 663.06065407]]
trk.get_state()[0]为:[ 1859.11179029 412.77162455 1914.66116315 663.06065407]
trk.id为:2775
链接d与trk.id+1: [ 1859.11179029 412.77162455 1914.66116315 663.06065407 2776. ]
链接d与trk.id+1并reshape(1,-1): [[ 1859.11179029 412.77162455 1914.66116315 663.06065407 2776. ]]
'''
if((trk.time_since_update < 1) and (trk.hit_streak >= self.min_hits or self.frame_count <= self.min_hits)):
ret.append(np.concatenate((d,[trk.id+1])).reshape(1,-1)) # +1 as MOT benchmark requires positive
i -= 1
#remove dead tracklet
if(trk.time_since_update > self.max_age):
self.trackers.pop(i)
if(len(ret)>0):
return np.concatenate(ret)
return np.empty((0,5))
# test.py代码可以独立运行,下面是我对concatenate 和 ret 和 np.empty((0,5))的测试:
#test.py 本文件是可以独立运行,用于测试sort部分代码
import numpy as np
def research(x, y):
ret = np.concatenate((x,y))
if (len(ret) > 0):
return ret
return np.empty((0, 5))
if __name__ == '__main__':
a = np.array([[1, 2],
[3, 4]])
b = np.array([[5, 6],
[7, 8]])
print("第一个输入为:\n{}".format(a))
print("第二个输入为:\n{}".format(b))
result = research(a, b)
print("结果是:\n{}".format(result))
输出结果:
第一个输入为:
[[1 2]
[3 4]]
第二个输入为:
[[5 6]
[7 8]]
结果是:
[[1 2]
[3 4]
[5 6]
[7 8]]
# test.py代码可以独立运行,下面是我对 ret.append( np.concatenate( (d,[trk.id+1]) ).reshape(1,-1) ) 的测试:
#test.py 本文件是可以独立运行,用于测试sort部分代码
import numpy as np
def research(x, y):
ret = np.concatenate((x, [y]))
if (len(ret) > 0):
return ret
return np.empty((0, 5))
if __name__ == '__main__':
a = np.array([1, 2, 3, 4])
b = 1
print("第一个输入为:\n{}".format(a))
print("第二个输入为:\n{}".format(b))
print()
ret = research(a, b)
print("结果是:\n{}".format(ret))
print("reshape之后的结果是:\n{}".format(ret.reshape(1,-1)))
