SpringBoot使用Mybatis
SpringBoot使用Mybatis
Orm 框架的本质是简化编程中操作数据库的编码,发展到现在基本上就剩两家了,一个是宣称可以不用写一句
Sql 的 Hibernate,一个是可以灵活调试动态 Sql 的 Mybatis ,两者各有特点,在企业级系统开发中可以根据需求灵
活使用。发现一个有趣的现象:传统企业大都喜欢使用 Hibernate ,互联网行业通常使用 Mybatis 。
Hibernate 特点就是所有的 Sql 都用 Java 代码来生成,不用跳出程序去写(看) Sql ,有着编程的完整性,发展
到最顶端就是 Spring Data Jpa 这种模式了,基本上根据方法名就可以生成对应的 Sql 了。
Mybatis 初期使用比较麻烦,需要各种配置文件、实体类、Dao 层映射关联、还有一大推其它配置。当然 Mybatis
也发现了这种弊端,初期开发了generator https://github.com/mybatis/generator 可以根据表结果自动生
产实体类、配置文件和 Dao 层代码,可以减轻一部分开发量;后期也进行了大量的优化可以使用注解了,自动管
理 Dao 层和配置文件等,发展到最顶端就是今天要讲的这种模式了,mybatis-spring-boot-starter 就是
Spring Boot+ Mybatis 可以完全注解不用配置文件,也可以简单配置轻松上手。
现在想想 Spring Boot 就是牛逼呀,任何东西只要关联到 Spring Boot 都是化繁为简。
1、mybatis-spring-boot-starter
官方说明:MyBatis Spring-Boot-Starter will help you use MyBatis with Spring Boot
其实就是 Mybatis 看 Spring Boot 这么火热也开发出一套解决方案来凑凑热闹,但这一凑确实解决了很多问题,
使用起来确实顺畅了许多。mybatis-spring-boot-starter主要有两种解决方案,一种是使用注解解决一切问
题,一种是简化后的老传统。
当然任何模式都需要首先引入mybatis-spring-boot-starter的 Pom 文件:
<dependency>
	<groupId>org.mybatis.spring.bootgroupId>
	<artifactId>mybatis-spring-boot-starterartifactId>
	<version>2.0.0version>
dependency>
好了下来分别介绍两种开发模式。
2、无配置文件注解版
就是一切使用注解搞定。
2.1 pom依赖
<project xmlns="http://maven.apache.org/POM/4.0.0" xmlns:xsi="http://www.w3.org/2001/XMLSchema-instance"
         xsi:schemaLocation="http://maven.apache.org/POM/4.0.0 https://maven.apache.org/xsd/maven-4.0.0.xsd">
    <modelVersion>4.0.0modelVersion>
    <parent>
        <groupId>org.springframework.bootgroupId>
        <artifactId>spring-boot-starter-parentartifactId>
        <version>2.1.0.RELEASEversion>
        <relativePath/>
    parent>

    <groupId>com.examplegroupId>
    <artifactId>spring-boot-mybatis-annotationartifactId>
    <version>0.0.1-SNAPSHOTversion>
    <name>spring-boot-mybatis-annotationname>
    <description>spring-boot-mybatis-annotationdescription>

    <properties>
        <project.build.sourceEncoding>UTF-8project.build.sourceEncoding>
        <java.version>1.8java.version>
    properties>

    <dependencies>

        <dependency>
            <groupId>org.springframework.bootgroupId>
            <artifactId>spring-boot-starter-webartifactId>
        dependency>

        <dependency>
            <groupId>org.mybatis.spring.bootgroupId>
            <artifactId>mybatis-spring-boot-starterartifactId>
            <version>2.0.0version>
        dependency>

        <dependency>
            <groupId>mysqlgroupId>
            <artifactId>mysql-connector-javaartifactId>
        dependency>

        <dependency>
            <groupId>org.springframework.bootgroupId>
            <artifactId>spring-boot-starter-testartifactId>
            <scope>testscope>
        dependency>

    dependencies>

    <build>
        <plugins>
            <plugin>
                <groupId>org.springframework.bootgroupId>
                <artifactId>spring-boot-maven-pluginartifactId>
            plugin>
        plugins>
    build>

project>
2.2 application.properties
mybatis.type-aliases-package=com.example.model

spring.datasource.url=jdbc:mysql://localhost:3306/test_user?serverTimezone=UTC&useUnicode=true&characterEncoding=utf-8&useSSL=true
spring.datasource.username=root
spring.datasource.password=root
spring.datasource.driver-class-name=com.mysql.cj.jdbc.Driver
Spring Boot 会自动加载 spring.datasource.* 相关配置,数据源就会自动注入到 sqlSessionFactory 中,
sqlSessionFactory 会自动注入到 Mapper 中,对了,你一切都不用管了,直接拿起来使用就行了。
在启动类中添加对 mapper 包扫描@MapperScan
package com.example;

import org.mybatis.spring.annotation.MapperScan;
import org.springframework.boot.SpringApplication;
import org.springframework.boot.autoconfigure.SpringBootApplication;

@SpringBootApplication
@MapperScan("com.example.mapper")
public class SpringBootMybatisAnnotationApplication {

    public static void main(String[] args) {
        SpringApplication.run(SpringBootMybatisAnnotationApplication.class, args);
    }

}
或者直接在 Mapper 类上面添加注解@Mapper,建议使用上面那种,不然每个 mapper 加个注解也挺麻烦的。
2.3 开发 Mapper
第三步是最关键的一块, Sql 生产都在这里
package com.example.mapper;

import com.example.enums.UserSexEnum;
import com.example.model.User;
import org.apache.ibatis.annotations.*;
import org.springframework.stereotype.Component;

import java.util.List;

@Component
public interface UserMapper {

    @Select("SELECT * FROM users")
    @Results({
            @Result(property = "userSex", column = "user_sex", javaType = UserSexEnum.class),
            @Result(property = "nickName", column = "nick_name")
    })
    List<User> getAll();

    @Select("SELECT * FROM users WHERE id = #{id}")
    @Results({
            @Result(property = "userSex", column = "user_sex", javaType = UserSexEnum.class),
            @Result(property = "nickName", column = "nick_name")
    })
    User getOne(Long id);

    @Insert("INSERT INTO users(userName,passWord,user_sex) VALUES(#{userName}, #{passWord}, #{userSex})")
    void insert(User user);

    @Update("UPDATE users SET userName=#{userName},nick_name=#{nickName} WHERE id =#{id}")
    void update(User user);

    @Delete("DELETE FROM users WHERE id =#{id}")
    void delete(Long id);

}
package com.example.enums;

public enum UserSexEnum {
	MAN, WOMAN
}
package com.example.model;

import com.example.enums.UserSexEnum;

import java.io.Serializable;

public class User implements Serializable {

	private static final long serialVersionUID = 1L;
	private Long id;
	private String userName;
	private String passWord;
	private UserSexEnum userSex;
	private String nickName;

	public User() {
		super();
	}

	public User(String userName, String passWord, UserSexEnum userSex) {
		super();
		this.passWord = passWord;
		this.userName = userName;
		this.userSex = userSex;
	}

	public Long getId() {
		return id;
	}

	public void setId(Long id) {
		this.id = id;
	}

	public String getUserName() {
		return userName;
	}

	public void setUserName(String userName) {
		this.userName = userName;
	}

	public String getPassWord() {
		return passWord;
	}

	public void setPassWord(String passWord) {
		this.passWord = passWord;
	}

	public UserSexEnum getUserSex() {
		return userSex;
	}

	public void setUserSex(UserSexEnum userSex) {
		this.userSex = userSex;
	}

	public String getNickName() {
		return nickName;
	}

	public void setNickName(String nickName) {
		this.nickName = nickName;
	}

	@Override
	public String toString() {
		// TODO Auto-generated method stub
		return "userName " + this.userName + ", pasword " + this.passWord + ", sex " + userSex.name();
	}

}
为了更接近生产我特地将 user_sex、nick_name 两个属性在数据库加了下划线和实体类属性名不一致,另外
user_sex 使用了枚举。
DROP TABLE IF EXISTS `users`;
CREATE TABLE `users` (
  `id` bigint(20) NOT NULL AUTO_INCREMENT COMMENT '主键id',
  `userName` varchar(32) DEFAULT NULL COMMENT '用户名',
  `passWord` varchar(32) DEFAULT NULL COMMENT '密码',
  `user_sex` varchar(32) DEFAULT NULL,
  `nick_name` varchar(32) DEFAULT NULL,
  PRIMARY KEY (`id`)
) ENGINE=InnoDB AUTO_INCREMENT=1 DEFAULT CHARSET=utf8;
-
@Select是查询类的注解,所有的查询均使用这个 -
@Result修饰返回的结果集,关联实体类属性和数据库字段一一对应,如果实体类属性和数据库属性名保持一致,就不需要这个属性来修饰。
-
@Insert插入数据库使用,直接传入实体类会自动解析属性到对应的值 -
@Update负责修改,也可以直接传入对象 -
@delete负责删除
了解更多属性参考这里:http://www.mybatis.org/mybatis-3/zh/java-api.html
注意,使用#符号和$符号的不同:
// This example creates a prepared statement, something like select * from teacher where name = ?;
@Select("Select * from teacher where name = #{name}")
Teacher selectTeachForGivenName(@Param("name") String name);

// This example creates n inlined statement, something like select * from teacher where name = 'someName';
@Select("Select * from teacher where name = '${name}'")
Teacher selectTeachForGivenName(@Param("name") String name);
2.4 控制器
package com.example.web;

import com.example.mapper.UserMapper;
import com.example.model.User;
import org.springframework.beans.factory.annotation.Autowired;
import org.springframework.web.bind.annotation.PathVariable;
import org.springframework.web.bind.annotation.RequestMapping;
import org.springframework.web.bind.annotation.RestController;

import java.util.List;


@RestController
public class UserController {

    @Autowired
    private UserMapper userMapper;

    @RequestMapping("/getUsers")
    public List<User> getUsers() {
        List<User> users = userMapper.getAll();
        return users;
    }

    @RequestMapping("/getUser")
    public User getUser(Long id) {
        User user = userMapper.getOne(id);
        return user;
    }

    @RequestMapping("/add")
    public void save(User user) {
        userMapper.insert(user);
    }

    @RequestMapping(value = "update")
    public void update(User user) {
        userMapper.update(user);
    }

    @RequestMapping(value = "/delete/{id}")
    public void delete(@PathVariable("id") Long id) {
        userMapper.delete(id);
    }


}
2.5 测试
上面三步就基本完成了相关 Mapper 层开发,使用的时候当作普通的类注入进入就可以了。
package com.example.mapper;

import com.example.enums.UserSexEnum;
import com.example.model.User;
import org.junit.Assert;
import org.junit.Test;
import org.junit.runner.RunWith;
import org.springframework.beans.factory.annotation.Autowired;
import org.springframework.boot.test.context.SpringBootTest;
import org.springframework.test.context.junit4.SpringRunner;

import java.util.List;

@RunWith(SpringRunner.class)
@SpringBootTest
public class UserMapperTest {

    @Autowired
    private UserMapper userMapper;

    @Test
    public void testInsert() throws Exception {
        userMapper.insert(new User("aa1", "a123456", UserSexEnum.MAN));
        userMapper.insert(new User("bb1", "b123456", UserSexEnum.WOMAN));
        userMapper.insert(new User("cc1", "b123456", UserSexEnum.WOMAN));
        Assert.assertEquals(3, userMapper.getAll().size());
    }

    @Test
    public void testQuery() throws Exception {
        List<User> users = userMapper.getAll();
        System.out.println(users.toString());
    }


    @Test
    public void testUpdate() throws Exception {
        User user = userMapper.getOne(1l);
        System.out.println(user.toString());
        user.setNickName("neo");
        userMapper.update(user);
        Assert.assertTrue(("neo".equals(userMapper.getOne(1l).getNickName())));
    }

}
运行testInsert():
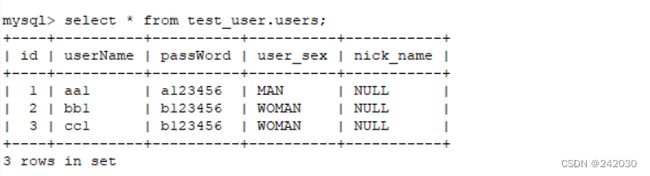
运行testQuery():
[userName aa1, pasword a123456, sex MAN, userName bb1, pasword b123456, sex WOMAN, userName cc1, pasword b123456, sex WOMAN]
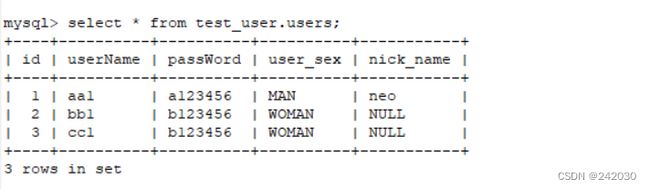
运行testUpdate():
3、极简xml版本
极简 xml 版本保持映射文件的老传统,接口层只需要定义空方法,系统会自动根据方法名在映射文件中找对应的
Sql。
3.1 pom依赖
<project xmlns="http://maven.apache.org/POM/4.0.0" xmlns:xsi="http://www.w3.org/2001/XMLSchema-instance"
         xsi:schemaLocation="http://maven.apache.org/POM/4.0.0 https://maven.apache.org/xsd/maven-4.0.0.xsd">
    <modelVersion>4.0.0modelVersion>
    <parent>
        <groupId>org.springframework.bootgroupId>
        <artifactId>spring-boot-starter-parentartifactId>
        <version>2.1.0.RELEASEversion>
        <relativePath/>
    parent>

    <groupId>com.examplegroupId>
    <artifactId>spring-boot-mybatis-xmlartifactId>
    <version>0.0.1-SNAPSHOTversion>
    <name>spring-boot-mybatis-xmlname>
    <description>spring-boot-mybatis-xmldescription>

    <properties>
        <project.build.sourceEncoding>UTF-8project.build.sourceEncoding>
        <java.version>1.8java.version>
    properties>

    <dependencies>

        <dependency>
            <groupId>org.springframework.bootgroupId>
            <artifactId>spring-boot-starter-webartifactId>
        dependency>

        <dependency>
            <groupId>org.mybatis.spring.bootgroupId>
            <artifactId>mybatis-spring-boot-starterartifactId>
            <version>2.0.0version>
        dependency>

        <dependency>
            <groupId>mysqlgroupId>
            <artifactId>mysql-connector-javaartifactId>
        dependency>

        <dependency>
            <groupId>org.springframework.bootgroupId>
            <artifactId>spring-boot-starter-testartifactId>
            <scope>testscope>
        dependency>

    dependencies>

    <build>
        <plugins>
            <plugin>
                <groupId>org.springframework.bootgroupId>
                <artifactId>spring-boot-maven-pluginartifactId>
            plugin>
        plugins>
    build>

project>
3.2 配置文件
pom 文件和上个版本一样,只是application.properties新增以下配置
mybatis.config-location=classpath:mybatis/mybatis-config.xml
mybatis.mapper-locations=classpath:mybatis/mapper/*.xml
mybatis.type-aliases-package=com.example.model
spring.datasource.url=jdbc:mysql://localhost:3306/test_user?serverTimezone=UTC&useUnicode=true&characterEncoding=utf-8&useSSL=true
spring.datasource.username=root
spring.datasource.password=root
spring.datasource.driver-class-name=com.mysql.cj.jdbc.Driver
指定了 Mybatis 基础配置文件和实体类映射文件的地址。
mybatis-config.xml 配置
DOCTYPE configuration PUBLIC "-//mybatis.org//DTD Config 3.0//EN" "http://mybatis.org/dtd/mybatis-3-config.dtd">
<configuration>
	<typeAliases>
		<typeAlias alias="Integer" type="java.lang.Integer" />
		<typeAlias alias="Long" type="java.lang.Long" />
		<typeAlias alias="HashMap" type="java.util.HashMap" />
		<typeAlias alias="LinkedHashMap" type="java.util.LinkedHashMap" />
		<typeAlias alias="ArrayList" type="java.util.ArrayList" />
		<typeAlias alias="LinkedList" type="java.util.LinkedList" />
	typeAliases>
configuration>
这里也可以添加一些 Mybatis 基础的配置。
3.3 添加 User 的映射文件
UserMapper.xml文件
DOCTYPE mapper PUBLIC "-//mybatis.org//DTD Mapper 3.0//EN" "http://mybatis.org/dtd/mybatis-3-mapper.dtd" >
<mapper namespace="com.example.mapper.UserMapper" >
    <resultMap id="BaseResultMap" type="com.example.model.User" >
        <id column="id" property="id" jdbcType="BIGINT" />
        <result column="userName" property="userName" jdbcType="VARCHAR" />
        <result column="passWord" property="passWord" jdbcType="VARCHAR" />
        <result column="user_sex" property="userSex" javaType="com.example.enums.UserSexEnum"/>
        <result column="nick_name" property="nickName" jdbcType="VARCHAR" />
    resultMap>

    <sql id="Base_Column_List" >
        id, userName, passWord, user_sex, nick_name
    sql>

    <select id="getAll" resultMap="BaseResultMap"  >
       SELECT
       <include refid="Base_Column_List" />
	   FROM users
    select>

    <select id="getOne" parameterType="java.lang.Long" resultMap="BaseResultMap" >
        SELECT
       <include refid="Base_Column_List" />
	   FROM users
	   WHERE id = #{id}
    select>

    <insert id="insert" parameterType="com.example.model.User" >
       INSERT INTO
       		users
       		(userName,passWord,user_sex)
       	VALUES
       		(#{userName}, #{passWord}, #{userSex})
    insert>

    <update id="update" parameterType="com.example.model.User" >
       UPDATE
       		users
       SET
       	<if test="userName != null">userName = #{userName},if>
       	<if test="passWord != null">passWord = #{passWord},if>
       	nick_name = #{nickName}
       WHERE
       		id = #{id}
    update>

    <delete id="delete" parameterType="java.lang.Long" >
       DELETE FROM
       		 users
       WHERE
       		 id =#{id}
    delete>

mapper>
其实就是把上个版本中 Mapper 的 Sql 搬到了这里的 xml 中了
3.4 编写 Mapper 层的代码
package com.example.mapper;

import com.example.model.User;
import org.springframework.stereotype.Component;

import java.util.List;

@Component
public interface UserMapper {

    List<User> getAll();

    User getOne(Long id);

    void insert(User user);

    void update(User user);

    void delete(Long id);

}
对比上一步,这里只需要定义接口方法。
package com.example.enums;

public enum UserSexEnum {
	MAN, WOMAN
}
package com.example.model;

import com.example.enums.UserSexEnum;

import java.io.Serializable;

public class User implements Serializable {

    private static final long serialVersionUID = 1L;
    private Long id;
    private String userName;
    private String passWord;
    private UserSexEnum userSex;
    private String nickName;

    public User() {
        super();
    }

    public User(String userName, String passWord, UserSexEnum userSex) {
        super();
        this.passWord = passWord;
        this.userName = userName;
        this.userSex = userSex;
    }

    public Long getId() {
        return id;
    }

    public void setId(Long id) {
        this.id = id;
    }

    public String getUserName() {
        return userName;
    }

    public void setUserName(String userName) {
        this.userName = userName;
    }

    public String getPassWord() {
        return passWord;
    }

    public void setPassWord(String passWord) {
        this.passWord = passWord;
    }

    public UserSexEnum getUserSex() {
        return userSex;
    }

    public void setUserSex(UserSexEnum userSex) {
        this.userSex = userSex;
    }

    public String getNickName() {
        return nickName;
    }

    public void setNickName(String nickName) {
        this.nickName = nickName;
    }

    @Override
    public String toString() {
        return "userName " + this.userName + ", pasword " + this.passWord + "sex " + userSex.name();
    }

}
3.5 控制器
package com.example.web;

import com.example.mapper.UserMapper;
import com.example.model.User;
import org.springframework.beans.factory.annotation.Autowired;
import org.springframework.web.bind.annotation.PathVariable;
import org.springframework.web.bind.annotation.RequestMapping;
import org.springframework.web.bind.annotation.RestController;

import java.util.List;

@RestController
public class UserController {

    @Autowired
    private UserMapper userMapper;

    @RequestMapping("/getUsers")
    public List<User> getUsers() {
        List<User> users = userMapper.getAll();
        return users;
    }

    @RequestMapping("/getUser")
    public User getUser(Long id) {
        User user = userMapper.getOne(id);
        return user;
    }

    @RequestMapping("/add")
    public void save(User user) {
        userMapper.insert(user);
    }

    @RequestMapping(value = "update")
    public void update(User user) {
        userMapper.update(user);
    }

    @RequestMapping(value = "/delete/{id}")
    public void delete(@PathVariable("id") Long id) {
        userMapper.delete(id);
    }


}
3.6 启动类
package com.example;

import org.mybatis.spring.annotation.MapperScan;
import org.springframework.boot.SpringApplication;
import org.springframework.boot.autoconfigure.SpringBootApplication;

@SpringBootApplication
@MapperScan("com.example.mapper")
public class SpringBootMybatisXmlApplication {

	public static void main(String[] args) {
		SpringApplication.run(SpringBootMybatisXmlApplication.class, args);
	}
}
3.7 测试
package com.example.mapper;

import com.example.enums.UserSexEnum;
import com.example.model.User;
import org.junit.Assert;
import org.junit.Test;
import org.junit.runner.RunWith;
import org.springframework.beans.factory.annotation.Autowired;
import org.springframework.boot.test.context.SpringBootTest;
import org.springframework.test.context.junit4.SpringRunner;

import java.util.List;

@RunWith(SpringRunner.class)
@SpringBootTest
public class UserMapperTest {

    @Autowired
    private UserMapper userMapper;

    @Test
    public void testInsert() throws Exception {
        userMapper.insert(new User("aa1", "a123456", UserSexEnum.MAN));
        userMapper.insert(new User("bb1", "b123456", UserSexEnum.WOMAN));
        userMapper.insert(new User("cc1", "b123456", UserSexEnum.WOMAN));
        Assert.assertEquals(3, userMapper.getAll().size());
    }

    @Test
    public void testQuery() throws Exception {
        List<User> users = userMapper.getAll();
        System.out.println(users.toString());
    }


    @Test
    public void testUpdate() throws Exception {
        User user = userMapper.getOne(1l);
        System.out.println(user.toString());
        user.setNickName("neo");
        userMapper.update(user);
        Assert.assertTrue(("neo".equals(userMapper.getOne(1l).getNickName())));
    }

}
package com.example.web;

import org.junit.Before;
import org.junit.Test;
import org.junit.runner.RunWith;
import org.springframework.beans.factory.annotation.Autowired;
import org.springframework.boot.test.context.SpringBootTest;
import org.springframework.http.MediaType;
import org.springframework.test.context.junit4.SpringRunner;
import org.springframework.test.web.servlet.MockMvc;
import org.springframework.test.web.servlet.request.MockMvcRequestBuilders;
import org.springframework.test.web.servlet.setup.MockMvcBuilders;
import org.springframework.web.context.WebApplicationContext;

import static org.springframework.test.web.servlet.result.MockMvcResultHandlers.print;

@RunWith(SpringRunner.class)
@SpringBootTest
public class UserControllerTest {

    @Autowired
    private WebApplicationContext wac;
    private MockMvc mockMvc;

    @Before
    public void setUp() throws Exception {
        mockMvc = MockMvcBuilders.webAppContextSetup(wac).build(); //初始化MockMvc对象
    }

    @Test
    public void getUsers() throws Exception {
        mockMvc.perform(MockMvcRequestBuilders.post("/getUsers")
                .accept(MediaType.APPLICATION_JSON_UTF8)).andDo(print());
    }

}
运行getUsers():
Body = [{"id":1,"userName":"aa1","passWord":"a123456","userSex":"MAN","nickName":"neo"},{"id":2,"userName":"bb1","passWord":"b123456","userSex":"WOMAN","nickName":null},{"id":3,"userName":"cc1","passWord":"b123456","userSex":"WOMAN","nickName":null}]
4、如何选择
两种模式各有特点,注解版适合简单快速的模式,其实像现在流行的这种微服务模式,一个微服务就会对应一个自
已的数据库,多表连接查询的需求会大大的降低,会越来越适合这种模式。
老传统模式比适合大型项目,可以灵活的动态生成 Sql ,方便调整 Sql ,也有痛痛快快,洋洋洒洒的写 Sql 的感
觉。