从0开始python学习-34.pytest常用插件
目录
1. pytest-html:生成HTML测试报告
2.pytest-xdist:并发执行用例
3. pytest-order:自定义用例的执行顺序
4. pytest-rerunfailures:用例失败时自动重试
5. pytest-result-log:用例执行结果记录到日志文件
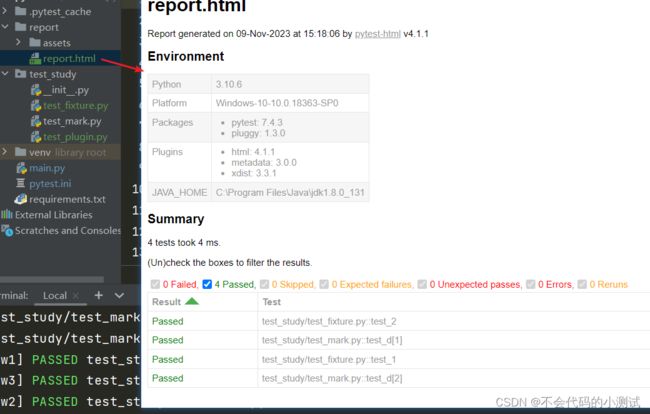
1. pytest-html:生成HTML测试报告
文档:Installation — pytest-html documentation
安装:pip install pytest-html -U
运行:
ini中配置: addopts = --html ./report/report.html
main方法:pytest.main(['-vs','--html=./report/report.html'])
直接运行:pytest --html=./report/report.html --self-contained-html
2. pytest-xdist:并发执行用例
文档:https://pytest-xdist.readthedocs.io/en/stable/
安装:pip install pytest-xdist -U
运行:pytest -n {0,1,2,3,4,5.....n, auto},示例:pytest -n auto(auto可以自动检测到系统的CPU数量,使用auto等于就是使用所有的CPU来进行执行用例,此时CPU占有率很高)
注意:
1. 进程数量不要超过文件的数量,同一个文件中的用例,会在同一个进程中执行
2. 进程数量不要超过CPU的数量
pytest-xdist默认是无序执行的,可以通过 --dist 参数来控制顺序
--dist=loadscope:将按照同一个模块 module 下的函数和同一个测试类 class 下的方法来分组,然后将每个测试组发给可以执行的 worker,确保同一个组的测试用例在同一个进程中执行。目前无法自定义分组,按类 class 分组优先于按模块 module 分组
--dist=loadfile:按照同一个文件名来分组,然后将每个测试组发给可以执行的 worker,确保同一个组的测试用例在同一个进程中执行
3. pytest-order:自定义用例的执行顺序
文档:https://pytest-order.readthedocs.io/en/latest/
安装:pip install pytest-order -U
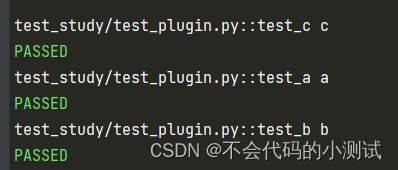
order后面的参数为大于等于0的正整数,可以不是顺序排的,只要排序数值之间有顺序就行
@pytest.mark.order(0)
def test_a():
    print('a')
@pytest.mark.order(7)
def test_b():
    print('b')
@pytest.mark.order(1)
def test_c():
    print('c')
4. pytest-rerunfailures:用例失败时自动重试
文档:https://github.com/pytest-dev/pytest-rerunfailures
安装: pip install pytest-rerunfailures -U
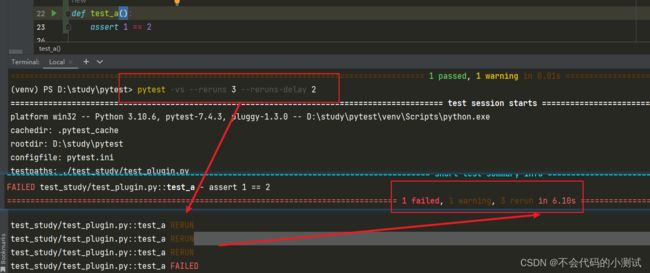
运行:--reruns n --reruns-delay m
--reruns n(重新运行次数),--reruns-delay m(下次测试重新开始之前等待的秒数)
5. pytest-result-log:用例执行结果记录到日志文件
文档:https://mp.weixin.qq.com/s/cp3rdKJb0Eglz0jIhZ6ZHw
安装:pip install pytest-result-log -U
注意:-k未选中、skip跳过、fixture错误等原因,有没有执行的用例,无法在日志记录结果的
运行:ini中进行配置
; 日志保存目录
log_file = ./pytest.log
; 记录日志等级:1. CRITICAL:严重错误,表示系统无法继续运行。
;2. ERROR:错误,但不影响系统运行。
;3. WARNING:警告,表示存在可能会导致错误的情况。
;4. INFO:信息,用于记录系统运行过程中的重要信息。
;5. DEBUG:调试信息,用于记录详细的系统执行过程。
;6. NOTSET:没有设置日志等级,表示输出所有日志信息。
log_file_level = info
# 记录日志时间
log_file_format = %(levelname)-8s %(asctime)s [%(name)s:%(lineno)s] : %(message)s
log_file_date_format = %Y-%m-%d %H:%M:%S
 # 控制是否记录结果,1记录,0不记录
result_log = 1
# 控制是否记录分割线,1记录,0不记录
result_log_separator = 1


